
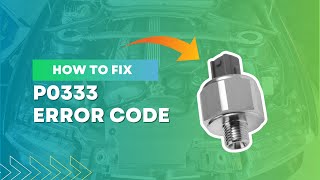
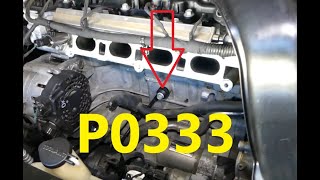
P0333 on 2019-2020 GMC Sierra 3500: Knock Sensor Circuit High Causes & Fixes
On 2019-2020 GMC Sierra 3500 trucks with gasoline engines, code P0333 is most often caused by an electrical issue at the ECM's X2 connector, not a bad knock sensor. GM issued TSB #20-NA-207 for this exact problem, which states voltage from the park/neutral signal circuit can bleed into the knock sensor circuit. Before buying parts, inspect and clean this connector, especially if the check engine light appears when shifting out of Park.
- Do not immediately replace the knock sensor for a P0333 code on this truck.
- The most likely cause is a poor electrical connection at the ECM X2 connector, as documented in GM TSB #20-NA-207.
- A key symptom of the TSB issue is the Check Engine Light appearing right after shifting from Park to Drive.
- Bank 2 is the passenger side of the engine.
- If the sensor must be tested, its resistance should be 93k-110k Ohms and the circuit bias voltage should be ~2.5V.
What's Unique About the 2019-2020 Gmc SIERRA 3500
For this specific truck platform, a P0333 code is very frequently an electrical problem, not a failed knock sensor. General Motors released Technical Service Bulletin #20-NA-207 which highlights that voltage from another circuit (like the transmission park/neutral signal) can bleed into the knock sensor wiring, causing a false high voltage reading. This issue is often traced to a poor connection, corrosion, or debris at the main ECM X2 electrical connector, specifically at Pin 52 (typically a Dark Blue wire). A key tell-tale sign of this specific issue is the Check Engine Light illuminating right when you shift the transmission out of Park.
Diagnostic Flowchart
Tap your situation to follow the diagnostic path that matches what you're seeing on this vehicle.
Generation note: The 2019 model year is the last of the third generation (K2XX platform), while the 2020 model year marks the beginning of the fourth generation (T1XX platform) which introduced the 6.6L L8T gas engine. The authoritative TSB #20-NA-207 was originally issued for earlier models but was revised in March 2022 to include model years up to 2020, confirming the ECM connector issue persists across these specific models.
Symptoms You May Notice
- Check Engine Light is on
- Reduced engine power and acceleration
- Poor fuel economy
- Check Engine Light appears specifically when shifting out of Park
- Engine may make an audible pinging or knocking sound (less common with a circuit high fault)
- Replacing the knock sensor without first inspecting the ECM X2 connector. Given the prevalence of TSB #20-NA-207, the wiring/connector issue is more probable and much cheaper to fix.
Most Likely Causes
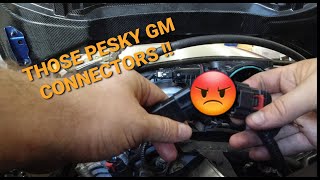
- Electrical Issue at ECM X2 Connector 🔴 High Probability This is a well-documented issue covered by GM Technical Service Bulletin #20-NA-207. Debris, moisture, or poor terminal contact can cause voltage from the transmission park/neutral circuit to bleed into the knock sensor circuit (Pin 52), creating a false high signal.
How to confirm: With the battery disconnected, locate the ECM on the driver's side of the engine bay and carefully inspect the X2 connector (often the second large connector from the front) for any signs of corrosion, damage, moisture, or pins that have backed out. Pay close attention to Pin 52.
Typical fix: Clean the connector and terminals with electrical contact cleaner, allow it to dry completely, apply a small amount of dielectric grease to the seal, and ensure it is reconnected securely. This resolves the majority of cases.
Est. part cost: $5-$15 - Faulty Knock Sensor 🟡 Medium Probability → Shop Ignition Knock (Detonation) Sensor
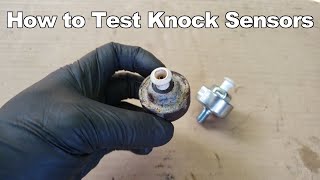
How to confirm: If the wiring is confirmed to be good, test the sensor's internal resistance with a multimeter. A typical reading should be between 93k-110k ohms. An open circuit (infinite resistance) or short (near-zero resistance) indicates a failed sensor.
Typical fix: Replace the Bank 2 knock sensor. On these trucks, it is located on the passenger side of the engine block and may require removing the starter for access. Ensure the mounting bolt is torqued to spec (typically 15-18 ft-lbs).
Est. part cost: $30-$90 - Damaged Wiring or Connector at the Sensor ⚪ Low Probability The sensor is located on the lower part of the engine block, where its wiring is exposed to heat, moisture, and potential road debris. Additionally, other TSBs like #21-NA-149 mention general engine harness chafing issues on these trucks that can cause various electrical faults.
How to confirm: Visually inspect the wiring harness and connector leading to the knock sensor on the passenger side of the engine for any signs of melting, chafing, corrosion, or breaks. Trace the harness for contact with sharp edges on the frame or engine components.
Typical fix: Repair the damaged section of wire or replace the connector pigtail.
Est. part cost: $10-$30
Rare But Worth Checking
- Faulty Engine Control Module (ECM): → Shop Engine Control Module (ECM) This is the least likely cause. The ECM's internal circuitry for reading the sensor could fail, but all other possibilities, especially the TSB-documented connector issue, should be exhausted first.
Diagnosis Steps
- Scan the vehicle for codes to confirm P0333 is present.
- IMPORTANT: Follow the guidance of TSB #20-NA-207 first. Disconnect the negative battery terminal.
- Locate the Engine Control Module (ECM) on the driver's side of the engine compartment. Disconnect the X2 connector (usually the second one from the front with a gray lever).
- Inspect the terminals, especially Pin 52 (Dark Blue wire), for corrosion, debris, or damage. Clean with electrical contact cleaner, let dry, apply dielectric grease to the connector seal, and reconnect securely.
- Reconnect the battery, clear the codes, and start the engine. Shift out of Park. If the code does not return, the problem is solved.
- If the code returns, perform a Key-On, Engine-Off (KOEO) voltage check on the sensor signal wire. The circuit has a 5V reference from the ECM, and a healthy circuit should show a bias voltage of approximately 2.5V. A reading near 5V points to an open circuit or faulty sensor, confirming the 'Circuit High' condition.
- Locate the Bank 2 knock sensor on the passenger side of the engine block. It may be near or require removal of the starter motor.
- Inspect the sensor's connector and wiring for any physical damage, melting, or corrosion.
- If wiring appears intact, disconnect the sensor and test its internal resistance with a multimeter. It should be within 93k-110k ohms. Readings outside this range indicate a failed sensor.
- If the sensor tests good, check its ground path. The sensor grounds through its body to the engine block. Ensure the mounting surface is clean and free of rust or corrosion.
- If the sensor passes tests, replace it. Ensure the mounting surface is clean and torque the new sensor to specification (typically 15-18 ft-lbs).
- If the sensor and wiring are good, the fault may lie within the ECM, which is rare.
Parts You'll Likely Need
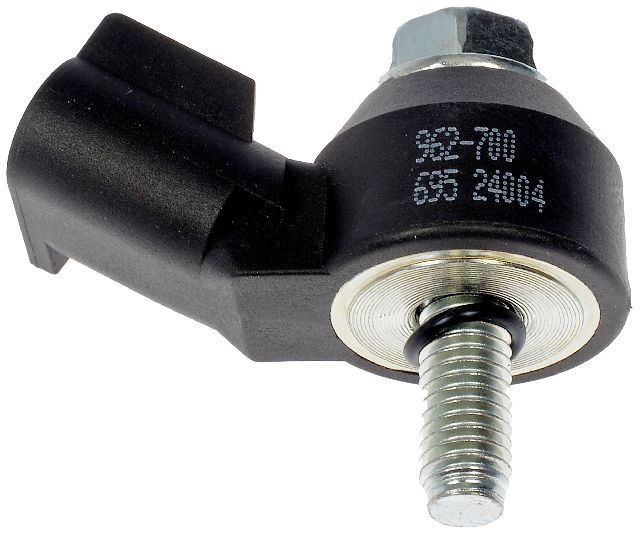
- Knock Sensor
(OEM #12623730)— This is the part to replace if it is confirmed to have failed after ruling out the more common wiring issues.
Trusted brands: ACDelco (GM OE P/N 213-1576), Delphi, NTK
OEM price range: $60-$100
Aftermarket price range: $30-$80 - Electrical Contact Cleaner and Dielectric Grease — Needed for the most common fix: cleaning the ECM X2 connector as per TSB #20-NA-207.
Trusted brands: CRC, Permatex
OEM price range: $10-$20
Aftermarket price range: $10-$20
Technical Service Bulletins (TSBs) & Recalls
- Bulletin #20-NA-207: The primary TSB for this issue. Addresses a possible electrical concern at the ECM X2 electrical connector that can cause DTC P0333 to set, often when shifting out of Park.
- Bulletin #21-NA-149: A related bulletin that addresses general engine wire harness chafing against various underhood components, which could potentially cause a short leading to P0333.
Platform-Specific Known Issues
- TSB #20-NA-207: This bulletin from GM directly addresses P0333 on 2019-2020 models. It states the cause is likely an electrical concern at the ECM X2 connector, where voltage can bleed from the transmission park/neutral signal circuit into the knock sensor signal wire (Pin 52), causing a false 'Circuit High' reading.
Mechanic-Grade Diagnostic Values
- Knock Sensor Internal Resistance — expected: 93,000 - 110,000 Ohms (93k-110k Ω). Failure: A reading of infinite resistance (open) or near-zero resistance (short).
- Knock Sensor Circuit Bias Voltage (KOEO) — expected: ~2.5 Volts DC. Failure: A reading near 5.0 Volts indicates an open in the circuit or a faulty sensor, which triggers the P0333 'Circuit High' code.
- Knock Sensor AC Voltage Output — expected: A small AC voltage signal should be generated when the engine block is tapped near the sensor.. Failure: No AC voltage signal when tapping indicates a dead sensor.
Wiring & Ground Locations
- Knock Sensor Ground — The body of the knock sensor itself, where it bolts to the engine block.. The sensor grounds directly to the engine block. A rusty, dirty, or loose mounting surface can create a poor ground, leading to incorrect signals. The mounting bolt torque is also critical for proper sensitivity.
- G103 (example) — Typically on the front of the passenger-side cylinder head.. This is a primary ground point for components on the passenger side of the engine. While not directly for the knock sensor circuit, a poor connection here can introduce electrical noise and voltage issues that affect multiple sensors.
- Engine Block to Chassis/Firewall Ground Strap — A braided strap typically running from the rear of a cylinder head or engine block to the vehicle's firewall/chassis.. This is a main ground path for the entire engine. A corroded or broken strap can cause a wide range of bizarre electrical problems, including sensor circuit faults, as the engine's electrical systems struggle to find a stable ground reference.
Helpful Videos

We Have This Part in Stock


The information in this article is provided for general reference and educational purposes only. Vehicle specifications, procedures, and part compatibility can vary by production date, trim level, and region. Always consult your vehicle's factory service manual and verify part numbers before purchasing or performing repairs. Safety-critical components such as airbags, seat belts, and braking systems should be installed by a qualified professional.
- Gmc SIERRA 3500:
- 🧭 Diagnostic Flowchart
- 🎬 Helpful Videos
- 🛍️ Shop This Part
- What's Unique About the 2019-2020 Gmc SIERRA 3500
- Symptoms You May Notice
- Most Likely Causes
- Rare But Worth Checking
- Diagnosis Steps
- Parts You'll Likely Need
- Technical Service Bulletins (TSBs) & Recalls
- Platform-Specific Known Issues
- Mechanic-Grade Diagnostic Values
- Wiring & Ground Locations
- 🎟️ Get 5% Off