
P0333 on 2014-2020 GMC Yukon: Knock Sensor Circuit High (Bank 2) Causes and Fixes
On 2014-2020 GMC Yukons, code P0333 is frequently caused by an electrical issue at the Engine Control Module (ECM) X2 connector, not a faulty knock sensor. Per GM Technical Service Bulletin #20-NA-207, inspecting and cleaning this connector for debris or corrosion is the primary recommended fix before replacing parts, as voltage from the transmission park/neutral circuit can bleed into the knock sensor circuit.
- Before buying any parts for a P0333 code on a 2014-2020 Yukon, inspect and clean the main Engine Control Module's (ECM) X2 connector.
- The issue is often electrical (voltage bleed from another circuit) and not a failed sensor, as documented in GM TSB #20-NA-207.
- If the sensor must be replaced, use a high-quality OEM (ACDelco) or reputable aftermarket (Delphi) part to avoid recurring issues.
What's Unique About the 2014-2020 Gmc YUKON
What makes this code unique on this specific GM truck platform is a known electrical anomaly documented by the manufacturer. General Motors issued Technical Service Bulletin (TSB) #20-NA-207, which states that voltage from the transmission's park/neutral signal circuit can 'bleed' into the knock sensor circuit, causing a false P0333 code, especially when shifting out of Park. This means the root cause is often a wiring or connector issue at the K20 ECM's X2 connector, rather than a failed sensor, leading many owners and technicians to misdiagnose the problem by replacing the sensor unnecessarily.
Diagnostic Flowchart
Tap your situation to follow the diagnostic path that matches what you're seeing on this vehicle.
Generation note: The 2014-2020 year range covers the end of the third generation (GMT900, through 2014) and the entire fourth generation (GMTK2xx, 2015-2020). The key electrical issue identified in TSB #20-NA-207 was initially documented for 2014-2018 models and later updated to include up to 2020 models, indicating a shared design vulnerability in the wiring harness and ECM connectors across this year range. A critical difference exists: 2014 GMT900 models have the knock sensors located under the intake manifold, making them prone to water damage and difficult to access. The 2015-2020 GMTK2xx models have the sensors located on the sides of the engine block, which is an easier repair.
Symptoms You May Notice
- Check Engine Light (MIL) is illuminated
- MIL may appear specifically when shifting the transmission out of Park.
- Audible engine pinging or knocking sounds, especially during acceleration.
- Reduced engine power or sluggish acceleration. 🎬 See this breakdown of common P0333 symptoms and potential fixes.
- Noticeable increase in fuel consumption.
- Rough or uneven idle.
- Immediately replacing the knock sensor without first inspecting the ECM X2 connector and the associated wiring harness. A user on CarKiller.com reported the code returned even after replacing the sensors, which points to the underlying electrical issue described in the TSB.
- Replacing the wrong knock sensor. Bank 2 is on the passenger side of the engine.
- Using cheap, low-quality aftermarket sensors. Forum users on TahoeYukonForum.com have reported that using non-ACDelco or non-Delphi sensors can cause codes to return, even if the sensor is new.
Most Likely Causes
- Electrical Issue at ECM X2 Connector 🔴 High Probability Documented in GM TSB #20-NA-207, voltage from the transmission park/neutral signal circuit can bleed into the knock sensor circuit within the harness or at the ECM connector, causing a false high voltage reading. This can be due to moisture, debris, or corrosion inside the connector.
How to confirm: Inspect the K20 Engine Control Module (ECM) X2 electrical connector for any debris, moisture, corrosion, or bent/backed-out pins. The ECM is typically located in the engine bay; the X2 connector is one of the large multi-pin plugs connected to it.
Typical fix: Disconnect the battery. Unplug the ECM X2 connector, clean the terminals on both the male and female sides with an appropriate electrical contact cleaner, and use compressed air to dry it completely. Apply a thin layer of dielectric grease to the connector seal before reconnecting to prevent future moisture intrusion. Repair any damaged terminals or wires.
Est. part cost: $5-$25 - Damaged or Shorted Knock Sensor Wiring 🟡 Medium Probability → Shop Ignition Knock (Detonation) Sensor The wiring harness is routed near hot exhaust components and areas of high vibration, making it susceptible to melting, chafing, or rodent damage over time. The harness connector at the sensor itself can also become brittle and fail. On 2015+ models, the Bank 2 sensor harness is near the starter, and can be damaged during starter replacement.
How to confirm: Perform a visual inspection of the wiring harness leading from the Bank 2 knock sensor to the ECM. Check for melted sections, chafing, or breaks. Use a multimeter to test for continuity and shorts to ground or voltage between the sensor connector and the ECM connector.
Typical fix: Repair the damaged section of the wiring harness. If the connector at the sensor is damaged, it can be replaced with a new pigtail connector.
Est. part cost: $15-$60 - Failed Bank 2 Knock Sensor ⚪ Low Probability → Shop Ignition Knock (Detonation) Sensor While sensors can fail, the electrical issues noted in TSBs are far more common on this platform. A sensor failure is often misdiagnosed when the true cause is wiring. However, physical damage can occur during other repairs, like starter replacement. On 2014 models, the sensor is under the intake manifold and prone to failure from water intrusion.
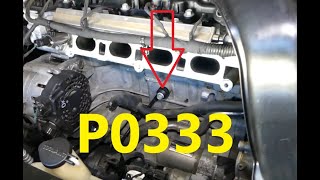
How to confirm: After confirming the wiring and ECM connector are good, test the sensor. For the 2015-2020 generation, the sensor is on the passenger side of the engine block. A multimeter can be used to check resistance, which should be between 93-100k Ohms 🎬 Watch: A mechanic demonstrates how to test the knock sensor circuit. for many GM vehicles. A more definitive test is to use an oscilloscope to view the voltage signal while tapping lightly on the engine block near the sensor.
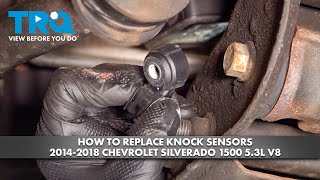
Typical fix: Replace the Bank 2 (passenger side) knock sensor. On 2015-2020 models, this is labor-intensive as it may require removing the starter 🎬 Watch: This walkthrough shows how to replace the sensor and starter. and a heat shield for access. The sensor should be torqued to the correct specification (often around 15 ft-lbs) as over- or under-tightening can affect its reading.
Est. part cost: $30-$80
Rare But Worth Checking
- Faulty Engine Control Module (ECM): → Shop Engine Control Module (ECM) This is rare, but if all wiring and the sensor itself test good, the fault may lie within the ECM's internal circuitry. This should be the last item to consider after all other possibilities are exhausted.
- Internal Engine Problems: In very rare cases, an actual mechanical issue like a collapsed lifter (a known issue on some GM V8s) could cause excessive engine vibration, potentially triggering the code. This would usually be accompanied by other codes like P0300 (random misfire) and audible engine noise.
Diagnosis Steps
- Scan the vehicle for any other stored trouble codes. Address other codes first, especially misfire (P0300-P0308) or other circuit codes.
- Per TSB #20-NA-207, the first step for this specific vehicle is to inspect the Engine Control Module's (ECM) K20 X2 connector for debris, moisture, corrosion, or damaged pins.
- If the connector is contaminated, disconnect the battery, clean the connector with electrical contact cleaner, dry it thoroughly, and apply dielectric grease to the seal before reconnecting.
- Clear the code and test drive, specifically shifting from Park, to see if the code returns. If it does not, the issue is likely resolved.
- If the code returns, perform a thorough visual inspection of the knock sensor wiring harness from the sensor to the ECM. Look for any signs of melting near the exhaust, chafing, or breaks.
- Disconnect the sensor (located on the passenger side of the engine block, may require starter removal for access on 2015+ models) and check for corrosion in its connector.
- Using a multimeter, test the sensor's internal resistance to see if it's within specification (typically around 93-100 k-ohms for many GM vehicles, but verify for your specific engine).
- Check for proper voltage and ground at the sensor connector with the key on, engine off.
- If the sensor and wiring test good, the fault may be an intermittent connection or a rare ECM issue.
Parts You'll Likely Need
- Knock Sensor (Bank 2)
(OEM #12623734 (Superseded by 12677703))— This is the part to replace if the sensor itself has failed, but only after ruling out the more common wiring and connector issues. It's recommended to use OEM or high-quality aftermarket parts.
Trusted brands: ACDelco (OEM), Delphi
OEM price range: $50-$90
Aftermarket price range: $30-$60 - Electrical Contact Cleaner — Needed for cleaning the ECM X2 connector, which is the most probable cause of the issue per GM service bulletins.
Trusted brands: CRC, WD-40 Specialist
OEM price range: $5-$15
Aftermarket price range: $5-$15 - Dielectric Grease — Essential for sealing electrical connectors, like the ECM X2 connector, from moisture after cleaning to prevent the issue from recurring.
Trusted brands: Permatex, CRC
OEM price range: $5-$10
Aftermarket price range: $5-$10
Related Codes That Often Appear With This One
- P0328 - Knock Sensor 1 Circuit High (Bank 1): If both codes appear, it's more likely to be a systemic issue like the ECM connector problem or a problem with the shared wiring harness.
Technical Service Bulletins (TSBs) & Recalls
- 20-NA-207: Information on Malfunction Indicator Lamp (MIL) Illuminated - DTC P0333 Set.
- PIP5576: Knock Sensor Codes P0333 (preliminary bulletin, superseded by 20-NA-207).
Platform-Specific Known Issues
- GM TSB #20-NA-207 (which supersedes PIP5576) specifically calls out that DTC P0333 can be set when shifting from Park. The cause is identified as potential voltage bleed-over from the transmission park/neutral signal circuit into the knock sensor circuit, creating a false 'circuit high' reading. The bulletin directs technicians to inspect the K20 ECM X2 connector for issues if standard diagnostics don't find a cause.
Mechanic-Grade Diagnostic Values
- Knock Sensor Internal Resistance — expected: 93k-100k Ohms. Failure: A reading outside this range, or an open (OL) or shorted reading, indicates a faulty sensor.
- Knock Sensor Signal Circuit Voltage (at ECM) — expected: Approximately 2.5V with Key On, Engine Off (KOEO). This is a bias voltage from the ECM.. Failure: A voltage significantly higher (approaching 5V) or lower (approaching 0V) points to a short to power, short to ground, or an open circuit.
Wiring & Ground Locations
- K20 ECM X2 Connector — In the engine bay, this is one of the large, multi-pin connectors plugging into the Engine Control Module.. This is the specific connector identified in TSB #20-NA-207 as the primary location for debris, moisture, and corrosion causing a false P0333 code.
- X2 Pin 37 (L-BU) — On the K20 ECM X2 connector.. This is the Knock Sensor 2 Signal pin for some V8 engine configurations (like the LFX). The wire is typically Light Blue. Testing at this pin checks the integrity of the entire circuit back to the ECM.
- X2 Pin 36 (D-BU) — On the K20 ECM X2 connector.. This is the Knock Sensor 1 Signal pin for some V8 engine configurations (like the LFX). The wire is typically Dark Blue. While not for P0333, it's a useful reference if P0328 is also present.
- G103 / G104 — On the rear of the right and left side cylinder heads, respectively.. These are the main engine block grounds to the chassis. A poor ground connection at these points can cause a host of electrical issues and erratic sensor readings, including a false knock sensor code.
- Battery to Frame Ground — A cable running from the negative battery terminal to a bolt on the vehicle's frame, often near the front body mount.. Corrosion at this main grounding point can cause widespread electrical problems, including modules not communicating correctly and strange sensor behavior. It is a common failure point on these trucks.
Real Owner Repair Stories
- YouTube user comment section, various forums (2015+ Silverado/Sierra/Yukon with 5.3L or 6.2L V8) — P0333 code appears, sometimes intermittently. May or may not have noticeable performance issues.
❌ Tried (didn't work) Replacing the knock sensor without checking wiring., Clearing the code, only for it to return immediately or after a short drive.
✅ What actually fixed it The wiring harness for the knock sensor was found to be damaged or chafed near the starter motor. This often happens after a starter replacement, where the harness is not properly secured afterward and makes contact with hot or moving parts. Repairing the damaged wire or replacing the pigtail connector resolved the code. - Reddit user r/1stGenTundras (principle applies) (General vehicle with intermittent P0333) — Check Engine Light for P0333 would appear after hitting a significant bump in the road, causing a loss of power.
❌ Tried (didn't work) Replacing spark plugs and ignition coils.
✅ What actually fixed it The user concluded that the intermittent nature, especially when triggered by a physical jolt, strongly pointed to a break or short in the wiring harness making intermittent contact, rather than a failed sensor. The final fix was to inspect and repair the wiring harness.
OEM Part Supersession History
12623734→12677703— GM regularly updates part designs to integrate new materials or technologies for improved durability and performance.
Model Year Variations Within This Range
- 2014 (GMT900 platform): The knock sensors are located under the intake manifold in wells on the engine's valley cover. This design is prone to collecting water and debris, leading to corrosion and failure of the sensors and harness. Replacement is very labor-intensive as the entire intake manifold must be removed.
- 2015-2020 (GMT K2XX platform): The knock sensors were relocated to the exterior sides of the engine block. Bank 1 (driver's side) is typically behind the starter motor, and Bank 2 (passenger's side) is more accessible, though still may require removing heat shields. This design is less prone to the water damage seen in earlier models but the wiring can be damaged during other repairs like starter replacement.
Helpful Videos
We Have This Part in Stock


The information in this article is provided for general reference and educational purposes only. Vehicle specifications, procedures, and part compatibility can vary by production date, trim level, and region. Always consult your vehicle's factory service manual and verify part numbers before purchasing or performing repairs. Safety-critical components such as airbags, seat belts, and braking systems should be installed by a qualified professional.
- Gmc YUKON:
- 🧭 Diagnostic Flowchart
- 🎬 Helpful Videos
- 🛍️ Shop This Part
- What's Unique About the 2014-2020 Gmc YUKON
- Symptoms You May Notice
- Most Likely Causes
- Rare But Worth Checking
- Diagnosis Steps
- Parts You'll Likely Need
- Related Codes That Often Appear With This One
- Technical Service Bulletins (TSBs) & Recalls
- Platform-Specific Known Issues
- Mechanic-Grade Diagnostic Values
- Wiring & Ground Locations
- Real Owner Repair Stories
- OEM Part Supersession History
- Model Year Variations Within This Range
- 🎟️ Get 5% Off