
P0335 on 2014-2019 Chevy Silverado 4.3L V6: Crank Sensor Causes & Fixes
This code typically points to a failed crankshaft position sensor, which can cause your truck to stall or not start. Replacing the sensor is the usual fix, but a special 'relearn' procedure with a scan tool is required afterward. Expect to pay $20-$70 for the part and around 1.5-2.5 hours for labor, as the starter motor must be removed for access.
- P0335 means the engine computer has lost the signal from the crankshaft position sensor, which can cause a no-start or stalling condition.
- The most common cause is a failed sensor, but wiring issues at known chafe points (per TSB 21-NA-149) must be checked.
- For this Silverado, replacing the sensor is not the final step. A 'CKP Variation Learn' procedure MUST be performed with a professional scan tool.
- Accessing the sensor requires removing the starter motor, which adds to the labor time.
What's Unique About the 2014-2019 Chevrolet Silverado
For the 2014-2019 Silverado with the 4.3L LV3 engine, the most critical, platform-specific detail is the need for a 'Crankshaft Position System Variation Learning Procedure' after replacing the sensor. Simply swapping the part is not enough. If this relearn procedure is not performed with a compatible diagnostic scan tool, the engine may continue to run poorly, idle erratically, or fail to start, even with a brand new sensor. Additionally, TSB 21-NA-149 specifically calls out known wiring harness chafe points on the 4.3L LV3 engine that can cause this and other electrical DTCs. Manufacturer service bulletin PIP5553A also notes that a pinched or chafed wiring jumper harness at a bolt can lead to a P0335, potentially causing the engine to stall or fail to start.
Symptoms You May Notice
- Check Engine Light is on
- Engine will not start (cranks but does not fire)
- Engine stalls unexpectedly, either while driving or at idle
- Rough or unstable idle
- Tachometer needle not moving or dropping to zero while the engine is cranking or running
- Hesitation or loss of power during acceleration
- Extended crank time before the engine starts
- Replacing the camshaft position sensor instead of the crankshaft sensor.
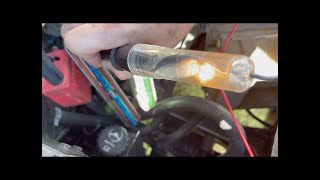
- Replacing the starter, as a no-start condition can be mistaken for a bad starter motor. 🎬 Watch why a new sensor might still cause a no-start.
- Assuming a new sensor is defective when the actual problem is that the required CKP relearn procedure was not performed.
Most Likely Causes
- Failed Crankshaft Position Sensor 🔴 High Probability → Shop Engine Crankshaft Position Sensor The sensor is located in a high-heat area behind the starter motor, and constant exposure to heat cycles and vibration can cause the internal electronics to fail over time.
How to confirm: After checking wiring, if a scan tool shows 0 RPM during cranking, the sensor is the primary suspect. Given the labor to access it, and its relatively low cost, it's often replaced once the starter is removed.
Typical fix: Replace the crankshaft position sensor and perform the CKP Variation Learn procedure.
Est. part cost: $20-$70 - Wiring Harness or Connector Issue 🟡 Medium Probability GM TSB 21-NA-149 specifically identifies multiple points on the 4.3L LV3 where the engine harness can chafe through. Common spots include the front corner of the left cylinder head, the drive belt idler pulley bracket, and the oil dipstick bracket. This damage can cause a short or open in the CKP sensor circuit. Additionally, TSB Bulletin #PIP5724 indicates that a wiring jumper harness pinched between the X15 connector can lead to P0335 and a possible crank-no-start condition.
How to confirm: Visually inspect the harness in the locations specified by TSB 21-NA-149. Use a multimeter to check for continuity, 5V reference, and ground at the sensor connector with the key on.
Typical fix: Repair the damaged section of wiring using approved procedures and protect the harness from future chafing with protective conduit or by re-routing it.
Est. part cost: $10-$30 - CKP System Variation Learn Not Performed 🟡 Medium Probability This is a required software calibration step after sensor replacement on this specific GM platform. Many DIYers or shops unfamiliar with these trucks may skip this step, leading to persistent symptoms. A user on GM-Trucks.com experienced this, where the truck ran poorly after sensor replacement until the relearn was considered.
How to confirm: If the sensor was just replaced and symptoms like rough idle, stalling, or the P0335 code persist, this is the most likely cause. A professional scan tool is needed to check the status and perform the procedure.
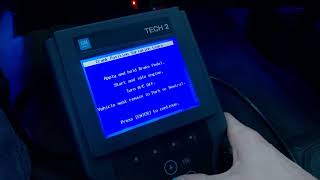
Typical fix: Perform the 'Crankshaft Position System Variation Learning Procedure' using a compatible bidirectional scan tool. 🎬 See how to perform the required Tech2 relearn procedure.
Est. part cost: $0 (if you have the tool)
Rare But Worth Checking
- Damaged Reluctor Ring: The reluctor ring (a toothed wheel on the crankshaft that the sensor reads) can be damaged during engine or transmission work. If the teeth are bent, broken, or covered in debris, it will cause an erratic signal. This is rare but possible if other major work was recently performed. Diagnosis requires visual inspection, often by removing the oil pan or transmission.
- Faulty Engine Control Module (ECM): → Shop Engine Control Module (ECM) While extremely rare, the ECM itself can fail. This should only be considered after all other possibilities (sensor, wiring, reluctor ring) have been definitively ruled out. TSB 21-NA-149 notes that the ECM is often unnecessarily replaced for wiring issues. TSB Bulletin #PIP4880F notes that in some hybrid models, P0335 may also be stored in the Power Inverter Module alongside the ECM.
Diagnosis Steps
- Verify the code with a scanner. Confirm P0335 is present and check for any other codes, especially those related to wiring faults mentioned in TSB 21-NA-149.
- Perform a visual inspection. Thoroughly inspect the engine wiring harness for chafing at the specific points identified in TSB 21-NA-149: the front corner of the left cylinder head, the drive belt idler pulley bracket, and the oil dipstick bracket.
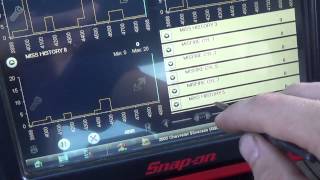
- Check for signal with a scan tool. A scan tool with live data can show engine RPM while cranking. If the RPM reads 0 while the engine is turning over, it strongly suggests a problem in the CKP circuit (sensor, wiring, or ECM).
- Access the Sensor. The CKP sensor is located on the lower passenger side of the engine block, behind the starter motor. The starter must be removed to access the sensor and its connector.
- Test the circuit. With the starter removed, disconnect the sensor. Check the connector for a 5-volt reference signal, a good ground connection, and a signal wire from the ECM. Check for corrosion or damage.
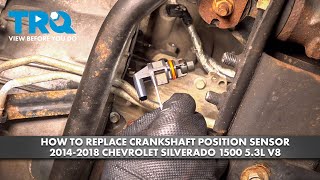
- Replace the sensor. If the wiring appears intact and power/ground are present, the sensor is the most likely culprit. It is held by a single 13mm bolt. 🎬 Watch this step-by-step guide to replacing the sensor yourself. Torque the new sensor bolt to 18 ft-lbs.
- Crucial Step: Perform the Crankshaft Position System Variation Learning Procedure. This requires a compatible bidirectional scan tool like the GM Tech2 or GDS2. Do not skip this step.
- Clear the code and test drive the vehicle to ensure the repair is complete.
Parts You'll Likely Need
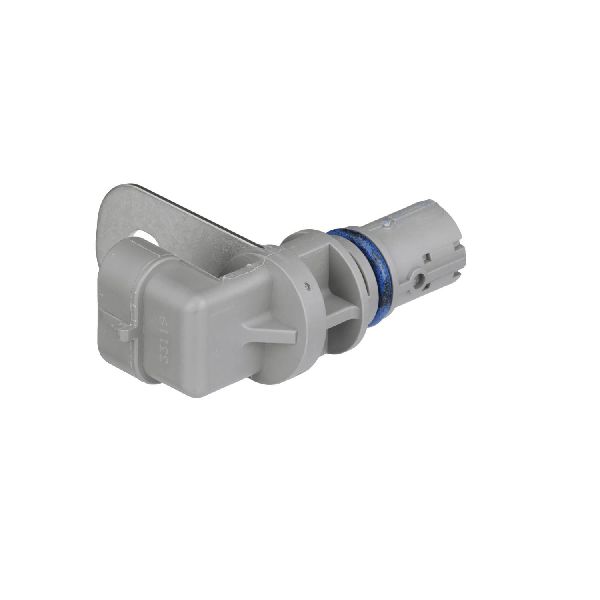
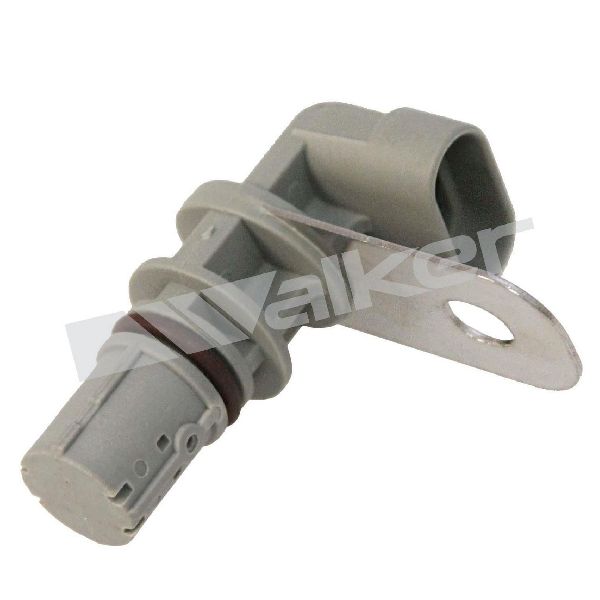
- Crankshaft Position Sensor
(OEM #12669636)— This sensor is the most common failure point for the P0335 code. Its failure leads to a loss of the engine speed and position signal required by the ECM. Multiple parts catalogs confirm this part requires a relearn procedure after installation.
Trusted brands: ACDelco (GM Genuine), Delphi, Standard Motor Products (SMP), Bosch, NTK
OEM price range: $50-$70
Aftermarket price range: $20-$45
Related Codes That Often Appear With This One
- P0300 — Random Misfire. An erratic or missing crankshaft position signal can prevent the ECM from correctly timing spark and fuel, leading to misfires across multiple cylinders. TSB 21-NA-149 lists P0335 and P0300 as potential co-occurring codes from the same wiring harness issue.
- P0336 — Crankshaft Position Sensor 'A' Circuit Range/Performance. This code indicates the ECM is receiving an erratic or illogical signal from the CKP sensor, rather than no signal (P0335). It often points to the same root causes: a failing sensor, wiring issue, or the need for a relearn procedure.
Technical Service Bulletins (TSBs) & Recalls
- TSB 21-NA-149: Details specific engine wire harness chafe points on the 4.3L LV3 engine that can cause a no-start, stalling, and set various DTCs including P0335.
- PIE0416A: An early engineering information bulletin noting an investigation into the root cause of DTCs P0335, P0340, or P0365, indicating it was a known area of concern for GM.
- TSB Bulletin #PIP5553A: Communicates that the vehicle may have an SES lamp with DTC P0335 and others due to a wiring jumper harness chafed at a bolt.
- TSB Bulletin #PIP5724: Notes that a wiring jumper harness pinched between the X15 can cause P0335 and a possible crank-no-start or stall.
- TSB Bulletin #PIP4880F: Provides diagnostic steps for P0335 and P0336, noting these codes may be stored in both the Engine Control Module and the Power Inverter Module.
Platform-Specific Known Issues
- Engine Harness Chafing (TSB 21-NA-149): For the 4.3L LV3 engine specifically, GM released a technical service bulletin detailing common locations where the main engine wiring harness can rub against metal components and short out. This can directly cause a P0335 code if the CKP sensor wires are damaged. Key areas to inspect are: the front corner of the left-hand cylinder head, the drive belt idler pulley bracket, and the oil dipstick tube bracket. Repairing the wires and adding protective sheathing is the fix.
Mechanic-Grade Diagnostic Values
- CKP Sensor Connector Pin 1 (Reference Voltage) — expected: 5 Volts (Key On, Engine Off). Failure: 0V or significantly less than 5V indicates a wiring or ECM issue.
- CKP Sensor Connector Pin 2 (Low Reference/Ground) — expected: Less than 2 ohms of resistance to a known good ground (e.g., battery negative terminal).. Failure: High or infinite resistance indicates a bad ground connection, likely at G102 or G106.
- CKP Sensor Connector Pin 3 (Signal Wire) — expected: A fluctuating voltage (square wave) when the engine is cranking, best viewed with an oscilloscope. A multimeter may show some changing voltage but cannot confirm signal quality.. Failure: No voltage change or a steady voltage indicates a failed sensor or wiring issue.
- CKP Sensor Bolt Torque — expected: 18 ft-lbs. Failure: Over or under-torquing can damage the sensor or lead to improper seating.
Scan Tool Commands That Help
- GM GDS2 / Tech2 or equivalent professional scanner: Crankshaft Position System Variation Learn — This procedure is mandatory after replacing the crankshaft position sensor or the ECM. It calibrates the ECM to the minor manufacturing variations in the new sensor and the reluctor ring to ensure accurate misfire detection and ignition timing. Failure to perform this will often leave the Check Engine Light on and cause poor running conditions.
Wiring & Ground Locations
- CKP Sensor Connector — On the lower passenger side of the engine block, accessible only after removing the starter motor.. This is the primary connection point for the sensor. Corrosion, oil contamination, or loose pins here will directly cause a P0335. Pinout: Pin 1 (Light Green) is 5V reference, Pin 2 is ground, Pin 3 (Purple/Dark Blue) is the signal.
- G102 (4.3L) — On the right front of the engine, near the crankshaft sensor.. This is a critical engine block ground. A loose or corroded connection here can disrupt the low reference signal for the CKP sensor, causing an invalid signal even if the sensor and wiring are otherwise good.
- G105 / G106 — Main battery grounds on the right front side of the engine block.. These are the primary ground points for the engine. While less specific to the CKP circuit than G102, poor connections here can cause widespread, difficult-to-diagnose electrical issues, including problems with sensor signals.
Real Owner Repair Stories
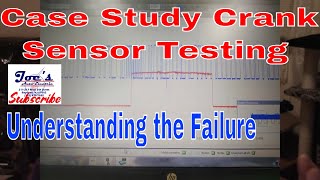
- YouTube channel 'Joe's Auto Electric' (2000 Chevrolet Silverado (older model, but demonstrates a key failure mode)) — Crank-no-start, P0335 code present.
❌ Tried (didn't work) Replacing the crankshaft position sensor (done by another shop).
✅ What actually fixed it The mounting surface on the engine block where the sensor sits was heavily corroded with rust. This created an excessive air gap, preventing the new sensor from reading the reluctor ring correctly. The fix was to remove the starter, remove the new sensor, thoroughly clean the mounting surface on the block to bare metal, and reinstall the sensor. - YouTube video from user 'GM 5.3L And 6.0L Long Start Code P0335 Crankshaft Sensor Wiring Problem Fixed' (GM Suburban (demonstrates a common wiring failure)) — Long crank (6-7 seconds) before starting, P0335 code.
❌ Tried (didn't work) Replacing the crankshaft position sensor (it was a new sensor).
✅ What actually fixed it After testing the connector and finding no signal on two of the three wires, the technician traced the harness and found a cut wire. Repairing the broken wire in the harness resolved the long crank and the P0335 code. - NHTSA ODI #11510305 — An owner reported their vehicle started running rough and returned codes P0335, P0016, and P0017. Despite replacing the camshaft sensor, crankshaft sensor, and VVT solenoids, the issue required further diagnostic attention.
OEM Part Supersession History
12623094→12669636— Standard part revision and update by the manufacturer.
Heads up: The new part number (12669636) is the correct replacement and is fully compatible. Always use the latest revision for repairs.
Diagnostic Flowchart
Other Known Issues on This Vehicle
Issues unrelated to this code that are worth knowing about as an owner of this generation:
- 6L80 Transmission Torque Converter Shudder 🔴 High — Widespread issue. Owners describe a 'rumble strip' feeling during light acceleration, often between 40-70 mph. Can occur at various mileages, sometimes as low as 50,000 miles. (Ref: TSB 18-NA-355 (for 8-speeds, but similar issues affect 6-speeds), TSB 20-NA-142. The fix often involves a specific transmission fluid flush or, in severe cases, torque converter replacement.)
- Active Fuel Management (AFM) Lifter Failure 🔴 High — A known issue on EcoTec3 engines, though reported less on the V6 than the V8s. A collapsed lifter can cause a persistent misfire (P0300), ticking noise, and potential engine damage if not addressed. (Ref: Multiple TSBs exist regarding misfires and engine noises, such as PIP5298B for P0300.)
- 6L80 Transmission Thermal Bypass Valve Failure 🟠 Medium — The valve, introduced around 2014, can stick closed, preventing fluid from reaching the transmission cooler and causing overheating, which leads to premature transmission failure.
- Engine Wiring Harness Chafing 🟠 Medium → Shop Engine Wiring Harness — Common on the 4.3L LV3. The harness can rub through on sharp metal edges, causing a wide variety of electrical issues and DTCs, including P0335. (Ref: TSB 21-NA-149)
- Water Leaks from Roof Antenna/Third Brake Light 🟡 Low — The roof-mounted antenna and high-mount stop lamp seals can fail, allowing water to leak into the cab. This can cause headliner stains and, in some cases, electrical problems if water reaches modules under the dash.
Used vs. New Parts: Buying Guide for This Vehicle
When a used part is the smart pick: For the sensor itself, it almost never makes sense to use a used part. The labor to access the sensor (removing the starter) is high, and the part itself is relatively inexpensive. Installing a used sensor with an unknown lifespan is a significant risk. A used engine wiring harness from a low-mileage donor vehicle could be a cost-effective solution if a large section of the original harness is damaged beyond simple repair.
Donor-vehicle mileage cap: roughly under 75000 miles for the part to have meaningful remaining life.
What to inspect on the donor part:
- For a wiring harness, inspect for any signs of chafing, brittle insulation, or previous repairs.
- Ensure all connector locking tabs are intact and not broken.
- Verify the donor vehicle was not from a flood or fire-damaged car.
OEM-only on this vehicle (don't cheap out):
- Crankshaft Position Sensor
Aftermarket brands forum-validated for this vehicle:
- ACDelco (GM Genuine)
- Delphi
Brands owners have reported issues with on this vehicle:
- No-name or unbranded sensors from online marketplaces are frequently cited as being dead-on-arrival or failing prematurely. Given the labor involved, saving a few dollars on a cheap sensor is not worth the risk of having to do the job twice.
Real Owner Stories
Aggregated from forums and TSBs cited above. Mileages and costs reflect what owners reported in those sources.
2014 Chevrolet Silverado 1500 5.3L (K2XX Platform)
Symptoms: The truck was running rough, stalling, and had a dead tachometer. It eventually resulted in a crank-but-no-start condition.
What fixed it: Replacement of the crankshaft position sensor followed by a CKP relearn procedure. The owner noted the truck ran very poorly after the sensor swap until the relearn was addressed.
Source hint: GM-Trucks.com: 'Tachometer not working, running rough- Anyone have a Wiring diagram'
2014-2019 Chevrolet Silverado 4.3L LV3
Symptoms: No-start, stalling, and various DTCs including P0335. IPC gauges were sweeping while driving and several IPC warning lights were illuminated.
What fixed it: Repairing damaged sections of the engine wiring harness at specific chafe points (left cylinder head, idler pulley bracket, or dipstick bracket) and adding protective conduit.
Source hint: TSB 21-NA-149
Related OBD-II Codes
Frequently Asked Questions
Where is the crankshaft position sensor located on my 4.3L LV3 Silverado?
Does TSB 21-NA-149 apply to my 4.3L V6 Silverado's P0335 code?
I replaced the sensor but my truck still runs rough and stalls. What did I miss?
Why did my crankshaft sensor fail on this specific engine?
What should I torque the new CKP sensor bolt to?
Is there a specific wiring issue I should look for on my 2014-2019 Silverado?
Helpful Videos
We Have This Part in Stock


The information in this article is provided for general reference and educational purposes only. Vehicle specifications, procedures, and part compatibility can vary by production date, trim level, and region. Always consult your vehicle's factory service manual and verify part numbers before purchasing or performing repairs. Safety-critical components such as airbags, seat belts, and braking systems should be installed by a qualified professional.
- Chevrolet Silverado:
- 🧭 Diagnostic Flowchart
- 🎬 Helpful Videos
- 🛍️ Shop This Part
- What's Unique About the 2014-2019 Chevrolet Silverado
- Symptoms You May Notice
- Most Likely Causes
- Rare But Worth Checking
- Diagnosis Steps
- Parts You'll Likely Need
- Related Codes That Often Appear With This One
- Technical Service Bulletins (TSBs) & Recalls
- Platform-Specific Known Issues
- Mechanic-Grade Diagnostic Values
- Scan Tool Commands That Help
- Wiring & Ground Locations
- Real Owner Repair Stories
- OEM Part Supersession History
- Other Known Issues on This Vehicle
- Used vs. New Parts: Buying Guide for This Vehicle
- Real Owner Stories
- 2014 Chevrolet Silverado 1500 5.3L (K2XX Platform)
- 2014-2019 Chevrolet Silverado 4.3L LV3
- Related OBD-II Codes
- Frequently Asked Questions
- 🎟️ Get 5% Off