
P0335 on 2014-2017 Dodge Durango: Crankshaft Sensor Causes & Fixes
P0335 on a 2014-2017 Dodge Durango indicates a problem with the crankshaft position sensor (CKP) circuit. The most common fix is replacing the sensor itself, which costs about $20-$90 for the part. This can often be a DIY job, but sensor location and difficulty differ between the 3.6L V6 and 5.7L V8 engines. On the 5.7L Hemi, the starter motor must be removed to access the sensor, adding labor time. Before replacing parts, check for relevant TSBs, as a simple PCM software update may resolve the
- P0335 means the crankshaft position sensor signal is lost, which can cause stalling, no-start, or rough running.
- The most common fix is replacing the sensor, but wiring issues and outdated PCM software are also possible causes.
- On the 5.7L Hemi engine, the starter motor must be removed to access the sensor, making the repair more difficult.
- Always check for applicable TSBs, as a software update from the dealer might be the correct fix.
- After replacement, a crank relearn procedure may be required using a scan tool or a specific drive cycle.
What's Unique About the 2014-2017 Dodge DURANGO

For the 2014-2017 Durango, Chrysler issued several Technical Service Bulletins (TSBs) related to this code. For 3.6L engines, TSBs #18-024-17 REV. C and #18-049-20 changed the P0335 code from a one-trip to a two-trip fault. This software update makes the system less sensitive to brief, intermittent signal losses that might not indicate a true part failure. Another TSB, #18-049-16 REV. A, specifically addresses P0335 on the 5.7L engine, suggesting engine-specific concerns. These bulletins highlight that a PCM software update could be a required first step in the diagnosis or repair, potentially avoiding an unnecessary sensor replacement.
🎬 Watch: 6 common causes to check before replacing parts.Diagnostic Flowchart

Tap your situation to follow the diagnostic path that matches what you're seeing on this vehicle.
Symptoms You May Notice
- Check Engine Light is on
- Engine cranks but will not start
- Engine stalls while driving, especially when warm
- Extended cranking time before the engine starts
- Rough idling or engine hesitation
- Engine misfires (may be accompanied by code P0300)
- Reduced engine power or vehicle in 'limp mode'
- Bouncing RPM gauge at idle
- Replacing the camshaft position sensor instead of the crankshaft position sensor.
- Replacing the starter motor when a no-start condition is caused by the lack of a crank signal.
- Replacing the battery, when the extended cranking is caused by the P0335 fault.
Most Likely Causes

- Faulty Crankshaft Position Sensor 🔴 High Probability → Shop Engine Crankshaft Position Sensor Heat, vibration, and oil contamination from common leaks (e.g., oil filter housing on the 3.6L) can cause the sensor to fail internally over time. It's the most frequently replaced part for this code. Failures often manifest when the engine gets hot.
How to confirm: Use a scan tool to check for an RPM signal while cranking the engine. If there is no signal, the sensor is likely bad. An oscilloscope provides the most definitive test of the sensor's square wave signal. A missing or erratic pattern confirms a failed sensor.
Typical fix: Replace the crankshaft position sensor. Ensure the new sensor's O-ring is lightly lubricated with oil before installation.
Est. part cost: $20-$90 - Wiring or Connector Issues 🟡 Medium Probability The sensor's wiring is located in the hot engine bay. Oil leaks are common on these engines and can saturate the connector and wiring, causing a poor connection or short circuit. Wires can also chafe against the engine block or heat shields.
How to confirm: Visually inspect the wiring harness and connector for any signs of damage, melting, corrosion, or oil saturation. Check for 5V reference, ground, and signal at the connector with a multimeter. A common test involves back-probing the connector to check for a changing voltage signal as the engine is cranked.
Typical fix: Repair the damaged wiring or clean the oil-soaked connector with electrical contact cleaner. If the connector is damaged, replace the pigtail.
Est. part cost: $15-$40 - Outdated PCM Software ⚪ Low Probability Manufacturer TSBs (#18-024-17 REV. C, #18-049-20, #18-049-16 REV. A) were released to update PCM software, making the system less sensitive to intermittent faults. This indicates the original software was prone to setting this code, especially for minor, non-critical signal dropouts.
How to confirm: A Dodge dealership or a qualified shop with access to OEM software (like WiTech) can check your vehicle's VIN to see if the PCM has the latest updates.
Typical fix: Update the Powertrain Control Module (PCM) software. This is often referred to as 'flashing the PCM'.
Est. part cost: $0-$150
Rare But Worth Checking
- Damaged Tone Ring: The tone ring (or reluctor wheel) that the sensor reads can get damaged, have broken/bent teeth, or become excessively dirty, preventing an accurate signal. This is less common but should be considered if a new sensor and good wiring don't solve the problem.
- Faulty Powertrain Control Module (PCM): → Shop Engine Control Module (ECM) While rare, the PCM itself can fail and stop processing the crank signal correctly. This should only be considered after all other possibilities, including wiring, the sensor, and software updates, have been thoroughly ruled out.
Diagnosis Steps
- Scan for Codes: Use an OBD-II scanner to confirm P0335 and check for any other related codes like P0339, P0340, or U1424.
- Check Live Data: While cranking the engine, monitor the RPM signal on the scan tool. No RPM reading (or a delayed reading) points strongly to a bad CKP sensor or circuit.
- Visual Inspection: Inspect the crankshaft position sensor and its wiring harness. Look for frayed wires, loose connections, or heavy oil contamination, which is a common issue.
- Check for TSBs: Before replacing parts, contact a Dodge dealer or equipped independent shop to check if your VIN has any open TSBs related to P0335. A PCM flash may be the required fix.
- Test the Circuit: If the wiring looks good, use a multimeter to check for a 5-volt reference, a good ground, and a signal from the sensor at the connector. The signal wire should show fluctuating voltage as the engine is cranked.
- Test or Replace the Sensor: Given the low cost of the part, many DIYers choose to replace the sensor at this stage. For a definitive diagnosis, use an oscilloscope to view the square wave pattern from the sensor. A missing or erratic pattern confirms a failed sensor.
- Inspect Tone Ring: If all else fails, inspect the tone ring for damage. This is the last resort as it requires more significant disassembly.
- Perform Crank Relearn: After replacing the sensor, a crankshaft position sensor relearn procedure may be necessary. This can sometimes be done with a high-end scan tool or by following a specific drive cycle.
Parts You'll Likely Need

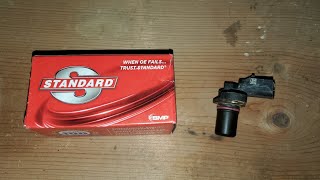
- Crankshaft Position Sensor
(OEM #Mopar 5149169AB (for 3.6L & 5.7L, but always verify with VIN))— This sensor is the most common failure point for the P0335 code due to its operating environment and susceptibility to heat and oil contamination.
Trusted brands: Mopar, NTK, Bosch, Duralast
OEM price range: $50-$90
Aftermarket price range: $20-$60
Related Codes That Often Appear With This One
- P0339 — This code for 'Crankshaft Position Sensor Intermittent' is often seen with P0335, as an intermittent failure can lead to a complete circuit failure. TSBs for the Durango often list both codes together.
- P0340 — This code relates to the camshaft position sensor. Since the crank and cam sensors work together for engine timing, a fault in one can sometimes lead the PCM to flag an issue with the other. TSB #18-024-17 REV. C also groups this code with P0335.
- U1424 — This code for 'Implausible Engine Torque Signal Received' can be triggered by a faulty crankshaft sensor signal, as the PCM cannot accurately calculate engine torque without a reliable RPM reading. A forum user with a 2014 3.6L Durango reported this code alongside P0335.
Technical Service Bulletins (TSBs) & Recalls
- 18-024-17 REV. C: Changed P0335 to a two-trip fault for 3.0L/3.6L engines.
- 18-049-20: Also changed P0335 to a two-trip fault for 3.0L/3.6L engines.
- 18-055-16 REV. A: Lists P0335 as a possible DTC addressed by a software update.
- 1802417: Another reference to changing P0335 to a two-trip fault for 3.6L engines in the 2017 MY.
- 18-049-16 REV. A: Specifically addresses P0335 on the 5.7L engine.
Platform-Specific Known Issues
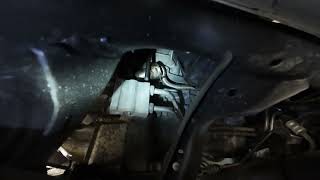
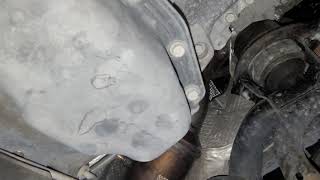
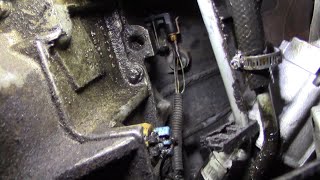
- 3.6L V6 Engine - Sensor Location & Oil Leaks: On the 3.6L Pentastar, the sensor is on the passenger side of the engine block, near the transmission bell housing. It is often obscured by a foil heat shield that must be bent or moved for access. This area is prone to oil leaks from the oil filter housing/cooler assembly located in the engine 'V', which can drip down and saturate the sensor and its connector.
- 5.7L V8 Hemi Engine - Starter Motor Removal Required: On the 5.7L Hemi, the crankshaft position sensor is located on the driver's side of the engine block, but access is blocked by the starter motor. The starter must be disconnected and removed to replace the sensor, which significantly increases the labor time and complexity of the job.
- Crank Relearn Procedure: After replacing the sensor, some Chrysler vehicles require a 'crank relearn' or 'cam/crank sync' procedure to sync the new sensor with the PCM. This can be done with a capable bidirectional scan tool. In some cases, the PCM may automatically relearn after a specific drive cycle (e.g., idling, driving at steady speeds), but a manual relearn is preferred for immediate results.
- TSB for Software Sensitivity: As noted in TSBs #18-024-17 REV. C and #18-049-20, Chrysler updated the PCM software to make the P0335 fault a 'two-trip' code. This prevents the Check Engine Light from illuminating after a single, brief signal interruption, reducing false alarms. Checking for this software update is a critical diagnostic step.
Mechanic-Grade Diagnostic Values
- CKP Sensor 5V Reference Supply — expected: 4.7 to 5.1 Volts DC. Failure: 0 Volts indicates an open in the supply circuit; voltage below 4.7V could indicate high resistance.
- CKP Sensor Ground Circuit — expected: Near 0 Volts (when testing voltage drop) or good continuity to ground.. Failure: Using a test light connected to 12V, the light should be brightly illuminated when probing the ground circuit; a dim light indicates high resistance.
- CKP Sensor Signal Circuit Voltage (Key On, Engine Off) — expected: 4.7 to 5.1 Volts DC. Failure: No voltage could indicate a short to ground. Voltage present when it shouldn't be could indicate a short to power.
- Live Data RPM while Cranking — expected: 100 to 500 RPM. Failure: A reading of 0 RPM on a scan tool while the engine is cranking strongly points to a failed CKP sensor or a complete circuit failure.
Scan Tool Commands That Help
- wiTECH (OEM), Appcar DiagFCA, HP Tuners, or other high-end bidirectional scanners: Cam/Crank Relearn or Crankshaft Relearn — This function should be performed after replacing the crankshaft position sensor, camshaft position sensor, timing components, or the PCM. It synchronizes the sensor signals with the PCM to ensure accurate timing, preventing rough running or misfire codes after the repair.
Wiring & Ground Locations
- G304 — On some Durango models, this ground is located in the left rear quarterpanel area.. While not a primary engine ground, body and module grounds like this are critical for the proper function of various electronic systems. A poor ground here could contribute to intermittent electrical issues or communication problems between modules, though it's a less likely cause for a specific P0335.
- Engine Ground Strap — There are multiple ground straps. A key one connects the engine block to the chassis to ensure the engine has a solid ground path. For the 3.6L, a ground cable is often located on the engine itself.. A loose, corroded, or broken main engine ground strap can cause a host of electrical problems, including erratic sensor behavior. The PCM and its sensors rely on a stable ground reference. An unstable ground can cause voltage fluctuations that might trigger sensor circuit codes like P0335.
Real Owner Repair Stories
- YouTube video comment on 'P0335 Crankshaft Position Sensor Fix for Jeep, Dodge and Chrysler Vehicles' (Jeep Patriot (platform-mate with similar engine/sensor)) — P0335 code present.
❌ Tried (didn't work) A repair shop (Pepboys) quoted $1,600+, claiming the transfer case needed to be removed for access.
✅ What actually fixed it The vehicle owner found a video showing the correct, much simpler procedure, implying that replacing the sensor without major disassembly was the actual fix, saving significant money and avoiding a misdiagnosis of labor complexity.
OEM Part Supersession History
Mopar 5149169AA→5149169AB— Standard part revision and improvement over time.
Heads up: 5149169AB is the widely accepted replacement for the specified 2014-2017 Durango range. Using the older 'AA' revision if found as new-old-stock is not recommended as 'AB' likely contains improvements for durability or signal quality.
Model Year Variations Within This Range
- 2016-2017: For the 2016 model year, the 3.6L Pentastar V6 received a significant update. Changes included a two-stage variable valve lift (VVL) system, a higher compression ratio (11.3:1 vs 10.2:1), cooled EGR, and other internal friction reductions. While the crankshaft position sensor part number remained the same, the PCM and its software logic were updated to accommodate the new engine characteristics. This makes checking for the correct PCM software version even more critical on these later models.
Helpful Videos


We Have This Part in Stock


The information in this article is provided for general reference and educational purposes only. Vehicle specifications, procedures, and part compatibility can vary by production date, trim level, and region. Always consult your vehicle's factory service manual and verify part numbers before purchasing or performing repairs. Safety-critical components such as airbags, seat belts, and braking systems should be installed by a qualified professional.
- Dodge DURANGO:
- 🧭 Diagnostic Flowchart
- 🎬 Helpful Videos
- 🛍️ Shop This Part
- What's Unique About the 2014-2017 Dodge DURANGO
- Symptoms You May Notice
- Most Likely Causes
- Rare But Worth Checking
- Diagnosis Steps
- Parts You'll Likely Need
- Related Codes That Often Appear With This One
- Technical Service Bulletins (TSBs) & Recalls
- Platform-Specific Known Issues
- Mechanic-Grade Diagnostic Values
- Scan Tool Commands That Help
- Wiring & Ground Locations
- Real Owner Repair Stories
- OEM Part Supersession History
- Model Year Variations Within This Range
- 🎟️ Get 5% Off