
P0335 on 1996-2000 Toyota Celica: Crank Sensor Causes and Fixes
P0335 on a Toyota Celica usually means the crankshaft position sensor has failed, causing a no-start or rough running condition. Before replacing the sensor, check for low battery voltage, as this is a known issue that can trigger the code per a Toyota TSB. A new OEM-quality Denso sensor costs between $90 and $150, while aftermarket options are cheaper but less reliable.
- P0335 on a 1996-2000 Celica will likely cause a no-start or stalling condition.
- The vehicle range spans two generations (1996-99 and 2000) which use different engines and different crank sensors. Verify your model year before buying parts.
- ALWAYS check your battery's health first. A weak battery is a documented cause of this code on Toyotas and is a simple, free check.
- The most common fix is replacing the crankshaft position sensor, but inspecting the wiring for damage is a critical step before spending money on parts.
- A scan tool that can read live data is the most helpful diagnostic tool; if it shows 0 RPM during cranking, the crank sensor circuit is the problem.
What's Unique About the 1996-2000 Toyota CELICA
The 1996-2000 Celica range spans two distinct generations, the 6th (1996-1999) and the 7th (2000). These generations use completely different engines and, therefore, different crankshaft position sensors and locations. It is crucial to identify the correct model year before purchasing parts. For the 6th Gen (5S-FE/7A-FE), the sensor is located on the lower part of the engine near the main crankshaft pulley, accessible by removing the passenger-side wheel and splash shields. For the 7th Gen (1ZZ-FE/2ZZ-GE), the sensor is on the front of the engine block (firewall side), below the intake manifold, where access is tighter. Additionally, a broad Toyota Technical Service Bulletin (TSB T-TT-0010-10 Rev) specifically notes that low battery voltage (below 11 volts) can cause a P0335 code on these vehicles, which is an important and often overlooked diagnostic step.
Diagnostic Flowchart
Tap your situation to follow the diagnostic path that matches what you're seeing on this vehicle.
Generation note: This range covers two generations: the 6th Gen (T200, 1996-1999) and the 7th Gen (T230, 2000). The 6th Gen models use 1.8L 7A-FE or 2.2L 5S-FE engines. The 7th Gen 2000 model introduced the 1.8L 1ZZ-FE (GT) and 1.8L 2ZZ-GE (GT-S) engines. The crankshaft position sensors are not interchangeable between these generations. Some very early 6th gen models may have the crank signal generated inside the distributor.
Symptoms You May Notice
- Check Engine Light is on
- Engine cranks but will not start
- Engine stalls intermittently, especially when warm
- Rough idle or engine misfiring
- Noticeable loss of engine power
- Reduced fuel economy
- Tachometer reads 0 RPM while cranking the engine (viewed on a scan tool)
- Replacing the camshaft position sensor (P0340) when P0335 is the primary code.
- Replacing ignition coils or spark plugs without first diagnosing the lack of an RPM signal.
- Replacing the fuel pump because of a no-start condition, when the ECM is not commanding fuel injection due to the missing crank signal.
- Overlooking a weak battery or faulty starter motor, which are known causes per Toyota TSBs and owner experiences.
Most Likely Causes
- Failed Crankshaft Position Sensor 🔴 High Probability → Shop Engine Crankshaft Position Sensor The sensor is located in a hot, oily environment at the bottom of the engine, and internal electronics can fail from years of heat cycles and vibration. The internal coil windings can develop an open or short circuit.
How to confirm: Use a scan tool to monitor Engine RPM while cranking. If it reads zero, the sensor or its circuit is faulty. You can also test the sensor's internal resistance with a multimeter. For the 2-wire inductive sensors on these models, the resistance should be between 985-1,600 ohms when cold. A reading of 'OL' (open loop) or zero resistance indicates a failed sensor.
Typical fix: Replace the crankshaft position sensor. Ensure the mounting surface is clean and apply a small amount of clean oil to the new sensor's O-ring before installation. It is highly recommended to use an OEM Denso part, as owners in forums report premature failure from cheaper aftermarket brands.
Est. part cost: $25-$150 - Low Battery Voltage 🟡 Medium Probability → Shop Vehicle Battery A Toyota TSB (T-TT-0010-10 Rev) confirms that low battery voltage (below 11V) can cause inconsistent engine cranking speed, leading the ECM to incorrectly flag a fault with the crankshaft sensor circuit. This can happen even if the sensor is perfectly fine.
How to confirm: Test the battery voltage with a multimeter. A healthy, fully charged battery should read approximately 12.6 volts with the engine off. Check the freeze frame data with a scan tool to see what the battery voltage was when the code was set. Also, have the battery load-tested at an auto parts store to check its health under load.
Typical fix: Recharge or replace the weak or dead battery. Clean any corrosion from the battery terminals and ensure connections are tight.
Est. part cost: $0-$200 - Wiring Harness or Connector Damage 🟡 Medium Probability The sensor's wiring is routed near the hot engine block and exhaust components. Over time, the insulation can become brittle, cracked, or melted, leading to a short or open circuit. Oil leaks from the oil pump or front main seal can also saturate the connector and damage the wiring.
How to confirm: Visually inspect the wiring harness from the sensor to the ECM for any signs of damage, melting, or oil contamination. Unplug the connector and check for corrosion or bent pins. A poor connection can mimic a failed sensor.
Typical fix: Repair the damaged section of wiring or replace the connector pigtail. Clean any corrosion from the connector pins using an electrical contact cleaner.
Est. part cost: $5-$50
Rare But Worth Checking
- Damaged Reluctor Ring: The crankshaft position sensor reads teeth on a reluctor ring (or sensor plate). If this ring is damaged, has broken teeth, or has slipped, the signal will be incorrect, triggering P0335. This is uncommon but can happen, especially if other engine work has been performed recently.
- Failing Starter Motor: A failing starter can draw excessive voltage or cause erratic cranking, which can confuse the ECM into setting a P0335 code, similar to a low battery issue. A forum user noted that a crank position sensor code isn't uncommon with a starter failure because the ECU expects to see engine movement but doesn't get any.
- Faulty Engine Control Module (ECM): → Shop Engine Control Module (ECM) This is the least likely cause. The ECM itself can fail, but all other possibilities, especially wiring and sensor issues, should be thoroughly ruled out before considering ECM replacement. A Reddit user mentioned this as a final possibility after replacing the sensor and checking wires.
Diagnosis Steps
- Check Battery Health: Before any other step, confirm your battery has at least 12.6 volts and have it load-tested. A weak battery is a known cause for this code on Toyotas. Use a scan tool to check the freeze frame data for battery voltage at the time the code was set; if it was below 11V, the battery is the likely culprit.
- Scan for RPM Signal: Connect an OBD-II scanner like Toyota Techstream and view live data. Monitor the 'Engine RPM' parameter while cranking the engine. If the RPM reads '0', it confirms the ECM is not receiving a signal from the crank sensor or its circuit.
- Inspect Wiring and Connector: Visually inspect the entire wiring harness for the crankshaft position sensor. Look for obvious damage like melting, chafing, or oil saturation. Disconnect the sensor and check for corrosion on the pins.
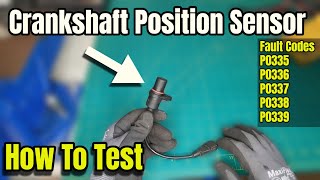
- Test the Sensor Resistance: If wiring appears okay, test the sensor itself. For these 2-wire inductive sensors, use a multimeter set to Ohms. Measure the resistance between the two pins on the sensor. 🎬 Watch: A quick guide on testing 2-wire crankshaft sensors. A good sensor should read between 985 and 1,600 Ohms when cold (approx. -10 to 50°C) for the 5S-FE/7A-FE engines. An open circuit (OL) or short (0 Ohms) indicates a bad sensor.
- Check for Signal at the ECM: If the sensor tests good, the issue may be in the wiring. You can back-probe the signal wires at the ECM connector and check for a fluctuating AC voltage with a multimeter or a clear sine wave with an oscilloscope while cranking the engine. This confirms if the signal is reaching the computer.
- Inspect the Reluctor Ring: If all else fails, you may need to visually inspect the reluctor ring (on the crankshaft pulley or flywheel) for damaged, missing teeth, or excessive rust/debris.
Parts You'll Likely Need
- Crankshaft Position Sensor (1996-1999, 6th Gen)
(OEM #90919-05011)— This is the correct sensor for the 1.8L 7A-FE and 2.2L 5S-FE engines used in the 6th generation Celica. It is located near the crankshaft pulley behind the passenger-side wheel splash shield.
Trusted brands: Denso (OEM), NGK, Delphi, Standard Motor Products
OEM price range: $120-$185
Aftermarket price range: $25-$70 - Crankshaft Position Sensor (2000, 7th Gen)
(OEM #90919-05048)— This is the correct sensor for the 1.8L 1ZZ-FE and 2ZZ-GE engines used in the 7th generation Celica. It is located on the firewall side of the engine block, below the intake manifold.
Trusted brands: Denso (OEM), Hitachi, Walker, Spectra Premium
OEM price range: $130-$195
Aftermarket price range: $30-$80
Related Codes That Often Appear With This One
- P0340 — P0340 is for the Camshaft Position Sensor. Since the crank and cam sensors work together for engine timing, a fault in the primary crank sensor circuit can sometimes cause the ECM to flag a related fault with the cam sensor. The TSB for low battery voltage also lists P0340 as a potential related code.
- P0300 — P0300 indicates a random or multiple cylinder misfire. If the crank sensor provides an erratic or incorrect signal, it will cause incorrect spark timing, leading to misfires.
Technical Service Bulletins (TSBs) & Recalls
- T-TT-0010-10 Rev: States that low battery voltage can cause a MIL ON for P0335 due to inconsistent engine rotational speed during cranking. It advises checking freeze frame data for battery voltage below 11 volts at the time the DTC was set.
Platform-Specific Known Issues
- A known issue, documented in TSB T-TT-0010-10 Rev, is that low battery voltage (below 11V) can trigger a P0335 code without there being an actual fault in the sensor or its wiring. Always check battery health first.
- Sensor location and part numbers are different between the 6th Gen (1996-1999) and 7th Gen (2000) models, making correct year/engine identification critical before ordering parts.
Mechanic-Grade Diagnostic Values
- Crankshaft Position Sensor Resistance (6th Gen, 5S-FE/7A-FE) — expected: 985 - 1,600 Ohms (Cold). Failure: Reading is 'OL' (open) or 0 Ohms (shorted).
- Crankshaft Position Sensor Air Gap — expected: Not specified, but must be clear of debris and rust.. Failure: An inaccurate or excessive air gap can cause a weak or biased signal, triggering a DTC. A shim may be required for proper spacing on some vehicles.
- Oscilloscope Waveform (Inductive Sensor) — expected: A clean, repeating AC sine wave that increases in amplitude and frequency as engine RPM increases.. Failure: A flat line (no signal), or a noisy/erratic waveform indicates a problem with the sensor, wiring, or reluctor wheel.
Scan Tool Commands That Help
- Toyota Techstream: Data List -> Powertrain / Engine and ECT / Engine Speed — This is the primary method to confirm if the ECM is receiving an RPM signal while cranking. If the value remains at 0 RPM, it points directly to a fault in the crankshaft position sensor or its circuit.
- Toyota Techstream: Freeze Frame Data — Use this to review the conditions when the P0335 code was set. Specifically, check the battery voltage parameter. If voltage was below 11V, it strongly suggests the low battery TSB is relevant to the fault.
Wiring & Ground Locations
- Engine Ground (7th Gen, 1ZZ-FE/2ZZ-GE) — On the engine block, right above the VVT-i / Lift solenoids. Another important ground is on the firewall, directly above the alternator.. A poor engine ground can introduce electrical noise or cause voltage drops, affecting the sensor's signal integrity and potentially leading to a false P0335 code. These grounds are often overlooked during engine swaps or major repairs.
- ECM Connector (7th Gen, 1ZZ-FE/2ZZ-GE) — The crankshaft position sensor wires (NE+ and NE-) can be back-probed at the ECM connector for definitive signal testing without accessing the sensor itself.. If the sensor resistance test passes but there is still no RPM signal on a scan tool, testing for the AC signal directly at the ECM pins will determine if the fault is in the wiring harness or the ECM itself.
Real Owner Repair Stories
- YouTube Commenter (Unspecified vehicle with P0335) — P0335 code present.
❌ Tried (didn't work) Replacing the crankshaft position sensor.
✅ What actually fixed it The root cause was a stretched timing chain, which caused the crankshaft and camshaft signals to go out of sync, leading to a bad reading from the crank sensor. The fix was to re-time the engine and replace the worn timing components.
Helpful Videos
We Have This Part in Stock


The information in this article is provided for general reference and educational purposes only. Vehicle specifications, procedures, and part compatibility can vary by production date, trim level, and region. Always consult your vehicle's factory service manual and verify part numbers before purchasing or performing repairs. Safety-critical components such as airbags, seat belts, and braking systems should be installed by a qualified professional.
- Toyota CELICA:
- 🧭 Diagnostic Flowchart
- 🎬 Helpful Videos
- 🛍️ Shop This Part
- What's Unique About the 1996-2000 Toyota CELICA
- Symptoms You May Notice
- Most Likely Causes
- Rare But Worth Checking
- Diagnosis Steps
- Parts You'll Likely Need
- Related Codes That Often Appear With This One
- Technical Service Bulletins (TSBs) & Recalls
- Platform-Specific Known Issues
- Mechanic-Grade Diagnostic Values
- Scan Tool Commands That Help
- Wiring & Ground Locations
- Real Owner Repair Stories
- 🎟️ Get 5% Off