
P0335 on 2001-2005 Toyota Celica: Crank Sensor Causes and Fixes
For a 2001-2005 Toyota Celica, code P0335 most often means a failed crankshaft position sensor, causing a no-start or stalling. Before replacing it, check for low battery voltage, as a Toyota TSB states this is a known cause. A new OEM Denso sensor costs about $110-$150.
- P0335 is a critical code on your Celica that will likely cause a no-start or stalling.
- **Always check your battery first.** A weak battery is a known cause for this code on this car, per a Toyota TSB.
- If the battery is good, the crankshaft position sensor is the most likely failed part.
- The sensor is located on the front of the engine near the main pulley; replacement is a moderately difficult DIY job.
- The most reliable OEM replacement part number appears to be 90919-05048 for both GT (1ZZ) and GT-S (2ZZ) models.
What's Unique About the 2001-2005 Toyota CELICA
On the 7th generation Celica, this code has a well-documented link to a non-sensor issue. A Toyota Technical Service Bulletin (TSB T-TT-0010-10 Rev) explicitly states that low battery voltage (below 11 volts) during cranking can trigger a P0335 code due to inconsistent engine rotational speed. This makes checking the battery and charging system a critical first step before assuming the sensor itself has failed. Both the 1ZZ-FE (GT) and 2ZZ-GE (GT-S) engines use the same sensor located on the front of the engine near the crankshaft pulley, which can be susceptible to oil leaks and road debris.
Diagnostic Flowchart
Tap your situation to follow the diagnostic path that matches what you're seeing on this vehicle.
Symptoms You May Notice
- Engine cranks but will not start
- Engine stalls intermittently, sometimes while driving
- Hard starting, especially when the engine is warm
- Rough or unstable idle
- Engine misfires or hesitates during acceleration
- Noticeable loss of engine power
- Illuminated Check Engine Light
- Replacing the camshaft position sensor (P0340) when the issue is the crankshaft sensor.
- Replacing the ignition coils or fuel pump without first checking for an RPM signal during cranking.
- Immediately replacing the crank sensor without first checking for low battery voltage, as per the Toyota TSB.
Most Likely Causes
- Low Battery Voltage 🔴 High Probability → Shop Vehicle Battery A Toyota Technical Service Bulletin (T-TT-0010-10 Rev) directly links low battery voltage (below 11V) to code P0335 on this platform due to inconsistent engine cranking speed. This should always be the first check.
How to confirm: Test the battery voltage with a multimeter. A healthy battery should read approximately 12.6 volts with the engine off and 13.7-14.7 volts with the engine running. Check freeze frame data with a scan tool to see the battery voltage at the moment the code was set.
Typical fix: Charge or replace the battery. Test the alternator to ensure it is charging correctly.
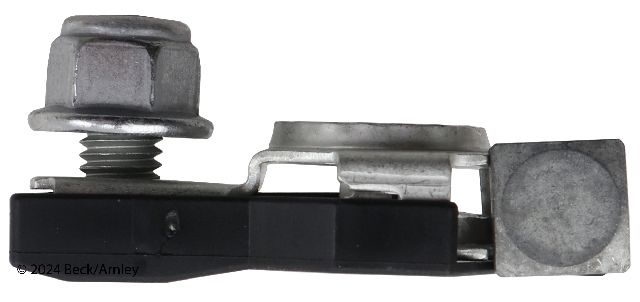
Est. part cost: $150-$250 - Failed Crankshaft Position Sensor 🔴 High Probability → Shop Engine Crankshaft Position Sensor The sensor is an electronic component that can fail over time due to heat cycles and vibration. Forum discussions confirm this is a common failure item. Using cheap, non-OEM sensors is a frequent cause of repeat failures.
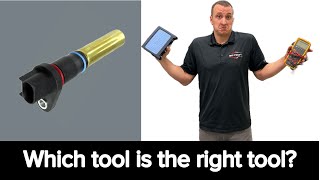
How to confirm: Use a scan tool to monitor RPM data while cranking; a reading of zero indicates no signal. You can also test the sensor's internal resistance with a multimeter. 🎬 Watch: A mechanic's guide to testing crankshaft sensors the right way. Disconnect it and measure between the two pins. The factory specification is 985-1600 ohms when cold (-10 to 50°C).
Typical fix: Replace the crankshaft position sensor. It is highly recommended to use an OEM Toyota or Denso-branded part for reliability.
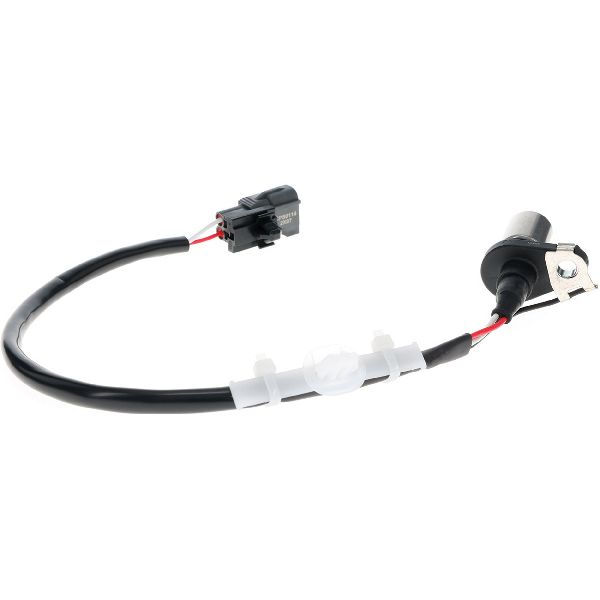
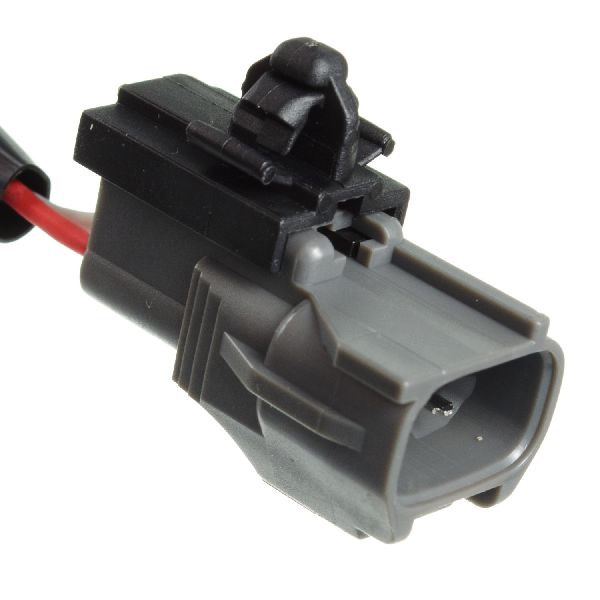
Est. part cost: $70-$150 - Damaged Wiring or Connector 🟡 Medium Probability The sensor is located low on the engine, making its wiring vulnerable to heat, oil contamination from a leaking front main seal, and road debris. The plastic connector can become brittle and break.
How to confirm: Visually inspect the wiring harness leading to the sensor for any signs of cracking, melting, or fraying. Check the connector for corrosion, moisture, or loose pins. Wiggle the harness while the engine is running (if possible) to see if it causes a stall.
Typical fix: Repair the damaged section of wiring or replace the connector pigtail.
Est. part cost: $15-$50 - Stretched or Jumped Timing Chain ⚪ Low Probability → Shop Engine Timing Chain
How to confirm: This is a more involved diagnosis. If the sensor and wiring are good, but the car runs poorly or has related cam/crank correlation codes, a mechanic may need to inspect the physical timing marks on the crank and camshafts to ensure they are aligned.
Typical fix: Replace the timing chain, tensioners, and guides.
Est. part cost: $300-$700
Rare But Worth Checking
- Damaged Reluctor Ring: The toothed wheel on the crankshaft that the sensor reads can become damaged, lose a tooth, or get covered in debris, but this is uncommon unless other engine work has been performed or there is significant internal engine wear.
- Faulty Engine Control Module (ECM): → Shop Engine Control Module (ECM) This is the least likely cause and should only be considered after all other possibilities, including wiring continuity checks back to the ECM, have been thoroughly ruled out.
Diagnosis Steps
- Check for other stored DTCs to see if other codes are present.
- Check Battery and Charging System: Per TSB T-TT-0010-10 Rev, first verify battery voltage is above 12.4V (and above 11V during cranking). Check freeze frame data for low voltage when the code was set.
- Check for RPM Signal: Connect an OBD-II scanner with live data capability. Monitor the 'Engine RPM' PID while cranking the engine. If it remains at 0, the ECM is not receiving a signal from the crank sensor circuit.
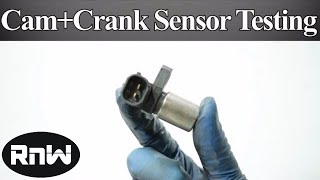
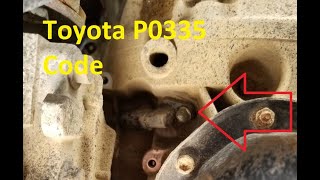
- Visual Inspection: Raise the vehicle and locate the crankshaft position sensor on the front of the engine (timing cover area), near the main pulley. 🎬 See this walkthrough on how to replace the sensor yourself. Visually inspect the sensor, its connector, and the wiring harness for obvious damage, corrosion, or oil contamination.
- Test the Sensor: Disconnect the sensor and measure the resistance between its two pins using a multimeter set to ohms. Compare the reading to the manufacturer's specification of 985-1600 ohms when cold. An open circuit (infinite resistance) or a dead short (zero resistance) indicates a failed sensor.
- Check for Signal at ECM: If the sensor and wiring appear good, a more advanced step is to back-probe the NE+ and NE- wires at the ECM connector to check for a signal with an oscilloscope while cranking. This confirms if the signal is reaching the computer.
- Inspect Timing Chain and Reluctor: If all electrical tests pass, the issue may be mechanical. This involves inspecting the timing chain for slack and verifying the reluctor ring on the crankshaft is not damaged or loose, which may require professional help.
Parts You'll Likely Need
- Crankshaft Position Sensor
(OEM #90919-05048)— This is the most common component to fail, causing a loss of signal to the ECM. The OEM part is strongly recommended for reliability, as aftermarket sensors are a known source of repeat problems.
Trusted brands: Toyota Genuine, Denso
OEM price range: $110-$150
Aftermarket price range: $40-$100 - Car Battery — A weak or failing battery is a documented cause of P0335 on this vehicle according to a Toyota TSB.
Trusted brands: Interstate, DieHard, Duralast
Aftermarket price range: $150-$250
Related Codes That Often Appear With This One
- P0340 — P0340 is for the Camshaft Position Sensor. The ECM uses both crank and cam signals to verify engine timing. A fault in the primary crank signal can sometimes cause a secondary code for the cam sensor, and the low battery TSB applies to both codes.
- P0300 — This is a random/multiple misfire code. Without a proper crank signal, the ECM cannot time spark correctly, leading to misfires.
Technical Service Bulletins (TSBs) & Recalls
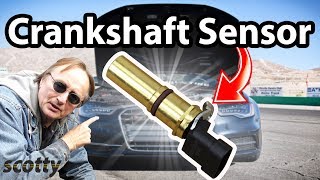
- T-TT-0010-10 Rev: Notes that low battery voltage (dropping below 11 volts) can cause inconsistent crankshaft rotational speed during startup, leading to a P0335 and/or P0340 code. Recommends checking freeze frame data for battery voltage at the time of the fault before replacing parts. 🎬 Watch: Understanding common causes and fixes for Toyota P0335 codes.
Platform-Specific Known Issues
- A low battery can cause this code without any fault in the sensor circuit itself, as documented in Toyota TSB T-TT-0010-10 Rev. The bulletin specifies to check freeze frame data for voltage below 11V when the code was set.
- Owner experiences strongly suggest that using aftermarket (non-Denso, non-Toyota) crankshaft position sensors often leads to premature failure or out-of-the-box issues. Sticking to the OEM part is a common recommendation.
Mechanic-Grade Diagnostic Values
- Crankshaft Position Sensor Resistance (Cold) — expected: 985 - 1,600 Ohms (at -10°C to 50°C / 14°F to 122°F). Failure: A reading of 0 ohms (short) or infinite ohms (open circuit).
- Crankshaft Position Sensor Resistance (Hot) — expected: 1,265 - 1,890 Ohms (at 50°C to 100°C / 122°F to 212°F). Failure: Resistance is out of specification when hot, which can indicate a heat-related failure.
- Crankshaft Position Sensor Signal (Oscilloscope) — expected: A consistent AC pulse waveform that changes frequency with engine RPM when back-probing the NE+ and NE- wires at the ECM.. Failure: A missing, erratic, or noisy waveform indicates a faulty sensor, wiring issue, or damaged reluctor ring.
- Wiring Harness Continuity (Sensor to ECM) — expected: Below 1 Ohm of resistance on both the NE+ and NE- wires between the sensor connector and the ECM connector.. Failure: High resistance or an open circuit indicates a broken wire.
Scan Tool Commands That Help
- Toyota Techstream / Professional Scan Tool: Live Data List > Engine SPD (or Engine RPM) — This is the first and most critical check. While cranking the engine, monitor this PID. If the value remains at 0 RPM, it confirms the ECM is not receiving a signal from the crankshaft position sensor circuit, narrowing the problem down to the sensor, wiring, or reluctor ring.
- Toyota Techstream / Professional Scan Tool: Freeze Frame Data > DTC P0335 — Immediately after confirming the code, review the freeze frame data. Per Toyota TSB T-TT-0010-10 Rev, pay close attention to the battery voltage PID at the moment the fault was recorded. A voltage below 11V strongly suggests the battery/charging system is the cause, not the sensor itself.
Wiring & Ground Locations
- Engine Harness Ground (Block) — On the engine block, right above the VVTL-i / VVT-i oil control solenoid(s).. A poor ground at this location can introduce electrical noise and cause runnability issues or false sensor readings for multiple engine components controlled by the ECM.
- Engine Harness Ground (Firewall) — A ground point that connects the harness to the firewall, located above the alternator.. This is an easily overlooked ground that is critical for the correct functioning of the ECU and its sensors. A loose or corroded connection here can cause a variety of intermittent electrical faults.
- Transmission to Chassis Ground — A ground strap running from the top of the transmission housing to the driver's side strut tower area.. Ensures the entire powertrain has a solid ground path to the vehicle's chassis, which is essential for stable sensor readings.
- Crank Sensor Signal Wires — The two wires running from the sensor connector to the ECM, designated NE+ and NE-.. These are the specific wires that carry the crankshaft position signal. Any damage, short, or open circuit on these wires will directly cause a P0335 code. The wiring harness may also include a shielded ground wire to prevent signal interference.
Real Owner Repair Stories
- Tacoma World forum user (Toyota with 186k miles (engine family shared with Celica)) — P0335 code present.
❌ Tried (didn't work) Replaced camshaft position sensor(s) with new DENSO parts., Replaced crankshaft position sensor with a new DENSO part.
✅ What actually fixed it The user was advised that after replacing both sensors with known-good OEM parts, the persistent P0335 code (sometimes along with cam/VVT codes) strongly points to a mechanical timing issue, such as a stretched timing chain. The final fix would be a timing chain service.
OEM Part Supersession History
90919-05048→90919-05048— No supersession found.
Heads up: Part number 90919-05048 appears to be consistent across the entire 2001-2005 Celica range for both 1ZZ-FE and 2ZZ-GE engines. No significant revisions or incompatibility issues were noted in research.
Model Year Variations Within This Range
- 2001-2002: The 1ZZ-FE engines in these earlier models were more prone to excessive oil consumption due to piston ring design. This can lead to a higher likelihood of oil leaks from engine seals, potentially contaminating the crankshaft position sensor and its connector, which are located low on the front of the engine.
- 2003-2005: Toyota updated the ECU for the Celica starting in the 2003 model year. While the diagnostic procedure for P0335 remains fundamentally the same, wiring pinouts at the ECM may differ slightly between the 2001-2002 and 2003-2005 models. Always verify with the correct wiring diagram for the specific year.
Helpful Videos
We Have This Part in Stock


The information in this article is provided for general reference and educational purposes only. Vehicle specifications, procedures, and part compatibility can vary by production date, trim level, and region. Always consult your vehicle's factory service manual and verify part numbers before purchasing or performing repairs. Safety-critical components such as airbags, seat belts, and braking systems should be installed by a qualified professional.
- Toyota CELICA:
- 🧭 Diagnostic Flowchart
- 🎬 Helpful Videos
- 🛍️ Shop This Part
- What's Unique About the 2001-2005 Toyota CELICA
- Symptoms You May Notice
- Most Likely Causes
- Rare But Worth Checking
- Diagnosis Steps
- Parts You'll Likely Need
- Related Codes That Often Appear With This One
- Technical Service Bulletins (TSBs) & Recalls
- Platform-Specific Known Issues
- Mechanic-Grade Diagnostic Values
- Scan Tool Commands That Help
- Wiring & Ground Locations
- Real Owner Repair Stories
- OEM Part Supersession History
- Model Year Variations Within This Range
- 🎟️ Get 5% Off