
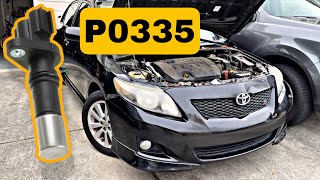
P0335 on 2013-2015 Toyota Corolla: Crankshaft Sensor Causes and Fixes
P0335 on a 2013-2015 Corolla indicates a problem with the crankshaft position sensor circuit. Before replacing the sensor, test the battery; a weak battery is a common cause for this code on Toyotas. If the battery is healthy, the sensor itself is the next likely culprit, costing about $30-$60 for an aftermarket part or $90-$150 for an OEM Denso replacement.
- Always test the battery before buying any parts for a P0335 code on a 2013-2015 Corolla.
- Symptoms are severe and include stalling or a no-start condition, making the car unsafe to drive.
- Check the freeze frame data; if battery voltage was below 11V when the code set, the battery is the likely culprit.
- The fix is often a simple battery replacement, not a more complex sensor swap.
What's Unique About the 2013-2015 Toyota COROLLA
For this generation of Toyota Corolla, a P0335 code has a significant 'gotcha' that can trap DIY mechanics. A Toyota Technical Service Bulletin (TSB) explicitly states that low battery voltage can trigger this code. The inconsistent cranking speed from a weak battery can be misinterpreted by the computer as a faulty sensor signal. Owners frequently report a slow crank followed by this code, only to find that a new battery, not a new sensor, was the solution. The TSB specifies to check freeze frame data; if battery voltage was below 11 volts when the code was set, the battery system should be diagnosed first.
Diagnostic Flowchart
Tap your situation to follow the diagnostic path that matches what you're seeing on this vehicle.
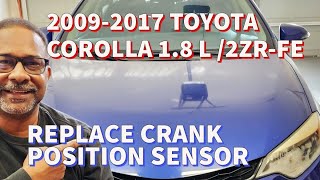
Generation note: This range covers the end of the 10th generation 🎬 Watch: Step-by-step P0335 sensor replacement for 2009-2013 models. (2013 model year) and the beginning of the 11th generation (2014-2015) Corolla. However, since both generations primarily use the same 1.8L 2ZR-FE engine, the causes, diagnosis, and repair process for code P0335 are virtually identical.
Symptoms You May Notice
- Engine will not start
- Engine cranks for a long time before starting
- Engine stalls unexpectedly, sometimes after warming up
- Rough idle or engine misfiring
- Hesitation or stumbling during acceleration
- Check Engine Light is on
- Clicking sounds from the engine bay during cranking
- Replacing the crankshaft position sensor when the actual problem is a weak battery. This is the most common misdiagnosis for this code on this vehicle.
Most Likely Causes
- Weak or Failing Battery 🔴 High Probability → Shop Vehicle Battery A manufacturer TSB confirms that low battery voltage during cranking provides an inconsistent rotational signal that the ECM can misread as a sensor fault. This is a very common scenario, especially if the car has been sitting unused.
How to confirm: Test the battery with a multimeter. A resting voltage below 12.4V indicates a weak battery. Perform a load test for a definitive diagnosis. Check the freeze frame data with a scanner to see if battery voltage was below 11V when the DTC was set.
Typical fix: Replace the vehicle's 12V battery.
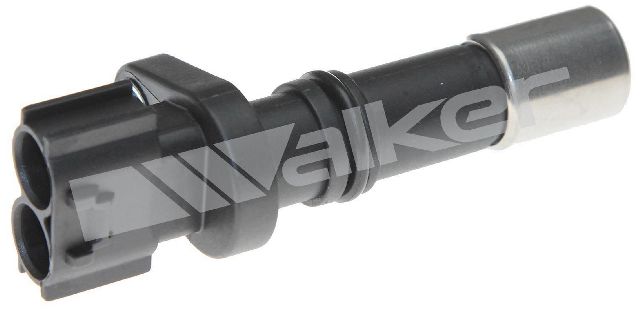
Est. part cost: $150-$250 - Failed Crankshaft Position Sensor 🔴 High Probability → Shop Engine Crankshaft Position Sensor The sensor is exposed to high heat and vibration at the back of the engine, leading to eventual electronic failure over time.
How to confirm: After confirming the battery and wiring are good, replacing the sensor is the next logical step. A professional can test the sensor's output signal with an oscilloscope. Resistance between terminals 1 and 2 should be checked; expected values are between 1630-2740 Ω when cold.
Typical fix: Replace the crankshaft position sensor.
Est. part cost: $30-$150 - Damaged Wiring or Connector 🟡 Medium Probability The wiring harness can be damaged by heat, oil, or rodents. The loom runs in a hot, tight area of the engine bay.
How to confirm: Visually inspect the wiring leading to the sensor for any signs of fraying, melting, or breaks. Check the connector for corrosion or loose pins. Test for reference voltage and ground at the connector with the key on. If no voltage is present, check for a blown fuse, often labeled EM2 or SNS in the fuse box.
Typical fix: Repair the damaged section of wire or replace the connector pigtail.
Est. part cost: $15-$50
Rare But Worth Checking
- Damaged Reluctor Ring: The reluctor ring (a toothed wheel on the crankshaft) can be damaged, or its teeth can become clogged with metallic debris, leading to an erratic signal. This is uncommon but possible and requires more intensive labor to inspect.
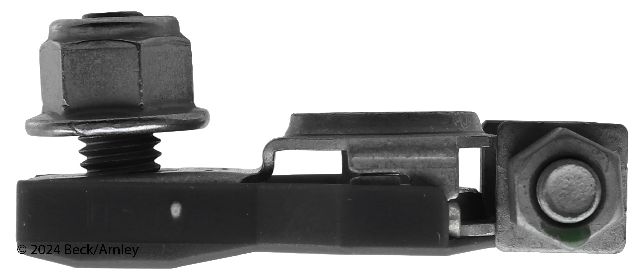
- Faulty Engine Control Module (ECM): → Shop Engine Control Module (ECM) This is very rare. The ECM should only be considered after all other possibilities, including the sensor, wiring, and battery, have been thoroughly ruled out.
- Faulty Starter Motor: A failing starter can draw excessive voltage during cranking or fail to turn the engine at a consistent speed, which can mimic a weak battery and trigger a P0335 code.
Diagnosis Steps
- Read the code with an OBD-II scanner and check for any other stored codes. Save the freeze frame data.
- CRITICAL: Test the battery first. Use a multimeter to check the voltage (should be >12.4V at rest). Perform a load test. Review the freeze frame data to see if voltage was below 11V when the code set. If the battery is weak or old, replace it, clear the codes, and see if P0335 returns.
- Inspect the wiring harness and connector for the crankshaft position sensor. Look for any visible damage, melting, or corrosion. Ensure the connector is securely plugged in.
- With the key on, engine off, check for a reference signal at the sensor connector. If no voltage is found, check for a related blown fuse (e.g., EM2, SNS).
- Test the sensor's internal resistance. Disconnect the sensor and measure the resistance between the two pins. A reading between 1630-2740 Ω (cold) is expected for the 2ZR-FE engine. If it's an open circuit (infinite resistance) or shorted (near zero), the sensor is bad.
- If the battery, wiring, and sensor resistance are good, the crankshaft position sensor is still the most likely cause. Proceed with replacement.
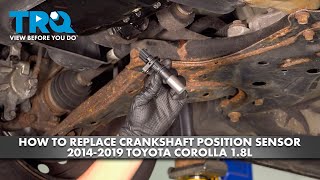
- The sensor is located on the rear of the engine block (firewall side), accessible by removing the front passenger-side wheel and a plastic splash shield. 🎬 See how to access and replace the sensor on 2014-2019 Corollas.
- Disconnect the electrical connector by pressing the release tab.
- Remove the single 10mm bolt holding the sensor in place.
- Gently twist and pull the old sensor out. It may be snug due to the O-ring seal.
- Lightly lubricate the O-ring on the new sensor with fresh engine oil and install it. Re-install the 10mm bolt and torque to approximately 80 in-lbs (about 7 ft-lbs).
- Reconnect the electrical connector, reinstall the splash shield and wheel, and clear the trouble code with a scanner.
Parts You'll Likely Need
- Crankshaft Position Sensor
(OEM #90919-05070 (superseded by 90919-A5004))— This is the most common part to fail after the battery has been ruled out as the cause.
Trusted brands: Denso (OEM supplier), NTK, Dorman, TRQ
OEM price range: $90-$150
Aftermarket price range: $30-$60 - 12V Automotive Battery — A weak battery is a very common trigger for this specific code on Toyota vehicles, as documented in a TSB.
Trusted brands: Interstate, DieHard, Duralast
OEM price range: $200-$300
Aftermarket price range: $150-$250
Related Codes That Often Appear With This One
- P0340 — This code relates to the Camshaft Position Sensor. The ECM compares signals from both the crank and cam sensors to verify engine timing. A low battery voltage can sometimes cause both codes to appear simultaneously, as noted in TSB T-TT-0010-10 Rev.
Technical Service Bulletins (TSBs) & Recalls
- T-TT-0010-10 Rev: Low battery voltage can contribute to a MIL "ON" condition for P0335 (Crankshaft Position Sensor Circuit) and/or P0340 (Camshaft Position Sensor Circuit) due to inconsistent rotational speed of the engine's crankshaft. Advises checking freeze frame data for voltage below 11V.
Platform-Specific Known Issues
- A Technical Service Bulletin (T-TT-0010-10 Rev) was issued by Toyota noting that low battery voltage can cause inconsistent cranking speed, leading the ECM to incorrectly flag a P0335 and/or P0340 code. The bulletin advises checking freeze frame data for battery voltage below 11V at the time the code was set.
- Owners report that the code can appear after the vehicle has been sitting for an extended period (e.g., a few months), which strongly points to battery self-discharge as the root cause rather than a sudden sensor failure.
Mechanic-Grade Diagnostic Values
- Crankshaft Position Sensor Resistance (2-wire inductive type) — expected: 1630 to 2740 Ω when cold; 2065 to 3225 Ω when hot.. Failure: A reading of near 0 Ω indicates a short circuit. A reading of infinity (OL) indicates an open circuit.
- Scan Tool Live Data: Engine Speed (RPM) — expected: A non-zero RPM value should be displayed while cranking the engine.. Failure: If the 'Engine SPD' parameter remains at 0 while the engine is physically cranking, it confirms a total loss of signal from the CKP sensor or its circuit.
- Crankshaft Position Sensor AC Voltage Output — expected: Fluctuating between 0.4 and 1.2 Volts AC while cranking the engine.. Failure: A reading of 0V AC while cranking points to a dead sensor or an open in the circuit.
Hidden / Shadow Codes Worth Checking
- P0335 Readiness Monitor Status: This is not a separate code, but a status check within the dealer scan tool. The ECM runs checks to confirm the fault. A status of 'ABNORMAL' confirms a persistent malfunction, while 'INCOMPLETE' means the specific driving conditions to verify the fault haven't been met yet. (see via Toyota Techstream software under the 'Utility' and 'All Readiness' menu.)
Scan Tool Commands That Help
- Toyota Techstream: Data List -> Powertrain / Engine and ECT / Engine Speed — This is the first step to verify the complaint. If 'Engine Speed' reads 0 RPM while cranking, it immediately confirms the ECM is not receiving a signal from the crankshaft sensor or its circuit.
- Toyota Techstream: Utility -> All Readiness — After a repair, or during diagnosis, to check the internal judgment result for DTC P0335. This can help determine if a fault is intermittent or has been successfully repaired without extensive driving.
Wiring & Ground Locations
- ECM Terminals NE+ and NE- — At the Engine Control Module (ECM) connector.. These are the specific terminals for the crankshaft position sensor signal. A technician can back-probe these pins to test the signal directly at the ECM, which allows for a definitive test of the entire circuit from the sensor to the computer.
- Ground Points BA, BB — In the engine compartment, on the left side (driver's side for LHD).. These are primary ground distribution points for the engine wiring harness. A corroded or loose ground at one of these locations can cause erratic behavior in various sensors, including the crankshaft position sensor.
Real Owner Repair Stories
- Reddit user on r/MechanicAdvice (2013 Toyota Corolla) — P0335 code, clicking sounds from the engine, car had been sitting for 3 months.
❌ Tried (didn't work) Replacing the crankshaft position sensor
✅ What actually fixed it The root cause was a weak battery from sitting for an extended period. The clicking sound was likely the starter solenoid struggling with low voltage. This story perfectly illustrates the TSB and the common misdiagnosis of replacing the sensor first. - YouTube channel 'jimsgaragetoys' (2009 Toyota Corolla S (10th Gen, 2ZR-FE engine) with 141,000 miles) — Intermittent no-start (engine would only crank), which eventually became a permanent no-start condition. P0335 code was present.
❌ Tried (didn't work) The owner lived with the intermittent issue for months before it failed completely.
✅ What actually fixed it Replacing the crankshaft position sensor (OEM Part # 90919-A5004) resolved the no-start condition. This is a clear example of the sensor itself failing due to age and mileage. - YouTube channel 'CHECK ENGINE KSA' (Toyota Camry (different model, but same principle)) — P0335 code, engine would stall when the sensor wiring was wiggled.
❌ Tried (didn't work) Initially suspected the sensor itself.
✅ What actually fixed it Found a single wire broken inside the harness right at the connector pigtail. Repairing the broken wire fixed the issue without needing to replace the sensor.
OEM Part Supersession History
90919-05070→90919-A5004— Standard part number update by Toyota. The parts are functionally identical.
Heads up: None. The new part number 90919-A5004 is the correct direct replacement for 90919-05070 for this vehicle.
Helpful Videos

We Have This Part in Stock


The information in this article is provided for general reference and educational purposes only. Vehicle specifications, procedures, and part compatibility can vary by production date, trim level, and region. Always consult your vehicle's factory service manual and verify part numbers before purchasing or performing repairs. Safety-critical components such as airbags, seat belts, and braking systems should be installed by a qualified professional.
- Toyota COROLLA:
- 🧭 Diagnostic Flowchart
- 🎬 Helpful Videos
- 🛍️ Shop This Part
- What's Unique About the 2013-2015 Toyota COROLLA
- Symptoms You May Notice
- Most Likely Causes
- Rare But Worth Checking
- Diagnosis Steps
- Parts You'll Likely Need
- Related Codes That Often Appear With This One
- Technical Service Bulletins (TSBs) & Recalls
- Platform-Specific Known Issues
- Mechanic-Grade Diagnostic Values
- Hidden / Shadow Codes Worth Checking
- Scan Tool Commands That Help
- Wiring & Ground Locations
- Real Owner Repair Stories
- OEM Part Supersession History
- 🎟️ Get 5% Off