
P0335 on 2004-2011 Toyota Highlander: Crank Sensor Causes and Fixes
P0335 on a Toyota Highlander almost always points to a failed crankshaft position sensor. The engine may crank but not start, or stall while driving. Replacing the sensor is the typical fix, with parts costing $40-$150. Before replacement, check the battery, as low voltage is a known cause for this code per a Toyota TSB.
- P0335 means the computer has lost the signal from the crankshaft sensor, which can cause a no-start or stalling.
- Before replacing any parts, fully charge and test your battery. A Toyota TSB confirms low voltage can trigger this code.
- The most common fix is replacing the crankshaft position sensor, but wiring issues are also possible.
- On V6 Highlanders, the sensor is difficult to reach, increasing labor time and cost.
What's Unique About the 2004-2011 Toyota HIGHLANDER

For the 2004-2011 Highlander, a notable and documented cause for P0335 is not always the sensor itself. A Toyota Technical Service Bulletin (TSB) points out that low battery voltage (below 11 volts) can trigger this code by causing inconsistent engine cranking speed. This is a crucial first check before replacing parts. Additionally, on V6 models (3.3L and 3.5L), the sensor's location behind the A/C compressor makes replacement more difficult than on the 4-cylinder engine or many other vehicles.
Diagnostic Flowchart

Tap your situation to follow the diagnostic path that matches what you're seeing on this vehicle.
Generation note: This range covers two Highlander generations: the first (XU20, 2004-2007) and the second (XU40, 2008-2011). The fundamental cause and symptoms of P0335 are the same across both. However, engine options (2.4L 2AZ-FE, 3.3L 3MZ-FE, 3.5L 2GR-FE) and component locations vary. For V6 models in particular, the sensor is known to be difficult to access, often tucked behind the A/C compressor. The 4-cylinder model has easier access, typically from the passenger side wheel well.
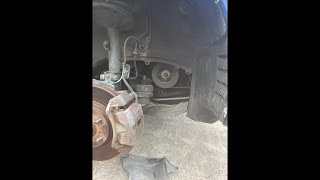
🎬 Watch: Step-by-step sensor replacement for the 2.4L 4-cylinder engine.Symptoms You May Notice
- Check Engine Light is on
- Engine cranks but will not start
- Engine stalls intermittently, sometimes suddenly while driving
- Rough idling and engine misfires
- Difficulty starting the engine (prolonged cranking)
- Poor or jerky acceleration
- Reduced fuel economy
- Engine hesitates or feels sluggish
- Replacing the starter motor when a no-start is caused by the lack of a crank signal. A failing starter can sometimes cause erratic voltage that triggers a P0335, but the root cause is the starter, not the sensor.
- Replacing the camshaft position sensor, which can have similar symptoms but will typically set a different code (e.g., P0340, P0345).
- Replacing ignition coils or spark plugs to fix a misfire that is actually caused by incorrect timing data from the bad crank sensor.
Most Likely Causes

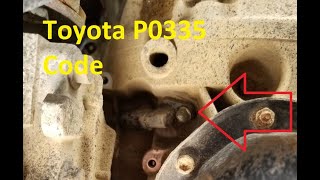
- Failed Crankshaft Position Sensor 🔴 High Probability → Shop Engine Crankshaft Position Sensor The sensor is located at the bottom of the engine, exposed to extreme heat cycles and potential oil leaks, which can degrade the internal electronics and plastic housing over time.
How to confirm: Use a scan tool to check for an RPM signal while cranking. If it reads zero or is erratic, the sensor circuit is faulty. You can also test the sensor's internal resistance with a multimeter against the service manual's specifications (typically between 985 - 1,600 ohms when cold for Denso sensors).
Typical fix: Replace the crankshaft position sensor. Applying a small amount of clean engine oil to the new sensor's O-ring helps ensure a proper seal.
Est. part cost: $40 - $150 - Wiring or Connector Issue 🟡 Medium Probability The wiring harness is in a high-heat area near the exhaust and engine block, causing it to become brittle, frayed, or melted over time. The connector pins can also corrode, leading to a poor connection.
How to confirm: Visually inspect the wiring harness from the sensor to the ECM for any signs of damage, melting, or corrosion. Unplug the connector and check for corroded or bent pins. Check for voltage at the connector with a multimeter.
Typical fix: Repair the damaged section of wiring or replace the connector pigtail. Clean corroded terminals with electrical contact cleaner.
Est. part cost: $10 - $30 - Low Battery Voltage ⚪ Low Probability → Shop Vehicle Battery As cited in Toyota TSB T-TT-0010-10 Rev, low battery voltage can cause inconsistent cranking speed, which the ECU may misinterpret as a crankshaft sensor fault. This can happen with an aging battery or failing alternator.
How to confirm: Test the battery's voltage and health. A reading below 12.4 volts at rest indicates a weak battery. Check the freeze-frame data on a scan tool; if the battery voltage was below 11V when the DTC was set, the battery is the likely culprit.
Typical fix: Charge or replace the battery. Test the alternator to ensure it's charging correctly.
Est. part cost: $150 - $250
Rare But Worth Checking
- Damaged Reluctor Ring (Tone Wheel): The reluctor ring on the crankshaft has teeth that the sensor reads. If these teeth are damaged, bent, or covered in metallic debris or rust, it can cause an erratic or missing signal. This is a more involved repair as it may require removing the crankshaft pulley.
- Timing Belt/Chain Issue: → Shop Engine Timing Chain If the timing belt (on 3.3L V6) or timing chain (on 2.4L I4 and 3.5L V6) has skipped a tooth, the correlation between the crankshaft and camshaft sensors will be incorrect, which can trigger a P0335 code.
- Weak Key Fob Battery: → Shop Vehicle Battery In one documented case on a Lexus forum, a user reported that a weak key fob battery caused a no-start condition that falsely triggered a P0335 code. The car's immobilizer system may have been affected. While unusual, it's a simple and cheap item to check.
- Faulty Engine Control Module (ECM): → Shop Engine Control Module (ECM) This is very rare. The ECM should only be considered after all other possibilities, including the sensor, wiring, battery, and reluctor ring, have been thoroughly ruled out.
Diagnosis Steps
- Check Battery Health: Before anything else, test the battery. As per TSB T-TT-0010-10 Rev, low voltage can cause this code. Ensure it has a full charge and passes a load test.
- Scan for Codes & Review Freeze Frame Data: Use an OBD-II scanner to confirm P0335. Crucially, review the freeze-frame data to see the vehicle's state when the code was set, paying close attention to the battery voltage parameter.
- Check Live Data: Use the scanner to monitor Engine RPM while cranking. If the reading is 0 RPM, it strongly suggests a problem with the crank sensor circuit (sensor, wiring, or connector).
- Inspect Wiring and Connector: Visually inspect the crankshaft position sensor's wiring harness and connector for any obvious signs of damage, such as burns, corrosion, loose connections, or frayed wires. Ensure the connector is securely plugged in.
- Test the Sensor: If the wiring looks good, test the sensor itself. You can do this by checking its internal resistance with a multimeter and comparing the reading to the specifications in a repair manual (e.g., 985-1600 Ohms for many Toyota models). A more definitive test requires an oscilloscope to view the sensor's output waveform.
- Check Key Fob Battery: As a simple, low-cost check, consider replacing the battery in your key fob, as at least one owner has reported this resolving a false P0335 code.
- Inspect the Reluctor Ring: If possible, visually inspect the teeth on the crankshaft pulley or flywheel for damage, heavy rust, or debris. This may require removing the sensor for a better view.
- Check Mechanical Timing: If other tests are inconclusive, verify that the engine's mechanical timing (timing belt/chain) is correct.
Parts You'll Likely Need
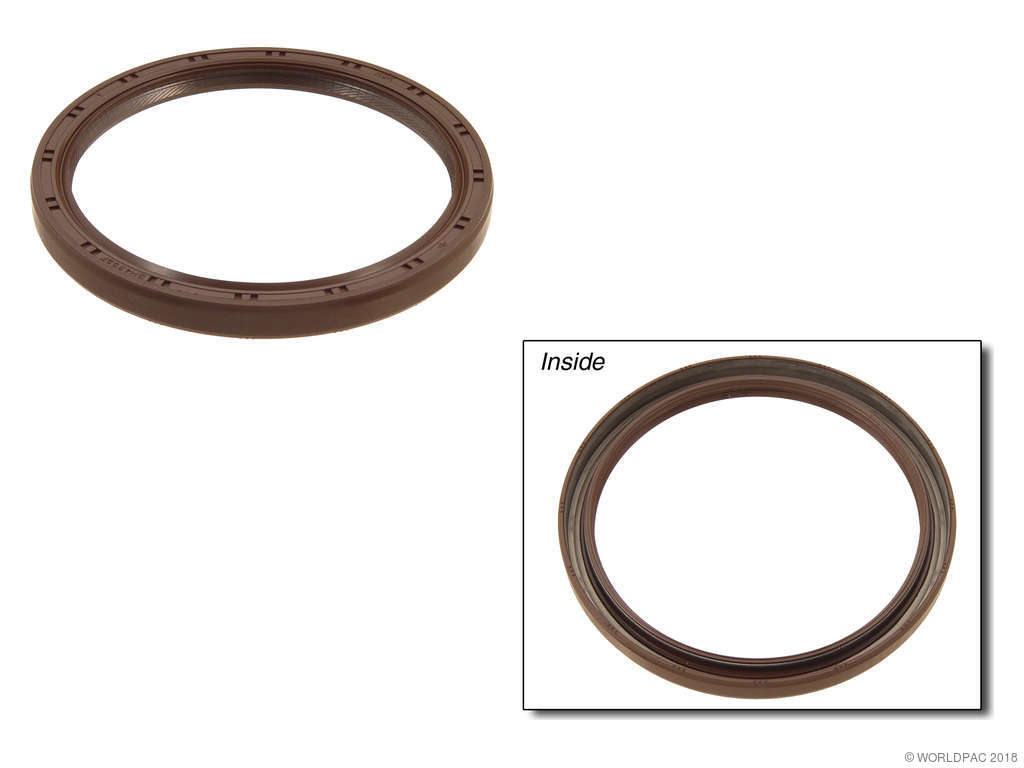
- Crankshaft Position Sensor
(OEM #90919-05047 (for 2.4L 2AZ-FE), 90919-05060 (for 3.5L 2GR-FE), 90919-A5002 (for 3.3L 3MZ-FE))— This is the most common failure point for code P0335. The sensor is an electronic component that fails from heat cycles and age.
Trusted brands: Denso (OEM Supplier), NGK/NTK, Delphi, Standard Motor Products
OEM price range: $110 - $160
Aftermarket price range: $40 - $90
Related Codes That Often Appear With This One
- P0340, P0345 — These codes are for the Camshaft Position Sensors. Since the ECM compares signals from both the crank and cam sensors for timing, a fault in one can sometimes lead to codes for the other. The TSB T-TT-0010-10 Rev also links P0335 and P0340 to low battery voltage.
- P0300-P0308 — These are misfire codes. An incorrect or missing crankshaft signal prevents the ECM from timing the spark and fuel injection correctly, leading to engine misfires.
Technical Service Bulletins (TSBs) & Recalls
- T-TT-0010-10 Rev: Notes that low battery voltage can contribute to a MIL "ON" condition for P0335 (Crankshaft Position Sensor Circuit) and/or P0340 (Camshaft Position Sensor Circuit). It advises checking freeze-frame data for battery voltage below 11 volts at the time the code was set.
Platform-Specific Known Issues
- TSB on Low Battery Voltage: → Shop Vehicle Battery A Technical Service Bulletin (T-TT-0010-10 Rev) was issued stating that low battery voltage (under 11V) can cause inconsistent engine cranking speed, leading to a P0335 and/or P0340 code. Always check the battery and charging system first by examining freeze-frame data.
- Difficult Access on V6 Models: On both the 3.3L and 3.5L V6 engines, the crankshaft position sensor is notoriously difficult to access. It is located on the front of the engine block, but tucked behind the A/C compressor, making replacement a more labor-intensive job compared to the 4-cylinder model.
Mechanic-Grade Diagnostic Values
- Crankshaft Position Sensor Resistance (3MZ-FE V6) — expected: 1,630 to 2,740 Ω (Cold), 2,065 to 3,225 Ω (Hot). Failure: A resistance reading outside of the specified range indicates a faulty sensor.
- Live Data Scan Tool 'Engine SPD' — expected: Should show a positive RPM value while cranking.. Failure: A reading of 0 RPM while the engine is physically cranking points to a fault in the crank sensor circuit (sensor, wiring, or ECM).
Scan Tool Commands That Help
- Toyota Techstream: Data List -> All -> Engine SPD — Use this to confirm if the ECM is receiving an engine speed signal while cranking. If the value is zero, it confirms a lack of signal from the crankshaft position sensor circuit.
- Toyota Techstream: Utility -> All Readiness -> Input DTC (P0335) — After a repair, this function can be used to run the system's internal monitor to confirm if the fault is truly gone without extensive driving. It will return a 'NORMAL' or 'ABNORMAL' status.
Wiring & Ground Locations

- E01, E02 — These are common engine compartment ground points. For the 2GR-FE (3.5L V6), a key engine harness ground attaches to a boss on the side of the front cylinder head, underneath the throttle body area.. A poor ground connection for the engine harness can introduce electrical noise or cause voltage drops, potentially disrupting the weak signal from the crankshaft position sensor and triggering a P0335 code.
- C5 (3MZ-FE) / B22 (2AZ-FE) Sensor Connector — This is the electrical connector directly on the crankshaft position sensor.. This is the primary point for testing sensor resistance and checking for voltage from the ECM. Corrosion or damage here is a common cause of failure.
Real Owner Repair Stories
- YouTube channel 'Jojet Avila' (Toyota Camry (demonstrates a common Toyota issue)) — Intermittent Check Engine Light with code P0335. Wiggling the sensor's wiring harness would cause the engine to stall.
❌ Tried (didn't work) Initial diagnosis pointed to the sensor itself.
✅ What actually fixed it The problem was a single cut wire inside the sensor's connector pigtail. After opening the harness loom, the broken wire was found, repaired, and the issue was resolved. - YouTube channel 'schrodingers box' (General Automotive (not specific to Highlander, but relevant principle)) — P0335 code returned immediately after replacing the crankshaft position sensor.
❌ Tried (didn't work) Replacing the crankshaft position sensor.
✅ What actually fixed it The issue was a faulty starter motor that was creating excessive electrical noise during cranking, which interfered with the crankshaft sensor's signal to the ECM. Replacing the starter motor resolved the P0335 code.
OEM Part Supersession History
90919-05036→90919-A5002— Standard part evolution for improved performance, reliability, or manufacturing efficiency.
Model Year Variations Within This Range
- 2004-2007 (XU20) vs 2008-2011 (XU40): The primary difference is the introduction of the 3.5L 2GR-FE V6 in the XU40 generation, replacing the 3.3L 3MZ-FE. This changed the part number for the V6 crankshaft sensor (from 90919-A5002 to 90919-05060) and slightly altered the wiring diagrams and ECM connector pinouts.
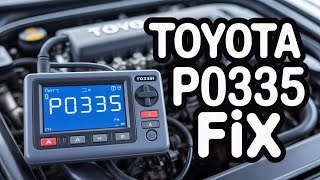
Helpful Videos

We Have This Part in Stock


The information in this article is provided for general reference and educational purposes only. Vehicle specifications, procedures, and part compatibility can vary by production date, trim level, and region. Always consult your vehicle's factory service manual and verify part numbers before purchasing or performing repairs. Safety-critical components such as airbags, seat belts, and braking systems should be installed by a qualified professional.
- Toyota HIGHLANDER:
- 🧭 Diagnostic Flowchart
- 🎬 Helpful Videos
- 🛍️ Shop This Part
- What's Unique About the 2004-2011 Toyota HIGHLANDER
- Symptoms You May Notice
- Most Likely Causes
- Rare But Worth Checking
- Diagnosis Steps
- Parts You'll Likely Need
- Related Codes That Often Appear With This One
- Technical Service Bulletins (TSBs) & Recalls
- Platform-Specific Known Issues
- Mechanic-Grade Diagnostic Values
- Scan Tool Commands That Help
- Wiring & Ground Locations
- Real Owner Repair Stories
- OEM Part Supersession History
- Model Year Variations Within This Range
- 🎟️ Get 5% Off