
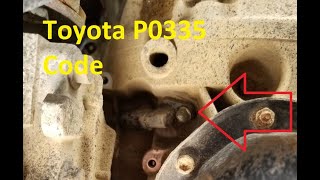
P0335 on 2012-2015 Toyota Prius C: Crank Sensor, Battery, and No-Start Fixes
On a 2012-2015 Prius C, code P0335 is very often caused by a weak 12V auxiliary battery, not a bad crankshaft sensor. Always test the 12V battery first. If the battery is good, the crankshaft position sensor is the next likely cause, costing about $25-$60 for an aftermarket part or $90-$120 for OEM. A loose or oil-fouled connector is another simple, common fix.
- For a P0335 on a Prius C, your first and most important diagnostic step is to test the 12V auxiliary battery.
- Symptoms are severe and usually result in the gasoline engine not starting, which can leave you stranded.
- If the 12V battery is good, inspect the crankshaft position sensor connector for looseness and oil contamination before replacing the sensor itself.
- The code P0A0F (Engine Failed to Start) is a normal companion to P0335 and will resolve when the root cause of P0335 is fixed.
What's Unique About the 2012-2015 Toyota PRIUS C
On a Prius C, this code has a very specific and common cause that is less frequent on non-hybrid vehicles: a weak 12V auxiliary battery. A Toyota Technical Service Bulletin (TSB #T-TT-0010-10 Rev) confirms that low battery voltage (below 11V) can cause inconsistent crankshaft rotation during startup, which the ECM misinterprets as a sensor failure, setting code P0335. Owners on forums like PriusChat and Reddit frequently report replacing the sensor when the real problem was the 12V battery, making it the most common misdiagnosis for this platform.
Diagnostic Flowchart
Tap your situation to follow the diagnostic path that matches what you're seeing on this vehicle.
Symptoms You May Notice
- Check Engine Light is on
- Engine cranks but fails to start (a common "no-start" condition)
- Vehicle enters "READY" mode, but the gasoline engine never turns on
- Engine stalls while driving, potentially without warning
- Vehicle operates in a limp-home mode using only the hybrid battery until it is depleted
- Rough or unstable idle
- Reduced acceleration and engine power
- Harsh shaking when the engine attempts to shut off at a stop
- Replacing the crankshaft position sensor when the actual fault is a weak 12V auxiliary battery.
Most Likely Causes
- Weak or Failing 12V Auxiliary Battery 🔴 High Probability → Shop Vehicle Battery As documented in Toyota TSB #T-TT-0010-10 Rev, low voltage causes inconsistent cranking speed, which the ECM flags as a crankshaft sensor error. This is a well-known Prius-specific issue affecting many Toyota models. Forum users repeatedly confirm a new battery resolves the code after a sensor replacement failed to do so.
How to confirm: Charge and load test the 12V auxiliary battery. Check the freeze-frame data with an OBD-II scanner to see the battery voltage at the moment the P0335 code was triggered. Voltage below 11V is a strong indicator, per the TSB. A user on PriusChat noted a code C2318 (low voltage at transmission module) appeared alongside P0335, pointing to the battery.
Typical fix: Replace the 12V auxiliary battery. The correct size is typically an AGM type S46B24R.
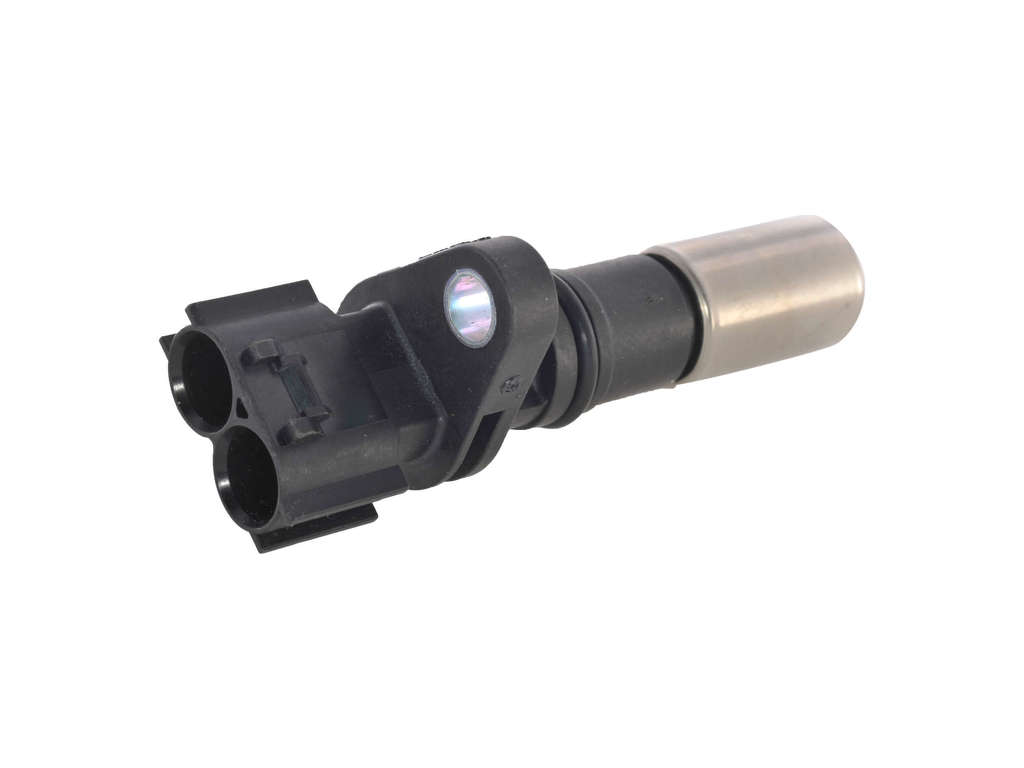
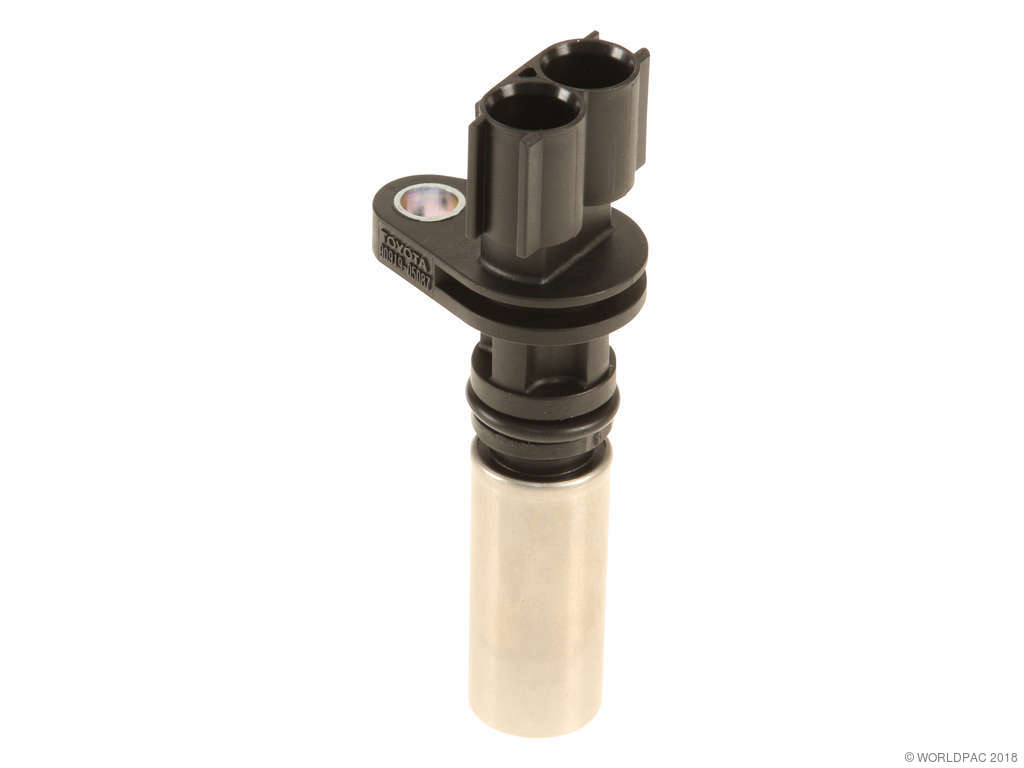
Est. part cost: $180-$250 - Failed Crankshaft Position Sensor 🟡 Medium Probability → Shop Engine Crankshaft Position Sensor The sensor is a standard electronic component that can fail over time due to heat cycles and vibration. Some owners report oil leaking *through* the sensor itself, fouling the connector and forcing it loose. This is a known failure mode.
How to confirm: If the 12V battery is good, test the sensor's resistance. Per the service manual, it should be 1630-2740 Ω when cold (-10 to 50°C) and 2065-3225 Ω when hot (50 to 100°C). Readings outside this range indicate a failed sensor. An oscilloscope can also be used to verify the signal waveform.
Typical fix: Replace the crankshaft position sensor and its O-ring. Apply a light coat of engine oil to the new O-ring before installation.
Est. part cost: $25-$120 - Wiring or Connector Issue ⚪ Low Probability The sensor is located low on the passenger side of the engine, exposing its wiring to potential road debris, heat, and oil contamination. The connector can become loose or filled with oil, causing a poor connection.
How to confirm: Visually inspect the wiring harness leading to the sensor for any signs of fraying, melting, or breaks. Unplug the connector and check for corrosion, bent pins, or oil contamination. A PriusChat user fixed their P0335 by cleaning an oil-filled connector with electrical spray and reconnecting it securely.
Typical fix: Repair the damaged section of wiring or clean/replace the connector. Ensure the connector clicks into place.
Est. part cost: $5-$50
Rare But Worth Checking
- Damaged Sensor Reluctor Ring: The reluctor ring (a toothed wheel on the crankshaft) can be damaged, have broken teeth, or have sheared a keyway, but this is uncommon without other major engine work or failure.
- Failed Engine Control Module (ECM): → Shop Engine Control Module (ECM) ECM failure is very rare but possible if all other components (battery, sensor, wiring) have been thoroughly tested and confirmed to be working correctly. A definitive diagnosis usually requires using an oscilloscope to confirm a good sensor signal is reaching the ECM, which is then failing to interpret it.
Diagnosis Steps
- Read all fault codes. Note if P0A0F, P0340, or C1259 are also present.
- CRITICAL STEP FOR PRIUS: Fully charge and load test the 12V auxiliary battery. Review freeze-frame data to check battery voltage when the DTC was set. If it's below 11 volts, replace the battery.
- If the battery is healthy, locate the crankshaft position sensor. It is on the passenger side of the engine block, near the main crankshaft pulley, held by a single 10mm bolt. 🎬 See this video for the sensor's exact location and removal. Access requires removing the passenger-side front wheel and a plastic splash shield.
- Inspect the sensor's electrical connector. It can become filled with oil or work itself loose. Clean with electrical contact cleaner and ensure it is securely reconnected.
- If wiring and battery are good, test the sensor's resistance with a multimeter. It should be 1630-2740 Ω when cold or 2065-3225 Ω when hot. If it's out of spec, replace the sensor.
- If the sensor tests good, check for continuity in the harness between the sensor connector and the ECM. An open or short in the wiring could be the cause.
- If all tests pass, the problem may be mechanical (reluctor ring) or a faulty ECM, though these are rare.
Parts You'll Likely Need
- 12V Auxiliary Battery
(OEM #28800-21181 (Toyota TrueStart S46B24R))— This is the most common cause of P0335 on a Prius C, as documented by Toyota's own service bulletin.
Trusted brands: Toyota TrueStart, Optima (YellowTop), Bosch, DieHard
OEM price range: $220-$260
Aftermarket price range: $190-$230 - Crankshaft Position Sensor
(OEM #90919-A5003 (replaces 90919-05057))— If the 12V battery is good, this sensor is the next most likely part to have failed.
Trusted brands: Denso (OEM manufacturer), NGK/NTK, Standard Motor Products (SMP), Delphi
OEM price range: $90-$120
Aftermarket price range: $25-$60
Related Codes That Often Appear With This One
- P0A0F — This code means "Engine Failed to Start." It is an effect, not a cause. The P0335 fault prevents the ECM from starting the engine, which in turn logs P0A0F.
- P0340 — This is for the Camshaft Position Sensor. The same TSB (#T-TT-0010-10 Rev) that links P0335 to low battery voltage also applies to P0340, as inconsistent cranking speed can affect both sensor readings.
- C1259 — This code indicates an HV System Regenerative Malfunction. It can be triggered alongside P0335 when the engine fails to start, as the system relies on the engine for proper operation and charging. A PriusChat user reported this code appearing with P0335 due to a loose, oily crank sensor connector.
Technical Service Bulletins (TSBs) & Recalls
- T-TT-0010-10 Rev: States that low battery voltage (below 11V) can cause inconsistent crankshaft rotational speed, leading to a P0335 and/or P0340 code. It advises checking freeze frame data for battery voltage at the time the code was set. This TSB applies to a wide range of Toyota vehicles, including the Prius C.
Platform-Specific Known Issues
- Weak 12V Battery Misdiagnosis: → Shop Vehicle Battery A known issue, documented by Toyota TSB T-TT-0010-10 Rev, is that low 12V auxiliary battery voltage can trigger a P0335 code even if the crankshaft sensor is perfectly fine. This is the most common point of misdiagnosis on the Prius platform.
- Oil Contamination of Connector: Multiple owners on PriusChat have reported that the crankshaft position sensor can leak engine oil through its body, filling the electrical connector with oil. This causes a poor connection and can even hydraulically push the connector off, triggering a P0335 code. The fix is often as simple as cleaning the connector and replacing the faulty sensor.
Mechanic-Grade Diagnostic Values
- Crankshaft Position Sensor Live Data (RPM) — expected: Should show a value greater than 0 RPM while cranking the engine.. Failure: A value of 0 RPM while cranking indicates no signal is being received by the ECM.
- Crankshaft Position Sensor Signal (Oscilloscope) — expected: A clean, consistent square wave pulse pattern (NE+ signal) when the engine is cranking or running.. Failure: A flat line, erratic pattern, or excessive noise on the waveform indicates a failed sensor or wiring issue.
- Crankshaft Position Sensor Signal Voltage — expected: The signal wire should pulse between approximately 0V and 5V as the crankshaft rotates.. Failure: No voltage pulse, or voltage that does not switch cleanly, points to a sensor or circuit fault.
Hidden / Shadow Codes Worth Checking
- Detail Code / INF Code: While no specific sub-code for P0335 was found, Toyota systems often store more specific 'Detail Codes' or 'INF codes' within the freeze frame data. These codes, visible with advanced scanners like Techstream, can provide more granular information about the failure condition (e.g., distinguishing between no signal and an erratic signal). (see via Using a professional scan tool like Toyota Techstream and navigating to the freeze frame data for the stored DTC.)
Scan Tool Commands That Help
- Toyota Techstream: Data List -> Powertrain / Engine and ECT / Engine Speed — This is the first check to confirm if the ECM is receiving any RPM signal at all. If it reads 0 while cranking, it confirms a total loss of the crankshaft position signal.
- Toyota Techstream: Utility -> All Readiness — After a repair (like replacing the sensor or fixing wiring), this function is used to check if the P0335 monitor has run and passed, confirming the fix without having to complete a full drive cycle.
- Toyota Techstream: Put the engine in inspection mode — This is a required step before performing certain diagnostic tests, allowing the gasoline engine to run on demand for inspection purposes.
Wiring & Ground Locations
- ECM Connector E5, Pin 27 (NE+) — At the Engine Control Module (ECM). This is the primary signal wire from the crankshaft position sensor.. This pin is where the ECM receives the positive crankshaft position signal. Testing for the correct waveform or voltage here can confirm if the sensor and wiring are good up to the ECM. On a 1NZ-FE, this is often an Orange wire.
- ECM Connector E5, Pin 34 (NE-) — At the Engine Control Module (ECM). This is the ground/return wire for the crankshaft position sensor.. This provides the ground reference for the sensor signal. A poor connection at this pin or a break in the wire will cause a loss of signal. On a 1NZ-FE, this is often a White wire.
- Sensor Ground Points — Various points on the engine block and chassis. Toyota often uses brown wires for dedicated sensor grounds to provide a clean signal reference.. The crankshaft position sensor relies on a clean ground. A corroded or loose engine-to-chassis ground can introduce electrical noise into the sensor circuit, potentially triggering a P0335 code even if the sensor and its direct wiring are intact.
When the Usual Fixes Don't Work
- While the vast majority of P0335 codes on the Prius C are resolved by addressing the 12V battery or the sensor itself, there are documented cases in forums where these fixes do not work. In one detailed account on PriusChat, a vehicle owner replaced the sensor, checked the wiring continuity, inspected the reluctor wheel, and even replaced the ECM, yet the no-start condition with code P0335 persisted. This serves as a counter-example, proving that in rare instances, the root cause can be an exceptionally elusive wiring fault, a subtle mechanical issue that was missed on initial inspection, or a problem with a replacement part being faulty out of the box.
OEM Part Supersession History
90919-05057→90919-A5003— Standard part revision and update by the manufacturer.
Heads up: No known incompatibilities. The new part number is the correct replacement for the original.
Helpful Videos


We Have This Part in Stock


The information in this article is provided for general reference and educational purposes only. Vehicle specifications, procedures, and part compatibility can vary by production date, trim level, and region. Always consult your vehicle's factory service manual and verify part numbers before purchasing or performing repairs. Safety-critical components such as airbags, seat belts, and braking systems should be installed by a qualified professional.
- Toyota PRIUS C:
- 🧭 Diagnostic Flowchart
- 🎬 Helpful Videos
- 🛍️ Shop This Part
- What's Unique About the 2012-2015 Toyota PRIUS C
- Symptoms You May Notice
- Most Likely Causes
- Rare But Worth Checking
- Diagnosis Steps
- Parts You'll Likely Need
- Related Codes That Often Appear With This One
- Technical Service Bulletins (TSBs) & Recalls
- Platform-Specific Known Issues
- Mechanic-Grade Diagnostic Values
- Hidden / Shadow Codes Worth Checking
- Scan Tool Commands That Help
- Wiring & Ground Locations
- When the Usual Fixes Don't Work
- OEM Part Supersession History
- 🎟️ Get 5% Off