
P0340 on 2017-2019 GMC Sierra 2500: Cam Sensor Causes & Fixes
On a 2017-2019 Sierra 2500, code P0340 typically points to a failed camshaft position sensor or a wiring circuit issue. The sensor itself is the most common failure point. Before replacing it, thoroughly inspect the wiring harness for chafing near the ECM bracket or front engine cover, a known issue. Expect to pay $30-$80 for a quality replacement part.
- P0340 means the Camshaft Position Sensor 'A' circuit has failed, which can cause stalling or a no-start condition.
- The most likely fix is replacing the camshaft position sensor, but only after a thorough wiring inspection.
- On these specific trucks, the wiring harness is known to chafe against the ECM bracket and other engine bay components, making a visual inspection a mandatory first step.
- Driving with this code is risky due to the potential for the engine to shut off unexpectedly.
- Use a quality replacement part from a brand like ACDelco or Delphi to ensure reliability. Part numbers differ between the 6.0L gas and 6.6L diesel engines.
What's Unique About the 2017-2019 Gmc SIERRA 2500
On this generation of Sierra HD trucks, the P0340 code is a known issue documented by multiple GM TSBs. While the sensor is a common culprit, wiring harness issues are particularly prevalent. TSBs like #21-NA-149 and #PIP5335C specifically call out harness chafing against components like the ECM/TCM bracket, shock tower, and front engine cover. This means a visual inspection of the harness is not just a suggestion but a critical first diagnostic step, as simply replacing the sensor will not fix a shorted or broken wire. TSB #PIP5335C also points to potential corrosion in the X154 connector on the front of the engine.
Diagnostic Flowchart
Tap your situation to follow the diagnostic path that matches what you're seeing on this vehicle.
Symptoms You May Notice
- Check Engine Light is on.
- Engine is hard to start or has long crank times.
- Engine stalls unexpectedly, sometimes while driving.
- Rough idle and engine misfires.
- Noticeable loss of power and poor acceleration.
- Engine may die and refuse to restart.
- Tachometer RPM dial may jump around erratically while the engine is running.
- Replacing the crankshaft position sensor. While symptoms can be similar, P0340 specifically points to the camshaft sensor circuit.
- Replacing the sensor without inspecting the wiring. A damaged wire or corroded connector is a common cause and will not be fixed by a new sensor. This is a critical mistake on this platform due to the known TSBs regarding harness chafing.
Most Likely Causes
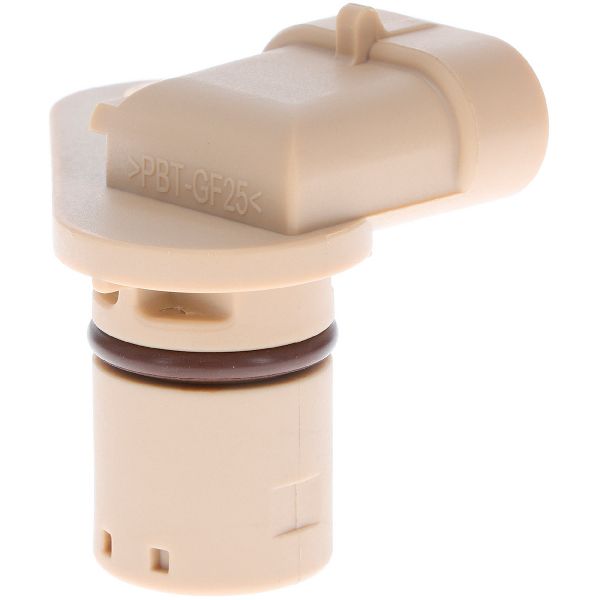
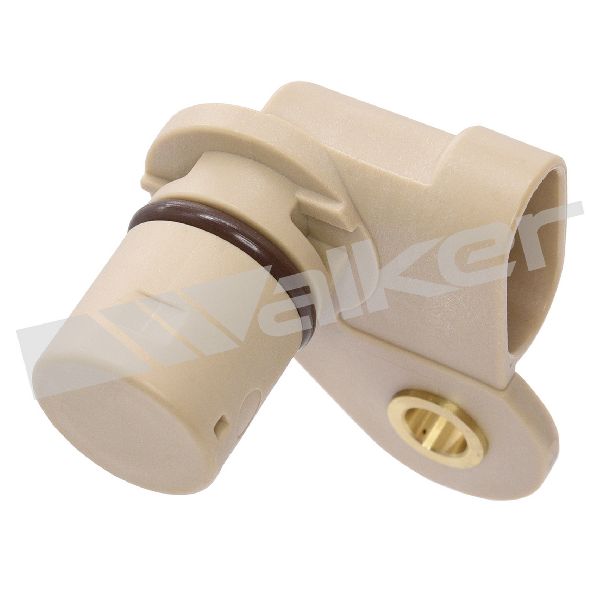
- Faulty Camshaft Position Sensor 🔴 High Probability → Shop Engine Camshaft Position Sensor The sensor operates in a high-heat environment and can fail electronically over time. GM has a history of this issue, as noted in TSB #PIP5099A for a similar platform. It is the most frequently replaced part for this code.
How to confirm: After confirming power (4.8-5.2V) and ground at the connector, test the sensor's signal wire with a multimeter or an oscilloscope for a clean square wave while cranking. Often, the simplest confirmation is swapping it with a new, known-good part, especially given the relatively low cost.
Typical fix: Replace the camshaft position sensor. On the 6.6L L5P, this involves removing the fan shroud and an idler pulley. On the 6.0L L96, it is notoriously difficult, located behind the water pump.
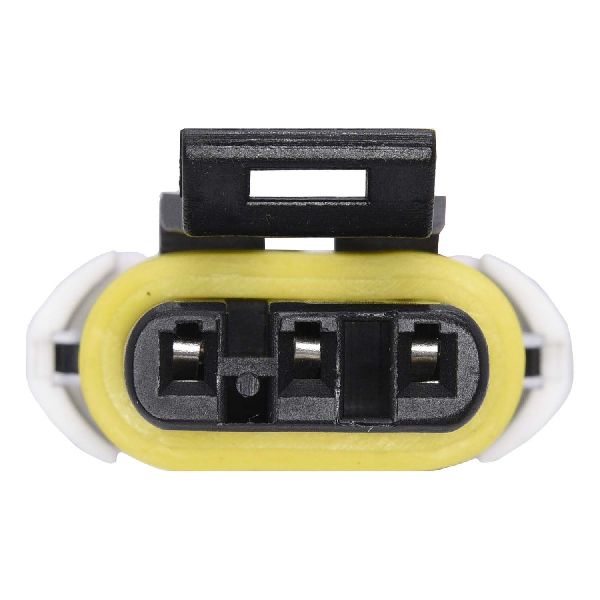
Est. part cost: $30-$80 - Wiring Harness or Connector Damage 🟡 Medium Probability The wiring harness is subject to heat, vibration, and abrasion. TSB #21-NA-149 specifically identifies multiple chafe points on these trucks, including against the ECM/TCM bracket, upper control arm, and shock tower bolt. Rodent damage is also a common cause of chewed wires in this area.
How to confirm: Visually inspect the wiring harness from the sensor to the ECM. Pay close attention to the known chafe points. Wiggle the harness while the engine is running (if possible) to see if it induces a stall. Check the connector for bent, corroded pins or water intrusion, especially connector X154 on some models.
Typical fix: Repair the damaged section of wire or replace the connector pigtail. Secure the harness away from sharp edges or moving parts with zip ties and protective loom.
Est. part cost: $15-$50 - Weak or Failing Battery / Alternator ⚪ Low Probability → Shop Vehicle Battery Modern trucks with complex electronics are sensitive to system voltage. Low voltage during cranking can cause erratic signals from various sensors. Additionally, a failing alternator can produce excessive AC ripple (electrical noise) that interferes with the sensitive cam sensor signal, triggering a false P0340 code.
How to confirm: Test the battery with a digital load tester. A simple voltage check is insufficient. Have an auto parts store test the alternator for proper output and for AC ripple voltage, which should be very low (under 0.5V AC).
Typical fix: Replace the battery or alternator.
Est. part cost: $150-$600
Rare But Worth Checking
- Timing Chain/Component Issue: → Shop Engine Timing Chain While rare, a stretched timing chain or a failed tensioner could cause the camshaft and crankshaft signals to be out of sync enough to trigger this code. This would typically be accompanied by mechanical noises like rattling, especially on startup.
- Failed Powertrain Control Module (ECM): → Shop Engine Control Module (ECM) This is very rare and should only be considered after all other possibilities (sensor, wiring, timing) have been exhaustively ruled out. The diagnostic procedure in some service manuals specifies replacing the ECM only after all circuit tests pass.
Diagnosis Steps
- Read all stored fault codes with an OBD-II scanner. If codes like P0642 or P0643 (5-volt reference) are present, diagnose them first.
- Visually inspect the camshaft position sensor and its electrical connector for any obvious damage, melting, or corrosion.
- Carefully trace the sensor's wiring harness back toward the ECM. Pay special attention to known chafe points: near the ECM/TCM bracket, the driver's side upper control arm, and the shock tower.
- Using a multimeter with the key on, engine off, backprobe the sensor connector. Verify the 5-volt reference wire has 4.8-5.2 volts and the ground wire has good continuity to ground (less than 5.0 ohms).
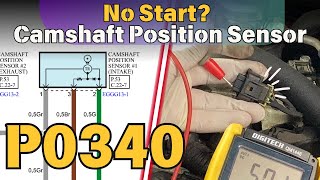
- If power and ground are good, use an oscilloscope to check for a square wave signal from the sensor while cranking the engine. 🎬 Watch: How to test and fix the sensor circuit. A flat line indicates a dead sensor or a break in the signal wire.
- If wiring and connections are confirmed good, replace the camshaft position sensor with a high-quality OEM or equivalent part.
- Clear the trouble codes and test drive the vehicle to see if the code returns. A crankshaft position variation relearn procedure may be required in some cases.
Parts You'll Likely Need
- Engine Camshaft Position Sensor (6.6L L5P Duramax)
(OEM #12636947)— This is the most frequent cause of code P0340 on the Duramax engine. The sensor fails internally from heat cycles and age.
Trusted brands: ACDelco (GM OE), Delphi, NTK
OEM price range: $45-$80
Aftermarket price range: $30-$65 - Engine Camshaft Position Sensor (6.0L L96 V8)
(OEM #12591720)— This is the corresponding sensor for the gasoline V8. It is also a common failure item, but replacement is much more labor-intensive.
Trusted brands: ACDelco (GM OE), Delphi, NTK
OEM price range: $40-$90
Aftermarket price range: $25-$50
Related Codes That Often Appear With This One
- P0341 — P0341 indicates a 'Range/Performance' issue with the same sensor circuit, meaning the signal is present but erratic or out of sync. It's common to see both codes as a sensor or its wiring fails.
- P0335 — This code is for the Crankshaft Position Sensor. Since the two sensors work together, a fault in one can sometimes cause the ECM to report a fault in the other, or a wiring issue may affect both. TSB #PIE0416A notes these codes can appear together.
- P0365 — This code is for the Camshaft Position Sensor 'B' circuit. If the engine has four camshafts (DOHC), it may have multiple sensors. TSB #PIE0416A also groups this code with P0340.
Technical Service Bulletins (TSBs) & Recalls
- PIP5335C: Advises technicians to use normal diagnostics when P0340/P0341 are found, but acknowledges that a root cause may not be easily identified, pointing towards intermittent circuit issues or connector corrosion.
- PIP5099A: Although for an earlier model, it establishes a precedent for replacing the cam position sensor when diagnostics are inconclusive.
- PIE0416A: A bulletin ending a field information request, showing that GM was investigating a pattern of P0340, P0335, and P0365 codes on 2017 models.
- 21-NA-149: A critical TSB for later models that details specific locations where the engine wiring harness is known to chafe and short out, causing a variety of codes including P0340.
Platform-Specific Known Issues
- TSB #21-NA-149 (supersedes PIT5677E): Details multiple engine harness chafing locations on 2019-2021 models that can cause P0340 and many other codes. Key spots include the ECM/TCM bracket, upper control arm, and shock tower bolt area.
- TSB #PIP5335C notes that for some 2017 models, a P0340 code may set where normal diagnostics do not lead to a clear cause, suggesting intermittent or hard-to-find circuit issues, often related to corrosion in the X154 connector.
- TSB #PIE0416A indicates that GM was actively investigating the root cause of P0340 (along with P0335 and P0365) on 2017 models, confirming it was a known issue at the time.
Mechanic-Grade Diagnostic Values
- Camshaft Position Sensor 5V Reference — expected: 4.8V to 5.2V (Key On, Engine Off). Failure: Voltage below 4.8V suggests a problem in the supply circuit or ECM.
- Camshaft Position Sensor Ground Circuit Resistance — expected: Less than 5.0 ohms to chassis ground. Failure: Resistance above 5.0 ohms indicates a poor ground connection.
- Camshaft Position Sensor Signal Wire (KOEO) — expected: Approximately 5.0V (for a pull-up circuit design). Failure: 0V or significantly lower voltage can indicate a short to ground or a faulty sensor.
- Alternator AC Ripple Voltage — expected: Under 0.5V AC with engine running. Failure: Significant AC voltage (above 0.5V) points to failing alternator diodes, which create electrical noise that can disrupt the CMP sensor signal.
- Scan Tool 'CMP Active Counter' — expected: Counter should increment steadily with each pass of a steel object over the sensor tip (bench test) or increase with engine RPM.. Failure: The counter not incrementing indicates a failed sensor.
Scan Tool Commands That Help
- GDS2 / Tech2: Crankshaft Position Variation Learn — This procedure is often required after replacing a camshaft or crankshaft position sensor, or the ECM, to synchronize the sensors with the reluctor wheel. Failure to perform this can sometimes cause persistent codes or running issues even after a successful part replacement.
- GDS2 / Tech2: CMP Active Counter — While observing live data, this parameter should increase steadily as the engine cranks or runs. If the count is erratic or drops out, it points to an intermittent sensor or wiring fault.
Wiring & Ground Locations
- G103 — On the front of the passenger side (right side) cylinder head.. This is a primary engine ground point. A loose or corroded G103 can cause a variety of sensor signal issues, including for the camshaft position sensor, due to an unstable ground reference for the ECM.
- G104 — On the rear of the driver's side (left side) cylinder head.. Another critical engine-to-chassis ground. Similar to G103, poor contact here can lead to floating grounds and erratic sensor behavior.
- L5P Duramax ECM Connector X1, Pin 56 — At the Engine Control Module (ECM).. This is the specific pin for the Camshaft Position Sensor Signal (D-BU/WH wire). It's the terminal point for testing the signal wire's continuity back to the ECM.
- L96 6.0L ECM Connector X1, Pin 19 — At the Engine Control Module (ECM).. This is the Run/Crank Ignition 1 Voltage pin (PK wire), which supplies power to the circuit. Verifying voltage here is part of diagnosing a no-power issue at the sensor.
- X154 Connector — A 16-pin connector on the driver's side of the front engine cover, near the vacuum pump.. TSB #PIP5335C specifically calls out this connector as a location prone to water intrusion and corrosion, which can directly cause an open or short in the camshaft position sensor circuit.
Real Owner Repair Stories
- RepairPal User Question (2012 GMC Sierra 1500 (similar platform/issue)) — Stall, crank-no-start, P0340 code.
❌ Tried (didn't work) Replaced spark plugs and wires, Replaced cam and crank sensors, Replaced vapor canister valve, Replaced ignition switch
✅ What actually fixed it The P0340 code would disappear when the alternator was unplugged. The final diagnosis was a faulty alternator producing excessive AC ripple (electrical noise), which interfered with the cam sensor signal. Replacing the alternator resolved the issue. - Chevrolet Forum User (2014 Chevy Silverado 5.3L) — Crank-no-start, P0340 code persisted after sensor replacement.
❌ Tried (didn't work) Replaced fuel rail pressure sensor, Replaced low-pressure fuel sensor, Replaced high-pressure fuel pump (HPFP), Replaced spark plugs and wires, Replaced battery, Replaced camshaft position sensor
✅ What actually fixed it The user was advised to verify the use of OEM parts and perform a crankshaft position variation relearn procedure using a bidirectional scan tool, as simply clearing codes is not always sufficient after component replacement. The issue points to a procedural problem (relearn needed) rather than a part failure.
Model Year Variations Within This Range
- 2012-2013 (similar platform): TSB #PIP5099A was issued for vehicles built in September or October 2012 with intermittent P0340 codes. The bulletin advises replacing the camshaft position sensor even if standard diagnostics do not find a fault, suggesting a known bad batch of sensors for that specific production window.
Helpful Videos
We Have This Part in Stock


The information in this article is provided for general reference and educational purposes only. Vehicle specifications, procedures, and part compatibility can vary by production date, trim level, and region. Always consult your vehicle's factory service manual and verify part numbers before purchasing or performing repairs. Safety-critical components such as airbags, seat belts, and braking systems should be installed by a qualified professional.
- Gmc SIERRA 2500:
- 🧭 Diagnostic Flowchart
- 🎬 Helpful Videos
- 🛍️ Shop This Part
- What's Unique About the 2017-2019 Gmc SIERRA 2500
- Symptoms You May Notice
- Most Likely Causes
- Rare But Worth Checking
- Diagnosis Steps
- Parts You'll Likely Need
- Related Codes That Often Appear With This One
- Technical Service Bulletins (TSBs) & Recalls
- Platform-Specific Known Issues
- Mechanic-Grade Diagnostic Values
- Scan Tool Commands That Help
- Wiring & Ground Locations
- Real Owner Repair Stories
- Model Year Variations Within This Range
- 🎟️ Get 5% Off