
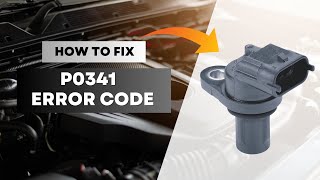
P0341 on 2014-2018 GMC Sierra 3500: Camshaft Sensor & Wiring Fixes
On a 2014-2018 GMC Sierra 3500, code P0341 is frequently caused by a chafed or damaged engine wiring harness, as noted in GM Technical Service Bulletins. Before replacing the camshaft position sensor, a thorough inspection of the wiring is critical, especially near the A/C compressor and where the harness passes the front engine cover. A new sensor costs about $30-$90.
- For code P0341 on a 2014-2018 Sierra 3500, always inspect the engine wiring harness for chafing before buying any parts.
- This code indicates a signal performance issue, not necessarily a dead sensor. Symptoms like stalling and hard starting are common.
- The problem is well-documented by GM in multiple Technical Service Bulletins, which strongly point to wiring faults.
- If other electrical codes are present, it further increases the likelihood of a single wiring harness issue being the root cause.
What's Unique About the 2014-2018 Gmc SIERRA 3500
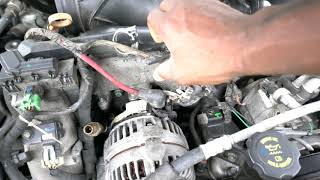
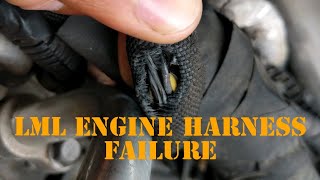
For this generation of Sierra HD trucks, P0341 is often more than just a bad sensor. General Motors has issued multiple Technical Service Bulletins (TSBs) highlighting a known issue with the engine wiring harness chafing against other components. TSB PIP5553A specifically points 🎬 Watch: A mechanic finds common wire chafing spots on this truck. to the harness getting chafed or pinched at the bolt for the X154 connector on the lower-left side of the engine's front cover. Owners on forums have also found chafed wires near the A/C compressor lines. This damage can cause a short or open circuit, leading to P0341 and a host of other seemingly unrelated electrical codes, making a thorough wiring inspection the most critical diagnostic step.
Diagnostic Flowchart
Tap your situation to follow the diagnostic path that matches what you're seeing on this vehicle.
Generation note: The 2014-2018 year range covers two generations of the Sierra 3500 HD. The 2014 model is the final year of the GMT900 platform, while the 2015-2018 models are the fully redesigned K2XX platform. While the engines are similar, wiring harness routing and specific component locations may differ. However, the root causes for P0341 (wiring, sensor) and the TSBs regarding chafed harnesses are common to both platforms within this year range. The 2017 model year also marked the introduction of the new L5P Duramax engine, replacing the LML.
Symptoms You May Notice
- Check Engine Light (SES Light) is on
- Engine is hard to start or requires long cranking time
- Engine stalls unexpectedly, sometimes at low speeds, when stopping, or even when turning.
- Rough idle or engine misfires
- Reduced engine power
- Vehicle may go into a crank-no-start condition.
- RPM gauge may jump around erratically before a stall.
- Immediately replacing the camshaft position sensor without first inspecting the wiring harness. Given the known TSBs for this vehicle, the wiring is a more likely culprit than the sensor itself.
- Using a cheap aftermarket sensor. Multiple owner accounts suggest that non-OEM sensors can be dead-on-arrival or fail quickly, causing the code to return.
Most Likely Causes
- Chafed or Damaged Engine Wiring Harness 🔴 High Probability Multiple GM TSBs (including PIP5553A) point to the engine wiring harness being susceptible to chafing. A specific problem spot is where the harness is pinched by the bracket for connector X154 on the lower left side of the front engine cover. Owners also report wires rubbing through near the A/C compressor lines.
How to confirm: Visually inspect the entire length of the camshaft position sensor harness. Pay extremely close attention to where the harness passes near the A/C lines and the front engine cover, specifically at the X154 connector bracket. Look for rubbed-through insulation, exposed copper wires, or pinched sections. The plastic wire loom can become brittle and crumble, exposing the wires within.
Typical fix: Repair the damaged section of wire using solder and heat-shrink tubing. Secure the harness away from the point of contact using zip ties or by re-routing it slightly. Replace brittle wire loom to protect the repair.
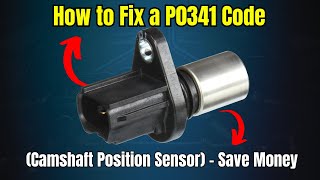
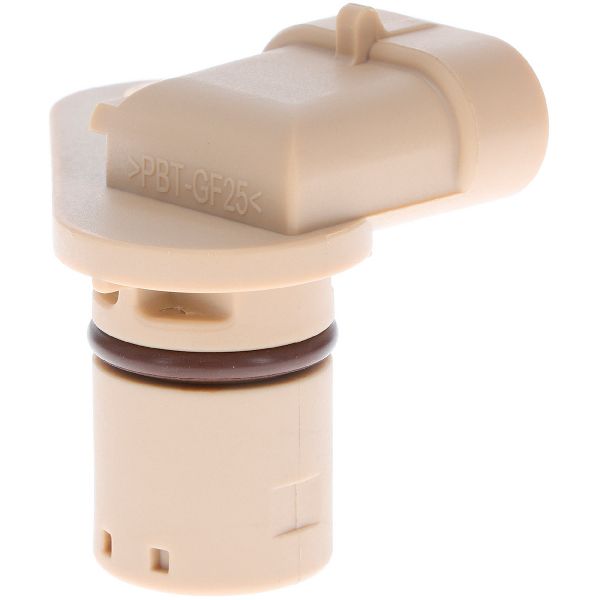
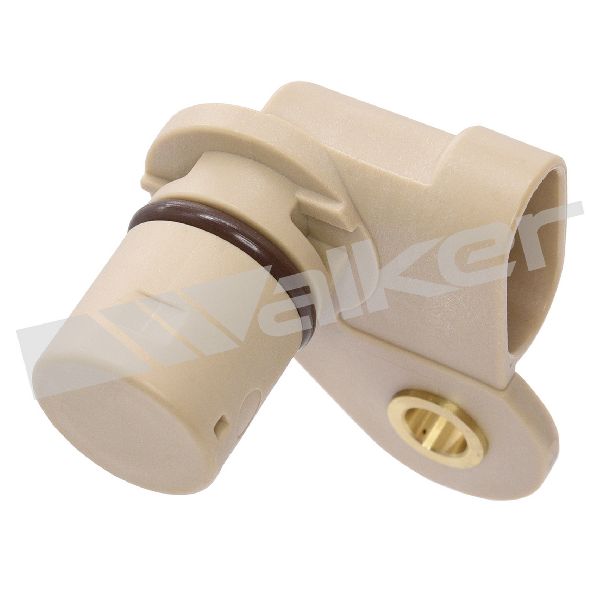
Est. part cost: $5-$50 - Failing Camshaft Position (CMP) Sensor 🟡 Medium Probability → Shop Engine Camshaft Position Sensor Sensors can fail from heat and vibration over time. There are also many forum reports of new aftermarket sensors being faulty out of the box or failing quickly, with the issue being resolved only after installing a genuine OEM part.
How to confirm: If the wiring is confirmed to be in good condition, the sensor is the next likely culprit. An oscilloscope is the best tool to verify an erratic signal pattern. A multimeter can be used to check for proper voltage (typically 5V) and ground at the sensor connector.
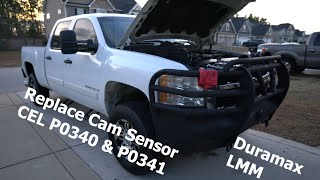
Typical fix: Replace the camshaft position sensor. 🎬 See this walkthrough for replacing the CMP sensor on a Duramax. On V8 engines, Bank 1 is the driver's side. The sensor is located on the front of the engine.
Est. part cost: $30-$90 - Poor Connection or Corrosion at Connector ⚪ Low Probability TSB PIP5335C specifically mentions corrosion in connector X154 as a possible cause for this code on some GM trucks. Oil leaks can also contaminate connectors, leading to poor signal transmission.
How to confirm: Disconnect the CMP sensor connector and the main harness connector (like X154 on the front cover) and inspect the terminals for any signs of green or white corrosion, moisture, oil contamination, or bent/loose pins.
Typical fix: Clean the connector terminals with an electrical contact cleaner. Apply a small amount of dielectric grease to prevent future moisture intrusion. If terminals are badly damaged, the connector pigtail may need to be replaced.
Est. part cost: $10-$30
Rare But Worth Checking
- Stretched Timing Chain: → Shop Engine Timing Chain While not common unless the engine has very high mileage, a stretched timing chain can cause the camshaft and crankshaft signals to become out of sync, triggering a P0341 performance code. This is an advanced diagnosis and would likely be accompanied by other timing-related codes or rattling engine noise.
- Failing Crankshaft Position (CKP) Sensor: The ECM compares the CMP and CKP sensor signals. A failing CKP sensor can sometimes cause the ECM to misinterpret the CMP signal, leading to a P0341 code. This is more likely if you also have CKP-related codes (P0335, P0336).
- Damaged Camshaft Reluctor Wheel: → Shop Engine Camshaft The reluctor wheel on the camshaft, which the sensor reads, can be damaged, come loose, or have debris on it, causing an erratic signal. This is rare but has been noted in forums, especially after major engine work.
- Failing Engine Control Module (ECM): This is extremely rare and should only be considered after all other possibilities have been exhaustively tested. One forum user reported that after replacing the sensor (with OEM) and checking all wiring, a replacement ECM finally solved the code.
Diagnosis Steps
- Read all fault codes with an OBD-II scanner. Note any other codes present, as they can provide clues (e.g., P0335, P0641, P06DA).
- Perform a thorough visual inspection of the engine wiring harness. Start at the camshaft position sensor and trace it back. Per TSB PIP5553A, pay extremely close attention to the harness where it passes the X154 connector bracket on the lower-left front of the engine. Also inspect the area around the A/C compressor and any other metal brackets.
- Inspect the camshaft position sensor electrical connector for loose pins, damage, or corrosion. Clean and apply dielectric grease if necessary.
- If no visible damage is found, use a multimeter to test the sensor's circuit. Check for the correct reference voltage (usually 5V) and a solid ground at the connector with the key on, engine off.
- For a definitive diagnosis of a range/performance issue, use an oscilloscope to view the sensor's output signal while the engine is running. The waveform should be a clean square wave with no dropouts or glitches. Wiggle the harness while observing the pattern to see if the signal drops out.
- If wiring and connections are good, consider the sensor itself. It is highly recommended to use a genuine OEM/ACDelco part to avoid issues with faulty aftermarket sensors.
- If a new OEM sensor and verified good wiring do not solve the issue, the problem may be mechanical. Investigate potential timing chain stretch or a damaged reluctor wheel, especially on high-mileage engines.
Parts You'll Likely Need
- Camshaft Position Sensor
(OEM #GM 97365038 (for 6.6L Duramax LML), GM 12591720 (for 6.0L V8 Gas))— If the wiring harness is intact, the sensor itself is the next most likely component to fail, causing an erratic signal. Using an OEM part is strongly recommended.
Trusted brands: ACDelco (GM Genuine), Delphi
OEM price range: $58-$92
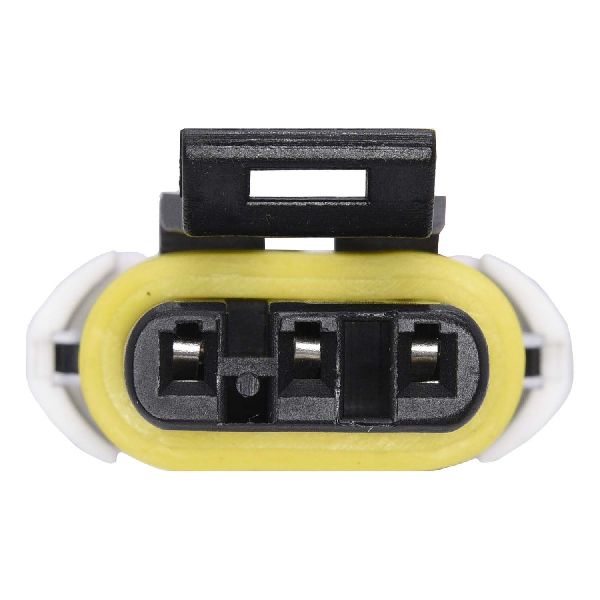
Aftermarket price range: $25-$60 - Wiring Harness Pigtail Connector — Needed if the connector itself or the wires immediately attached to it are damaged by heat, corrosion, or chafing.
Trusted brands: ACDelco, Dorman
OEM price range: $25-$50
Aftermarket price range: $15-$30
Related Codes That Often Appear With This One
- P0340 — This code indicates a general fault in the same sensor circuit. They often appear together when the signal is intermittent or failing.
- P0335 / P0336 — These codes relate to the Crankshaft Position Sensor. Since the ECM compares cam and crank signals for timing, a fault in one can sometimes flag an issue with the other. A chafed harness can also affect both sensor circuits simultaneously.
- P06DA, P06DB, P06DC, P0300, P0641 — TSB #PIP5553A lists these codes as appearing alongside P0341, all pointing to a common cause: a chafed wiring harness affecting multiple circuits including the oil pump and ignition systems.
Technical Service Bulletins (TSBs) & Recalls
- PIP5553A: Communicates that a chafed wiring harness can cause P0341 and other DTCs, leading to a stall or no-start.
- PIP5335C: Notes instances of P0341 and advises technicians to follow standard diagnostics if the cause is not immediately apparent.
- PI0699B: Describes a specific wiring harness chafing point on the A/C line for 6.6L Duramax engines that causes P0341.
Platform-Specific Known Issues
- TSB #PIP5553A: Chafed Wiring Harness at X154 Connector: For 2018 models, GM issued a bulletin regarding a list of electrical codes, including P0341, that could be caused by the engine wiring jumper harness chafing on a bolt for the X154 connector. This connector is located on the lower-left side of the engine's front cover. The chafing can lead to intermittent shorts or opens in the circuit, causing stalling or a no-start condition.
- TSB #PIP5335C: Intermittent P0340/P0341 with No Obvious Cause: For 2014 models, this bulletin advises that if standard diagnostics do not isolate the cause of P0340 or P0341, technicians should inspect for corrosion within the X154 connector on the front engine cover. Water intrusion can lead to poor connections and erratic sensor signals.
Mechanic-Grade Diagnostic Values
- CMP Sensor 5V Reference Voltage (KOEO) — expected: 4.8 - 5.2 Volts DC. Failure: Voltage below 4.8V or at 0V points to a wiring issue or a problem with the ECM's power supply.
- CMP Sensor Ground Circuit Resistance — expected: Below 5.0 Ohms. Failure: Resistance higher than 5.0 Ohms indicates a poor ground connection, which can cause an unstable or noisy signal.
- CMP Sensor Signal (Oscilloscope) — expected: A clean, digital square wave switching between approximately 0V and 5V as the engine runs.. Failure: A missing signal, a signal that drops out (especially when wiggling the harness), or a distorted/noisy waveform indicates a faulty sensor, poor connection, or wiring problem.
- ECM Pulse Count for DTC Trigger — expected: Between 398 and 402 CMP pulses per 100 engine cycles.. Failure: The ECM will set DTC P0341 if it detects fewer than 398 or more than 402 pulses per 100 engine cycles over a sustained period.
- Alternator AC Voltage Ripple — expected: Under 0.5V AC. Failure: AC voltage ripple exceeding 0.5V suggests failing alternator diodes, which can introduce electrical noise into the system and interfere with the CMP sensor signal.
Scan Tool Commands That Help
- GDS2 / High-End Scan Tool: Crankshaft Position System Variation Learn (CASE Relearn) — This procedure should be performed after replacing the camshaft sensor, crankshaft sensor, or ECM. It helps the ECM compensate for minor manufacturing variations in the reluctor wheel and sensors, ensuring accurate timing correlation and preventing the code from returning. Note: Some sources suggest this is not required or supported on LML Duramax engines as the timing is fixed.
- GDS2 / High-End Scan Tool: Camshaft/Crankshaft Signal Live Plot — During diagnosis, graphing the CMP and CKP sensor signals together allows a technician to visually confirm if they are tracking each other correctly during engine speed changes. Any deviation or dropout in the CMP signal relative to the CKP signal would confirm a performance issue.
Wiring & Ground Locations
- X154 Connector — A 16-pin connector located on the front engine cover, near the vacuum pump on the driver's side.. This connector is a known weak point mentioned in multiple TSBs. It is a common location for harness chafing (TSB PIP5553A) and internal corrosion from water intrusion (TSB PIP5335C), both of which can cause an intermittent loss of the camshaft sensor signal.
- G103 — On the front of the passenger side cylinder head.. This is a primary engine ground. While not exclusive to the CMP sensor circuit, a loose or corroded connection at G103 can cause widespread, unpredictable electrical problems, including incorrect sensor reference voltages or noisy ground signals that could trigger a P0341.
- CMP Sensor Connector (Typical Pinout) — At the camshaft position sensor itself.. Knowing the pinout is essential for testing the circuit with a multimeter. For many GM V8s, the 3-wire connector typically has a 5V reference, a low reference (ground), and the signal wire. For example, on some models, Pin 1 is the 5V reference, Pin 2 is the ground, and Pin 3 is the signal. Verifying these voltages is a key diagnostic step.
Real Owner Repair Stories
- CorvetteForum user (similar GM engine logic) (1999 Chevrolet Corvette) — Occasional struggle to start, followed by Check Engine Light with code P0341.
❌ Tried (didn't work) Replaced camshaft position sensor with a new aftermarket part.
✅ What actually fixed it The new aftermarket camshaft position sensor was found to be faulty out of the box. The issue was resolved only after replacing it with a genuine GM OEM part. - YouTube video by 'ScannerDanner' (2011 GMC Sierra 4.3L V6) — Check Engine Light with codes P0340 and P0341.
❌ Tried (didn't work) Initial assumption was a bad sensor or a mechanical timing issue.
✅ What actually fixed it An oscilloscope showed a good sensor signal, but tapping on the sensor's electrical connector caused the signal to drop out completely. The final fix was replacing the sensor's pigtail connector, not the sensor itself. - YouTube video by 'Chasing that P0341 Code' (Chevy Silverado (Duramax)) — P0341 code returned after replacing the CMP sensor, vehicle had a shutter/loss of power.
❌ Tried (didn't work) Replacing the camshaft position sensor with a new GM part.
✅ What actually fixed it A thorough inspection of the wiring harness revealed exposed wires where the plastic loom had disintegrated near the A/C compressor lines. Repairing the chafed section of the harness resolved the code.
OEM Part Supersession History
12568983, 12585545→12591720— Standard part evolution for improved performance or manufacturing.
Heads up: These part numbers apply to the 6.0L V8 gas engine.N/A→97365038— This is the specified part for the 6.6L Duramax LML engine (2011-2016).
Heads up: This part number is specific to the LML Duramax diesel engine.
Model Year Variations Within This Range
- 2014 vs 2015-2018: The 2014 model year is the last of the GMT900 platform, while 2015 marked the switch to the new K2XX platform. While the engines are largely the same, the body, chassis, and some electrical harness routing changed, which could alter the exact location of potential wire chafing points.
- 2017-2018: For the 6.6L Duramax, the 2017 model year introduced the significantly redesigned L5P engine, which replaced the LML engine used from 2011-2016. While the function of the camshaft position sensor is the same, its part number, location, and associated wiring may differ from the earlier LML models.
Helpful Videos
We Have This Part in Stock


The information in this article is provided for general reference and educational purposes only. Vehicle specifications, procedures, and part compatibility can vary by production date, trim level, and region. Always consult your vehicle's factory service manual and verify part numbers before purchasing or performing repairs. Safety-critical components such as airbags, seat belts, and braking systems should be installed by a qualified professional.
- Gmc SIERRA 3500:
- 🧭 Diagnostic Flowchart
- 🎬 Helpful Videos
- 🛍️ Shop This Part
- What's Unique About the 2014-2018 Gmc SIERRA 3500
- Symptoms You May Notice
- Most Likely Causes
- Rare But Worth Checking
- Diagnosis Steps
- Parts You'll Likely Need
- Related Codes That Often Appear With This One
- Technical Service Bulletins (TSBs) & Recalls
- Platform-Specific Known Issues
- Mechanic-Grade Diagnostic Values
- Scan Tool Commands That Help
- Wiring & Ground Locations
- Real Owner Repair Stories
- OEM Part Supersession History
- Model Year Variations Within This Range
- 🎟️ Get 5% Off