
P0353 on 2007-2016 Dodge Durango: Ignition Coil 'C' Circuit Causes and Fixes
The P0353 code on a Dodge Durango indicates a problem with the ignition coil for cylinder #3. The most common fix is replacing the faulty ignition coil, which is a straightforward DIY job. Expect to pay between $25 and $75 for a new coil. If the coil swap test doesn't move the code, inspect the wiring and connector before suspecting a rarer PCM issue.
- P0353 on a Dodge Durango means there's a fault in the ignition coil circuit for cylinder #3, usually causing a misfire.
- The most likely cause is a failed ignition coil, which is a simple and inexpensive part to replace yourself.
- Always perform the 'swap test' by moving the cylinder #3 coil to another cylinder to confirm it's the faulty part before buying a new one.
- If the coil isn't the problem, check the spark plug and the coil's electrical connector next.
- Driving with a constant misfire can damage your catalytic converter, so it's important to fix this issue promptly.
What's Unique About the 2007-2016 Dodge Durango
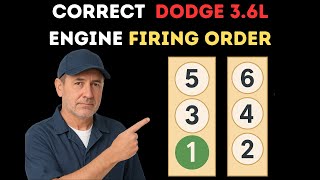
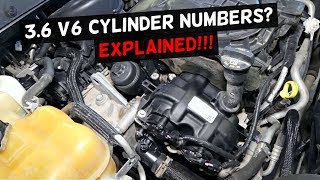
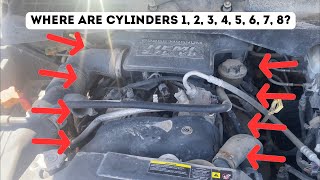
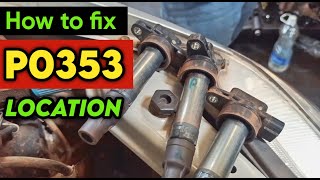
For the Dodge Durango, the P0353 code is a very specific fault that almost always points to a component failure rather than a systemic design flaw. The key difference across the 2007-2016 model years is the engine and cylinder layout. Second-generation models (2007-2009) used V8s where cylinder 3 is on the driver's side, while third-generation models (2011-2016) primarily used the 3.6L Pentastar V6, where cylinder 3 is also on the driver's side but in a different position. The diagnostic process is identical, but accessing the coil may vary slightly. On 3.6L V6 engines, accessing the driver's side coils (including #3) requires removing the upper intake manifold, making the job more involved.
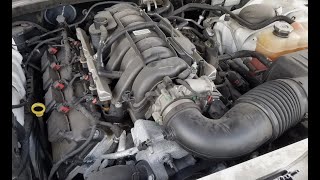
Generation note: This range covers two Durango generations. The 2nd generation (2007-2009) offered 4.7L and 5.7L V8 engines. The 3rd generation (2011-2016) used the 3.6L Pentastar V6 and 5.7L HEMI V8. The location of cylinder #3 differs by engine: - 3.6L Pentastar V6: The middle cylinder on the passenger's side (right bank). Access is straightforward. - 5.7L HEMI V8 (and other V8s): The second cylinder from the front on the driver's side (left bank).
Symptoms You May Notice
- Check Engine Light is on
- Engine running rough or shaking, especially at idle.
- Noticeable engine misfire or hesitation during acceleration.
- Loss of engine power.
- Flashing Check Engine Light in severe cases, indicating a catalyst-damaging misfire.
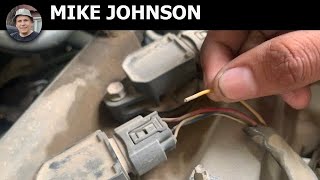
- Replacing the fuel injector for cylinder 3. A P0353 code is an electrical circuit code 🎬 Watch: A mechanic explains the P0353 ignition coil circuit failure. for the ignition system, not the fuel system. A fuel injector issue would typically set a P0203 code.
- Replacing the PCM first. PCM failure is very uncommon and it should be the last item to suspect after thorough diagnosis of the coil, plug, and wiring.
Most Likely Causes
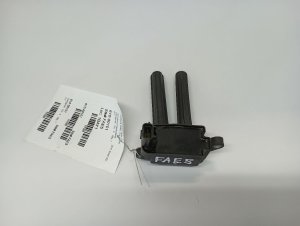
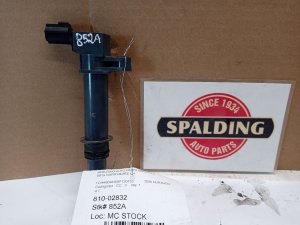
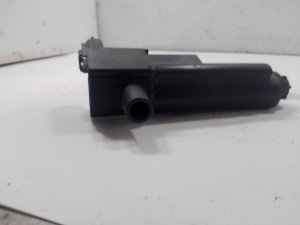
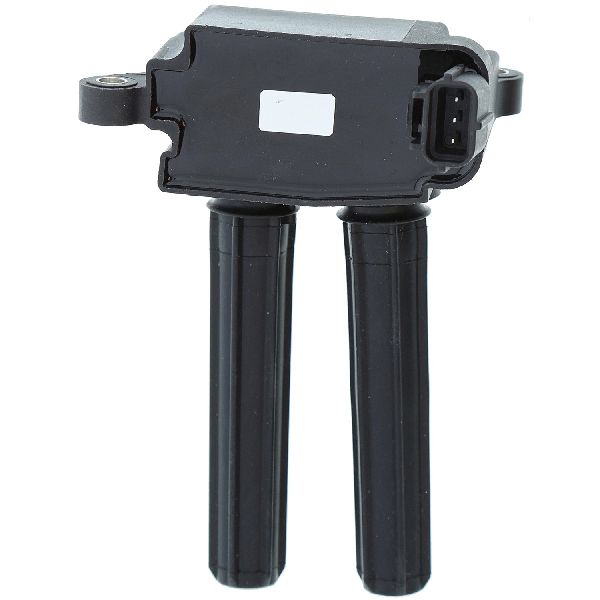
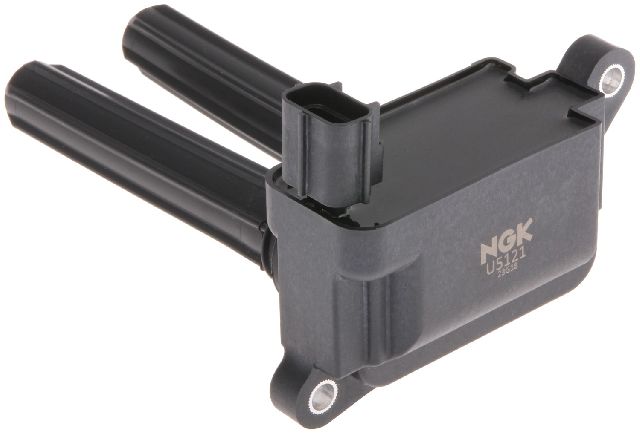
- Faulty Ignition Coil 🔴 High Probability → Shop Ignition Coil Ignition coils are wear-and-tear components that operate under high heat and voltage, and they have a finite lifespan. Heat cycling in the engine bay leads to internal breakdown over time.
How to confirm: The easiest way to confirm a bad coil is to swap the ignition coil from cylinder 3 with one from another cylinder (e.g., cylinder 1). Clear the codes and drive the vehicle. If the code changes to P0351, the coil is faulty. This is the definitive test before spending money on parts.
Typical fix: Replace the ignition coil for cylinder 3.
Est. part cost: $25-$75 - Worn or Fouled Spark Plug 🟡 Medium Probability → Shop Spark Plug A worn-out spark plug with a large gap can strain the ignition coil, causing it to fail prematurely. It's a common maintenance item that is often overlooked.
How to confirm: After confirming the coil is good, inspect the spark plug for cylinder 3. Look for wear (eroded electrode), oil fouling, or heavy carbon buildup. Compare it to a new plug. A worn plug increases the voltage required to jump the gap, stressing the coil.
Typical fix: Replace the spark plug for cylinder 3. It is often recommended to replace all spark plugs at the same time for even performance.
Est. part cost: $5-$20 per plug - Damaged Coil Connector or Wiring ⚪ Low Probability The plastic connector and its locking tab can become brittle from engine heat cycles and break. Wires can also be damaged from chafing against engine components or improper repairs. Rodents are also known to chew on engine wiring.
How to confirm: Visually inspect the electrical connector for cylinder 3's ignition coil. Check for broken plastic, corrosion on the pins, or loose-fitting wires. Wiggle the connector with the engine running to see if it affects the misfire. Use a multimeter to check for 12V power and a pulsing ground signal at the connector.
Typical fix: If the connector is broken, replace it with a new pigtail connector, which involves cutting the old one off and splicing the new one in using butt connectors or solder and heat shrink.
Est. part cost: $10-$25 for a pigtail
Rare But Worth Checking
- Leaking Valve Cover Gasket: → Shop Engine Valve Cover A common issue on many engines is a leaking valve cover gasket that allows oil to seep into the spark plug tubes. This oil can saturate and ruin the ignition coil boot and spark plug, causing a misfire and eventually damaging the coil itself. If you find oil when you pull the coil, the valve cover gasket must be replaced to prevent repeat failures.
- Faulty Powertrain Control Module (PCM): → Shop Engine Control Module (ECM) While rare, the internal driver circuit in the PCM that controls the ignition coil can fail. This should only be considered after all other possibilities (coil, plug, wiring) have been definitively ruled out. A mechanic can use an oscilloscope to confirm if the PCM is sending a proper signal. If not, the PCM will need to be replaced and programmed.
Diagnosis Steps
- Read the trouble codes with an OBD-II scanner to confirm P0353 and check for any other codes like P0303.
- Visually inspect the ignition coil, its electrical connector, and nearby wiring for cylinder #3. Look for any obvious signs of damage, corrosion, or oil contamination from a leaky valve cover gasket.
- The Swap Test: Label and swap the ignition coil from cylinder #3 with an adjacent, easily accessible coil (like cylinder #1 or #5).
- Clear the trouble codes using the scanner.
- Start the engine and let it run for a minute or two. Re-scan for codes.
- If the code has moved to the cylinder you swapped the coil to (e.g., P0351 for cylinder #1), the ignition coil is bad and needs to be replaced.
- If the code P0353 returns, the problem is not the coil. The next step is to inspect and likely replace the spark plug for cylinder #3.
- If the plug is new or in good condition and the code persists, the issue is likely in the wiring or the connector. Use a multimeter to test for battery voltage on the power wire and a pulsing ground signal from the PCM on the control wire at the coil connector with the engine running.
- If the wiring and connector are confirmed to be good (have power and a signal), the final, though least likely, possibility is a fault in the Powertrain Control Module (PCM).
Parts You'll Likely Need
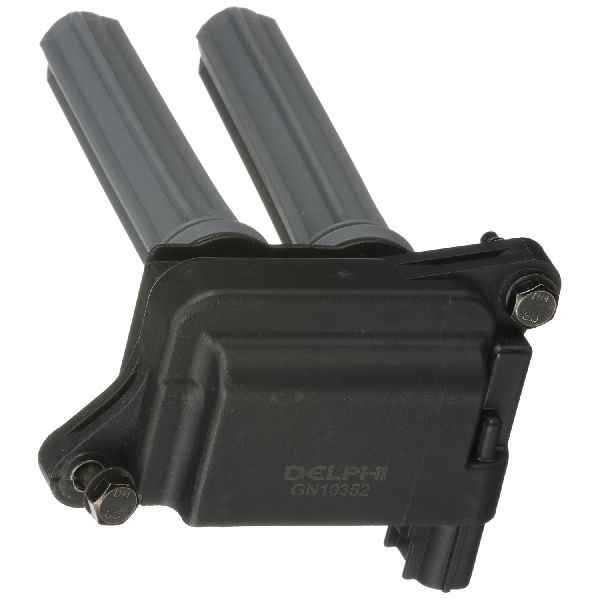
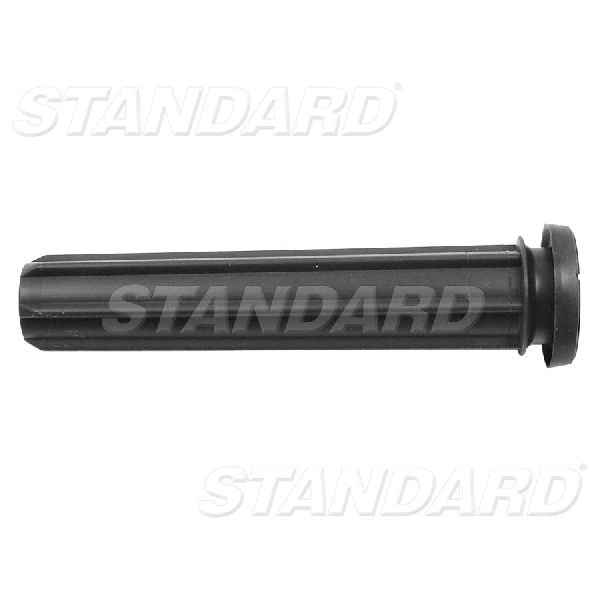
- Ignition Coil (Coil-on-Plug)
(OEM #3.6L V6: 68223569AD (replaces 68223569AB, 68223569AC). 5.7L HEMI V8: 68238603AA (replaces 56029129AF, 68060346AA).)— This is the most frequent cause of a P0353 code. It's a primary component of the ignition system that fails from heat and high voltage stress over time.
Trusted brands: Mopar, NGK, Denso, Bosch
OEM price range: $50-$90
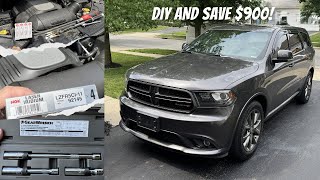
Aftermarket price range: $25-$75 - Spark Plug
(OEM #3.6L V6: NGK ZFR5LP-13G. 5.7L HEMI V8: NGK LZFR5C-11.)— A worn or fouled spark plug can cause the misfire or contribute to the failure of the ignition coil. It's a standard maintenance part that should be checked.
Trusted brands: NGK, Champion, Bosch
OEM price range: $10-$25
Aftermarket price range: $5-$15
Related Codes That Often Appear With This One
- P0303 — P0303 means 'Cylinder 3 Misfire Detected'. Since P0353 indicates a fault in the ignition circuit for cylinder 3, it is the direct cause of the misfire, so these codes almost always appear together.
Platform-Specific Known Issues
- On 3.6L Pentastar V6 engines, accessing the ignition coils on the driver's side bank (cylinders 2, 4, 6) requires removing the upper intake manifold. This adds significant labor time and complexity. However, for code P0353 (Cylinder 3), the coil is on the easily accessible passenger side.
Mechanic-Grade Diagnostic Values
- Ignition Coil Primary Resistance (3.6L Pentastar) — expected: 0.46 - 0.57 Ohms. Failure: A reading outside this range, or an open/infinite reading (OL), indicates a faulty primary winding.
- Ignition Coil Secondary Resistance (3.6L Pentastar) — expected: 9.5 - 15.7 kOhms (kilo-ohms). Failure: A reading outside this range, or an open/infinite reading (OL), indicates a faulty secondary winding.
- Ignition Coil Primary Resistance (5.7L HEMI) — expected: 0.5 - 2.0 Ohms. Failure: A reading outside this range indicates a likely fault. A reading of 0.5 Ohms has been observed on a known good coil.
- Ignition Coil Secondary Resistance (5.7L HEMI) — expected: 6,000 - 10,000 Ohms (6-10 kOhms). Failure: A reading outside this range, or an open/infinite reading (OL), indicates a faulty secondary winding.
- Ignition Coil Connector - Power Feed Voltage — expected: ~12V (Battery Voltage) with Key On, Engine Off. Failure: Low or no voltage indicates a problem in the power supply circuit from the ASD (Auto Shutdown) relay.
- Ignition Coil Connector - Control Circuit Signal — expected: A pulsing ground signal when the engine is cranking or running. This is best observed with an oscilloscope or a multimeter with a Hz function.. Failure: A constant ground, constant voltage, or no signal indicates a wiring fault or a problem with the PCM driver circuit.
Scan Tool Commands That Help
- wiTECH (Dealer Tool): ASD Relay Actuation — When testing the power feed wire at the ignition coil connector. A technician can command the ASD relay on without the engine running to verify if the power supply circuit to the coils is intact.
- High-end Professional Scanners (e.g., Autel, Snap-on): Misfire Counter Live Data — To confirm in real-time that cylinder #3 is the one misfiring. This is useful for verifying the issue before and after the repair, especially in cases of intermittent misfires.
Wiring & Ground Locations
- Cylinder #3 Coil Connector (3.6L & 5.7L) — The electrical connector plugs directly into the top of the ignition coil for cylinder #3. For the 3.6L V6, this is the middle coil on the passenger side. For the 5.7L V8, it's the second coil from the front on the driver's side.. This is the primary point for electrical testing. The power feed wire (often Dark Green/Orange) should have battery voltage, and the control wire (color varies by year/engine) receives the pulsing ground signal from the PCM.
- G904 (5.7L HEMI) — Located on the lower left (driver's) side of the engine block.. This is a primary engine-to-chassis ground. A loose or corroded connection here can cause insufficient voltage to reach the ignition coils and other components, leading to weak spark, misfires, and various electrical gremlins.
- Engine Ground Straps (General) — Multiple ground straps connect the engine block and cylinder heads to the vehicle's chassis/firewall. One common strap is Mopar P/N 5064962AA, used on both 3.6L and 5.7L engines. Another is P/N 68070029AA for the 3.6L.. The ignition system relies on a solid ground path. A broken, frayed, or corroded ground strap can create resistance, forcing the electrical current to find other paths and causing erratic behavior in the ignition coils and PCM.
- D-Pillar Ground Location — Inside the vehicle, behind the trim on the D-pillar (rearmost pillar).. While less likely to be the primary cause for a single coil code, official Mopar upfitter guides identify this as a key grounding point for the vehicle's body electronics. In complex diagnostic cases where main grounds are good, checking all chassis grounds is a valid step.
OEM Part Supersession History
56029129AF, 68060346AA→68238603AA— Standard part evolution for improved reliability and manufacturing consistency.
Heads up: All listed part numbers are interchangeable for the 5.7L HEMI within the specified vehicle years.
Model Year Variations Within This Range
- 2011-2015 vs 2016+: For the 3.6L Pentastar V6, a revised version was introduced in 2016 for some models (like the Grand Cherokee). This updated engine featured different ignition coils and intake manifold design. While the Durango in this range primarily used the first-generation 3.6L, it's important to verify the part number by VIN for 2016 models to ensure the correct coil is purchased.
Diagnostic Flowchart
Other Known Issues on This Vehicle
Issues unrelated to this code that are worth knowing about as an owner of this generation:
- Totally Integrated Power Module (TIPM) Failure 🔴 High — Very common on 2011-2013 models. Can cause random electrical issues, no-start conditions, or engine stalling. (Ref: Multiple recalls issued, including V62 and R09, to install an external fuel pump relay to bypass the failing internal one.)
- 3.6L Pentastar V6 Rocker Arm/Lifter Failure 🔴 High — A well-documented issue causing a 'Pentastar tick' that can progress to misfires and camshaft damage, often after 80,000 miles. (Ref: While no universal recall, TSBs exist and updated parts kits (like 68661146AA) have been released for repairs.)
- 5.7L HEMI V8 'HEMI Tick' (MDS Lifter Failure) 🔴 High — Common on engines with the Multi-Displacement System (MDS). A ticking noise signals a failing lifter roller, which can destroy the camshaft if not addressed. Often occurs at higher mileage (100k+ miles). (Ref: No specific recall, but it is a widely known failure mode. The common fix is to replace the camshaft and all lifters, often with an MDS-delete kit for a permanent solution.)
- Cracked Exhaust Manifold Bolts (V8 Engines) 🟠 Medium — Common on 2nd generation (2004-2009) V8 models, causing a ticking noise that is loudest on a cold start and may quiet down as the engine warms.
- Water Pump/Thermostat Housing Failure 🟠 Medium — Failures leading to coolant leaks and potential overheating are common across both V6 and V8 engines, particularly on 3rd generation models.
Used vs. New Parts: Buying Guide for This Vehicle
When a used part is the smart pick: For this repair, buying used parts is generally not recommended. However, if the fault is confirmed to be a broken electrical connector, sourcing a used pigtail from a junkyard harness is a viable and cost-effective option. A used PCM is also a possibility, but it will require professional programming to the vehicle's VIN, which can be complex.
Donor-vehicle mileage cap: roughly under 80000 miles for the part to have meaningful remaining life.
What to inspect on the donor part:
- For a pigtail connector: Ensure the plastic is not brittle, the locking tab is intact, and there's at least 4-6 inches of wire to work with.
- For a PCM: Check for any signs of water damage or corrosion on the case and pins. Ensure the part number matches exactly.
OEM-only on this vehicle (don't cheap out):
- Powertrain Control Module (PCM) - While used is an option, a new or remanufactured Mopar PCM is the most reliable choice to avoid programming headaches and ensure compatibility.
Aftermarket brands forum-validated for this vehicle:
- NGK
- Denso
- Bosch
Brands owners have reported issues with on this vehicle:
- Unnamed, no-brand ignition coils from online marketplaces often have high failure rates and may not perform to OEM specifications, potentially causing further issues.
Real Owner Stories
Aggregated from forums and TSBs cited above. Mileages and costs reflect what owners reported in those sources.
2002 Dodge Durango
Symptoms: Owner reported a 'ticking clicking sound' and had trouble codes P0353 and P0356.
What fixed it: After a coil swap test did not move the code, the owner was advised that the next diagnostic steps were to investigate a wiring issue or a potentially faulty Powertrain Control Module (PCM).
Source hint: 2CarPros.com - Ticking Clicking Sound, Codes P0353 and P0356
Chrysler Town & Country (with 3.6L V6)
Symptoms: Owner experienced a persistent P0353 'misfire nightmare' after replacing every component in the ignition circuit for that cylinder.
What fixed it: The fault was ultimately traced to the wiring harness itself. This was confirmed by running a temporary bypass wire directly from the PCM to the ignition coil connector, which resolved the issue and isolated the bad wire.
Source hint: Chrysler Forum - P0353 Misfire Nightmare – Throwing in the Towel
Related OBD-II Codes
Frequently Asked Questions
On my 3.6L Pentastar V6 Durango, is it difficult to access the ignition coil for cylinder 3 to fix a P0353 code?
What is the first and most important diagnostic step for a P0353 code on my Dodge Durango before I buy any parts?
I swapped the coil and the P0353 code came back. What should I check next?
My 2012 Durango has a P0353 code and other random electrical issues. Could these be related?
I have a P0353 code and also hear a ticking noise from the engine. Is there a connection?
If the coil, plug, and wiring are all good, what is the last possible cause for a persistent P0353?
Helpful Videos
Used OEM Parts in Stock
New Aftermarket Parts Available


The information in this article is provided for general reference and educational purposes only. Vehicle specifications, procedures, and part compatibility can vary by production date, trim level, and region. Always consult your vehicle's factory service manual and verify part numbers before purchasing or performing repairs. Safety-critical components such as airbags, seat belts, and braking systems should be installed by a qualified professional.
- Dodge Durango:
- 🧭 Diagnostic Flowchart
- 🎬 Helpful Videos
- 🛍️ Shop This Part
- What's Unique About the 2007-2016 Dodge Durango
- Symptoms You May Notice
- Most Likely Causes
- Rare But Worth Checking
- Diagnosis Steps
- Parts You'll Likely Need
- Related Codes That Often Appear With This One
- Platform-Specific Known Issues
- Mechanic-Grade Diagnostic Values
- Scan Tool Commands That Help
- Wiring & Ground Locations
- OEM Part Supersession History
- Model Year Variations Within This Range
- Other Known Issues on This Vehicle
- Used vs. New Parts: Buying Guide for This Vehicle
- Real Owner Stories
- 2002 Dodge Durango
- Chrysler Town & Country (with 3.6L V6)
- Related OBD-II Codes
- Frequently Asked Questions
- 🎟️ Get 5% Off