
OBD-II Code P0364: Camshaft Position Sensor 'B' Circuit Low (Bank 1)
The Ultimate Guide to Meaning, Diagnosis, and Repair
- A failed camshaft position sensor or a damaged wiring harness causes 80% of P0364 codes.
- Check for Technical Service Bulletins (TSBs) before buying parts; 2019-2021 Ford F-150s frequently require a dealer-only PCM software update to resolve this code.
- Stop driving if you experience sudden stalling or severe power loss, as ignoring P0364 can destroy your catalytic converter and add $800 to $2,800 to your repair bill.
- Verify the sensor receives a steady 5V reference and has less than 1 Ohm of ground resistance using a multimeter before replacing any components.
What Does P0364 Mean?
P0364 means the Powertrain Control Module (PCM) detects a continuous low voltage or a missing signal from the 'B' camshaft position sensor on engine bank 1. This sensor tells the computer the exact rotational position of the exhaust camshaft. This data dictates variable valve timing (VVT) and ignition timing, directly controlling engine performance, fuel economy, and emissions.
Technical definition: The SAE/OBD-II definition for P0364 is "Camshaft Position Sensor 'B' Circuit Low (Bank 1)". The PCM detects the voltage signal from the Bank 1 exhaust camshaft position sensor is below the specified minimum range or absent entirely, indicating a short to ground or an open circuit.
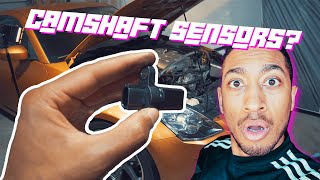
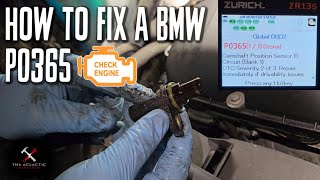
🎬 See how to diagnose the P0365 circuit on a BMW.Can I Drive With P0364?
Yes, But With Caution. You can drive short distances, but it carries significant risk. Expect rough idling, sudden stalling, or reduced power, which are dangerous in traffic. Avoid long trips and diagnose the issue immediately. Prolonged driving with incorrect timing destroys the catalytic converter, adding $800 to $2,800 to the repair bill.
Common Causes
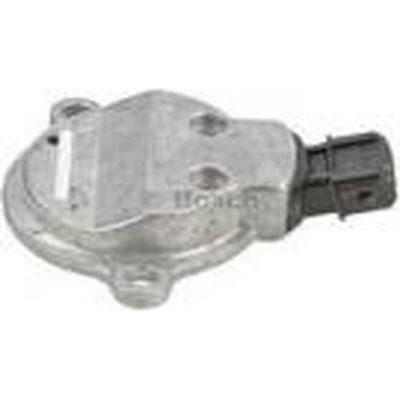
- Faulty Camshaft Position Sensor (Very Common) — The sensor itself is the most frequent culprit. Internal electronics fail from constant heat cycles and engine vibration, preventing it from generating or sending a correct signal to the PCM.
- Wiring or Connector Issues (Including Oil Contamination) (Common) — The wiring harness is highly susceptible to damage. Wires chafe against engine parts, melt from heat, or break from vibration. Additionally, leaking valve cover gaskets often allow engine oil to seep into the electrical connector, disrupting the sensitive signal and causing a short to ground.
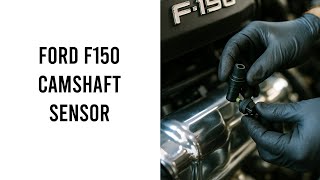
- Powertrain Control Module (PCM) Software Issue (Less Common) — On certain vehicles, notably 2019-2021 Ford F-150s, 🎬 Watch: Locating the camshaft sensor on a Ford F-150. overly sensitive monitoring software in the PCM triggers the code, not a hardware failure. A software update from the dealership is the only fix.
- Low or Dirty Engine Oil (Less Common) — The variable valve timing (VVT) system operates hydraulically using engine oil. Critically low or sludge-filled oil causes the VVT phasers to respond slowly. This desynchronizes the camshaft's actual position from its expected position, leading to erratic sensor readings that the PCM flags as an electrical fault.
- Failing Battery or Alternator (Uncommon) — A weak battery or a failing alternator causes low system voltage across the entire vehicle. This supplies insufficient voltage to the camshaft sensor, triggering a 'Circuit Low' code.
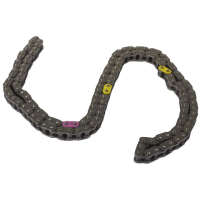
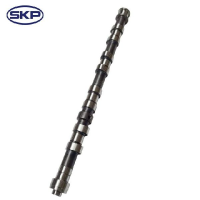
- Timing Chain/Belt or Component Issue (Rare) — A stretched timing chain, a failed chain tensioner, or a damaged VVT phaser causes the camshaft's mechanical position to fall out of sync with the crankshaft. The sensor reports this discrepancy, sometimes resulting in an electrical circuit code if other timing codes are present.
- Faulty Powertrain Control Module (PCM) (Very Rare) — The driver circuit within the PCM responsible for interpreting the camshaft sensor's signal occasionally fails. Consider this only after exhaustively ruling out the sensor, wiring, and software.
Symptoms
- Check Engine Light is On — This is the first indicator. An active P0364 code causes an automatic failure of emissions or smog tests.
- Rough Idle or Stalling — The engine runs unevenly, vibrates, or stalls unexpectedly, especially when coming to a stop or at low RPMs. This is a severe safety hazard in traffic.
- Engine is Hard to Start or Won't Start — The engine cranks for an extended period before starting, or fails to start entirely. The PCM requires the camshaft signal to time fuel injection and ignition.
- Reduced Engine Power and Poor Acceleration — The car feels sluggish, hesitates, and struggles to reach highway speeds. The PCM often activates 'limp mode' to prevent damage, severely limiting performance.
- Decreased Fuel Economy (also visible on scanner) — Incorrect timing forces the engine to consume significantly more fuel to produce the same amount of power.
Diagnostic Flowchart
Tap your situation to follow the diagnostic path that matches what you're seeing on this code.
Common Fixes & Costs
- Replace Camshaft Position Sensor
— Parts: $25-$120, Labor: $70-$250, ~1 hr book time
(DIY)
: OEM Motorcraft DU-105 (Alt: Denso 196-6008, Bosch 0232103126, Walker 235-1550)
: OEM Nissan 23731-AL61D (Bank 2 'A') or 23731-6J90B (Bank 1 'B') (Alt: Denso 196-4013, Bosch 0232103033, Delphi SS10888)
: OEM BMW 12147518628 (Alt: Hella 6PU009121-701 (OEM Supplier), Bosch 0232103037, Denso 196-4006) - Reprogram Powertrain Control Module (PCM) — Parts: $0, Labor: $100-$250, ~1.5 hr book time (Professional)
- Repair Wiring Harness or Connector — Parts: $15-$60, Labor: $100-$400, ~2.5 hr book time (Intermediate)
- Perform an Oil and Filter Change — Parts: $30-$80, Labor: $20-$60, ~0.5 hr book time (DIY)
- Replace Timing Chain/Belt and/or VVT Components — Parts: $300-$1000+, Labor: $800-$2000+, ~9 hr book time (Professional)
DIY vs Professional
- Replace Camshaft Position Sensor — Beginner: Yes, in most cases.
Tools: Basic socket set, screwdriver, torque wrench. - Reprogram Powertrain Control Module (PCM) — Beginner: No.
Tools: Manufacturer-specific diagnostic scan tool and software subscription. - Repair Wiring Harness or Connector — Beginner: No.
Tools: Multimeter, wire strippers, wire crimpers, heat shrink tubing, quality connectors. - Perform an Oil and Filter Change — Beginner: Yes.
Tools: Wrench for drain plug, oil filter wrench, drain pan, new oil and filter. - Replace Timing Chain/Belt and/or VVT Components — Beginner: No.
Tools: Extensive set of professional mechanic's tools, engine-specific timing tools, torque wrenches.
Used vs. New Parts: Buying Guide
When a used part is worth it: Buying a used camshaft position sensor is never recommended. It is a sensitive electronic part with a finite lifespan. The minimal cost savings do not justify the risk and labor cost of a repeat failure.
Donor-vehicle mileage cap: roughly under 20000 miles for the part to have meaningful remaining life.
Donor quality checklist:
- If forced to buy used, source from a vehicle with the lowest possible mileage.
- Visually inspect the used sensor for cracks, melting, or corrosion on the pins.
- Match the OEM part number exactly; do not rely on visual similarity.
Decision logic:
- If The part is a camshaft position sensor. → Buy a new OEM or high-quality Tier-1 aftermarket part (e.g., Bosch, Denso, Delphi). Reliability outweighs the cost savings of a used part.
- If Budget is extremely tight and the sensor is easily accessible (under 30 minutes to change). → A low-cost new aftermarket sensor is a better risk than a used one, but expect a shorter lifespan.
- If The sensor is difficult to access (requires removing other components). → Always buy a new OEM part to minimize the chance of repeating the labor-intensive job.
Warranty tradeoff: Used parts typically have a 30-90 day warranty that does not cover labor. New aftermarket parts offer a 1-year to limited lifetime warranty. New OEM parts carry a 12-month/12,000-mile warranty.
Worst-case if a used part fails: $200-$400 if a cheap or used sensor fails after installation, requiring repeat labor costs plus the price of another new sensor.
What Happens If You Wait — Timeline
- 0-2 weeks: Check Engine Light illuminates. The car requires a slightly longer crank time to start but otherwise runs normally. (MPG impact: 0-5%% · Added cost: $0-25 in wasted fuel.)
- 2 weeks - 3 months: Symptoms become consistent. The engine idles roughly when cold. Hesitation during acceleration is noticeable, and occasional stalling at stops occurs. (MPG impact: 5-15%% · Added cost: $50-150 in wasted fuel.)
- 3-6 months: The engine runs poorly constantly. Stalling becomes a frequent safety risk. Inefficient combustion dumps unburned fuel into the exhaust, beginning to overheat the catalytic converter. (MPG impact: 15-25%% · Added cost: $150+ in wasted fuel, plus increasing risk of catalytic converter damage ($800-$2800).)
- 6+ months: Severe drivability issues; the car fails to start. The catalytic converter substrate melts from prolonged exposure to raw fuel, causing a major exhaust restriction and power loss. (MPG impact: 25%+% · Added cost: $800-$3000+ for a new catalytic converter and secondary oxygen sensors.)
Cost of Not Fixing It
- 0-1 Month: Noticeable drop in fuel economy (5-15%), rough idling, and potential for stalling in traffic. The vehicle fails emissions tests. (Added cost: $50-$150 in wasted fuel.)
- 1-6 Months: Increased risk of catalytic converter damage. Inefficient combustion dumps unburned fuel into the exhaust, melting the converter's internal substrate. (Added cost: $800-$2800 for catalytic converter replacement.)
- 6+ Months: Internal engine strain due to prolonged incorrect timing. Increased carbon buildup on valves and pistons. The vehicle becomes undrivable due to a no-start condition. (Added cost: Potentially thousands if severe engine timing issues lead to valve or piston damage.)
Diagnosis Steps
- Check for Technical Service Bulletins (TSBs)
Before touching any tools, check for manufacturer TSBs for your specific VIN. Models like 2019-2021 Ford F-150s have known software issues that cause P0364. The only fix is a PCM re-program at a dealership.
Tools: Internet access, Vehicle Identification Number (VIN) (Beginner) - Check Engine Oil Level and Condition
Ensure the engine oil is full and clean. Low or dirty oil impedes the function of the Variable Cam Timing (VCT) system, indirectly triggering this electrical code.
Tools: Rag or paper towel (Beginner) - Inspect the Sensor, Connector, and Harness
Visually inspect the Bank 1 'B' camshaft position sensor and its electrical connector. Look for damage, melting, corrosion on the pins, or oil contamination inside the connector. Trace the wiring harness back, looking for frayed sections or areas rubbing against hot components.
Tools: Flashlight, Inspection mirror (Beginner) - Swap Sensors (If Applicable)
On many engines, the intake ('A') and exhaust ('B') camshaft sensors are identical. Swap the Bank 1 Sensor 'A' and Sensor 'B'. Clear the codes and run the engine. If P0364 disappears and is replaced by P0344 (Sensor 'A' Circuit Low), you have definitively confirmed the sensor is faulty.
Tools: Basic hand tools (socket set, etc.) (Intermediate) - Review Live Data with a Scan Tool
Using an advanced scan tool, monitor the live data PIDs for the camshaft position sensor. A persistently incorrect or absent reading while cranking the engine points towards a sensor or circuit failure, helping differentiate between an electrical fault and a mechanical timing issue.
Tools: Advanced OBD-II Scan Tool (Advanced) - Test for Reference Voltage
Using a multimeter set to DC Volts, test the power supply to the sensor. Disconnect the sensor, turn the key to 'ON' (engine off), and connect the multimeter's black lead to the battery negative. Probe the reference voltage pin on the connector harness with the red lead. A healthy circuit shows a steady 5V DC. A reading near 0V indicates an open or short in the power wire.
Tools: Multimeter (Intermediate) - Test the Ground Circuit
With the sensor disconnected and key on, switch your multimeter to measure resistance (Ohms). Place one lead on the ground pin in the harness connector and the other on the battery negative terminal. A good ground reads less than 1 Ohm. A high resistance reading (OL) indicates a faulty ground wire.
Tools: Multimeter (Intermediate) - Test the Sensor's Internal Resistance (If Applicable)
With the sensor unplugged, set your multimeter to Ohms. Measure the resistance between the specified pins on the sensor itself. Expected resistance varies widely by manufacturer (200 Ohms to 4 kOhms). A reading of infinite resistance (OL) means the sensor is open internally. Consult the service manual for exact specifications.
Tools: Multimeter, Service Manual (Advanced) - Analyze the Live Signal with an Oscilloscope
Connect an oscilloscope to the signal wire (back-probing the connected sensor) and a good ground. As you crank the engine, you should see a clean digital square wave, switching sharply between 0V and 5V. For a P0364 fault, the waveform is typically a flat line at 0V, confirming no signal is generated or it is shorted to ground.
Tools: Oscilloscope, Back-probe kit (Advanced)
When This Code Triggers (Freeze-Frame Conditions)
- Engine Coolant Temp: 180-200°F (The fault is most often logged when the engine is fully warmed up and running for several minutes.)
- RPM: 1500-2500 RPM (The code frequently sets during steady-state cruising or light acceleration, not at idle.)
- Engine Load: 30-60% (This indicates the engine is under a moderate workload, consistent with maintaining speed on a level road.)
- Vehicle Speed: 35-55 mph (The fault is often triggered during city or suburban driving conditions, rather than high-speed highway driving.)
Related Codes
- P0365 — This is the generic code for a malfunction in the same circuit. P0364 specifically indicates a 'low' voltage condition, while P0365 is a more general circuit fault.
- P0369 — This code indicates an intermittent signal from the same sensor. P0364 points to a constant 'low' fault, whereas P0369 suggests a loose connector or a chafed wire making occasional contact.
- P0390 — This is the identical 'Circuit Low' code but for the 'B' sensor on Bank 2. If you have both P0364 and P0390, suspect a systemic issue like critically low oil, widespread wiring damage, or a PCM fault.
- P0012 / P0022 — These codes mean 'Camshaft Position Timing Over-Retarded'. Fix P0364 first. A bad sensor signal prevents the PCM from knowing the cam's true position, causing false mechanical timing codes.
Climate & Environmental Factors
- Extreme Heat: High under-hood temperatures accelerate the aging process of electronic components within the sensor, leading to premature failure. Heat makes wiring insulation brittle and susceptible to cracking.
- Extreme Cold: Cold temperatures make plastic connectors and wiring insulation brittle, increasing the risk of cracking if disturbed. Rapid temperature changes lead to condensation inside the sensor, causing corrosion and short circuits.
- High Humidity / Moisture: Moisture is a primary enemy of electrical systems. If the sensor's seal fails, moisture seeps in, corroding the electrical pins and causing intermittent signals or a complete loss of connection.
How to Talk to a Mechanic About This Code
Say this: "I have an OBD-II code P0364 for the Camshaft Position Sensor 'B' Circuit Low on Bank 1. I'd like to schedule a diagnostic to confirm if the issue is the sensor, the wiring, or a software update. Please check for power, ground, and signal at the sensor connector before recommending a replacement part."
This signals you understand the potential causes beyond just a bad sensor. It directs the technician to perform a proper electrical diagnosis, preventing them from blindly replacing parts.
Avoid saying:
- 'My check engine light is on, can you just fix it?'
- 'I think I need a new cam sensor.'
- 'Just do whatever you think is best.'
Questions to ask before authorizing the repair:
- Did you test the sensor's circuit for correct 5V reference and ground?
- What did the sensor's signal look like on the oscilloscope? Was it missing or erratic?
- Have you checked for any Technical Service Bulletins (TSBs) related to this code for my specific vehicle?
- Is the wiring harness and connector free of oil contamination and physical damage?
- What is the warranty on the replacement part and the labor?
Where to Take It: Dealer vs Independent vs Chain
- Dealer:
Recommended if you own a vehicle known for software-related P0364 codes (like a 2019-2021 F-150) or if the vehicle is under warranty. Otherwise, an independent shop is more cost-effective.
Best for: Vehicles under warranty., Known software-related issues (e.g., Ford F-150 TSBs)., Complex electrical issues where independent shops have failed.
Downsides: Highest labor rates., Less willing to perform component-level wiring repairs, often suggesting full harness replacement. (Typical cost: +50% vs. baseline) - Independent Shop:
Best fit for most situations. A competent independent shop easily diagnoses and repairs the sensor or wiring issues that commonly cause P0364. Ensure they are comfortable with electrical diagnostics.
Best for: Out-of-warranty vehicles., Straightforward sensor replacements and wiring diagnostics., Building a long-term relationship with a trusted mechanic.
Downsides: Diagnostic capabilities vary greatly; look for ASE certifications., May lack access to the latest manufacturer-specific software for PCM updates. (Typical cost: +0% vs. baseline) - Chain Shop:
Use with caution. Acceptable only if you have already confirmed the sensor itself is faulty. Avoid for initial diagnosis, as they are likely to replace the part without testing the circuit.
Best for: Simple, clear-cut part replacements where the diagnosis is already certain.
Downsides: Technician skill varies dramatically., High pressure to upsell services., Often lack advanced diagnostic tools (like oscilloscopes) for proper circuit testing. (Typical cost: -10% vs. baseline)
When to Walk Away From the Repair
If the estimated repair cost exceeds 40-50% of the car's private-party value, seriously consider selling or trading it in rather than repairing it.
- Car worth $4000, fix is $2000: Borderline. This repair is 50% of the car's value. Get a second opinion before proceeding.
- Car worth $12000, fix is $1800: Fix it. The repair cost is well below the threshold and makes economic sense.
- Car worth $2500, fix is $1500: Walk away. The repair is 60% of the car's value and is not a sound investment.
What Scan Tool You Need for This Code
Minimum: A scanner that reads and clears codes, and displays live data streams from the camshaft position sensor.
A basic $20 code reader only shows the P0364 code. It cannot display live data (the sensor's signal) required to determine if the problem is the sensor or the wiring.
Budget: BlueDriver Pro (~$100) — Connects to your smartphone via Bluetooth. It reads the P0364 code, provides freeze-frame data, and displays live sensor data crucial for diagnosis.
Mid-range: Foxwell NT510 Elite (~$200) — A powerful handheld scanner offering full system diagnostics. It graphs live data and includes bidirectional controls to command components directly.
Professional: Autel MaxiCOM MK808 / MK808BT (~$450-550) — A professional-level tablet scanner with extensive vehicle coverage. It provides full-system diagnostics and full bidirectional control to test components directly.
Rent vs buy: Auto parts stores scan codes for free but do not loan the tool. For P0364, seeing live data is key. A budget pick like the BlueDriver is a good investment for a one-time fix. For frequent DIY repairs, a midrange or pro-level tool is required.
How to Clear the Code After You Fix It
- Use an OBD-II scan tool to clear the Diagnostic Trouble Code (DTC) from the PCM's memory.
- Reconnect any disconnected components, such as the battery.
- Perform a complete OBD-II drive cycle to allow the vehicle's readiness monitors to run their self-tests.
Drive cycle (~30 minutes): A generic drive cycle includes a cold start (engine off for 8+ hours), a 2-3 minute idle, 10-15 minutes of mixed city driving (stops, starts, varied speeds), followed by 5-10 minutes of steady-state driving at highway speeds (55-60 mph). The vehicle must then cool down completely.
Readiness monitors affected: Comprehensive Component Monitor, Misfire Monitor, Catalyst (CAT) Monitor, Oxygen (O2) Sensor Monitor
Before emissions retest: drive at least 100 miles to fully set monitors.
Watch out for:
- Disconnecting the battery clears the code but resets all readiness monitors to 'Not Ready', causing an automatic emissions test failure.
- The code immediately returns if the root cause of the fault was not correctly repaired.
- Failing to drive the car under the correct conditions prevents the readiness monitors from resetting before an emissions test.
Will This Fail Emissions / State Inspection?
Yes — this code typically fails an OBD-II emissions inspection.
- California: An illuminated Check Engine Light is an automatic failure of the Smog Check. After repair, a complete OBD-II drive cycle must be performed to set all readiness monitors before a retest.
- New York: A vehicle automatically fails the emissions portion of the NYS inspection if the Check Engine Light is on. After clearing the code, the vehicle must be driven to reset readiness monitors.
- Texas: In counties requiring emissions testing, an illuminated Check Engine Light results in an automatic failure. For model years 2001 and newer, only one readiness monitor can be 'Not Ready' to pass.
Most Commonly Affected Vehicles
- Ford F-150 (2019-2021) — Extremely common on 5.0L and 3.5L PowerBoost engines due to PCM software glitches. Check for TSBs 22-2393, 21-2229, and 21-2083 before replacing any parts. The repair is a dealer-performed software update.
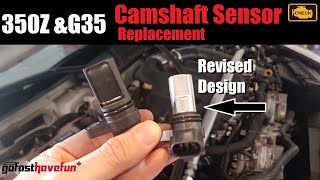
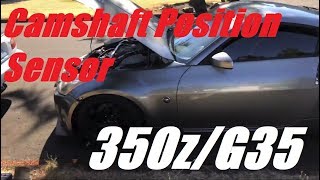
- Nissan / Infiniti Altima, Murano, 350Z, G35, various (2002-2024) — Vehicles with the VQ35DE V6 engine are notorious for camshaft sensor failures. It is common practice to replace both cam sensors and the crank sensor at the same time.
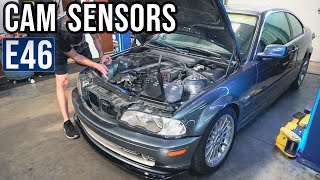
- BMW 3-Series (E46), 5-Series (E39), X3 (E83), X5 (E53) (1999-2006) — Models with the M52TU and M54 inline-six engines frequently experience exhaust camshaft sensor failure. Failure is often preceded by oil leaks from the valve cover dripping onto wiring.
- Honda Accord (2003-2017) — On models with J-series V6 and K-series 4-cylinder VTEC engines, this code strongly points to a failed exhaust camshaft position sensor. Using an OEM part is crucial for longevity.
- Hyundai / Kia Elantra, Tiburon, Sorento, Sportage (2001-2017) — Common on models with the 2.4L Theta II GDI and 2.7L Delta V6 engines. Wiring harnesses become brittle from heat, causing shorts near the back of the engine.
- Subaru Impreza, Outback, Forester, WRX (2005-2014) — On Subaru's boxer engines, P0364 points to the exhaust cam sensor on Bank 1 (passenger side). Access is tight due to the engine's flat design.
- Chevrolet / GM Malibu, Equinox, Traverse (2010-2018) — Often seen on the 2.4L Ecotec and 3.6L LFX V6 engines. Check for stretched timing chains on higher mileage 3.6L engines, which trigger this electrical code.
- Toyota Camry, Sienna, RAV4 (2004-2024) — Toyota models with the 2GR-FE V6 experience this code due to a failed sensor or wiring damage. Diagnosis is straightforward compared to other makes.
Manufacturer-Specific Notes
- Ford: On 2019-2021 F-150s with 5.0L or 3.5L PowerBoost engines, P0364 is frequently caused by a PCM software glitch. A dealer must perform a software update as outlined in TSBs like 21-2083.
- Nissan: The VQ-series V6 engines are notorious for camshaft and crankshaft position sensor failures. Experienced technicians replace both camshaft sensors and the crankshaft sensor as a set to prevent future issues.
- BMW: On inline-six engines (M52TU, M54), an oil filter housing gasket leak drips oil directly onto wiring. This oil saturation degrades the camshaft sensor's wiring insulation, causing a short to ground.
- Honda: VTEC engines are highly sensitive to camshaft sensor inputs. When P0364 appears, the sensor itself has likely failed. Using a quality OEM replacement part is highly recommended to avoid repeat failures.
Real Owner Stories
2021 Ford F-150 5.0L with 30K miles
Check Engine Light came on with code P0364. The truck ran perfectly fine with no noticeable symptoms like rough idle or stalling.
What they tried:
- The owner suspected a bad sensor and prepared to order a replacement part.
Outcome: After searching online forums, the owner found Ford TSB 21-2083, describing a software glitch. The dealership reprogrammed the PCM under warranty, permanently fixing the problem without replacing any parts.
Lesson: For 2019-2021 Ford F-150s, always check for TSBs before replacing parts for P0364. A no-cost software update at the dealer is the correct fix.
2005 Nissan 350Z (VQ35DE engine) at 115K miles
The car required long cranks to start, idled roughly, and stalled at stoplights. Code P0364 was active.
What they tried:
- The owner replaced only the Bank 1 exhaust camshaft sensor.
- The code and symptoms returned within a week.
Outcome: The owner replaced the cheap aftermarket sensor with a high-quality OEM sensor, and simultaneously replaced the Bank 2 sensor and the crankshaft position sensor. This resolved the issue completely.
Lesson: On Nissan VQ engines, these sensors fail around the same time. Replace all three (both cam sensors and the crank sensor) as a set using OEM parts to avoid repeat repairs.
2004 BMW 325i (E46 with M54 engine) at 140K miles
P0364 appeared alongside a noticeable drop in power and fuel economy. The engine felt sluggish at lower RPMs.
What they tried:
- The owner replaced the exhaust camshaft position sensor, but the code returned immediately after clearing it.
Outcome: The owner discovered the wiring harness leading to the sensor was soaked in oil from a leaking valve cover gasket. The oil degraded the wire insulation, causing a short circuit. Repairing the harness and replacing the gasket fixed the code.
Lesson: Always inspect the wiring and connector for oil contamination before replacing a sensor. A new sensor cannot fix a shorted circuit.
How to Prevent This Code From Triggering
- Perform regular oil changes with high-quality oil. (Every 5,000-7,500 miles or as per manufacturer specs.) — Clean, correct-viscosity oil is critical for the hydraulic VVT system. Sludge causes timing components to stick, leading to sensor correlation errors.
- Address engine oil leaks promptly. (Whenever a leak is detected.) — Leaking valve cover gaskets drip oil onto sensor connectors and wiring harnesses. The oil degrades insulation, leading to shorts and circuit failure.
- Maintain a healthy battery and charging system. (Check battery terminals for corrosion annually.) — Low system voltage from a weak battery causes electronic modules and sensors to receive insufficient power, triggering 'circuit low' codes.
- Inspect and clean engine ground connections. (During major services or if electrical issues appear.) — Corroded ground straps create high resistance, causing sensors to send faulty signals to the PCM.
- Protect wiring from damage. (During any under-hood maintenance.) — Ensure wiring harnesses are secured away from hot exhaust manifolds or sharp metal edges to prevent chafed or broken wires.
Frequently Asked Questions
What does 'Bank 1' and 'Sensor B' mean?
'Bank 1' is the side of the engine containing cylinder #1. 'Sensor B' universally refers to the exhaust camshaft position sensor, while 'Sensor A' refers to the intake sensor.
What are common misdiagnosis mistakes for P0364?
The most common mistake is immediately replacing the sensor without testing the circuit. If the code returns, the actual problem was a damaged wire, a bad ground, or a missed TSB requiring a software update.
My code came back after replacing the sensor. What now?
If the code returns, you used a poor-quality aftermarket sensor, or the sensor was never the problem. Re-check the wiring harness for hidden damage, verify connector pins are tight, and confirm your vehicle doesn't need a software update.
Can I swap sensors to test if one is bad?
Yes, on many engines the intake ('A') and exhaust ('B') sensors are identical. Swap the Bank 1 Sensor 'A' and Sensor 'B'. If your P0364 code changes to P0344 ('A' Circuit Low), you have confirmed the sensor is faulty.
Will P0364 clear itself?
No. This code indicates a hard electrical fault. The PCM keeps the Check Engine Light on until the underlying problem is repaired and the codes are manually cleared with a scan tool.
What is the difference between a Hall-effect and a Variable Reluctance (VR) sensor?
Most modern cars use 3-wire Hall-effect sensors which are powered and produce a clean digital square wave. P0364 diagnosis is primarily for Hall-effect sensors, as a VR sensor failure sets a different type of code.
Can a bad oil control solenoid (OCS) cause P0364?
It is unlikely to directly cause P0364, which is an electrical circuit code. A faulty OCS typically sets a mechanical timing code like P0011 or P0012. Address timing codes only after resolving the P0364 electrical fault.
What happens if I ignore P0364?
Ignoring the code leads to persistent poor engine performance, bad fuel mileage, and dangerous stalling. Running with incorrect timing eventually destroys the catalytic converter from unburned fuel dumping into the exhaust.
Key Takeaways
- A failed camshaft position sensor or a damaged wiring harness causes 80% of P0364 codes.
- Check for Technical Service Bulletins (TSBs) before buying parts; 2019-2021 Ford F-150s frequently require a dealer-only PCM software update to resolve this code.
- Stop driving if you experience sudden stalling or severe power loss, as ignoring P0364 can destroy your catalytic converter and add $800 to $2,800 to your repair bill.
- Verify the sensor receives a steady 5V reference and has less than 1 Ohm of ground resistance using a multimeter before replacing any components.
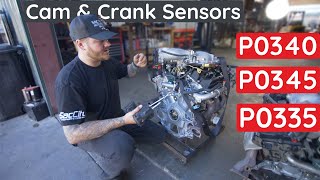
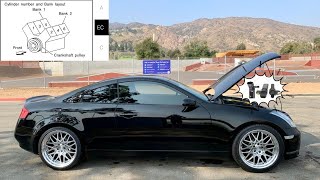
Helpful Videos
Shop the Parts Behind P0364
Below are the parts most often responsible for code P0364, ranked by how frequently each one is the actual culprit (per the diagnosis above). Tap any to see what we have for your vehicle.


The information in this article is provided for general reference and educational purposes only. Vehicle specifications, procedures, and part compatibility can vary by production date, trim level, and region. Always consult your vehicle's factory service manual and verify part numbers before purchasing or performing repairs. Safety-critical components such as airbags, seat belts, and braking systems should be installed by a qualified professional.
- 🧭 Diagnostic Flowchart
- 🎬 Helpful Videos
- 🛍️ Shop This Part
- What Does P0364 Mean?
- Can I Drive With P0364?
- Common Causes
- Symptoms
- Common Fixes & Costs
- DIY vs Professional
- Used vs. New Parts: Buying Guide
- What Happens If You Wait — Timeline
- Cost of Not Fixing It
- Diagnosis Steps
- When This Code Triggers (Freeze-Frame Conditions)
- Related Codes
- Climate & Environmental Factors
- How to Talk to a Mechanic About This Code
- Where to Take It: Dealer vs Independent vs Chain
- When to Walk Away From the Repair
- What Scan Tool You Need for This Code
- How to Clear the Code After You Fix It
- Will This Fail Emissions / State Inspection?
- Most Commonly Affected Vehicles
- Manufacturer-Specific Notes
- Real Owner Stories
- 2021 Ford F-150 5.0L with 30K miles
- 2005 Nissan 350Z (VQ35DE engine) at 115K miles
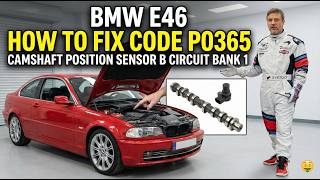
- 2004 BMW 325i (E46 with M54 engine) at 140K miles
- How to Prevent This Code From Triggering
- Frequently Asked Questions
- What does 'Bank 1' and 'Sensor B' mean?
- What are common misdiagnosis mistakes for P0364?
- My code came back after replacing the sensor. What now?
- Can I swap sensors to test if one is bad?
- Will P0364 clear itself?
- What is the difference between a Hall-effect and a Variable Reluctance (VR) sensor?
- Can a bad oil control solenoid (OCS) cause P0364?
- What happens if I ignore P0364?
- Key Takeaways
- 🎟️ Get 5% Off