
P0365 on 2017-2018 Buick Encore: Causes and Fixes for Camshaft Sensor 'B' Circuit
On a 2017-2018 Buick Encore, code P0365 often points to a weak battery causing sensor errors during startup, a known issue highlighted in GM Technical Service Bulletins. Before replacing the exhaust camshaft position sensor, have your battery professionally tested, as low voltage during cranking is a common cause. A new sensor costs about $25-$60.
- Always test the battery first for a P0365 code on a 2017-2018 Buick Encore, especially if codes P0335 or P0340 are also present.
- The 'B' in P0365 refers to the exhaust camshaft position sensor.
- Both the intake and exhaust camshaft position sensors are the same part number (GM 55566932), making sourcing a replacement and diagnostic swapping easier.
- Replacing the sensor is a DIY-friendly task requiring only basic tools, primarily an E10 Torx socket.
What's Unique About the 2017-2018 Buick ENCORE
General Motors has noted a specific sensitivity on this platform to low voltage conditions. Technical Service Bulletin #PIP5482B directly links code P0365, often appearing with P0335 (crankshaft sensor) and P0340 (intake camshaft sensor), to potential battery issues. This means a weak or failing battery can cause these codes to appear during engine cranking, leading to a misdiagnosis of faulty sensors when the battery is the actual root cause. The TSB notes this is especially common on vehicles with very low miles or those parked for extended periods.
Diagnostic Flowchart
Tap your situation to follow the diagnostic path that matches what you're seeing on this vehicle.
Symptoms You May Notice
- Check Engine Light is on
- Difficulty starting the engine, or crank-no-start
- Engine stalling or cutting out, especially at idle
- Rough idle
- Reduced engine power and poor acceleration
- Engine misfiring or hesitation
- In rare cases, no noticeable symptoms at all
- Replacing the camshaft position sensor when the root cause is a weak battery.
- Replacing the crankshaft position sensor instead of the camshaft position sensor.
- Assuming the sensor is bad without checking for a wiring harness issue, such as a known chafe point.
Most Likely Causes
- Weak or Failing Battery 🔴 High Probability → Shop Vehicle Battery As documented in GM TSB #PIP5482B, low voltage during engine start-up can cause the ECM to incorrectly flag faults with the cam and crank sensors. This is a known issue for this specific vehicle platform and its relatives (Chevy Trax, Sonic, Cruze). The TSB states this can happen after just two consecutive engine starts with a low battery state of charge.
How to confirm: Use a professional battery tester (like the GR8/EL-50313-20B mentioned in the TSB) to check the battery's health, state of charge, and cranking amps. A simple voltage check is often not sufficient, as a battery can show 12V but have a dead cell causing a voltage drop under load. If the battery passes, the TSB advises clearing the codes and attempting two starts to see if they return.
Typical fix: Replace the vehicle's battery.
Est. part cost: $150-$300 - Faulty Exhaust Camshaft Position Sensor 🟡 Medium Probability → Shop Engine Camshaft Position Sensor Sensors can fail over time due to heat cycles and vibration. On the 1.4L engine, both the intake and exhaust sensors are identical parts and are known to fail. They are held in by a single E10 Torx bolt. 🎬 Watch this step-by-step guide to replacing the sensors yourself.
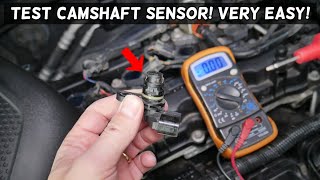
How to confirm: After confirming the battery is healthy, inspect the sensor. If no visible damage is found, a common diagnostic step is to swap the exhaust ('B') sensor with the intake ('A') sensor. Clear the codes and see if the fault follows the sensor (i.e., a P0340 code appears). If it does, the sensor is bad. Testing with a multimeter can be inconclusive without an oscilloscope. 🎬 See how to test a camshaft position sensor with a multimeter.
Typical fix: Replace the exhaust camshaft position sensor ('B' sensor). The sensor has a small O-ring that should be replaced with it.
Est. part cost: $25-$60 - Wiring or Connector Issue ⚪ Low Probability The engine harness on GM's 1.4L platform has known chafe points. TSB #16NA118 identifies a spot where the harness can rub against an ECM stud, potentially causing a short or open circuit. Wires near the exhaust can also melt.
How to confirm: Visually inspect the wiring harness and connector leading to the exhaust camshaft position sensor for any signs of damage, corrosion, melted plastic, or loose pins. Check for continuity and voltage at the connector with a multimeter. Pay close attention to the harness routing near the ECM. 🎬 Watch a mechanic diagnose and fix the P0365 fault code.
Typical fix: Repair the damaged wiring or clean/replace the connector.
Est. part cost: $5-$50
Rare But Worth Checking
- Timing Chain Problem: → Shop Engine Timing Chain A stretched timing chain or failing tensioner can cause the camshaft and crankshaft signals to go out of sync, triggering this code. This is usually accompanied by rattling noises from the engine, especially on cold starts.
- Faulty Engine Control Module (ECM): This is a very rare cause. The ECM should only be considered after all other possibilities, including the battery, sensor, and wiring, have been thoroughly ruled out. Sometimes an ECM software update is required per other service bulletins to fix diagnostic sensitivity.
Diagnosis Steps
- Read all stored fault codes with an OBD-II scanner. Note if P0335, P0340, or BCM codes like B1517 are also present.
- CRITICAL: Perform a professional battery health test. Check for voltage, state of charge, and cold cranking amps. A weak battery is a highly probable cause per TSB #PIP5482B. Do not trust a simple multimeter test if the battery is several years old.
- If the battery is healthy, locate the exhaust camshaft position sensor ('B' sensor) on the passenger side of the 1.4L engine, towards the firewall.
- Inspect the sensor's electrical connector and wiring for any visible damage, corrosion, or oil contamination. Check for known harness chafe points near the ECM bracket.
- As a simple test, try swapping the exhaust (rear) and intake (front) camshaft position sensors. They are identical parts. Clear the codes and run the engine. If the code changes to P0340 (Intake Sensor), you have confirmed the sensor itself is faulty.
- If the code returns as P0365 after the swap, the problem lies in the wiring or the ECM. Perform continuity tests on the signal, power, and ground wires from the sensor connector to the ECM.
- If wiring is confirmed good, the next step is typically to replace the exhaust camshaft position sensor.
- Clear the trouble codes and test drive the vehicle to see if the code returns. Some GM vehicles may require a camshaft position sensor relearn procedure, though it often happens automatically with driving.
- If the code persists, more advanced diagnostics are needed to check for timing chain issues or a potential ECM fault.
Parts You'll Likely Need
- Engine Camshaft Position Sensor
(OEM #55566932)— This is the most likely part to have failed if the battery is confirmed to be good. On the 1.4L engine, the intake and exhaust sensors are the same part number.
Trusted brands: ACDelco (GM Genuine), Delphi, Bosch, TRQ
OEM price range: $45-$65
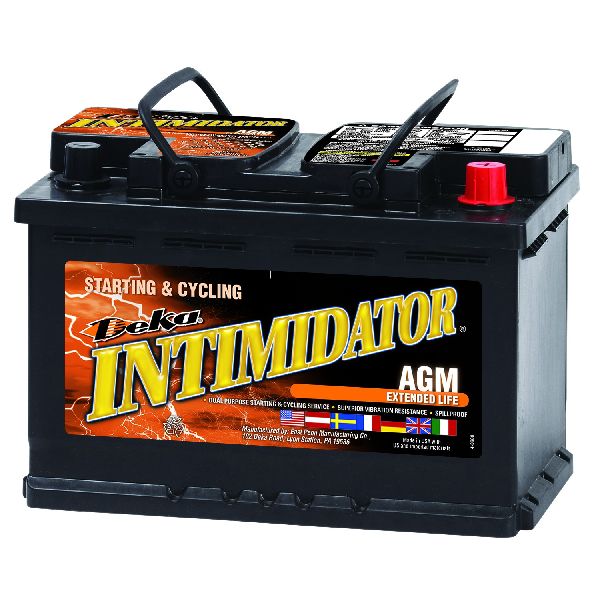
Aftermarket price range: $25-$50 - Automotive Battery — A weak battery is a very common cause for this code on the Buick Encore, as specified in manufacturer service bulletins.
Trusted brands: ACDelco, DieHard, Interstate
OEM price range: $200-$300
Aftermarket price range: $150-$250
Related Codes That Often Appear With This One
- P0335 — Crankshaft Position Sensor Circuit Malfunction. As noted in TSB #PIP5482B, this code often appears with P0365 due to a common underlying electrical issue, like a weak battery.
- P0340 — Camshaft Position Sensor 'A' (Intake) Circuit Malfunction. This code is also mentioned in TSB #PIP5482B and can be triggered by the same low-voltage conditions as P0365.
- B1517 — Battery Voltage Below Threshold. This code stored in the Body Control Module is a strong indicator that the vehicle has experienced a low voltage event, corroborating the battery as a likely cause for P0365.
Technical Service Bulletins (TSBs) & Recalls
- PIP5482B: Communicates the steps to diagnose and repair the concern of MIL on with DTC's P0335 P0340 P0365 set current or in history. The Technician is advised to Perform the Battery Inspection / Test.
- PIE0416A: Ends the need for information from the field on vehicles that have the condition of Malfunction Indicator Lamp Illuminated with DTCs P0335, P0340, or P0365 Set.
- 16NA118: Provides a procedure to reroute the engine harness because of possible chafing on the ECM stud, which could cause various electrical faults.
Platform-Specific Known Issues
- GM Technical Service Bulletin #PIP5482B specifically highlights that DTCs P0335, P0340, and P0365 can be set due to a low battery condition. It advises technicians to perform a full battery inspection before replacing any sensors.
- GM Technical Service Bulletin #PIE0416A was an engineering request to gather information on this issue, which was later superseded by the diagnostic advice in PIP5482B.
- A user on a Chevy Cruze forum with the same 1.4L engine experienced a crank-no-start condition that was resolved by unplugging the exhaust camshaft sensor, pointing towards a sensor or circuit failure. The car also had a B1517 battery voltage code stored, reinforcing the link between electrical issues and this fault.
Mechanic-Grade Diagnostic Values
- Camshaft Position Sensor Power Supply Voltage — expected: 4.5V to 5.0V DC. Failure: 0V or significantly lower voltage indicates an open in the power wire or an ECM fault.
- Camshaft Position Sensor Ground Circuit Resistance — expected: Near 0 Ohms. Failure: High resistance (more than a few ohms) indicates a poor ground connection, which can cause erratic sensor signals.
- Harness Continuity (Sensor Connector to ECM Connector) — expected: Below 1.0 Ohm. Failure: High resistance or an 'OL' (Over Limit) reading indicates a broken wire in the harness.
- Harness Short to Ground (Signal or Power Wire) — expected: 10 kOhms or higher (ideally OL). Failure: A low resistance reading indicates a short circuit to ground.
Hidden / Shadow Codes Worth Checking
- P0366: Camshaft Position Sensor 'B' Circuit Range/Performance. This indicates the sensor signal is present but irrational or out of expected range compared to the crankshaft sensor, pointing towards a timing issue or a failing sensor. (see via Standard OBD-II scanner.)
- P0367: Camshaft Position Sensor 'B' Circuit Low. This indicates the signal voltage is consistently too low, often caused by a short to ground or a failing sensor. (see via Standard OBD-II scanner.)
- P0368: Camshaft Position Sensor 'B' Circuit High. This indicates the signal voltage is consistently too high, often caused by a short to a voltage source. (see via Standard OBD-II scanner.)
Scan Tool Commands That Help
- GDS2 / Professional Scan Tool: Cam Crank Relearn (or CASE Relearn) — After replacing a camshaft or crankshaft position sensor, or after timing chain service. This procedure synchronizes the new sensor data with the ECM to ensure accurate timing calculations and prevent false misfire detection.
Wiring & Ground Locations
- Main Engine Ground (1.4L) — A ground wire running from the main engine wiring harness (near the ignition coil) to a bolt on the top of the engine valve cover.. A loose, corroded, or broken ground at this specific location is a known issue on this engine platform that can cause erratic sensor behavior and trigger camshaft sensor codes.
- CMP Sensor Connector Pinout — At the exhaust camshaft position sensor connector.. Knowing the pin functions is essential for testing. Pin 1 is the 5V power supply, Pin 2 is the signal wire, and Pin 3 is the ground provided by the ECM.
OEM Part Supersession History
55566932→55566932 (current)— No supersession found. This part number appears to be stable for the specified model years and beyond.
Heads up: The intake and exhaust camshaft position sensors are the same part number on this engine.
Helpful Videos

We Have This Part in Stock


The information in this article is provided for general reference and educational purposes only. Vehicle specifications, procedures, and part compatibility can vary by production date, trim level, and region. Always consult your vehicle's factory service manual and verify part numbers before purchasing or performing repairs. Safety-critical components such as airbags, seat belts, and braking systems should be installed by a qualified professional.
- Buick ENCORE:
- 🧭 Diagnostic Flowchart
- 🎬 Helpful Videos
- 🛍️ Shop This Part
- What's Unique About the 2017-2018 Buick ENCORE
- Symptoms You May Notice
- Most Likely Causes
- Rare But Worth Checking
- Diagnosis Steps
- Parts You'll Likely Need
- Related Codes That Often Appear With This One
- Technical Service Bulletins (TSBs) & Recalls
- Platform-Specific Known Issues
- Mechanic-Grade Diagnostic Values
- Hidden / Shadow Codes Worth Checking
- Scan Tool Commands That Help
- Wiring & Ground Locations
- OEM Part Supersession History
- 🎟️ Get 5% Off