
P0365 on 2016-2021 GMC Sierra 1500: Exhaust Camshaft Sensor Causes and Fixes
P0365 on a 2016-2021 GMC Sierra 1500 indicates a problem with the Bank 1 exhaust camshaft position sensor circuit. The most common fix is replacing the sensor itself, but wiring issues are also frequent, especially harness chafing, which is a known issue on these trucks. Expect to pay $25-$60 for an aftermarket sensor or $60-$100 for an OEM part.
- P0365 points to the exhaust camshaft position sensor circuit on the driver's side of the engine.
- The most likely fix is replacing the sensor, which is an accessible and affordable DIY job.
- Do not skip a thorough inspection of the wiring harness for damage, as this is a known problem on these trucks and is covered by manufacturer TSBs.
- Driving with this code can lead to poor performance and stalling, so it should be addressed promptly.
What's Unique About the 2016-2021 Gmc SIERRA 1500
The 2016-2021 Sierra spans two generations (K2XX: 2016-2018 and T1XX: 2019-2021), but the P0365 code is a common problem for both. A key issue across various GM trucks of this era, including the Sierra, is engine wiring harness chafing. GM has issued multiple Technical Service Bulletins (TSBs), like 21-NA-149, acknowledging that DTCs including P0365 can be triggered by the harness rubbing against specific points like the corner of the cylinder head, A/C components, or frame brackets. This makes a thorough wiring inspection just as important as checking the sensor itself, as simply replacing the sensor will not fix a wiring fault.
Diagnostic Flowchart
Tap your situation to follow the diagnostic path that matches what you're seeing on this vehicle.
Generation note: This range covers the end of the third generation (K2XX: 2016-2018) and the beginning of the fourth generation (T1XX: 2019-2021). While the engines (e.g., 5.3L L83/L84, 6.2L L86/L87) and sensor functions are similar, wiring harness routing and potential chafe points can differ. TSB 21-NA-149 specifically addresses harness chafing issues on 2019 and newer models, calling out contact points near the ECM/TCM bracket, upper control arm, and shock tower.
Symptoms You May Notice
- Check Engine Light is on
- Engine is hard to start or cranks but won't start
- Rough or uneven idle, sometimes fluctuating below 500 RPM
- Engine stalling, especially at low speeds or when coming to a stop
- Hesitation or loss of power during acceleration
- Reduced fuel economy, potentially by 5-10%
- Engine may enter a reduced power or "limp mode"
- Replacing the crankshaft position sensor. While related, P0365 is specific to the camshaft sensor circuit.
- Replacing the sensor without inspecting the wiring. Given the known TSBs about harness chafing, skipping a thorough wiring inspection can lead to the problem returning immediately or shortly after the repair.
- Replacing the sensor when the actual issue is a faulty VVT solenoid or low/dirty engine oil affecting the cam phaser's operation.
Most Likely Causes
- Faulty Exhaust Camshaft Position Sensor (Bank 1) 🔴 High Probability → Shop Engine Camshaft Position Sensor Sensors are exposed to extreme heat cycles and potential oil contamination from the valve cover area, leading to failure over time. It's a common failure point on many modern engines.
How to confirm: After checking wiring, test the sensor's output with a multimeter or oscilloscope. A simpler DIY method is to swap the exhaust sensor with the intake sensor on the same bank (if they are the same part number, which they often are on these engines) and see if the code changes to P0340 (Intake Sensor Circuit). If it does, the sensor is bad.
Typical fix: Replace the Bank 1 (driver's side) exhaust camshaft position sensor. 🎬 Watch: A breakdown of common causes and fixes for P0365 It is located on the front of the driver's side cylinder head.
Est. part cost: $25-$100 - Wiring Harness Damage or Poor Connection 🔴 High Probability This is a very common issue. GM TSB 21-NA-149 (superseding others) details numerous chafe points. Due to engine vibration, the harness can rub against the corner of the cylinder head, the generator (alternator) bracket, the drive belt idler pulley bracket, and the ECM/TCM bracket, causing shorts or open circuits. Sometimes wires break internally right at the connector from vibration.
How to confirm: Visually inspect the entire wiring harness leading to the sensor for any signs of rubbing, melting, or corrosion. Pay close attention to the specific chafe points listed in TSB 21-NA-149. Gently tug on the individual wires at the sensor connector; a broken wire may stretch or pull out. Check for 5V reference, ground, and signal wires at the connector with a multimeter.
Typical fix: Repair the damaged section of wire using solder and heat shrink. If damage is at the connector, replace the connector pigtail. Secure the harness away from sharp edges or hot components using zip ties and protective loom.
Est. part cost: $15-$50 - Dirty or Low Engine Oil / Faulty VVT Solenoid ⚪ Low Probability The camshaft position is controlled by phasers which use oil pressure, regulated by a VVT solenoid (also called a camshaft position actuator). If oil is low, dirty, or the wrong viscosity, the phaser may not respond correctly, causing a timing deviation that the sensor reports. The solenoid itself can also fail.
How to confirm: Check engine oil level and condition. If the oil is old or low, an oil change may be a good first step. The VVT solenoid can be tested for resistance or swapped with the intake solenoid to see if the code changes. 🎬 See these quick DIY methods to fix the P0365 code A scan tool can command the solenoid to check for a response.
Typical fix: Change engine oil and filter. If the solenoid is faulty, replace the Bank 1 exhaust VVT solenoid.
Est. part cost: $30-$80 for solenoid, $40-$100 for oil change. - Timing Chain or Phaser Issue ⚪ Low Probability → Shop Engine Timing Chain While less common for just a P0365, stretched timing chains or faulty camshaft phasers can cause the camshaft position to be out of sync with the crankshaft, triggering this code, often along with others like P0011 or P0014.
How to confirm: This is an advanced diagnosis. A scan tool capable of reading live data can show camshaft deviation angles. Physical inspection requires significant engine disassembly.
Typical fix: Requires replacement of the timing chain, guides, and tensioners, and potentially the camshaft phasers.
Est. part cost: $400-$1200
Rare But Worth Checking
- Faulty Engine Control Module (ECM): This is very rare and should only be considered after all other possibilities, including the sensor, wiring, oil system, and mechanical timing, have been exhaustively ruled out.
- Damaged Camshaft Reluctor Wheel: → Shop Engine Camshaft The reluctor wheel on the camshaft, which the sensor reads, can be damaged, dirty, or slip, causing incorrect signals. This is uncommon and typically requires significant engine disassembly to inspect.
Diagnosis Steps
- Scan the vehicle for all stored trouble codes and review freeze-frame data to see the conditions when the code was set.
- Check engine oil level and condition. If low or dirty, address this first as it can affect VVT operation.
- Visually inspect the Bank 1 (driver's side) exhaust camshaft position sensor and its connector for damage, oil leaks, or loose connections.
- Carefully inspect the wiring harness from the sensor back to the main loom. Per TSB 21-NA-149, pay extremely close attention to where the harness passes the corner of the cylinder head, alternator bracket, A/C lines, and the ECM bracket. Look for any signs of rubbing, melting, or breaks.
- If wiring looks good, use a multimeter with the key on, engine off. Check for a 5V reference, a good ground, and a signal wire at the sensor connector.
- If power and ground are present, test the sensor itself. An oscilloscope is best, but swapping the exhaust sensor with the intake sensor (P0340) is a reliable DIY method. Clear codes and see if P0340 appears. If so, the sensor is bad.
- If the sensor and wiring are confirmed good, investigate the VVT solenoid for proper operation before suspecting mechanical timing issues.
Parts You'll Likely Need
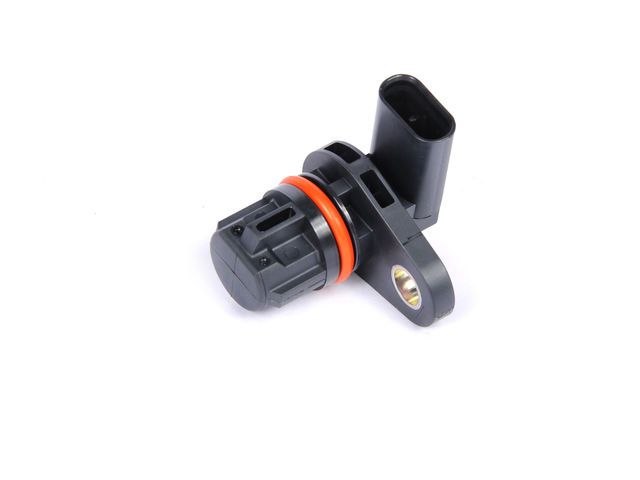
- Exhaust Camshaft Position Sensor (Bank 1)
(OEM #12686856 (or superseded by 12695331))— This is the most frequent cause of a P0365 code, failing due to heat and age.
Trusted brands: ACDelco, Delphi, NGK, Bosch
OEM price range: $60-$100
Aftermarket price range: $25-$60 - Camshaft Position Sensor Connector Pigtail
(OEM #ACDelco PT2628 (verify fitment))— If the wiring is damaged at the connector, or the lock tab is broken, replacing the pigtail is the standard repair.
Trusted brands: ACDelco, Dorman
OEM price range: $25-$40
Aftermarket price range: $15-$30
Related Codes That Often Appear With This One
- P0340 — Camshaft Position Sensor 'A' Circuit (Bank 1). This code relates to the intake camshaft sensor on the same bank. Seeing both could point to a shared wiring, power supply, or ground issue in the harness.
- P0369 — Camshaft Position Sensor 'B' Circuit Intermittent (Bank 1). This indicates the signal is cutting in and out, strongly suggesting a wiring issue like a loose connection or chafed wire rather than a completely failed sensor.
- P0014 / P0011 — These codes relate to camshaft position timing (over-advanced or over-retarded). If the sensor provides bad data, or if a VVT solenoid/phaser is malfunctioning, it can lead the ECM to set these timing correlation codes.
- P0335 — Crankshaft Position Sensor 'A' Circuit. TSB PIE0416A specifically groups P0335, P0340, and P0365, indicating GM was investigating a potential common cause for these codes, often pointing to widespread harness issues. [PIE0416A]
Technical Service Bulletins (TSBs) & Recalls
- PIT5677E: Engine Wire Harness Chafing / Various DTCs set. [PIT5677E]
- PIE0416A: Malfunction Indicator Lamp Illuminated with DTCs P0335, P0340, or P0365 Set. [PIE0416A]
- 21-NA-149: A more recent bulletin that replaces PIT5677E and others, detailing specific locations of engine wire harness chafing on 2019+ models.
Platform-Specific Known Issues
- TSB 21-NA-149 (superseding PIT5677E) is critical for this diagnosis. It highlights a widespread issue with engine wire harness chafing on 2019-2022 models. Specific inspection points for V8/V6 engines include the front corner of the left cylinder head, the drive belt idler bracket, and contact with the ECM/TCM bracket. The bulletin notes a harness retaining clip may have been removed during production, leading to the issue.
- TSB PIE0416A shows that GM was investigating the root cause of P0365, P0340, and P0335 codes on 2016-era vehicles, indicating this has been a known area of concern for some time. [PIE0416A]
Mechanic-Grade Diagnostic Values
- 5-Volt Reference Circuit Voltage — expected: 4.8-5.2 Volts DC. Failure: Voltage below 4.8V or above 5.2V indicates a short to ground, open/high resistance, or a short to voltage.
- Low Reference Circuit Resistance — expected: Less than 1.0 Ohm. Failure: Resistance greater than 1.0 Ohm indicates an open or high resistance in the ground circuit.
- Signal Circuit Voltage (Static) — expected: 4.8-5.2 Volts DC. Failure: Voltage significantly lower than 4.8V suggests a short to ground or open circuit; higher voltage suggests a short to power.
- Signal Circuit Voltage (Dynamic) — expected: A square wave switching between approximately 0V and 5V.. Failure: A flat line at 0V, 5V, or an intermediate voltage indicates a failed sensor or a circuit fault.
- VVT Solenoid (Camshaft Actuator) Resistance — expected: 8 to 13 Ohms. Failure: A reading outside this range, or that is erratic while tapping the solenoid, indicates a faulty solenoid.
Hidden / Shadow Codes Worth Checking
- P0366: Camshaft Position Sensor 'B' Circuit Range/Performance (Bank 1). This suggests the sensor is providing a signal, but it's irrational or out of the expected range, possibly due to a mechanical timing issue or a failing sensor. (see via Standard OBD-II scanner.)
- P0367: Camshaft Position Sensor 'B' Circuit Low Input (Bank 1). This indicates the signal voltage is stuck low, pointing to a short to ground or a failed sensor. (see via Standard OBD-II scanner.)
- P0368: Camshaft Position Sensor 'B' Circuit High Input (Bank 1). This indicates the signal voltage is stuck high, pointing to a short to voltage. (see via Standard OBD-II scanner.)
- P0369: Camshaft Position Sensor 'B' Circuit Intermittent (Bank 1). This strongly points to a wiring issue, like a loose connection, chafed wire, or moisture in a connector, causing the signal to drop out. (see via Standard OBD-II scanner.)
Scan Tool Commands That Help
- GDS2 / Tech2 (or equivalent professional scanner): Camshaft Position Actuator Test — Use this bidirectional control when you suspect a related VVT system issue (often with codes like P0011/P0014). It allows you to command the VVT solenoid to a specific duty cycle (e.g., 0% to 100%) and observe the change in camshaft angle on live data to confirm the solenoid and phaser are responding.
- GDS2 / Tech2 (or equivalent professional scanner): Camshaft Position Solenoid Test — This is a simpler on/off test of the VVT solenoid. It's a quick way to verify the solenoid clicks and the circuit is capable of being energized by the ECM.
- Professional Scanner: Crankshaft Position Variation Relearn — While primarily for the crankshaft sensor, some GM procedures require a relearn after significant timing-related work. If P0365 persists after a repair, ensuring the related crank relearn has been performed can rule out procedural issues.
Wiring & Ground Locations
- Sensor Connector Pinout — At the Bank 1 (Driver's Side) Exhaust Camshaft Position Sensor.. Knowing the pinout is essential for testing. For typical GM 3-wire sensors: Pin A is the 5V reference from the ECM, Pin B is the low reference (ground) from the ECM, and Pin C is the signal wire back to the ECM.
- G103 — On the front of the passenger side (Bank 2) cylinder head.. While on the opposite bank, this is a primary engine ground. A poor connection here can cause unpredictable electrical issues across the engine, potentially affecting sensor readings on Bank 1.
- G104 / Engine-to-Chassis Strap — Typically on the rear of the driver's side (Bank 1) cylinder head, often where a braided ground strap connects the engine to the firewall/chassis.. This is a critical ground path for the engine block. Corrosion or a broken strap at this location can cause the sensor's ground reference to become unstable, leading to signal errors and codes like P0365.
- G110 / G114 (2019+ models) — On the T1XX platform (2019-2021), these grounds are located on the body and engine harness.. GM issued an Engineering Information bulletin (PIE0548) to investigate loose connections at G110 (Body Harness) and G114 (Engine Harness) on 2019-2020 models. A loose ground here can cause a wide range of DTCs, including sensor circuit faults.
OEM Part Supersession History
12686856→12695331— Standard part revision by the manufacturer, likely for improved durability or performance.
Model Year Variations Within This Range
- 2016-2018 (K2XX Platform): These models use the 5.3L L83 or 6.2L L86 engines. Wiring chafe points are well-documented, but they may differ slightly from the later generation. Key grounds to check include G103 and G104.
- 2019-2021 (T1XX Platform): These models use the updated 5.3L L84 or 6.2L L87 engines. GM issued TSB 21-NA-149 for harness chafing and EI PIE0548 to investigate loose grounds at G110 and G114, which are specific concerns for this newer platform.
Helpful Videos

![How to Fix P0365 Engine Code in 3 Minutes [2 DIY Methods / Only $9.78]](https://img.youtube.com/vi/VaX_PBSaxo0/mqdefault.jpg)
We Have This Part in Stock


The information in this article is provided for general reference and educational purposes only. Vehicle specifications, procedures, and part compatibility can vary by production date, trim level, and region. Always consult your vehicle's factory service manual and verify part numbers before purchasing or performing repairs. Safety-critical components such as airbags, seat belts, and braking systems should be installed by a qualified professional.
- Gmc SIERRA 1500:
- 🧭 Diagnostic Flowchart
- 🎬 Helpful Videos
- 🛍️ Shop This Part
- What's Unique About the 2016-2021 Gmc SIERRA 1500
- Symptoms You May Notice
- Most Likely Causes
- Rare But Worth Checking
- Diagnosis Steps
- Parts You'll Likely Need
- Related Codes That Often Appear With This One
- Technical Service Bulletins (TSBs) & Recalls
- Platform-Specific Known Issues
- Mechanic-Grade Diagnostic Values
- Hidden / Shadow Codes Worth Checking
- Scan Tool Commands That Help
- Wiring & Ground Locations
- OEM Part Supersession History
- Model Year Variations Within This Range
- 🎟️ Get 5% Off