
P0366 on 2015-2022 Chevrolet Colorado: Exhaust Cam Sensor Causes and Fixes
P0366 on a 2015-2022 Colorado usually points to a wiring harness problem or a bad exhaust camshaft position sensor on Bank 1. A common cause is the engine harness chafing against the camshaft cover, which is documented in a GM Technical Service Bulletin. Inspecting the wiring is the first step before replacing the sensor.
- Before buying any parts for a P0366 code, thoroughly inspect the engine wiring harness where it passes over the passenger-side camshaft cover for signs of rubbing or damage.
- This code is specifically for the exhaust camshaft position sensor on the passenger side of the engine (Bank 1).
- P0366 is often accompanied by codes P0365, P0014, and P06A3, all of which can be caused by the same wiring harness issue.
- If the wiring is intact, the most likely cause is a failed camshaft position sensor, which is a relatively inexpensive and accessible part to replace for a DIYer.
What's Unique About the 2015-2022 Chevrolet COLORADO

On this generation of the Chevrolet Colorado, particularly with the 3.6L V6 engine, the P0366 code is strongly associated with a known wiring harness issue. General Motors issued Technical Service Bulletin #18-NA-307, which describes how the engine harness can rub (chafe) against the sharp edge of the camshaft cover or cylinder head, eventually damaging the wires inside. This can trigger P0366 and other related codes even when the sensor itself is not faulty, making a thorough wiring inspection a critical first step that is not always necessary on other vehicles.
Diagnostic Flowchart

Tap your situation to follow the diagnostic path that matches what you're seeing on this vehicle.
Symptoms You May Notice

- Check Engine Light (MIL) is on
- Lack of engine power or poor acceleration
- "Reduced Power" message displayed on the Driver Information Center (DIC)
- Rough or unstable idle
- StabiliTrak warning light may illuminate, often accompanied by a "Service StabiliTrak" message
- Engine is difficult to start or cranks longer than usual
- Engine stalling
- Replacing the camshaft position sensor without first inspecting the wiring harness. The chafing issue is very specific to this platform and is a more likely cause than sensor failure.
- Confusing the camshaft position sensor with the camshaft position actuator solenoid (also known as a VVT solenoid). They are different parts located near each other. P0366 points to the sensor, while codes like P0014 can be caused by either the sensor or the actuator.
- Replacing the wrong sensor. 🎬 Watch: Identify the exact sensor locations on your 3.6L engine 'Bank 1' is the passenger side, and 'Sensor B' is the exhaust camshaft sensor. Ensure the correct sensor is being diagnosed and replaced.
Most Likely Causes

- Chafed or Damaged Engine Wiring Harness 🔴 High Probability As documented in TSB #18-NA-307, the engine wiring harness is routed in a way that it can rub against the sharp edge of the passenger-side camshaft cover or cylinder head, causing wires to short or break. This is the most likely cause for this specific vehicle and code.
How to confirm: Visually inspect the engine wiring harness where it passes over the passenger-side (Bank 1) camshaft cover. Pull back the plastic conduit to check the individual wires inside for signs of rubbing, exposed copper, or breaks. Some owners report feeling a 'dent' or 'flat spot' in the harness even when external damage isn't visible.
Typical fix: Repair the damaged wires according to manufacturer procedures (solder and heat shrink is recommended). The TSB specifies protecting the harness by wrapping all contact points with a double layer of Woven Polyester Electrical Tape (PET). Finally, use zip ties to secure the harness and pull it away from the sharp edge to prevent future contact.
Est. part cost: $5-$20 for tape and zip ties. - Faulty Exhaust Camshaft Position Sensor (Bank 1) 🟡 Medium Probability → Shop Engine Camshaft Position Sensor Sensors can fail over time due to extreme heat cycles and engine vibration. Oil leaks from the valve cover can also contaminate the sensor and its connector, causing failure.
How to confirm: After confirming the wiring is intact, you can test the sensor. A common method is to swap the Bank 1 exhaust sensor with the Bank 1 intake sensor (they are different parts, so this is not possible). A better method is to swap the Bank 1 exhaust sensor with the Bank 2 exhaust sensor (driver's side). If the code changes to P0391 (Exhaust Cam Sensor 'B' Bank 2), the sensor is faulty. A multimeter or oscilloscope can also test the sensor's output signal.
Typical fix: Replace the Bank 1 exhaust camshaft position sensor.
Est. part cost: $30-$60 - Loose or Corroded Connector ⚪ Low Probability The connector is exposed to engine heat and vibration, which can cause it to become loose or allow moisture to enter, leading to corrosion.
How to confirm: Disconnect the sensor and inspect the connector pins and the sensor pins for corrosion, moisture, or damage. Ensure it clicks securely when reconnected.
Typical fix: Clean the connector terminals with electrical contact cleaner. If the connector housing or lock is broken, it may need to be replaced.
Est. part cost: $0-$25
Rare But Worth Checking
- Damaged Reluctor Wheel: The reluctor wheel (or tone ring) on the camshaft, which the sensor reads, can be damaged during major engine work. If the code appears immediately after a timing chain replacement, this is a possibility.
- Stretched or Misaligned Timing Chain: → Shop Engine Timing Chain While the 3.6L LGZ is less prone to the timing chain issues of its predecessor (the LLT), significant stretching can still occur, causing the camshaft timing to be out of sync with the crankshaft, which can trigger performance-related cam codes. This is usually accompanied by other timing correlation codes like P0008 or P0017.
- Faulty Engine Control Module (ECM): This is very rare. The ECM should only be considered after all other possibilities, including wiring and the sensor itself, have been exhaustively ruled out.
Diagnosis Steps
- Read all diagnostic trouble codes (DTCs) with an OBD-II scanner. Note any other codes present, especially P0365, P0014, P06A3, P16A1, or P16A2.
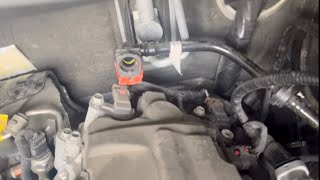
- Crucial Step for this Vehicle: Carefully inspect the engine wiring harness where it runs across the passenger-side (Bank 1) camshaft cover, as detailed in TSB #18-NA-307. Pull the harness away from the engine and peel back the protective conduit. Look for any signs of chafing, abrasion, or exposed copper wires. The damage may be on the underside of the harness and not immediately visible.
- If damage is found, repair the wires using appropriate methods (solder, heat shrink). Wrap the repaired section and surrounding contact points with a double layer of durable woven polyester electrical tape (PET tape). Use zip ties to secure the harness away from the sharp edge of the camshaft cover to prevent recurrence.
- If no wiring damage is visible, inspect the sensor's electrical connector for loose connections, corrosion, or oil contamination. Clean with electrical contact cleaner and ensure it is securely fastened.
- Test the sensor. A reliable method is to swap the Bank 1 exhaust sensor with the Bank 2 exhaust sensor (driver's side). Clear the codes, run the engine, and see if the fault code moves to Bank 2 (e.g., P0391). If it does, the original sensor is bad.
- If the code returns and wiring/sensor are confirmed good, more advanced diagnostics may be needed, such as checking the sensor signal with an oscilloscope or verifying timing chain alignment.
Parts You'll Likely Need
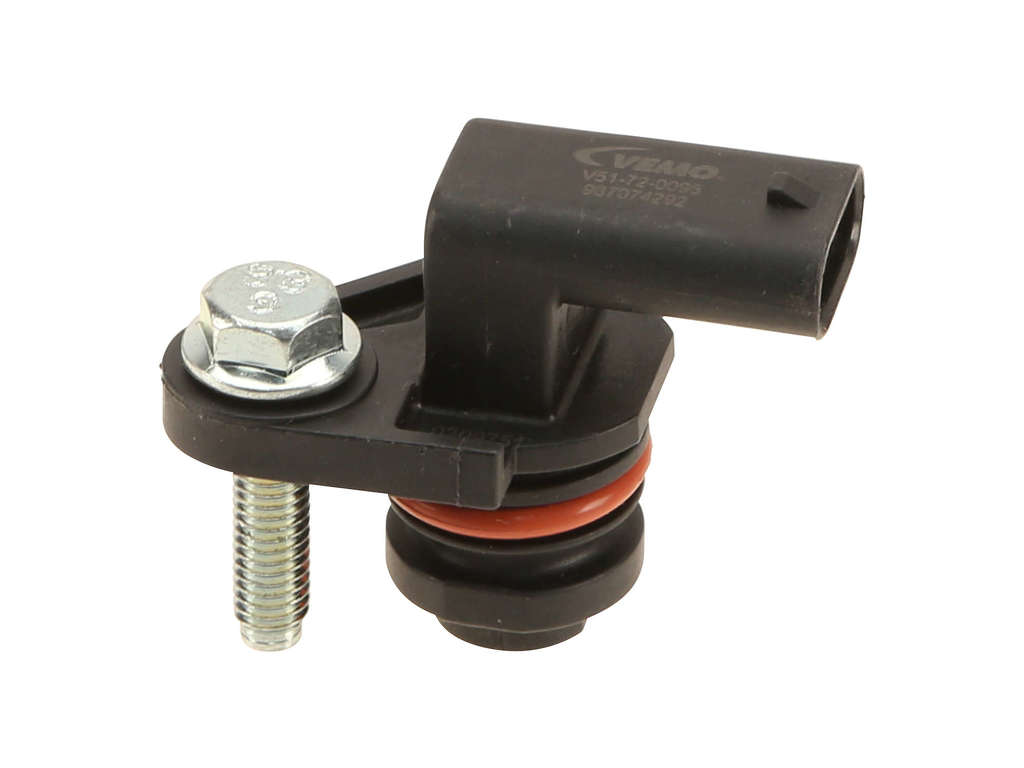
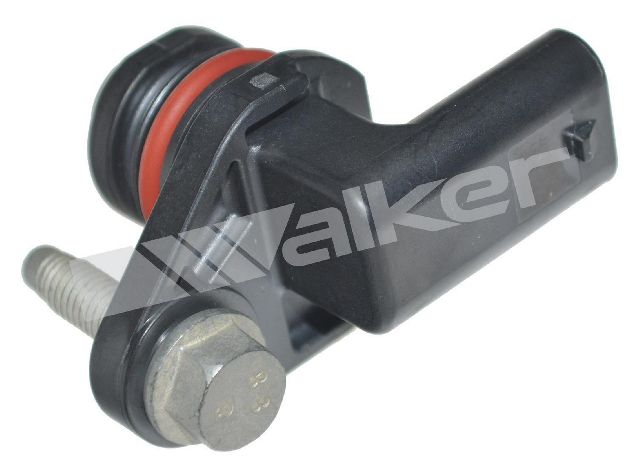
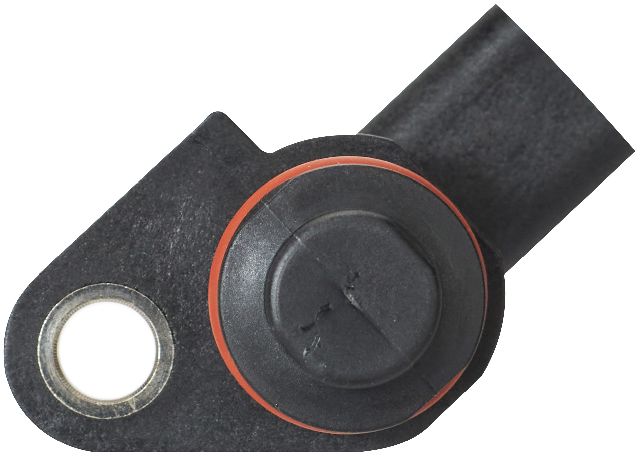
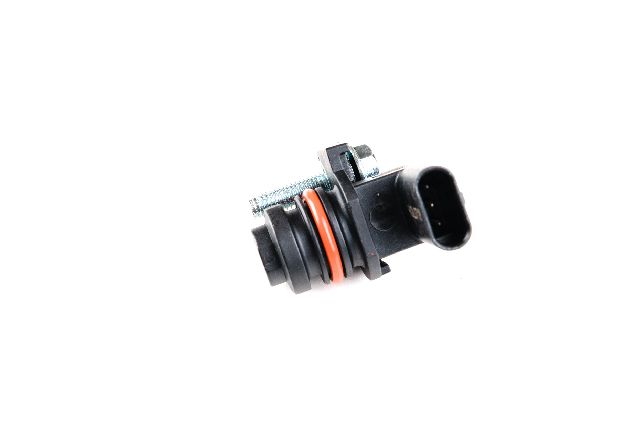
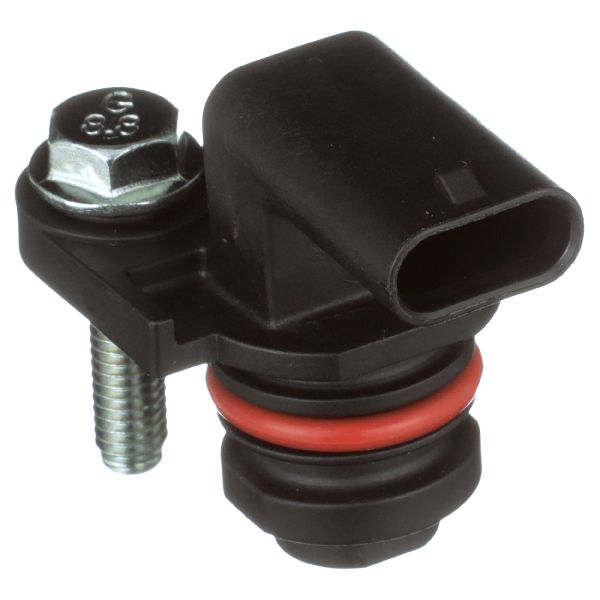
- Exhaust Camshaft Position Sensor (Bank 1)
(OEM #12688385)— This is the sensor that triggers the code. It is replaced if it fails testing after the wiring harness is confirmed to be intact. Note: This is the EXHAUST sensor for Bank 1 (Passenger Side).
Trusted brands: ACDelco (GM Genuine), Delphi, NTK/NGK
OEM price range: $40-$60
Aftermarket price range: $25-$45 - Intake Camshaft Position Sensor (Bank 1)
(OEM #12688384)— Listed for clarification. This is the INTAKE sensor. It is a different part from the exhaust sensor and is not the cause of P0366, but is often confused.
Trusted brands: ACDelco (GM Genuine), Delphi
OEM price range: $40-$60
Aftermarket price range: $25-$45 - Woven Polyester Electrical Tape (PET Tape) — Required to properly repair and protect the wiring harness from the chafing issue described in TSB #18-NA-307. It is more durable and abrasion-resistant than standard vinyl electrical tape.
Trusted brands: Tesa, 3M
OEM price range: $5-$15
Aftermarket price range: $5-$15
Related Codes That Often Appear With This One
- P0365 — This code indicates a general circuit malfunction for the same sensor, while P0366 points to a performance/range issue. They often appear together when there's a wiring problem.
- P0014 — This code relates to 'Exhaust Camshaft Position Timing - Over-Advanced (Bank 1)'. A faulty sensor signal can cause the ECM to misinterpret the camshaft's timing, triggering this code. It is also listed in TSB 18-NA-307.
- P06A3 — This code indicates an issue with a '5V Reference Circuit'. The camshaft position sensor is on a 5-volt reference circuit, so a short in the harness can trigger this code simultaneously. It is explicitly mentioned in TSB 18-NA-307.
- P16A1 / P16A2 — These codes relate to a 'Sensor Communication Circuit'. Later revisions of TSB 18-NA-307 added these codes as potential results of the same wiring harness chafing issue.
Technical Service Bulletins (TSBs) & Recalls
- 18-NA-307: Describes a procedure to locate and repair a short in the engine wiring harness that causes codes P0014, P0365, P0366, P06A3, P16A1, and P16A2, along with symptoms like lack of power, rough idle, and Stabilitrak warnings.
Platform-Specific Known Issues
- TSB #18-NA-307: This bulletin is the most critical piece of information for this code. It explicitly calls out that the engine wiring harness can chafe on the camshaft cover or cylinder head, causing a variety of DTCs including P0366, P0365, P0014, P06A3, P16A1, and P16A2. The fix involves repairing and rerouting the harness to prevent future damage.
Mechanic-Grade Diagnostic Values
- Camshaft Position Sensor 3-Pin Connector Voltage — expected: With Key On, Engine Off (KOEO): Pin 1 (5V Reference) to Pin 2 (Low Reference/Ground) should read ~5.0 Volts. Pin 2 to chassis ground should show good continuity (<1 ohm).. Failure: A reading of 0V on the reference circuit indicates a wiring break or ECM fault. No continuity on the ground pin indicates a bad ground path.
- Camshaft Position Sensor Signal (Oscilloscope) — expected: A clean square wave that switches between approximately 0V and 5V. The frequency of the wave should increase proportionally with engine RPM.. Failure: A missing signal, a noisy/erratic waveform, or a signal that is stuck high or low points to a failed sensor or a short/open in the signal wire.
Scan Tool Commands That Help
- GDS2 (GM Global Diagnostic System 2): Camshaft Position Actuator Solenoid Control — After verifying wiring and sensor integrity, a technician can command the Bank 1 exhaust cam phaser to a specific angle. While commanding the change, the technician should watch the live data from the P0366 sensor. If the phaser moves but the sensor's reported angle is erratic or doesn't change, it strongly confirms a faulty sensor. If the sensor reading is stable but the phaser doesn't achieve the commanded angle, the problem is likely with the actuator solenoid or oil pressure.
Wiring & Ground Locations
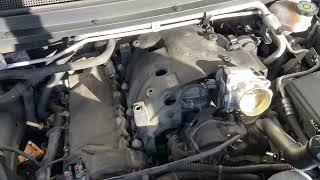
- B22B Exhaust Camshaft Position Sensor (Bank 1) — On the rear of the passenger side (Bank 1) cylinder head. Access is tight and may require removing the engine cover and insulation.. This is the specific sensor that generates the P0366 code.
- Engine Harness Chafe Point — The wiring harness section that passes over the top of the passenger side (Bank 1) camshaft cover. Some owners have also found chafing on a nearby A/C line bracket.. This is the location of the wiring damage described in TSB #18-NA-307, which is the most common cause of P0366 on this vehicle.
- G107 — A primary engine-to-chassis ground point, typically located on the right side (passenger side) of the engine block.. While the sensor's low reference is provided by the ECM, the ECM itself relies on clean chassis grounds. A corroded or loose G107 can cause a variety of difficult-to-diagnose sensor and module communication errors, including intermittent sensor performance codes.
Real Owner Repair Stories
- ColoradoFans.com forum user (2018 Chevrolet Colorado) — Check Engine Light with codes P0366, P0365, and P0340.
❌ Tried (didn't work) Initial dealer diagnosis replaced the camshaft position sensor, but the codes returned.
✅ What actually fixed it The final repair involved finding and repairing a chafed wire in the engine harness near the passenger side valve cover, exactly as described in TSB 18-NA-307. This confirmed the wiring, not the sensor, was the root cause. - Forum user report (2017 Chevrolet Colorado) — P0366, Reduced Power message.
❌ Tried (didn't work) Visual inspection of the harness-to-cam-cover area showed no obvious damage.
✅ What actually fixed it A more thorough inspection revealed the wiring harness was rubbing against a metal A/C line bracket adjacent to the cam cover. The insulation was worn through, causing an intermittent short. The fix was to repair the damaged wire and secure the harness away from the bracket.
OEM Part Supersession History
12716245→12688385— Part consolidation or minor revision.
Heads up: There is some confusion in parts catalogs, with some showing the supersession in reverse. 12688385 is the currently accepted GM Genuine part number for the Bank 1 Exhaust sensor. The ACDelco Professional aftermarket equivalent is often 213-4701.
Model Year Variations Within This Range
- 2015-2022: TSB #18-NA-307 was revised multiple times, with the latest version in April 2023 extending the model year coverage to 2022 and adding DTCs P16A1/P16A2 to the list of potential codes caused by the harness chafing. The fundamental issue and repair procedure remain the same across all years.
Helpful Videos
We Have This Part in Stock

The information in this article is provided for general reference and educational purposes only. Vehicle specifications, procedures, and part compatibility can vary by production date, trim level, and region. Always consult your vehicle's factory service manual and verify part numbers before purchasing or performing repairs. Safety-critical components such as airbags, seat belts, and braking systems should be installed by a qualified professional.
- Chevrolet COLORADO:
- 🧭 Diagnostic Flowchart
- 🎬 Helpful Videos
- 🛍️ Shop This Part
- What's Unique About the 2015-2022 Chevrolet COLORADO
- Symptoms You May Notice
- Most Likely Causes
- Rare But Worth Checking
- Diagnosis Steps
- Parts You'll Likely Need
- Related Codes That Often Appear With This One
- Technical Service Bulletins (TSBs) & Recalls
- Platform-Specific Known Issues
- Mechanic-Grade Diagnostic Values
- Scan Tool Commands That Help
- Wiring & Ground Locations
- Real Owner Repair Stories
- OEM Part Supersession History
- Model Year Variations Within This Range
- 🎟️ Get 5% Off