
P0369 on 2016-2017 Honda Pilot: Camshaft Sensor Interruption, Causes, and Fixes
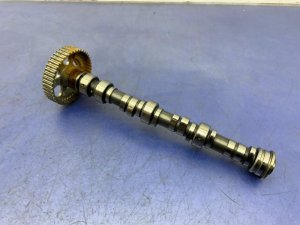
On a 2016-2017 Honda Pilot, P0369 is rarely just a bad sensor. It's a known issue where excessive camshaft movement damages the sensor. The proper fix, confirmed by Honda TSBs, requires replacing the camshaft, thrust cover, and sensor, making it a significant mechanical repair.
- P0369 on a 2016-2017 Pilot is a serious code indicating a likely mechanical engine problem, not just a sensor failure.
- Diagnosis MUST include inspecting the CMP sensor for physical damage and measuring camshaft end play.
- Do not simply replace the sensor without checking for the underlying mechanical issue, or the problem will reoccur.
- The correct repair for the common mechanical failure involves replacing the camshaft, thrust cover, and sensor together.
- Due to the complexity of the diagnosis and repair (involving timing belt removal), this is a job for a professional technician.
What's Unique About the 2016-2017 Honda PILOT

For this specific generation of Honda Pilot, code P0369 is a well-documented and serious issue that goes beyond a simple electrical fault. Honda issued Technical Service Bulletins (TSBs) like ATS161201 and A18010I acknowledging that the code is a symptom of a mechanical failure. The root cause is that the camshaft thrust cover's surface roughness is out of specification, leading to premature wear. This wear allows excessive side-to-side movement of the camshaft (end play), causing the reluctor wheel (or timing gear) on the camshaft to physically contact and destroy the CMP sensor, leading to the intermittent signal. Simply replacing the sensor will not solve the problem long-term, as the new sensor will also be damaged.
Diagnostic Flowchart

Tap your situation to follow the diagnostic path that matches what you're seeing on this vehicle.
Symptoms You May Notice
- Check Engine Light (MIL) is on, may be steady or flashing
- Reduced engine power or 'limp mode'
- Engine may hesitate, stumble, or stall, especially during acceleration
- Rough or unstable idling
- Multiple other warning lights may appear simultaneously, such as for emissions, power steering, and hill start assist.
- Replacing only the Camshaft Position Sensor without checking for excessive camshaft end play. The new sensor will likely be damaged and the code will return.
- Replacing only the camshaft thrust cover. Honda's TSB specifically warns that the camshaft will 'machine the new thrust cover again', leading to a repeat failure.
Most Likely Causes

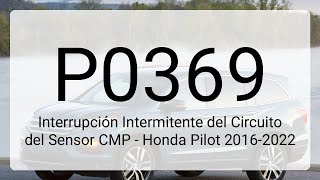
- Excessive Camshaft End Play Damaging the CMP Sensor 🔴 High Probability → Shop Engine Camshaft Position Sensor A known manufacturing issue where the camshaft thrust cover's surface roughness is out of spec, leading to premature wear and excessive movement of the camshaft. This is documented in Honda TSBs ATS161201 and A18010I. 🎬 Watch: A detailed breakdown of the P0369 diagnostic process.
How to confirm: A technician must measure the camshaft end play using a dial indicator. The service limit for camshaft thrust clearance (end play) is 0.30 mm (0.0118 in). Readings exceeding this confirm the mechanical issue. The CMP sensor for Bank 1 Exhaust should be removed and inspected for physical damage, such as scoring, wear, or plastic shavings from being hit by the timing gear. Visible damage is a strong indicator of this mechanical failure.
Typical fix: As per Honda TSBs, the only correct fix is to replace the affected camshaft, the camshaft thrust cover, and the damaged CMP sensor as a set. Honda specifically warns that replacing only the thrust cover will result in a repeat failure as the camshaft will 'machine the new thrust cover again'. The camshaft pulley should also be inspected for damage and replaced if necessary.
Est. part cost: $400-$800 - Failed Camshaft Position (CMP) Sensor 🟡 Medium Probability → Shop Engine Camshaft Position Sensor While often a symptom of the larger mechanical issue, the sensor itself can fail independently due to heat and age. However, it should never be replaced without first checking for physical damage and measuring camshaft end play to rule out the TSB-related issue.
How to confirm: After confirming camshaft end play is within specification and the sensor shows no physical damage, test the sensor's circuit. With the ignition ON, check for 5V reference and 5V on the signal wire, and battery voltage (approx. 12.6V) at the ground terminal when testing against the battery positive. An oscilloscope is the best tool to verify the square wave signal from the sensor while the engine is running.
Typical fix: Replace the Bank 1 exhaust camshaft position sensor.
Est. part cost: $40-$100 - Wiring or Connector Issue ⚪ Low Probability Factory engine grounds can be insufficient or attached to painted surfaces, potentially causing intermittent electrical issues.
How to confirm: Visually inspect the wiring harness and connector for the CMP sensor for any signs of damage, corrosion, or loose pins. Check for a blown fuse, often labeled 'SNS' or 'sensor' in the fuse box. Perform a continuity test on the ground, power, and signal wires between the sensor connector and the PCM.
Typical fix: Repair the damaged wiring or replace the connector pigtail. Improving the main engine grounds is also a recommended preventative measure.
Est. part cost: $15-$50
Rare But Worth Checking
- Powertrain Control Module (PCM) Fault: → Shop Engine Control Module (ECM) This is extremely rare. The PCM should only be considered as the cause after all other possibilities, especially the mechanical TSB, have been thoroughly ruled out. In some other Honda models, a software update has been issued to fix an overly sensitive PCM logic for P0369, but this is not the primary cause for the Pilot.
- Stretched or Slipped Timing Belt: → Shop Engine Timing Chain While not common, a timing belt that has stretched or slipped a tooth can cause the camshaft and crankshaft signals to be out of sync, which the PCM may interpret as an intermittent sensor signal. This would typically be accompanied by other performance issues and possibly other timing-related codes.
Diagnosis Steps
- Read the trouble codes with an OBD-II scanner. Confirm P0369 is present and note any other codes.
- Carefully remove the Bank 1 'B' (exhaust) Camshaft Position Sensor, located on the rear cylinder head (near the firewall).
- Inspect the sensor for any signs of physical damage, such as scrape marks, wear, or plastic shavings. Damage is a strong indicator of the camshaft end play issue.
- If the sensor is damaged, the next step is to measure camshaft end play with a dial indicator to confirm it is out of specification. The service limit is 0.30 mm (0.0118 in). This is the critical step to confirm the mechanical failure described in TSB ATS161201.
- If end play is excessive, follow the TSB repair: replace the camshaft, camshaft thrust cover, and the CMP sensor. This requires timing belt removal. Inspect the camshaft pulley for collateral damage as well.
- If the sensor is NOT damaged and end play is within spec, proceed with electrical diagnosis. Inspect the sensor's wiring and connector for damage, corrosion, or loose connections.
- Check for a blown fuse related to the sensor circuit, which may be labeled 'SNS' or 'Sensor'.
- If wiring and fuse are good, test the sensor circuit. With the ignition on, you should have a 5V reference, 5V on the signal wire, and a good ground. Use an oscilloscope to observe the sensor's square wave pattern while cranking the engine. Dropouts or an inconsistent pattern indicate a faulty sensor or wiring.
- Clear the codes and perform a test drive, ideally under the same conditions recorded in the freeze frame data, to ensure the repair was successful.
Parts You'll Likely Need
- Camshaft (Bank 1) — Required if excessive camshaft end play is confirmed, as per Honda TSBs. The original camshaft surface contributes to the wear.
Trusted brands: Honda Genuine
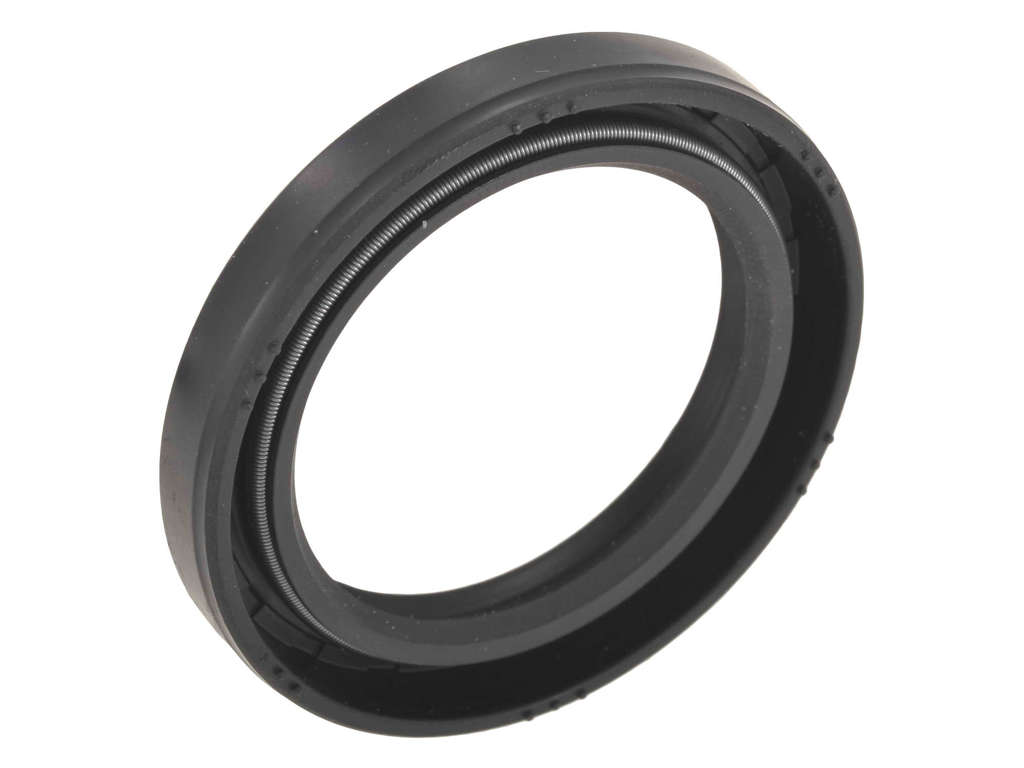
OEM price range: $300-$500 - Camshaft Thrust Cover
(OEM #12240-RNA-A00)— The root cause of the wear issue due to out-of-spec surface roughness; must be replaced with the camshaft.
Trusted brands: Honda Genuine
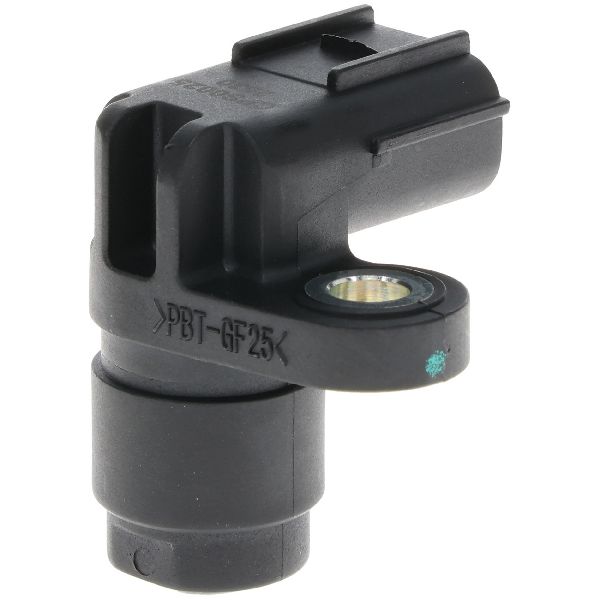
OEM price range: $25-$50 - Camshaft Position Sensor (Bank 1, Exhaust)
(OEM #37510-5A2-A01)— Gets physically damaged by the camshaft movement or fails electrically.
Trusted brands: Honda Genuine, Denso, NGK/NTK
OEM price range: $70-$120
Aftermarket price range: $40-$80
Technical Service Bulletins (TSBs) & Recalls

- A18010I: ServiceNews article confirming reports of reduced engine power, DTC P0369, and excessive camshaft end play on 2016-17 Pilots and 2017 Ridgelines.
- ATS161201: Tech line summary identifying the root cause as out-of-spec camshaft thrust cover surface roughness, leading to excessive end play and damage to the CMP sensor. Mandates replacing the cam, cover, and sensor together.
Platform-Specific Known Issues
- Honda has issued multiple Technical Service Bulletins (TSBs) and tech line summaries (A18010I, ATS161201) regarding P0369 on 2016-2017 Pilots. These documents confirm the cause is often excessive camshaft end play due to an out-of-spec camshaft thrust cover, which leads to the CMP sensor being physically damaged. An owner complaint filed with the NHTSA (ODI #11719919) corroborates this, stating the technician found the 'CMP SENSOR TO HAVE WEAR FROM TIMING GEAR DUE TO CAMSHAFT MOVING SIDE TO SID[E]'. A repair shop invoice for a 2017 Pilot with 78k miles also confirms the diagnosis: 'FOUND FRONT CAMSHAFT THRUST COVER WORN OUT AND CAMSHAFT POSITION SENSOR WORN OUT DUE TO CAMSHAFT MOVEMENT'.
Mechanic-Grade Diagnostic Values
- Camshaft Thrust Clearance (End Play) — expected: Standard: 0.030 - 0.200 mm (0.0012 - 0.0079 in). Failure: Service Limit: 0.30 mm (0.0118 in). A measurement exceeding this limit confirms the mechanical failure described in the TSB.
- CMP Sensor Circuit Voltage (at sensor connector, ignition ON) — expected: 5V on the reference wire, 5V on the signal wire (relative to battery ground).. Failure: Readings outside the expected 5V range indicate a fault in the wiring or the PCM.
- CMP Sensor Ground Circuit (at sensor connector, ignition ON) — expected: Approximately 12.6V when probing the ground terminal with the red lead and the battery positive terminal with the black lead.. Failure: A reading significantly lower than battery voltage indicates a poor ground connection.
Scan Tool Commands That Help
- Honda Diagnostic System (HDS): DTC Clear / Reset — After a repair, the HDS tool is used to clear the P0369 code. The vehicle is then idled for at least 10 seconds to see if the DTC reappears, confirming if the fix was successful or if the fault is persistent.
Wiring & Ground Locations
- Main Engine Ground — The main factory ground strap connects from the chassis (often near the battery) to the engine block or transmission. On some Honda V6 engines, a key ground is located on the thermostat housing.. A poor or corroded main engine ground can cause a variety of intermittent electrical issues, including erratic sensor signals. Some owners have found the factory ground point connected to a painted surface, which can be improved by scuffing the paint to ensure a bare metal connection.
- Cylinder Head Ground — A ground wire is typically bolted directly to the cylinder head.. Since the CMP sensor is mounted on the cylinder head, a solid ground connection at this location is critical for stable sensor operation. An unreliable ground here could contribute to the 'intermittent interruption' described by the P0369 code.
Real Owner Repair Stories
- Reddit user comment in r/hondapilot (2016 or 2017 Honda Pilot) — Check Engine Light with P0369, vehicle entered 'limp mode'.
❌ Tried (didn't work) The user warns against just replacing the sensor, implying this is a common but incorrect first step.
✅ What actually fixed it The user, identifying as a technician, states the fix is to replace the camshaft, the thrust plate (cover), and the damaged sensor, confirming the TSB procedure. They note that the cam sensor gets 'chewed up by the cam gear because of a camshaft that gets worn out of spec from the trust plate'.
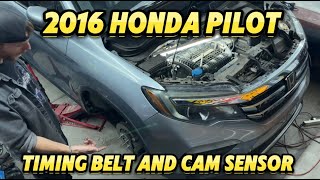
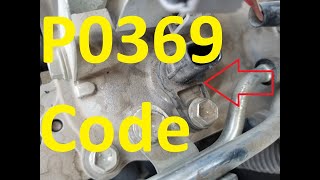
Helpful Videos


Used OEM Parts in Stock
New Aftermarket Parts Available


The information in this article is provided for general reference and educational purposes only. Vehicle specifications, procedures, and part compatibility can vary by production date, trim level, and region. Always consult your vehicle's factory service manual and verify part numbers before purchasing or performing repairs. Safety-critical components such as airbags, seat belts, and braking systems should be installed by a qualified professional.
- Honda PILOT:
- 🧭 Diagnostic Flowchart
- 🎬 Helpful Videos
- 🛍️ Shop This Part
- What's Unique About the 2016-2017 Honda PILOT
- Symptoms You May Notice
- Most Likely Causes
- Rare But Worth Checking
- Diagnosis Steps
- Parts You'll Likely Need
- Technical Service Bulletins (TSBs) & Recalls
- Platform-Specific Known Issues
- Mechanic-Grade Diagnostic Values
- Scan Tool Commands That Help
- Wiring & Ground Locations
- Real Owner Repair Stories
- 🎟️ Get 5% Off