
OBD-II Code P0376: Timing Reference High Resolution Signal 'B' Too Many Pulses
What P0376 means, why it triggers, and how to fix it like a pro
- P0376 triggers when the engine computer counts too many timing pulses from sensor 'B', causing immediate drivability issues like stalling and hard starts.
- The two most common culprits are a failed camshaft/crankshaft position sensor or a chafed wiring harness shorting out against a metal engine bracket.
- Driving with P0376 is unsafe due to the high risk of sudden stalling in traffic and guarantees a $1,200+ catalytic converter replacement if misfires persist.
- Never replace the sensor without testing first; verify the 5V reference, check for a solid ground, and ensure alternator AC ripple is below 0.5V to rule out electrical noise.
What Does P0376 Mean?
The Powertrain Control Module (PCM) is receiving an erratic signal from a primary engine speed and position sensor. Specifically, code P0376 indicates the computer counts more pulses from the 'B' timing reference sensor than mathematically possible within a specific timeframe. This sensor is typically a crankshaft position sensor (CKP), a camshaft position sensor (CMP), or an optical sensor in a diesel injection pump. This extra electrical 'noise' disrupts the precise timing required for fuel injection and spark, causing immediate engine performance failures.
Technical definition: The SAE/OBD-II definition is "Timing Reference High Resolution Signal 'B' Too Many Pulses". The PCM detects that engine position sensor 'B' is producing a signal with a pulse count exceeding the predetermined threshold for a specific number of engine revolutions. On high-resolution diesel systems, which generate up to 64 pulses per camshaft revolution, signal integrity is critical; any electrical interference registers as an extra pulse.
Can I Drive With P0376?
Yes, but risky You can physically drive the vehicle, but it is highly unsafe. Expect severe drivability issues including rough idling, sudden stalling in traffic, and reduced power. Continuing to drive with incorrect engine timing guarantees long-term damage to the catalytic converter, adding $1,200 to $2,800 to your final repair bill. Stop driving and diagnose the issue immediately to prevent being stranded.
Common Causes
- Faulty Camshaft or Crankshaft Position Sensor (Very Common) — Internal electronics degrade from extreme heat and engine vibration, causing the sensor to output erratic, noisy signals that the PCM counts as extra pulses.
- Damaged or Chafed Wiring Harness (Common) — Wires fray, melt against hot exhaust parts, or chafe on metal engine brackets. This creates intermittent shorts to ground, injecting false pulse signals into the circuit.
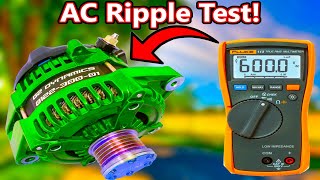
- Electrical Interference (AC Ripple) (Less Common) — A failing alternator diode trio leaks AC voltage into the DC electrical system. The sensitive timing sensors pick up this electrical 'noise', which the PCM misreads as extra timing pulses.
- Damaged Reluctor Wheel (Tone Ring) (Less Common) — The toothed wheel the sensor reads is bent, loose, or covered in metallic debris. This physical distortion alters the magnetic field, generating false pulse readings.
- Stretched Timing Chain or Belt (Rare) — Severe timing chain stretch alters the physical correlation between the crankshaft and camshaft, causing the PCM to read an unexpected pulse pattern.
- Failing PCM or FICM (Very Rare) — The main computer (PCM) or Fuel Injection Control Module (FICM) suffers an internal hardware failure. All wiring and sensor tests must be exhausted before condemning a module.
Symptoms
- Check Engine Light is On — The Malfunction Indicator Lamp (MIL) illuminates immediately or after two consecutive failure cycles.
- Engine Stalling and Rough Idle — The engine shakes violently at a stop or shuts off completely without warning at low RPMs.
- Hard Starting or No-Start — The engine cranks for an extended period before firing, or fails to start entirely because the PCM cannot establish base timing.
- Severe Power Loss — The vehicle hesitates and lacks acceleration as the PCM defaults to a restrictive 'limp-home' timing strategy to prevent engine damage.
- Audible Spark Knock — A distinct pinging or rattling sound from the engine under acceleration, caused by fuel detonating at the wrong time due to incorrect ignition timing.
Diagnostic Flowchart
Tap your situation to follow the diagnostic path that matches what you're seeing on this code.
Common Fixes & Costs
- Replace Camshaft Position Sensor — Parts: $50-$150, Labor: $100-$200, ~1.2 hr book time (DIY)
- Replace Crankshaft Position Sensor — Parts: $50-$150, Labor: $150-$250, ~1.8 hr book time (Intermediate)
- Repair or Replace Wiring Harness — Parts: $50-$900, Labor: $150-$1500, ~5 hr book time (Professional)
- Clean or Replace Reluctor Ring — Parts: $50-$250, Labor: $200-$800, ~5 hr book time (Professional)
- Professional Diagnosis — Parts: $0, Labor: $125-$185, ~1.2 hr book time (Professional)
DIY vs Professional
- Replace Camshaft/Crankshaft Position Sensor — Beginner: Yes, if easily accessible.
Tools: Socket set, wrenches, flashlight. - Repair Wiring Harness/Connector — Beginner: No.
Tools: Soldering iron, heat shrink, wire strippers, multimeter, wiring diagrams. - Replace Reluctor Ring — Beginner: No.
Tools: Engine lift, transmission jack, timing component tools.
Used vs. New Parts: Buying Guide
When a used part is worth it: Never buy used electronic sensors. The high failure rate of used parts negates any initial cost savings, forcing you to pay labor charges twice.
Donor-vehicle mileage cap: roughly under 20000 miles for the part to have meaningful remaining life.
Donor quality checklist:
- If sourcing a used wiring harness, pull it from a low-mileage vehicle wrecked by physical damage, not engine fire.
- Avoid harnesses from rust-belt vehicles due to internal corrosion.
- Match the OEM part number exactly.
Decision logic:
- If The part is a camshaft or crankshaft position sensor. → Buy a new OEM part. The risk of premature failure with cheap or used sensors is exceptionally high.
- If The part is a wiring harness pigtail. → Buy a new OEM pigtail. Used connectors have brittle locking tabs that break during installation.
- If The part is a control module (PCM/FICM). → Purchase a professionally remanufactured unit with a warranty rather than gambling on a junkyard module.
Warranty tradeoff: Used parts offer 30-day warranties that do not cover labor. New OEM sensors offer 1-2 year warranties. Remanufactured FICMs often carry lifetime warranties.
Worst-case if a used part fails: $200-$500 in repeat labor costs when a used sensor fails immediately after installation.
What Happens If You Wait — Timeline
- 0-2 weeks: Check Engine Light illuminates. Occasional hard starting or brief stumbles at idle occur, but the vehicle remains drivable. (MPG impact: 0-5%% · Added cost: $0-$40 in wasted fuel.)
- 2 weeks - 3 months: Symptoms escalate to frequent engine stalling at stoplights, violent rough idling, and severe power loss during acceleration. (MPG impact: 5-15%% · Added cost: $50-$150 in wasted fuel and towing fees.)
- 3-6 months: Persistent misfires dump unburnt fuel into the exhaust, superheating the catalytic converter and melting its internal honeycomb substrate. (MPG impact: 15-25%% · Added cost: $1200-$2800 for catalytic converter replacement.)
- 6+ months: The melted catalytic converter creates a total exhaust restriction. The engine loses all power, overheats rapidly, and destroys the exhaust manifolds and O2 sensors. (MPG impact: 25-50%+% · Added cost: $2500-$4500+ for comprehensive exhaust and engine repairs.)
Cost of Not Fixing It
- Short-Term (0-1 month): Fuel economy drops 5-15%, accompanied by severe performance loss and a high risk of stalling in traffic. (Added cost: $50-$150 in wasted fuel.)
- Medium-Term (1-6 months): Persistent misfires dump unburnt fuel into the exhaust, superheating and melting the catalytic converter. (Added cost: $1200-$2800 for catalytic converter replacement.)
- Long-Term (6+ months): Catastrophic exhaust restriction destroys oxygen sensors and causes internal engine damage from continuous spark knock. (Added cost: $2500-$4000+ for comprehensive exhaust and engine repairs.)
Diagnosis Steps
- Scan Codes & Review Freeze Frame Data
Read all stored codes with an OBD-II scanner. Note any accompanying circuit codes (P0335) or misfire codes. Analyze the freeze frame data to identify the exact engine RPM and load when the fault triggered.
Tools: OBD-II Scanner (Beginner) - Check Live Data for Engine RPM
Monitor Engine RPM (PID 0x0C) via live data while cranking. A healthy sensor shows a steady 150-300 RPM. If the RPM reads zero or drops out erratically, the primary speed sensor or its circuit is failing.
Tools: OBD-II Scanner with Live Data (Beginner) - Perform a Harness 'Wiggle Test'
With the engine idling, aggressively wiggle the wiring harness from the cam/crank sensors back to the PCM. If the engine stumbles or stalls when you move a specific section, you have located a broken wire or short.
Tools: Protective Gloves (Beginner) - Test for Alternator AC Ripple
Set a multimeter to AC Volts. With the engine running and headlights on, touch the probes to the battery terminals. Readings above 0.5V (500mV) confirm the alternator is leaking AC noise, which corrupts timing signals.
Tools: Digital Multimeter (Intermediate) - Detailed Visual Inspection
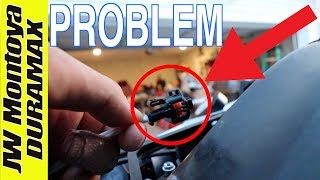
Inspect the sensor, connector, and harness. Look for melted plastic, green corrosion inside the connector pins, oil contamination, or harness chafing against metal brackets.
Tools: Flashlight, Inspection Mirror (Intermediate) - Test Sensor Voltage and Ground
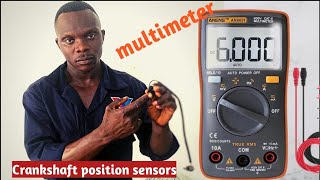
Disconnect the sensor. Turn the key ON. Use a multimeter to verify the connector receives a 5V reference signal from the PCM and has a solid ground (less than 5 ohms resistance). Missing voltage indicates a wiring failure, not a bad sensor.
Tools: Digital Multimeter, Vehicle-specific wiring diagram (Advanced) - [Pro Tip] Test Sensor Resistance (2-Wire Sensors)
For Variable Reluctance (VR) sensors, measure resistance across the two sensor pins. Compare the reading to OEM specs (typically 200-1,000 Ohms). An infinite reading means an internal open circuit; zero means a short.
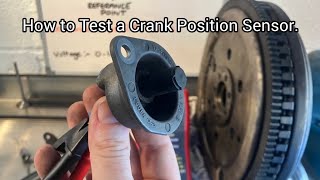
Tools: Digital Multimeter, Service Manual (Advanced) - Inspect the Reluctor Ring
Remove the sensor and visually inspect the internal toothed tone ring. Look for bent teeth, looseness, or metallic sludge stuck to the magnetic pickup that distorts the signal.
Tools: Flashlight, Basic hand tools (Intermediate) - [Pro Tip] FICM Voltage Drop Test (Ford 6.0L)
Test the FICM voltage at the inspection screw. Key-on voltage must be 47-49V. Cranking voltage must not drop below 46V. Lower readings confirm a failing FICM power supply.
Tools: Digital Multimeter, Torx T20 driver (Advanced) - [Pro Tip] Analyze Signal with an Oscilloscope
Connect an oscilloscope to the sensor signal wire. A healthy Hall-effect sensor shows a sharp square wave; a VR sensor shows a clean AC sine wave. Look for visual 'glitches', hash, or extra spikes that confirm P0376.
Tools: Oscilloscope (Advanced)
When This Code Triggers (Freeze-Frame Conditions)
- Engine Coolant Temp: 180-205°F (82-96°C) (Fully warmed up engine)
- Engine RPM: 1500-2500 RPM (Cruise or steady throttle, not at idle)
- Engine Load: 30-60% (Under moderate load, such as climbing a slight grade)
- Vehicle Speed: 35-55 mph (56-88 kph) (Highway or arterial road driving)
Related Codes
- P0377 — Indicates 'Too Few Pulses,' the exact opposite of P0376. The diagnostic process is identical. The signal is highly erratic, fluctuating between too many and too few pulses.
- P0378 — Indicates an 'Intermittent/Erratic' signal from the 'B' sensor. Caused by loose connections or chafed wiring. A running 'wiggle test' is the best diagnostic approach.
- P0335 — Generic code for 'Crankshaft Position Sensor A Circuit Malfunction.' Indicates a hard electrical failure (open circuit or short to ground) rather than signal noise.
- P0385 — Indicates a 'Crankshaft Position Sensor B Circuit Malfunction'. Seeing P0376 and P0385 together confirms a hard failure in the 'B' sensor's wiring circuit.
Climate & Environmental Factors
- Cold Weather: Sub-zero temperatures exacerbate failing sensors or FICMs, causing severe cold-start failures. Wiring insulation also becomes brittle and cracks easily when disturbed in the cold.
- High Humidity / Road Salt: Moisture and salt accelerate corrosion inside electrical connectors. Corroded pins create high resistance, corrupting the low-voltage timing signal.
- Extreme Heat: Sustained engine bay heat bakes sensor electronics and melts wiring insulation routed too close to exhaust manifolds.
How to Talk to a Mechanic About This Code
Say this: "I have a P0376 code causing intermittent stalling. I need a full electrical diagnostic. Please test the sensor signal with an oscilloscope and perform a harness wiggle test before recommending a sensor replacement."
This proves you understand P0376 is frequently a wiring issue. It forces the shop to perform actual electrical diagnostics rather than blindly firing the parts cannon at the sensor.
Avoid saying:
- 'Just replace the crankshaft sensor.'
- 'My check engine light is on, can you look at it?'
- 'I read online it's the sensor, so just change that.'
Questions to ask before authorizing the repair:
- Did you test the sensor signal with an oscilloscope? Was the waveform clean or noisy?
- Did you perform a 'wiggle test' on the wiring harness to check for intermittent shorts?
- Have you checked for any Technical Service Bulletins (TSBs) related to this code?
- If the wiring is the problem, can you splice in a repair, or does the whole harness need replacement?
- What is the warranty on the parts and labor?
Where to Take It: Dealer vs Independent vs Chain
- Dealer:
Use only if the vehicle is under warranty or a specific TSB applies. Otherwise, they are unnecessarily expensive for this repair.
Best for: Vehicles under powertrain warranty., Known manufacturer-specific issues covered by a TSB (e.g., Duramax harness chafing)., Complex electrical issues requiring proprietary diagnostic software.
Downsides: Highest labor rates, typically $150-$220/hr., Dealers often refuse to splice wires, forcing you to buy a $1,500 complete engine harness. (Typical cost: +40% vs. baseline) - Independent Shop:
Best overall choice. An independent shop with strong electrical diagnostic skills offers the best value for locating and repairing the wiring shorts that cause P0376.
Best for: Out-of-warranty vehicles., Diagnosing intermittent electrical faults, as they are willing to perform affordable wire splicing., Vehicles with well-documented aftermarket fixes (like Ford FICM failures).
Downsides: Diagnostic capabilities vary; you must verify they have an oscilloscope and an ASE-certified electrical technician. (Typical cost: +0% vs. baseline) - Chain Shop:
Avoid. Chain shops lack the diagnostic tools required to trace the wiring faults that frequently trigger P0376, leading to wasted money on unneeded sensors.
Best for: Simple, clear-cut sensor replacements where the part is easily accessible.
Downsides: Technicians lack advanced electrical training and oscilloscope equipment., High pressure to sell parts leads to replacing sensors without confirming they are the root cause. (Typical cost: -10% vs. baseline)
When to Walk Away From the Repair
If the estimated repair cost exceeds 50% of the vehicle's private-party value, sell or trade the vehicle.
- Car worth $4000, fix is $2200: Walk away. The repair is 55% of the car's value. Sell it as a mechanic's special.
- Car worth $15000, fix is $1200: Fix it. The repair is only 8% of the vehicle's value.
- Car worth $3000, fix is $800: Borderline. The cost is 27% of the value. Proceed only if the transmission and engine are otherwise flawless.
What Scan Tool You Need for This Code
Minimum: A scanner capable of reading and graphing live data, specifically Engine RPM (PID 0x0C).
Basic $20 code readers only display the P0376 code without providing the crucial live RPM data needed to see if the sensor signal is dropping out during cranking.
Budget: BlueDriver Pro (~$90) — Connects to your smartphone to graph live Engine RPM data. It reads freeze-frame data to show exact engine conditions when the code triggered.
Mid-range: Autel MaxiCOM MK808S (~$350) — Provides robust live data graphing and bidirectional controls, allowing you to monitor the RPM signal and command other modules to isolate the fault.
Professional: TOPDON Phoenix Lite 3 (~$750) — Offers full bidirectional control and supports add-on oscilloscope modules. An oscilloscope is the ultimate tool for P0376, allowing visual inspection of the sensor's electronic signal for the exact noise causing the code.
How to Clear the Code After You Fix It
- Clear all diagnostic trouble codes using an OBD-II scan tool.
- Ensure the fuel tank is between 15% and 85% full.
- Perform a complete drive cycle to reset the vehicle's readiness monitors.
Drive cycle (~30 minutes): Start with an 8-hour cold soak. Idle for 3 minutes. Drive at a steady 55 mph for 15 minutes. Perform three cycles of accelerating to 65 mph and coasting down to 40 mph without braking. Drive in stop-and-go traffic for 10 minutes. Idle in drive for 2 minutes before shutting off.
Readiness monitors affected: Comprehensive Component Monitor (CCM), Misfire Monitor, Catalyst Monitor, Oxygen (O2) Sensor Monitor
Before emissions retest: drive at least 50 miles to fully set monitors.
Watch out for:
- Clearing the code resets all monitors; the vehicle will automatically fail an emissions test until the drive cycle is complete.
- The code returns immediately if the wiring short was not repaired.
- Skipping the 8-hour cold soak prevents the EVAP and O2 heater monitors from running.
Will This Fail Emissions / State Inspection?
Yes — this code typically fails an OBD-II emissions inspection.
- California: An active P0376 triggers an automatic smog check failure. A full drive cycle must be completed post-repair to set readiness monitors before re-testing.
- New York: The NYS DMV OBD-II scan will detect P0376, resulting in an immediate emissions test failure.
- Texas: Vehicles in the 17 emissions-testing counties will fail the OBD portion of the annual state inspection with this code active.
Most Commonly Affected Vehicles
- Chevrolet/GMC Silverado/Sierra with Duramax Diesel (2004-2016) — The main wiring harness frequently chafes on the alternator or A/C brackets, shorting the cam/crank sensor wires. GM issued TSB #21-NA-149 for this exact issue.
- Ford F-Series/E-Series with 6.0L Power Stroke Diesel (2003-2007) — P0376 is heavily linked to a failing FICM (Fuel Injection Control Module) providing unstable voltage to the sensors.
- Dodge/Ram 2500/3500 with Cummins Diesel (1998-2012) — The wiring harness passing over the front of the engine bakes from radiator heat, becoming brittle and causing intermittent signal faults.
- Volkswagen Jetta/Golf/Passat TDI (2009-2015) — Timing codes stem from failing crankshaft position sensors or mechanical issues with the timing belt tensioner.
- Nissan Altima, Frontier, Rogue, Xterra (2002-2012) — Subject to multiple voluntary recalls for failing crankshaft position sensors. OEM replacement is mandatory; aftermarket sensors fail rapidly.
- Hyundai/Kia Santa Fe, Sorento, Sonata (2007-2014) — Triggered by a failing crankshaft position sensor located on the front of the engine block near the transmission bell housing.
- Various Engines with Optical Injection Pump Sensors (1994-2002) — Older diesels (e.g., GM 6.5L) use an internal optical sensor in the injection pump. Failure of this sensor guarantees a P0376 code.
- Ford F-Series with 6.4L Power Stroke Diesel (2008-2010) — The engine harness rubs against the high-pressure fuel pump and driver-side valve cover, shorting the sensor circuits.
Manufacturer-Specific Notes
- General Motors (Duramax): The main wiring harness frequently chafes on the A/C or alternator brackets, causing shorts. Always inspect these areas before replacing sensors. GM TSB #21-NA-149 details this repair.
- Ford (6.0L Power Stroke): Always test the FICM voltage first. A cold no-start that resolves when warm is a classic symptom of a failing FICM power supply corrupting the timing signal.
- Dodge/Ram (Cummins): The crankshaft position sensor wiring is routed behind the harmonic balancer and is highly susceptible to heat damage, causing the insulation to crack and short out.
- Nissan: Nissan issued massive recalls for failing crankshaft position sensors in the 2000s. If you have this code on an older Nissan, the sensor itself is the guaranteed culprit.
Real Owner Stories
2006 GMC Sierra 2500HD (Duramax) at 155K miles
Engine stalled at low speeds and suffered hard restarts with an active P0376 code. The owner replaced the crankshaft position sensor 6 months prior.
What they tried:
- Suspected the replacement crankshaft sensor failed prematurely.
- Performed a targeted visual inspection of the engine wiring harness near the alternator bracket.
Outcome: Discovered the main engine wiring harness rubbed through on a sharp A/C line bracket. The insulation on the crank sensor signal wire was destroyed, causing an intermittent short to ground. Repaired the wire with solder and heat shrink, then wrapped the harness in high-temperature abrasion-resistant sleeving. Total cost was $15. The code cleared permanently.
Lesson: On GM Duramax trucks, always inspect the wiring harness for chafing near the alternator and A/C brackets before replacing sensors. This is the most common failure point and perfectly mimics a dead sensor.
2004 Ford F-250 (6.0L Power Stroke) at 190K miles
Truck suffered a cold no-start condition. After extended cranking, it started but ran violently rough with a P0376 code. Symptoms vanished when the engine reached operating temperature.
What they tried:
- Replaced the camshaft position sensor. The code returned the next morning.
- Towed the truck to a diesel specialist.
Outcome: The technician performed a FICM (Fuel Injection Control Module) voltage test. Key-on voltage was 48V, but cranking voltage plummeted to 38V. This confirmed a failing FICM power supply corrupting the timing signals. Installed a remanufactured FICM for $750. The truck started flawlessly in freezing weather, resolving P0376.
Lesson: Do not blindly replace sensors on a 6.0L Power Stroke. Cold start timing codes are the hallmark symptom of a failing FICM. Perform a 5-minute voltage drop test first to save hundreds on misdiagnosis.
2007 Dodge Ram 3500 (5.9L Cummins) at 220K miles
Experienced unpredictable stalling and bucking at highway speeds with a P0376 code.
What they tried:
- Replaced both the crankshaft and camshaft position sensors. No improvement.
- Performed a 'wiggle test' on the main engine harness while idling.
Outcome: Wiggling the harness near the front engine cover immediately caused the engine to stumble and stall. The internal wiring inside the plastic loom was heat-baked and brittle, causing the insulation to crack and short intermittently. Spliced in a new section of wiring for the affected sensor circuit. Stalling stopped entirely.
Lesson: For intermittent stalling, the fault is almost always wiring, not the component. A running 'wiggle test' is the fastest diagnostic step to locate hidden breaks in an aging harness.
How to Prevent This Code From Triggering
- Protect Wiring Harnesses in High-Heat Areas (During major engine work or every 50,000 miles.) — Engine heat bakes wire insulation, making it brittle and prone to cracking. Wrapping vulnerable harness sections in high-temperature Tesa tape or fiberglass sleeving prevents the chafing and shorts that trigger P0376.
- Apply Dielectric Grease to Sensor Connectors (Whenever a sensor is disconnected.) — Dielectric grease seals out moisture and prevents pin corrosion. Corrosion creates high electrical resistance, which corrupts the sensitive 5V timing signal.
- Test Battery and Alternator Health (Annually before winter.) — Failing alternators introduce AC ripple (electrical noise) into the system. Sensitive PCM electronics misinterpret this noise as extra timing pulses.
- Install Only OEM Sensors (When replacement is required.) — Cheap aftermarket sensors use inferior internal magnets and electronics that fail to meet strict OEM timing specifications, causing codes to return within weeks.
Frequently Asked Questions
What does the 'B' in P0376 mean?
The 'B' designates a specific timing circuit or sensor, as many engines use multiple sensors ('A' and 'B'). You must consult a vehicle-specific service manual to identify exactly which sensor 'B' refers to on your engine.
What is the most common misdiagnosis for P0376?
Replacing the sensor without inspecting the wiring. Technicians frequently find the actual problem is a chafed wire shorting against the engine block or a corroded connector.
Can a recent timing belt replacement cause P0376?
Yes. Improper belt tension, a damaged sensor during installation, or mechanical timing being off by a single tooth will trigger this code.
I replaced the sensor, but the code came back. What now?
The fault is in the wiring harness, the connector, or the reluctor ring. Perform a 'wiggle test' on the harness to locate intermittent shorts. Also, verify you used an OEM sensor, as cheap aftermarket parts fail rapidly.
Can a bad alternator cause a P0376 code?
Yes. A failing alternator creates 'dirty' electrical signals (AC ripple) that the PCM misinterprets as extra timing pulses. A healthy alternator must produce less than 0.5V of AC ripple to prevent sensor interference.
Can P0376 cause transmission shifting problems?
Yes. The Transmission Control Module (TCM) relies on engine speed data to determine shift points. An erratic RPM signal causes harsh shifting or forces the transmission into limp mode.
Is it safe to clear the P0376 code and keep driving?
No. Clearing the code does not fix the mechanical or electrical short. The code will return immediately, and driving with incorrect timing risks sudden stalling and severe catalytic converter damage.
Key Takeaways
- P0376 triggers when the engine computer counts too many timing pulses from sensor 'B', causing immediate drivability issues like stalling and hard starts.
- The two most common culprits are a failed camshaft/crankshaft position sensor or a chafed wiring harness shorting out against a metal engine bracket.
- Driving with P0376 is unsafe due to the high risk of sudden stalling in traffic and guarantees a $1,200+ catalytic converter replacement if misfires persist.
- Never replace the sensor without testing first; verify the 5V reference, check for a solid ground, and ensure alternator AC ripple is below 0.5V to rule out electrical noise.
Helpful Videos

Shop the Parts Behind P0376
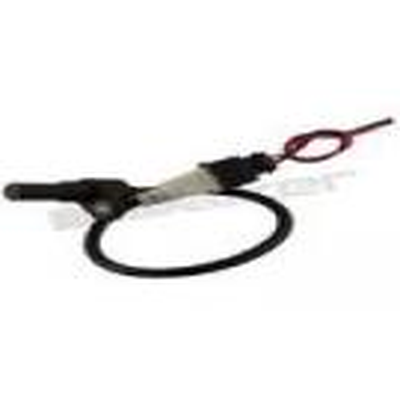
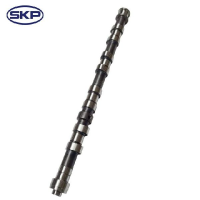
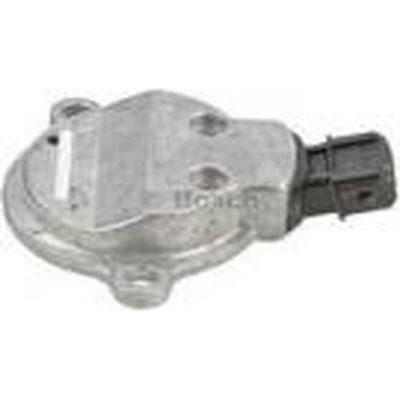
Below are the parts most often responsible for code P0376, ranked by how frequently each one is the actual culprit (per the diagnosis above). Tap any to see what we have for your vehicle.


The information in this article is provided for general reference and educational purposes only. Vehicle specifications, procedures, and part compatibility can vary by production date, trim level, and region. Always consult your vehicle's factory service manual and verify part numbers before purchasing or performing repairs. Safety-critical components such as airbags, seat belts, and braking systems should be installed by a qualified professional.
- 🧭 Diagnostic Flowchart
- 🎬 Helpful Videos
- 🛍️ Shop This Part
- What Does P0376 Mean?
- Can I Drive With P0376?
- Common Causes
- Symptoms
- Common Fixes & Costs
- DIY vs Professional
- Used vs. New Parts: Buying Guide
- What Happens If You Wait — Timeline
- Cost of Not Fixing It
- Diagnosis Steps
- When This Code Triggers (Freeze-Frame Conditions)
- Related Codes
- Climate & Environmental Factors
- How to Talk to a Mechanic About This Code
- Where to Take It: Dealer vs Independent vs Chain
- When to Walk Away From the Repair
- What Scan Tool You Need for This Code
- How to Clear the Code After You Fix It
- Will This Fail Emissions / State Inspection?
- Most Commonly Affected Vehicles
- Manufacturer-Specific Notes
- Real Owner Stories
- 2006 GMC Sierra 2500HD (Duramax) at 155K miles
- 2004 Ford F-250 (6.0L Power Stroke) at 190K miles
- 2007 Dodge Ram 3500 (5.9L Cummins) at 220K miles
- How to Prevent This Code From Triggering
- Frequently Asked Questions
- What does the 'B' in P0376 mean?
- What is the most common misdiagnosis for P0376?
- Can a recent timing belt replacement cause P0376?
- I replaced the sensor, but the code came back. What now?
- Can a bad alternator cause a P0376 code?
- Can P0376 cause transmission shifting problems?
- Is it safe to clear the P0376 code and keep driving?
- Key Takeaways
- 🎟️ Get 5% Off