
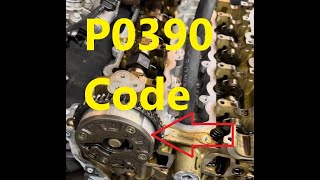
P0390 on 2006-2012 Toyota RAV4 3.5L V6: Camshaft Sensor 'B' Bank 2 Explained
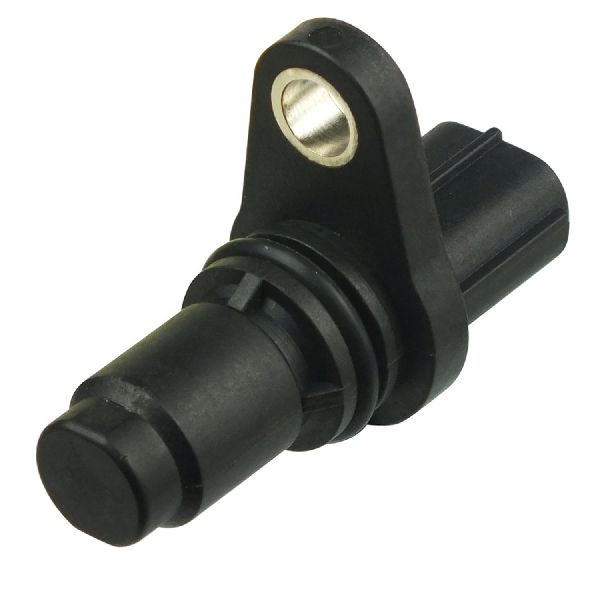
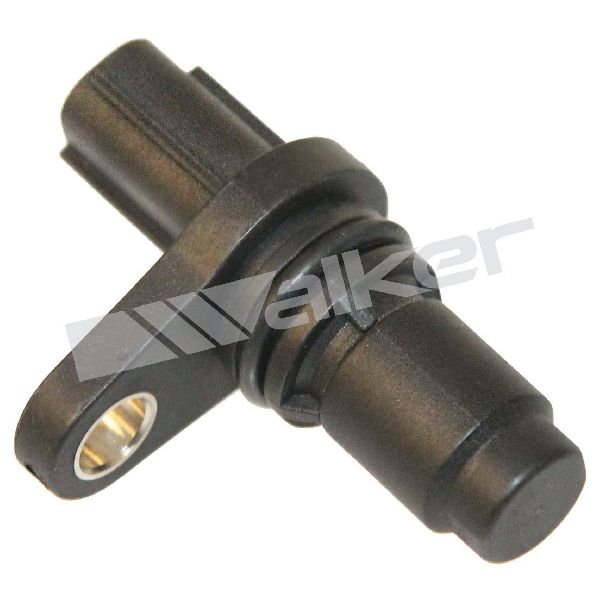
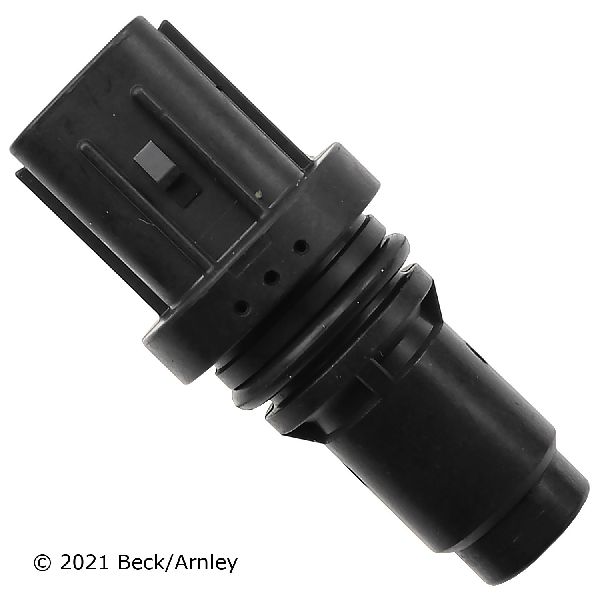
This code points to the exhaust camshaft position sensor on Bank 2 (the front/radiator side of the engine). It's most often a failed sensor or a wiring issue. A new OEM-quality sensor costs around $60-$120 and is relatively easy to replace with a single 10mm bolt.
- P0390 points to the exhaust camshaft sensor on the front (radiator side) of the engine.
- The most likely cause is a failed sensor, which is relatively inexpensive and easy to replace.
- Before buying a new sensor, inspect the wiring for damage and perform the sensor swap test between the front and rear banks to confirm the diagnosis.
- This is a common DIY repair. The sensor is held by one 10mm bolt and is easily accessible on top of the engine.
What's Unique About the 2006-2012 Toyota RAV4
The 2GR-FE is a quad-cam engine with four camshaft position sensors, which can cause confusion. P0390 isolates the problem to a very specific sensor: the exhaust cam sensor on the front-facing cylinder bank. Unlike some engines where cam sensors are buried, all four sensors on the RAV4's V6 are accessible on the top of the valve covers, making diagnosis and replacement much simpler for a DIYer. Bank 2 being at the front is also a key detail for locating the correct part.
Symptoms You May Notice
- Check Engine Light is on
- VSC and/or TRAC lights may illuminate
- Rough or unstable idle
- Hesitation or stumbling during acceleration
- Noticeable loss of engine power
- Increased fuel consumption
- Engine may be difficult to start or may stall
- Replacing the wrong sensor (e.g., the intake sensor or a sensor on Bank 1).
- Replacing the ECM when the problem is a simple wiring break.
- Assuming the sensor is bad without performing the swap test or checking the wiring first.
Most Likely Causes
- Failed Exhaust Camshaft Position Sensor (Bank 2) 🔴 High Probability → Shop Engine Camshaft Position Sensor Sensors are electronic components that can fail with age due to constant heat cycles and internal degradation. It is the most common point of failure for this code.
How to confirm: Swap the suspect sensor with the identical sensor from Bank 1 (rear bank, exhaust position). If the code changes to P0365 (Camshaft Position Sensor 'B' Circuit Bank 1), the sensor is bad. If the P0390 code returns, the problem is in the wiring or ECM. Alternatively, test the sensor's resistance; it should be between 835-1,400 Ω when cold and 1,060-1,645 Ω when hot.
Typical fix: Replace the Bank 2 exhaust camshaft position sensor. Using an OEM or Denso-branded sensor is highly recommended for reliability.
Est. part cost: $60-$120 - Damaged Wiring or Connector 🟡 Medium Probability The wiring harness is exposed to significant engine heat, 🎬 See: How to diagnose 2GR-FE camshaft sensor circuit issues which can make the plastic connector and wire insulation brittle and prone to cracking. Rodents are also known to chew on the soy-based wiring insulation used in this era of Toyota vehicles.
How to confirm: Visually inspect the wiring harness and connector for the Bank 2 exhaust cam sensor. Look for frayed wires, corrosion in the connector pins, or signs of rodent damage. Use a multimeter to check for 5V reference, ground, and signal continuity back to the ECM.
Typical fix: Repair the damaged section of the wiring harness or replace the connector pigtail.
Est. part cost: $15-$40 - Oil Contamination ⚪ Low Probability A leaking valve cover gasket can allow oil to seep into the sensor's connector, disrupting the electrical signal. This is more common on higher mileage engines.
How to confirm: Remove the sensor's electrical connector and inspect for engine oil inside. A faulty valve cover gasket will show external oil residue around the cover's seam.
Typical fix: Clean the oil from the connector with electrical contact cleaner. Replace the valve cover gasket to prevent recurrence, then replace the sensor if cleaning doesn't resolve the issue.
Est. part cost: $30-$70
Rare But Worth Checking
- Faulty Engine Control Module (ECM): → Shop Engine Control Module (ECM) This is very rare. The ECM should only be considered after all other possibilities (sensor, wiring) have been definitively ruled out through testing. An outdated software calibration can also sometimes misinterpret a valid sensor signal, and a re-flash by a dealer may be required.
- Timing Chain or VVT System Issue: A stretched timing chain or a problem with the VVT actuator could theoretically cause the cam/crank correlation to be off, but this would typically be accompanied by other trouble codes (like P0300-P0306 misfire codes) and significant mechanical noise.
Diagnosis Steps
- Verify the Code: Use an OBD-II scanner to confirm that P0390 is the active code. Check for any other stored codes and freeze frame data.
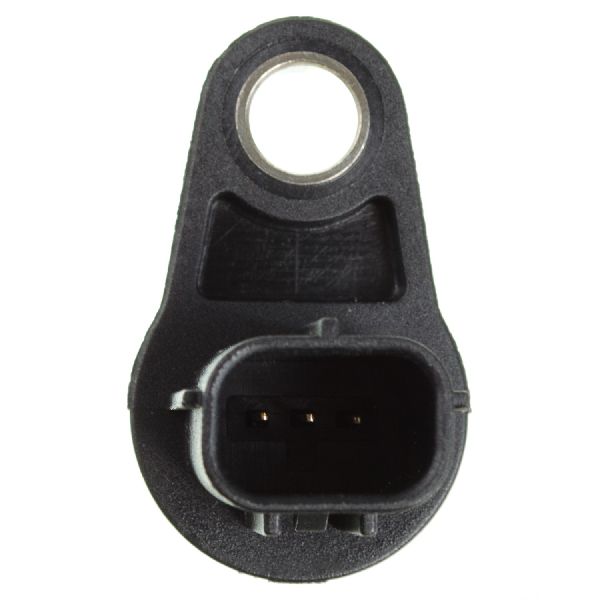
- Locate the Sensor: Identify the Bank 2 (front, radiator side) exhaust camshaft position sensor. It is located on the top of the valve cover, has a gray connector, and is held in by a single 10mm bolt.
- Inspect Connector and Wiring: Disconnect the sensor and inspect the connector and harness for any signs of damage, corrosion, or oil contamination. Ensure the connector clip is not broken and it fastens securely.
- Perform Sensor Swap Test: The exhaust cam sensors for Bank 1 and Bank 2 are identical. Swap the front sensor (Bank 2) with the rear sensor (Bank 1). Clear the codes and drive the vehicle. If the code changes to P0365 (Bank 1), the sensor you moved is faulty. If P0390 returns, the sensor is likely good, and the problem is in the wiring or ECM.
- Test the Circuit: If the sensor swap proves the sensor is good, use a multimeter to check the connector for a 5-volt reference, a good ground, and the signal wire's integrity back to the ECM per the service manual. With the ignition off, resistance between the signal wire and ground should be 0.5-1.5 kΩ. The sensor itself should have a resistance between 835-1,400 Ω when cold.
- Replace the Part: If the sensor is confirmed faulty, replace it with a new one. If the wiring is damaged, repair or replace the affected section.
- Clear Codes and Test Drive: After the repair, clear all diagnostic trouble codes and perform a test drive to ensure the fix was successful and the Check Engine Light does not return.
Parts You'll Likely Need
- Exhaust Camshaft Position Sensor (Bank 2)
(OEM #90919-A5003 (Replaces: 90919-05057))— This is the sensor that directly corresponds to the P0390 code and is the most common failure point.
Trusted brands: Denso (OEM Manufacturer), Aisin, NTK/NGK
OEM price range: $90-$120
Aftermarket price range: $60-$90 - Camshaft Position Sensor Connector Pigtail
(OEM #90980-11875 (Verify by VIN))— Needed if the original connector or wiring is damaged by heat, corrosion, or rodents. The locking tab often becomes brittle and breaks.
Trusted brands: Dorman, Standard Motor Products (SMP), OEM
OEM price range: $25-$40
Aftermarket price range: $15-$30
Related Codes That Often Appear With This One
- P0393 — P0393 (Camshaft Position Sensor 'B' Circuit High Input Bank 2) is a more specific version of the P0390 circuit fault and can appear alongside it.
- P0024 — P0024 ('B' Camshaft Position - Timing Over-Advanced or System Performance Bank 2) can occur if the faulty sensor reading causes the VVT system to behave incorrectly.
- P0365 — This code for the Bank 1 exhaust sensor will appear after performing a sensor swap if the original Bank 2 sensor was indeed faulty.
Technical Service Bulletins (TSBs) & Recalls
- T-SB-0318-08: A service bulletin for a common clunking noise from the steering intermediate shaft on 2006-2008 RAV4s, a well-known issue for this platform.
Platform-Specific Known Issues
- Real-world Repair Story: A user on a 4Runner forum with a similar engine experienced a P0390 code that persisted even after replacing the sensor. The ultimate cause was found to be a loose wire in the connector, highlighting the importance of checking the wiring integrity even if it looks fine visually.
Mechanic-Grade Diagnostic Values
- Camshaft Position Sensor Resistance (cold) — expected: 835 to 1,400 Ω. Failure: Reading outside this range indicates a faulty sensor.
- Camshaft Position Sensor Resistance (hot) — expected: 1,060 to 1,645 Ω. Failure: Reading outside this range indicates a faulty sensor.
- Sensor Connector Voltage (Key On, Engine Off) — expected: 4.8V to 5.2V (Reference Voltage). Failure: No voltage or low voltage points to a wiring or ECM issue.
- ECM Voltage Threshold for DTC P0390 — expected: Signal should fluctuate. Code sets if voltage is < 0.3V or > 4.7V for over 5 seconds.. Failure: A static voltage reading that is too high or too low.
Scan Tool Commands That Help
- Toyota Techstream: Utility -> All Readiness -> Input DTC P0390 — After a repair, this function can be used to run the internal monitor and confirm if the fault condition is truly gone, without extensive driving.
- Toyota Techstream: Live Data -> Camshaft Position Sensor Waveform — To visually inspect the sensor's output signal. A healthy signal is a clean, repetitive square wave. Gaps, noise, or a flat line indicate a problem with the sensor or circuit.
Wiring & Ground Locations
- Bank 2 Exhaust Cam Sensor Connector — On the front (radiator side) valve cover, it is the rearmost of the two sensors on that cover. It has a gray connector.. This is the primary connector to inspect for damage, oil contamination, or to perform voltage/resistance tests for P0390.
- ECM Connector E6 — In the engine bay, typically housed in a black plastic box near the battery.. This is the main ECM connector where the camshaft sensor wiring terminates. It's used for continuity testing of the harness between the sensor and the ECM.
- Engine Harness Ground (Bank 2) — A ground bundle for the engine harness attaches to a boss on the side of the front cylinder head (Bank 2), underneath the throttle body area.. A loose or corroded ground at this location can cause erratic sensor readings and trigger false sensor codes like P0390.
OEM Part Supersession History
90919-05057→90919-A5003— Standard part number update and consolidation by Toyota. The part is functionally identical.
Heads up: None. The new part number 90919-A5003 is a direct replacement for the original.
Model Year Variations Within This Range
- 2009-2012: While the engine mechanics for the 2GR-FE remained consistent, wiring harness diagrams show potential wire color changes pre- and post-September 2009 production. Technicians should always verify pin locations rather than relying solely on wire color for diagnosis.
Diagnostic Flowchart
Other Known Issues on This Vehicle
Issues unrelated to this code that are worth knowing about as an owner of this generation:
- Rubber VVT-i Oil Line Failure 🔴 High — Common on early models (2006-2009). A ruptured line can cause catastrophic engine failure in seconds due to rapid oil loss. Most have likely been replaced by now. (Ref: Toyota issued a Limited Service Campaign (LSC 90K) and TSB EG010-07 to replace the rubber hose with an all-metal line.)
- Water Pump Failure 🟠 Medium — Prone to failure between 80,000-150,000 miles. It's an internal pump, so initial leaks are often hidden, seeping coolant into the timing cover area before becoming visible externally.
- Intermediate Steering Shaft Clunk 🟡 Low — A common issue causing a clunking or popping noise from the steering column when turning. It's more of an annoyance than a safety risk. (Ref: T-SB-0318-08 (superseded ST001-08) was issued to address this with a redesigned part.)
- Timing Cover Oil Leak 🟠 Medium — Can develop at higher mileage (100k+ miles). It's a slow seep from the sealant, but the repair is labor-intensive as it requires significant engine disassembly.
Used vs. New Parts: Buying Guide for This Vehicle
When a used part is the smart pick: A used wiring connector pigtail from a junkyard is a viable option if the plastic is not brittle and the locking tab is intact. This can be more cost-effective than a new pigtail, especially if you can pull it yourself.
Donor-vehicle mileage cap: roughly under 100000 miles for the part to have meaningful remaining life.
What to inspect on the donor part:
- For a pigtail, check for flexibility in the wires (not stiff or cracked).
- Ensure the connector's locking tab clicks firmly and is not broken.
- Inspect for any signs of corrosion on the pins or melting of the plastic housing.
OEM-only on this vehicle (don't cheap out):
- Camshaft Position Sensor: Due to the sensitivity of the VVT system and the risk of incorrect signals from low-quality aftermarket parts, using an OEM (Toyota) or the original equipment manufacturer (Denso) sensor is strongly recommended to avoid repeat failures or new codes.
Aftermarket brands forum-validated for this vehicle:
- Denso (OEM for Toyota)
- Aisin
- NTK/NGK
Brands owners have reported issues with on this vehicle:
- Unnamed, no-brand 'white-box' sensors from online marketplaces. These often have poor quality control and can be dead-on-arrival or fail prematurely.
Real Owner Stories
Aggregated from forums and TSBs cited above. Mileages and costs reflect what owners reported in those sources.
2006-2012 Toyota RAV4 3.5L V6
Symptoms: The Check Engine Light appeared along with the VSC and TRAC warning lights.
What fixed it: Diagnosis of the Bank 2 exhaust camshaft position sensor and wiring issues common to the XA30 platform.
Source hint: rav4world.com
2007-2012 Lexus ES350 (2GR-FE)
Symptoms: Diagnostic process involved multimeter testing and confirming sensor location.
What fixed it: Confirming the correct sensor location and performing circuit integrity tests.
Source hint: clublexus.com thread titled 'P0390 help!'
2003-2009 Toyota 4Runner (Similar Engine)
Symptoms: The P0390 code persisted even after the owner replaced the camshaft sensor with a new one.
What fixed it: The issue was finally resolved by finding and repairing a loose wire inside the sensor connector.
Source hint: vehicle_specific_issues: Real-world Repair Story
Related OBD-II Codes
Frequently Asked Questions
Where is the Bank 2 exhaust camshaft position sensor located on my 3.5L V6 RAV4?
Why did my VSC and TRAC lights come on at the same time as the P0390 code?
Is there a reliable way to test if the sensor is actually bad before I buy a new one?
Does TSB-0318-08 relate to my P0390 engine code?
What brand of replacement sensor should I use for the 2GR-FE engine?
Could an oil leak be causing my P0390 code?
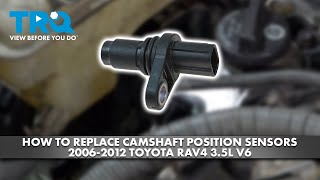
Helpful Videos
We Have This Part in Stock


The information in this article is provided for general reference and educational purposes only. Vehicle specifications, procedures, and part compatibility can vary by production date, trim level, and region. Always consult your vehicle's factory service manual and verify part numbers before purchasing or performing repairs. Safety-critical components such as airbags, seat belts, and braking systems should be installed by a qualified professional.
- Toyota RAV4:
- 🧭 Diagnostic Flowchart
- 🎬 Helpful Videos
- 🛍️ Shop This Part
- What's Unique About the 2006-2012 Toyota RAV4
- Symptoms You May Notice
- Most Likely Causes
- Rare But Worth Checking
- Diagnosis Steps
- Parts You'll Likely Need
- Related Codes That Often Appear With This One
- Technical Service Bulletins (TSBs) & Recalls
- Platform-Specific Known Issues
- Mechanic-Grade Diagnostic Values
- Scan Tool Commands That Help
- Wiring & Ground Locations
- OEM Part Supersession History
- Model Year Variations Within This Range
- Other Known Issues on This Vehicle
- Used vs. New Parts: Buying Guide for This Vehicle
- Real Owner Stories
- 2006-2012 Toyota RAV4 3.5L V6
- 2007-2012 Lexus ES350 (2GR-FE)
- 2003-2009 Toyota 4Runner (Similar Engine)
- Related OBD-II Codes
- Frequently Asked Questions
- 🎟️ Get 5% Off