
P0440 on 2006-2011 Honda Civic: EVAP System Malfunction Causes and Fixes
For a 2006-2011 Honda Civic, P0440 is most often caused by a loose gas cap or a faulty EVAP canister purge valve. First, tighten or replace the gas cap with an OEM part. If the light returns, the purge valve in the engine bay is the next most likely part to fail and costs about $40-$80 for an aftermarket replacement. This is a very common DIY repair.
- P0440 on a 2006-2011 Civic is a general EVAP system fault, not a specific leak size.
- Always check the gas cap first; use an OEM replacement if in doubt.
- The engine bay purge valve (36162-RNA-A01) is the most likely component to fail after the gas cap.
- The issue is not severe and does not prevent you from driving the car, but it will cause an emissions test failure.
What's Unique About the 2006-2011 Honda Civic
The 2006-2011 Honda Civic (8th generation) with the 1.8L R18A1 engine has two very common failure points for EVAP codes. The first is the EVAP canister purge valve, located conveniently in the engine bay, which is known to stick open. The second is the canister vent valve, located under the car near the gas tank, which is exposed to road debris and moisture. While P0440 is a general code, diagnosis on this Civic often quickly narrows down to one of these two valves after the gas cap has been checked and confirmed to be sealing properly.
Symptoms You May Notice
- Check Engine Light is on.
- A faint fuel smell may be noticeable around the car, especially near the gas tank area or after refueling.
- Difficulty refueling (gas pump nozzle clicks off repeatedly) can occur if the vent valve is stuck closed.
- Slightly reduced fuel economy.
- Replacing the charcoal canister when only the vent valve has failed. The vent valve is often the true culprit but may be sold as part of the canister assembly. Check if the valve can be purchased separately.
- Replacing other EVAP components before confirming the gas cap is an OEM part and is sealing correctly. An aftermarket cap is a very frequent cause of persistent, hard-to-diagnose EVAP codes.
Most Likely Causes
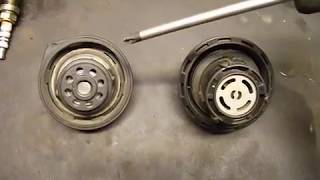
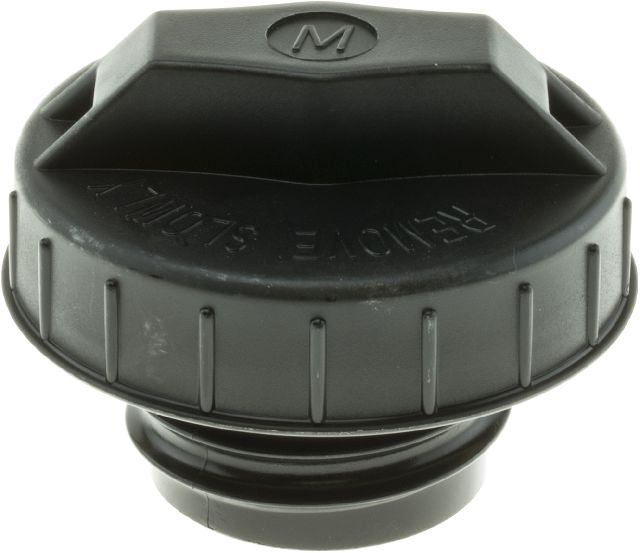
- Loose, Damaged, or Incorrect Gas Cap 🔴 High Probability → Shop Fuel Tank Cap This is the most common cause for EVAP codes on all vehicles. The rubber seal on the cap can crack and degrade over time, or the ratchet mechanism can wear out, preventing a proper seal. Aftermarket caps are a frequent source of problems.
How to confirm: Ensure the cap is tightened until it clicks at least once. Inspect the cap's rubber O-ring for cracks, stiffness, or debris. Check the fuel filler neck for rust or distortion that could prevent a seal. Replacing it with a new OEM cap is often the cheapest and most effective diagnostic step.
Typical fix: Tighten or replace the gas cap.
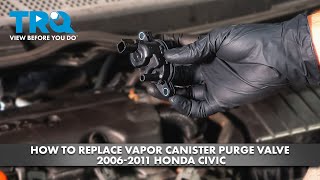
Est. part cost: $15-$35 - Faulty EVAP Canister Purge Valve (Solenoid) 🔴 High Probability → Shop Vapor Canister This specific valve is a known common failure item on the 8th generation Civic, often getting stuck open or closed. It's located in the engine bay and is subjected to constant heat cycles.
How to confirm: Locate the valve in the engine bay. With the engine off, disconnect the valve's electrical connector and the two vapor hoses. Attempt to blow through the valve. It should be normally closed, so no air should pass through. If you can blow through it, it's stuck open and must be replaced. You can also test for a clicking sound when applying 12V to its terminals.
Typical fix: Replace the EVAP canister purge valve.
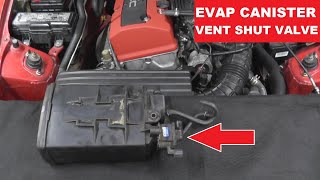
Est. part cost: $40-$120 - Faulty EVAP Canister Vent Valve (Solenoid) 🟡 Medium Probability → Shop Vapor Canister This valve is located under the car with the charcoal canister, making it highly susceptible to corrosion and damage from road salt, water, and debris. The electrical connector and the valve itself can fail.
How to confirm: This is harder to test without a capable scan tool that can command the valve to open and close. A visual inspection of the wiring and valve for heavy rust or physical damage is a good first step. A common symptom of a stuck-closed vent valve is the gas pump repeatedly shutting off during refueling. If a smoke test is performed, smoke will be seen exiting the vent valve if it is stuck open.
Typical fix: Replace the canister vent valve. It is often sold with the charcoal canister as an assembly, but can sometimes be purchased separately. 🎬 See how to test and replace the vent shut valve.
Est. part cost: $100-$350 - Cracked or Disconnected EVAP Hoses ⚪ Low Probability
How to confirm: Visually inspect all accessible EVAP lines in the engine bay and under the vehicle for cracks, brittleness, or loose connections. Pay close attention to the hoses connected to the purge valve and the charcoal canister. A smoke test is the most effective way to find a hard-to-see leak.
Typical fix: Replace the damaged section of hose.
Est. part cost: $10-$50 - Leaking Charcoal Canister ⚪ Low Probability → Shop Vapor Canister
How to confirm: Visually inspect the canister (located under the car, near the gas tank) for physical cracks or damage, which can happen from road debris. A smoke test is the definitive way to confirm a leak from the canister body itself, rather than one of its attached components.
Typical fix: Replace the charcoal canister assembly.
Est. part cost: $200-$400
Rare But Worth Checking
- Faulty Fuel Tank Pressure (FTP) Sensor: → Shop Fuel Tank This sensor tells the computer the pressure within the EVAP system. If it provides incorrect readings, the computer may falsely believe there is a leak when there isn't one. This is less common than component leaks but can happen.
Diagnosis Steps
- Scan the computer for any other related trouble codes. Note any codes like P0441, P0443, or P0455 which can help pinpoint the issue.
- Check the gas cap. Ensure it is a Honda OEM cap, is tightened until it clicks, and the seal is not cracked or worn. Clear the code and drive for a few days to see if it returns.
- If the code returns, perform a visual inspection of the EVAP hoses in the engine bay and under the car for any obvious cracks or disconnections.
- Locate the EVAP purge valve in the engine bay (Part #36162-RNA-A01). 🎬 Watch this step-by-step guide to replacing the purge valve. With the vehicle off, disconnect the vapor line and check if it's stuck open by trying to blow through it. It should be closed and block air.
- Inspect the EVAP canister and vent valve assembly under the car (driver's side, in front of the rear wheel) 🎬 Watch this video to quickly locate your Civic's EVAP components. for heavy corrosion, physical damage, or loose wiring.
- If the cause is not apparent, a smoke test is the most effective next step. This involves injecting smoke into the EVAP system's service port to visually identify the source of any leaks from hoses, valves, or the canister.
- If no leaks are found, test the electrical circuits for the purge and vent valves using a multimeter for proper voltage and resistance. A capable scan tool can also be used to command the valves to cycle on and off to confirm operation.
Parts You'll Likely Need
- Gas Cap
(OEM #17670-SJA-013)— This is the most frequent and easiest fix for any EVAP code. Using an OEM cap is highly recommended as aftermarket versions can be unreliable and cause the code to persist.
Trusted brands: Honda (OEM)
OEM price range: $25-$35
Aftermarket price range: $15-$25 - EVAP Canister Purge Valve
(OEM #36162-RNA-A01)— This is a very common failure point on the 8th generation Civic that leads to EVAP codes. It is located in the engine bay and is relatively easy to replace.
Trusted brands: Honda (OEM), Denso (often the OEM supplier), Standard Motor Products, Dorman
OEM price range: $70-$110
Aftermarket price range: $40-$80 - EVAP Canister Vent Shut Valve
(OEM #17311-SNA-A01)— This valve, located under the car, is the second most common electronic component to fail in the EVAP system for this vehicle, often due to corrosion. It can sometimes be purchased separately from the canister.
Trusted brands: Honda (OEM), Dorman
OEM price range: $105-$155
Aftermarket price range: $60-$100
Related Codes That Often Appear With This One
- P0441 — Indicates incorrect purge flow, often pointing directly to a faulty or stuck EVAP purge valve in the engine bay.
- P0443 — Indicates a fault in the purge valve's electrical circuit, pointing to the valve's solenoid or wiring.
- P0446 — Indicates a fault in the vent control circuit, pointing specifically to the vent valve or its wiring under the car.
- P0455 — Indicates a large EVAP leak was detected, which can be caused by the same components as P0440, such as a missing gas cap or a stuck-open purge valve.
Platform-Specific Known Issues
- source — Multiple owners on 8thcivic.com report that after checking the gas cap, the P0440 or related EVAP codes were resolved by replacing the purge valve solenoid (36162-RNA-A01) located on the intake manifold. The repair is described as taking less than 15 minutes with basic tools.
- A common story in forums involves the P0440 light appearing, the owner replacing the gas cap with a cheap aftermarket version, and the light returning. The issue is only resolved after purchasing a genuine Honda OEM gas cap, which creates a proper seal that aftermarket caps sometimes fail to provide.
Mechanic-Grade Diagnostic Values
- EVAP Canister Purge Valve (Solenoid) Coil Resistance — expected: 30-40 Ohms at room temperature.. Failure: A reading of infinite ohms (open circuit) or near zero ohms (short circuit) indicates a failed solenoid.
- EVAP Canister Vent Shut Valve (Solenoid) Coil Resistance — expected: 20 - 40 Ohms (general Honda specification).. Failure: A reading of infinite ohms indicates an open circuit, while a reading near 0 ohms indicates a short circuit.
- Voltage at EVAP Canister Vent Shut Valve Connector — expected: Approximately 12V (Battery Voltage) on the power pin with the ignition key in the 'ON' position.. Failure: 0V or significantly low voltage points to a wiring issue, a blown fuse, or a problem with the Power Control Module (PCM).
Scan Tool Commands That Help
- Honda HDS (Honda Diagnostic System) or capable aftermarket scan tool: EVAP System Functional Test — This command initiates the vehicle's self-test procedure on demand. It will command the purge and vent valves to cycle and monitor the Fuel Tank Pressure (FTP) sensor to check for leaks, blockages, or faulty components. It's the most comprehensive way to test the entire system electronically.
- Honda HDS or capable aftermarket scan tool: EVAP Vent Solenoid ON/OFF — This bidirectional control is used to manually command the vent valve (normally open) to close. This is critical for performing a smoke test, as the system must be sealed to find leaks. It also confirms if the solenoid is responding to the PCM's command.
- Honda HDS or capable aftermarket scan tool: EVAP Purge Valve ON/OFF — This command manually opens the normally closed purge valve. It can be used to check if the valve is physically stuck or if the solenoid is functional. A technician can command it open and feel for vacuum from the intake manifold side to confirm operation.
Wiring & Ground Locations
- G101 — On the engine block, typically attached to the thermostat housing on the right (passenger) side of the engine.. This is a primary ground termination point for the Engine Control Module (ECM/PCM) and many sensors. A corroded or loose G101 ground can cause erratic sensor readings and improper operation of solenoids like the EVAP purge and vent valves, leading to false trouble codes.
- EVAP Canister Purge Valve Connector — On the intake manifold, in the engine bay.. This 2-pin connector provides power and ground control from the PCM to the purge valve. Checking for battery voltage (with key on) and a ground signal from the PCM at these pins is a key diagnostic step for codes like P0443, but can also be relevant for P0440 if the valve is not operating.
- EVAP Canister Vent Valve Connector — Under the vehicle, on the EVAP canister assembly, which is located near the center of the car, just in front of the gas tank.. This connector is highly exposed to road spray and corrosion. A poor connection here is a common cause of vent valve circuit codes (like P0446) and can cause the valve to fail to operate, contributing to a P0440.
OEM Part Supersession History
17670-SNA-A02→17670-T3W-A01— Standard part update/revision by Honda.
Heads up: The new part number is fully compatible and is the correct replacement for the original gas cap on this vehicle.
Diagnostic Flowchart
Other Known Issues on This Vehicle
Issues unrelated to this code that are worth knowing about as an owner of this generation:
- Cracked Engine Block (R18A1) 🔴 High — Affects 2006-2008 and some early 2009 models. A manufacturing defect can cause a coolant leak from a crack in the block, leading to overheating and engine failure. Onset can occur at various mileages, some reported over 100k miles. (Ref: Honda TSB 10-048 extended the warranty to 10 years/unlimited miles, but this has since expired for all affected vehicles.)
- Failing Clear Coat / Paint 🟠 Medium — Widespread across the generation, especially on darker colors like black, blue, and red. The clear coat begins to fail, peel, and oxidize, typically on the roof, hood, and trunk. This often becomes apparent after 5-7 years. (Ref: Honda issued a warranty extension (TSB available) for the paint for 7 years from the original purchase date, which has now expired for all vehicles.)
- Defective Sun Visors 🟡 Low — Extremely common. The plastic at the visor's pivot point cracks, causing the visor to droop and obstruct the driver's view. This was the subject of a class-action lawsuit. (Ref: A class-action settlement (Cooper v. American Honda Motor Co., Inc.) provided reimbursement for past repairs, but no formal recall was issued. Replacement part numbers include 83280-SNA-A01ZA.)
Used vs. New Parts: Buying Guide for This Vehicle
When a used part is the smart pick: For purely mechanical or structural parts like the charcoal canister body (if not cracked) or mounting brackets, a used part from a low-mileage, non-corroded donor car can be a cost-effective option. However, given the low cost of new aftermarket electronic components, it's rarely worth the risk for valves.
Donor-vehicle mileage cap: roughly under 80000 miles for the part to have meaningful remaining life.
What to inspect on the donor part:
- Check for heavy rust or corrosion on electrical connectors and metal housings, especially for the vent valve.
- Inspect plastic components for brittleness or visible cracks.
- If possible, test the resistance of used solenoids with a multimeter before purchase to ensure they are within spec (e.g., 30-40 ohms for the purge valve).
- Avoid parts from vehicles in the 'salt belt' or areas with high humidity, as corrosion is the primary failure mode for under-car components.
OEM-only on this vehicle (don't cheap out):
- Gas Cap: This is the most critical part to buy OEM. Aftermarket gas caps are a very common cause of persistent EVAP codes on Hondas, even when new. The savings are not worth the diagnostic headache.
Aftermarket brands forum-validated for this vehicle:
- Denso (often the OEM supplier for electronic parts)
- Standard Motor Products (SMP)
- Dorman (generally considered a mid-grade, acceptable alternative, though quality can be hit-or-miss)
Brands owners have reported issues with on this vehicle:
- Unbranded, low-cost parts from online marketplaces. Forum users frequently report these parts failing quickly or being dead-on-arrival.
Real Owner Stories
Aggregated from forums and TSBs cited above. Mileages and costs reflect what owners reported in those sources.
2006-2011 Honda Civic 1.8L
Symptoms: The check engine light was on with EVAP codes. After replacing the gas cap with a cheap aftermarket version, the light returned.
What fixed it: Purchasing and installing a genuine Honda OEM gas cap to create a proper seal.
Source hint: Vehicle_specific_issues: DIY Gas Cap Replacement Story
2008 Honda Civic 1.8L
Symptoms: Check engine light on with code P0443 (closely related to P0440).
What fixed it: Replacing the EVAP purge valve solenoid (36162-RNA-A01) located on the intake manifold. The repair took less than 15 minutes.
Source hint: 8thcivic.com - Thread 'P0443 evap purge valve'
Related OBD-II Codes
Frequently Asked Questions
Is there a specific part number for the purge valve that commonly fails on the 8th generation Civic?
I have a 2008 Civic with a P0440; is this related to the cracked engine block TSB?
Can I use an aftermarket gas cap to fix the P0440 code on my Civic?
Why does the gas pump nozzle keep clicking off when I try to refuel my 2006-2011 Civic?
Is the Acura CSX prone to the same P0440 issues as the Honda Civic?
How can I quickly test if my Civic's purge valve is the cause of the P0440?
Helpful Videos

Used OEM Parts in Stock

New Aftermarket Parts Available


The information in this article is provided for general reference and educational purposes only. Vehicle specifications, procedures, and part compatibility can vary by production date, trim level, and region. Always consult your vehicle's factory service manual and verify part numbers before purchasing or performing repairs. Safety-critical components such as airbags, seat belts, and braking systems should be installed by a qualified professional.
- Honda Civic:
- 🧭 Diagnostic Flowchart
- 🎬 Helpful Videos
- 🛍️ Shop This Part
- What's Unique About the 2006-2011 Honda Civic
- Symptoms You May Notice
- Most Likely Causes
- Rare But Worth Checking
- Diagnosis Steps
- Parts You'll Likely Need
- Related Codes That Often Appear With This One
- Platform-Specific Known Issues
- Mechanic-Grade Diagnostic Values
- Scan Tool Commands That Help
- Wiring & Ground Locations
- OEM Part Supersession History
- Other Known Issues on This Vehicle
- Used vs. New Parts: Buying Guide for This Vehicle
- Real Owner Stories
- 2006-2011 Honda Civic 1.8L
- 2008 Honda Civic 1.8L
- Related OBD-II Codes
- Frequently Asked Questions
- 🎟️ Get 5% Off