
P0440 on 2007-2011 Honda CR-V: EVAP System Malfunction Causes and Fixes
On a 2007-2011 Honda CR-V, code P0440 is most often caused by a loose or worn-out gas cap. If a new gas cap doesn't fix it, the next most likely culprit is a faulty EVAP purge valve located in the engine bay. A new OEM gas cap costs around $25-$40, and a purge valve is about $50-$90 for an OEM part.
- Always check the gas cap first for a P0440 code. Ensure it's tight and the seal is in good condition.
- If the gas cap is not the issue, the EVAP purge valve in the engine bay is the next most likely part to have failed and is a common fix for this CR-V.
- Using a genuine Honda OEM gas cap is strongly recommended over cheaper aftermarket alternatives to ensure a proper seal.
- This code will not affect your vehicle's drivability, but it will cause you to fail an emissions inspection.
- A smoke test is the most definitive way to find a leak if the gas cap and purge valve are not the cause.
What's Unique About the 2007-2011 Honda CR-V
For the third-generation Honda CR-V, the P0440 code often points to one of two very common and simple failures. While many vehicles can have complex and hard-to-find leaks, CR-V owners frequently resolve this code with either a new gas cap or by replacing the purge valve solenoid. The purge valve, in particular, is a known weak point that can fail and cause this code even after the gas cap has been replaced. The 'Check Fuel Cap' message on the dash is a very strong indicator, but its absence does not rule out a cap or other EVAP issue.
Symptoms You May Notice
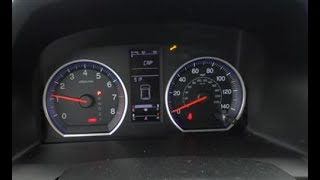
- Check Engine Light is on
- A faint smell of gasoline, especially around the rear of the vehicle or near the gas cap.
- A 'Check Fuel Cap' message may appear on the dashboard information display. 🎬 Watch: What to do when the Check Fuel Cap message appears.
- No noticeable difference in driving performance.
- Replacing the oxygen sensors. O2 sensors are part of the exhaust system and have no connection to the EVAP system.
- Replacing the catalytic converter. This is an expensive part of the exhaust system and is unrelated to fuel vapor leaks.
- Assuming an expensive repair without first checking the gas cap. Always start with the simplest and most common fix.
Most Likely Causes
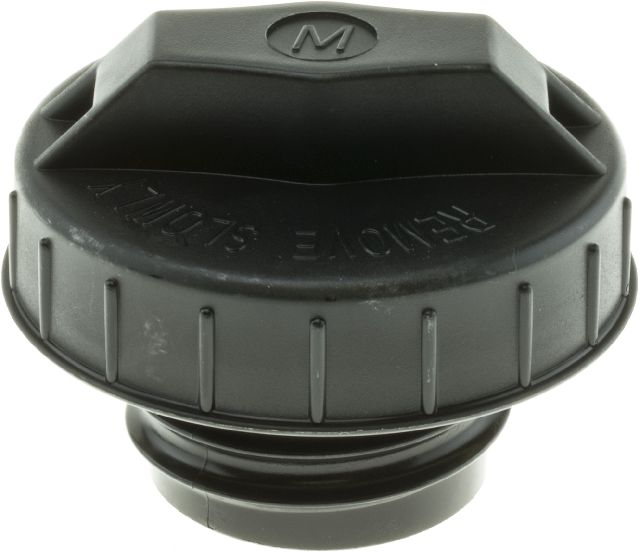
- Loose, Worn, or Incorrect Gas Cap 🔴 High Probability → Shop Fuel Tank Cap The gas cap seal is a simple rubber O-ring that degrades over time from exposure to fuel vapors and weather, losing its ability to create a perfect seal. This is the most common cause for any EVAP leak code on most vehicles.
How to confirm: First, ensure the cap is tightened until it clicks at least once. Inspect the rubber seal on the cap for cracks, stiffness, or damage. Check the fuel filler neck for rust or debris that could prevent a good seal; light sanding and cleaning can help.
Typical fix: Replace the gas cap. It is highly recommended to use a genuine OEM Honda gas cap, as aftermarket caps are known to cause sealing issues, leading to persistent codes.
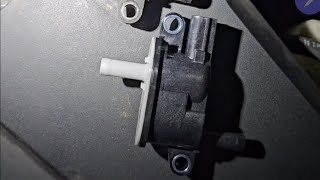
Est. part cost: $25-$40 - Faulty EVAP Canister Purge Valve 🟡 Medium Probability → Shop Vapor Canister The purge valve (or purge solenoid) is an electromechanical part that is constantly working while the engine runs. It can get stuck open or closed, which the system will detect as a fault. This is a frequently reported failure point on this CR-V generation that often presents after a new gas cap fails to resolve the code.
How to confirm: The purge valve is located in the engine bay. With the engine running, you can disconnect the vacuum hose and feel for suction; if there is constant vacuum at idle, the valve is stuck open. A more definitive test involves using a handheld vacuum pump or a scan tool to command the valve open and closed and check its response.
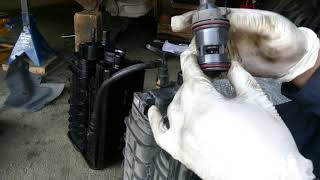
Typical fix: Replace the purge valve. This is a relatively simple DIY job requiring basic hand tools to remove the air filter housing for access. 🎬 See this guide on fixing low purge flow issues.
Est. part cost: $50-$90 - Faulty EVAP Vent Valve / Canister Assembly ⚪ Low Probability → Shop Vapor Canister Vent Valve The vent valve is located with the charcoal canister under the car, where it is exposed to road grime, salt, and moisture. It can fail by getting stuck open or closed, or the canister itself can become saturated with fuel or cracked from road debris impact.
How to confirm: The vent valve can be tested with a scan tool to command it closed. A smoke test is the most effective way to confirm a leak in the canister or a stuck-open vent valve. The canister is located under the vehicle, accessible after removing a protective cover near the rear passenger-side wheel.
Typical fix: The vent valve is often sold as part of the entire EVAP canister assembly. Replacement involves lowering the assembly from under the vehicle. 🎬 Watch: Step-by-step EVAP canister replacement walkthrough.
Est. part cost: $200-$500 - Cracked or Disconnected EVAP Hoses ⚪ Low Probability Rubber hoses become brittle with age and heat cycles. Hoses in the engine bay are prone to heat damage, while hoses under the vehicle can be damaged by road debris or corrosion at connection points.
How to confirm: Visually inspect all accessible EVAP lines in the engine bay and running along the undercarriage to the fuel tank. A smoke test is the most reliable method to find a small crack or pinhole leak in a hose.
Typical fix: Replace the damaged section of the hose.
Est. part cost: $10-$50
Rare But Worth Checking
- Cracked Fuel Filler Neck: → Shop Fuel Filler Neck Rust can perforate the metal tube where the gas cap seals, creating a leak that a new cap cannot fix. This is more common in areas that use road salt and can be definitively found with a smoke test.
- Faulty Fuel Tank Pressure (FTP) Sensor: → Shop Fuel Tank A faulty sensor can report incorrect pressure readings to the computer, causing it to believe there is a leak when there isn't one. This is less common than component failure but can happen.
Diagnosis Steps
- Retrieve the code with an OBD-II scanner and confirm P0440 is present. Note any other codes and check freeze-frame data.
- Check the gas cap. Remove it, inspect the seal for cracks or damage, and reinstall it, ensuring it clicks at least once. Clear the code and drive for a few days to see if it returns.
- If the code returns, replace the gas cap with a new OEM part as a low-cost, high-probability fix.
- Visually inspect the EVAP purge valve in the engine bay and the hoses connected to it for any obvious cracks or damage.
- Visually inspect the EVAP canister, vent valve, and associated hoses under the vehicle (near the rear passenger wheel) for any signs of damage, corrosion, or loose connections.
- If no visual issues are found, test the purge valve. With the engine at idle, disconnect the hose from the valve leading to the intake manifold and feel for vacuum. There should be none. If there is, the valve is stuck open and bad.
- If the purge valve tests good, the vent valve is the next suspect. This usually requires a scan tool to command it closed for testing or removal for bench testing.
- If all components test good, perform a smoke test. This involves injecting low-pressure smoke into the EVAP system's service port to visually identify the source of the leak from any cracks in hoses, the canister, or the filler neck.
Parts You'll Likely Need
- Fuel Tank Cap
(OEM #17670-SJA-013 (Note: This part number may be superseded, always verify with VIN))— This is the most common cause of a P0440 code. The seal wears out over time, allowing vapors to escape.
Trusted brands: Honda (Genuine OEM)
OEM price range: $25-$40
Aftermarket price range: $15-$25 - EVAP Canister Purge Valve
(OEM #36162-RRA-A01)— A very common failure point on this CR-V generation that will trigger a P0440 code, often after a new gas cap fails to solve the issue.
Trusted brands: Honda (Genuine OEM), Denso, Standard Motor Products
OEM price range: $60-$90
Aftermarket price range: $40-$70 - EVAP Vapor Canister Assembly
(OEM #17011-SWA-A01 (Note: Verify with VIN))— Less common, but the canister can crack or the integrated vent valve can fail, requiring replacement of the whole unit.
Trusted brands: Honda (Genuine OEM)
OEM price range: $450-$550
Aftermarket price range: $200-$400
Related Codes That Often Appear With This One
- P0441 — Incorrect Purge Flow. This often points more directly to a faulty purge valve or vent valve, which can also trigger the general P0440.
- P0442 — Small EVAP Leak Detected. If the system's self-test determines the leak is small, it may set this code alongside or instead of P0440.
- P0455 — Large EVAP Leak Detected. This is a more specific version of P0440 and is often caused by a gas cap left completely off or a major hose disconnection.
Technical Service Bulletins (TSBs) & Recalls
- TSB 14-083: Warranty Extension: Front Door And Tailgate Lock Actuators
- TSB 14-084: Warranty Extension: Rear Door Lock Actuators
- TSB 12-072: Warranty Extension: A/C Compressor Clutch
Platform-Specific Known Issues
- Owner Experience: Gas Cap vs. Purge Valve: → Shop Vapor Canister A common story on forums like CRVOwnersClub.com involves an owner getting a P0440 or 'Check Fuel Cap' light. They replace the gas cap (sometimes with an aftermarket one, which fails to fix it), clear the code, and it returns. The second step is almost always replacing the purge valve (P/N 36162-RRA-A01), which permanently solves the problem. This two-step process is the most frequent fix reported by owners.
- DIY Tip for Purge Valve Replacement: → Shop Vapor Canister When replacing the purge valve, owners note that access is tight. The air filter box assembly must be removed to comfortably reach the valve and its hose clamps. This involves removing a few 10mm bolts and loosening the intake tube clamp. While simple, it's a necessary step for what is otherwise a very quick repair.
Mechanic-Grade Diagnostic Values
- EVAP Canister Vent Valve (Solenoid) Resistance — expected: 25 - 30 Ohms at room temperature. Failure: A reading significantly outside this range indicates a faulty solenoid winding.
- EVAP Canister Purge Valve Resistance — expected: Approximately 23 to 26 Ohms at room temperature. Failure: A reading outside of this range suggests the valve's internal coil is faulty.
Scan Tool Commands That Help
- Honda HDS (Honda Diagnostic System): EVAP System Functional Test — This is a comprehensive, automated test that commands the purge and vent valves to seal the system and monitors the Fuel Tank Pressure (FTP) sensor to verify its ability to hold pressure. It's the dealer-level method to confirm system integrity after a repair or when a leak source is not obvious.
- Professional OBD-II Scan Tool: Command EVAP Purge Valve / Vent Valve — Used to manually open and close the purge and vent valves to check for function. A technician will listen for a click from the valve and monitor FTP sensor data or use a smoke machine to see if the valve is sealing correctly when commanded closed.
Wiring & Ground Locations
- EVAP Canister Purge Valve — Located on the rear of the engine.. This is a key electromechanical component. A poor connection or faulty wiring at its 2-pin connector can mimic a failed valve, causing a P0440 or related circuit code. The connector provides power and a control signal from the PCM.
- EVAP Canister Vent Shut Valve — Located near the fuel tank, as part of the charcoal canister assembly.. This valve seals the EVAP system from the atmosphere for pressure testing. Its wiring runs under the vehicle and is susceptible to damage. A wiring fault can prevent it from closing, causing a guaranteed leak detection and P0440 code.
- G101 — Located on the left side of the engine.. This is a primary engine ground point. While not exclusively for the EVAP system, a corroded or loose G101 can cause a variety of sensor and actuator problems, including erratic behavior of EVAP solenoids that rely on a stable ground reference.
- G401 — Located under the left side of the dash.. This is an interior body ground. The PCM and other control modules rely on this ground. A fault here could potentially impact the PCM's ability to correctly command or interpret signals from the EVAP system components.
Real Owner Repair Stories
- YouTube user 'So I Can' (Honda (model not specified, but general EVAP diagnosis)) — Persistent P0440 engine code.
❌ Tried (didn't work) Replaced gas cap, Inspected engine bay hoses, Replaced EVAP canister and other components from a donor car
✅ What actually fixed it The final cause was a cracked seal on the fuel tank vent valve, located on top of the gas tank. This required dropping the fuel tank to access and replace the small, cracked plastic component. After replacement and driving 400 miles, the check engine light did not return.
"I Checked Everything" — The Actual Cause
- A faulty Fuel Tank Pressure (FTP) sensor can pass a smoke test because there is no physical leak, but it will fail the vehicle's self-test. The sensor may send incorrect voltage readings to the PCM, making the computer believe there is a leak when the system is perfectly sealed. This can lead to a P0440 code even when a smoke machine shows no visible leaks.
OEM Part Supersession History
36162-RRA-A01→Not explicitly superseded, but this part number is confirmed to fit a wide range of Honda vehicles from 2006-2015, including the 2007-2014 CR-V.— N/A
Diagnostic Flowchart
Other Known Issues on This Vehicle
Issues unrelated to this code that are worth knowing about as an owner of this generation:
- Power Door Lock Actuator Failure 🟠 Medium — Extremely common, often starting around 85,000 miles. When one fails, others often follow. (Ref: Honda TSB 14-083 and 14-084 (Warranty extension, now expired).)
- A/C Compressor Clutch Failure 🔴 High — Widespread issue where the A/C clutch fails, causing the A/C to blow warm air. Can sometimes lead to serpentine belt damage if the bearing seizes. (Ref: Honda TSB 12-072 (Warranty extension, now expired).)
- VTC Actuator Rattle on Cold Start 🟠 Medium — Common on K24 engines. A brief, loud rattle or grinding noise for 1-2 seconds upon starting the engine when cold. Caused by a worn pin in the VTC gear. (Ref: No recall, but an updated part was released. Some owners report the issue returning even with the new part.)
- Excessive Oil Consumption 🟠 Medium — More frequently reported on 2010-2011 models, but can affect all years. Owners report needing to add oil between changes.
- Rear Differential Groan/Moan 🟡 Low — A groaning or moaning noise from the rear of the vehicle during slow-speed turns. Not a failure, but requires a fluid change with Honda's specific Dual Pump II fluid to resolve. (Ref: Honda TSB exists recommending a fluid change and burnishing procedure.)
Used vs. New Parts: Buying Guide for This Vehicle
When a used part is the smart pick: A complete EVAP canister assembly (including the vent valve) from a junkyard can be a cost-effective option, as a new OEM assembly is very expensive. This is a good choice if you have confirmed the canister or vent valve is the point of failure.
Donor-vehicle mileage cap: roughly under 100000 miles for the part to have meaningful remaining life.
What to inspect on the donor part:
- Source the part from a vehicle in a dry, non-salt-belt region to minimize rust and corrosion risk.
- Visually inspect the used canister for any physical cracks or signs of impact damage.
- Ensure all hose connection nipples are intact and not broken or brittle.
- If possible, get the part from a lower-mileage donor vehicle.
OEM-only on this vehicle (don't cheap out):
- Fuel Cap: Aftermarket gas caps are notoriously unreliable and a frequent cause of persistent EVAP codes. Always use a genuine Honda (OEM) gas cap to ensure a proper seal.
Aftermarket brands forum-validated for this vehicle:
- Denso (for Purge Valve)
- Standard Motor Products (SMP) (for Purge Valve)
Brands owners have reported issues with on this vehicle:
- Unknown or 'white-box' brands for gas caps and electronic valves from online marketplaces are frequently reported on forums as not fixing the issue or failing prematurely.
Real Owner Stories
Aggregated from forums and TSBs cited above. Mileages and costs reflect what owners reported in those sources.
2007-2011 Honda CR-V
Symptoms: Check Engine Light P0440 or 'Check Fuel Cap' light appeared. Owner replaced the gas cap with an aftermarket one, but the code returned.
What fixed it: Replacing the purge valve (P/N 36162-RRA-A01) permanently solved the problem.
Source hint: vehicle_specific_issues: Owner Experience: Gas Cap vs. Purge Valve
2007-2011 Honda CR-V 3rd Gen
Symptoms: Check engine light P0440 - what to do?
What fixed it: Tightening the gas cap, then replacing it with an OEM part, and finally replacing the purge valve when the light persisted.
Source hint: reddit.com/r/CRV thread: 'Check engine light P0440 - what to do?'
2007-2011 Honda CR-V
Symptoms: P0440 and Check Gas Cap Light.
What fixed it: Replacing the OEM gas cap and then the purge solenoid valve.
Source hint: crvownersclub.com thread: 'P0440 and Check Gas Cap Light'
Related OBD-II Codes
Frequently Asked Questions
My dashboard says 'Check Fuel Cap' but the cap is tight. Is there a specific part I should replace on my 2007-2011 CR-V?
Is the P0440 code related to the VTC actuator rattle common on the 2007-2011 CR-V?
Does TSB 12-072 regarding the A/C compressor clutch cover my P0440 EVAP issue?
Where is the EVAP canister located on the 3rd Gen CR-V if I need to check for damage?
Do I need to remove the engine to replace the purge valve on my CR-V?
Are there any warranty extensions for the door locks that might be related to my check engine light?
Helpful Videos
![[Fix] Check Fuel Cap Warning Light](https://img.youtube.com/vi/B4EVwm1Umuk/mqdefault.jpg)

Used OEM Parts in Stock
New Aftermarket Parts Available


The information in this article is provided for general reference and educational purposes only. Vehicle specifications, procedures, and part compatibility can vary by production date, trim level, and region. Always consult your vehicle's factory service manual and verify part numbers before purchasing or performing repairs. Safety-critical components such as airbags, seat belts, and braking systems should be installed by a qualified professional.
- Honda CR-V:
- 🧭 Diagnostic Flowchart
- 🎬 Helpful Videos
- 🛍️ Shop This Part
- What's Unique About the 2007-2011 Honda CR-V
- Symptoms You May Notice
- Most Likely Causes
- Rare But Worth Checking
- Diagnosis Steps
- Parts You'll Likely Need
- Related Codes That Often Appear With This One
- Technical Service Bulletins (TSBs) & Recalls
- Platform-Specific Known Issues
- Mechanic-Grade Diagnostic Values
- Scan Tool Commands That Help
- Wiring & Ground Locations
- Real Owner Repair Stories
- "I Checked Everything" — The Actual Cause
- OEM Part Supersession History
- Other Known Issues on This Vehicle
- Used vs. New Parts: Buying Guide for This Vehicle
- Real Owner Stories
- 2007-2011 Honda CR-V
- 2007-2011 Honda CR-V 3rd Gen
- 2007-2011 Honda CR-V
- Related OBD-II Codes
- Frequently Asked Questions
- 🎟️ Get 5% Off