
P0441 on 2009-2015 Honda Pilot: EVAP Incorrect Purge Flow Causes and Fixes
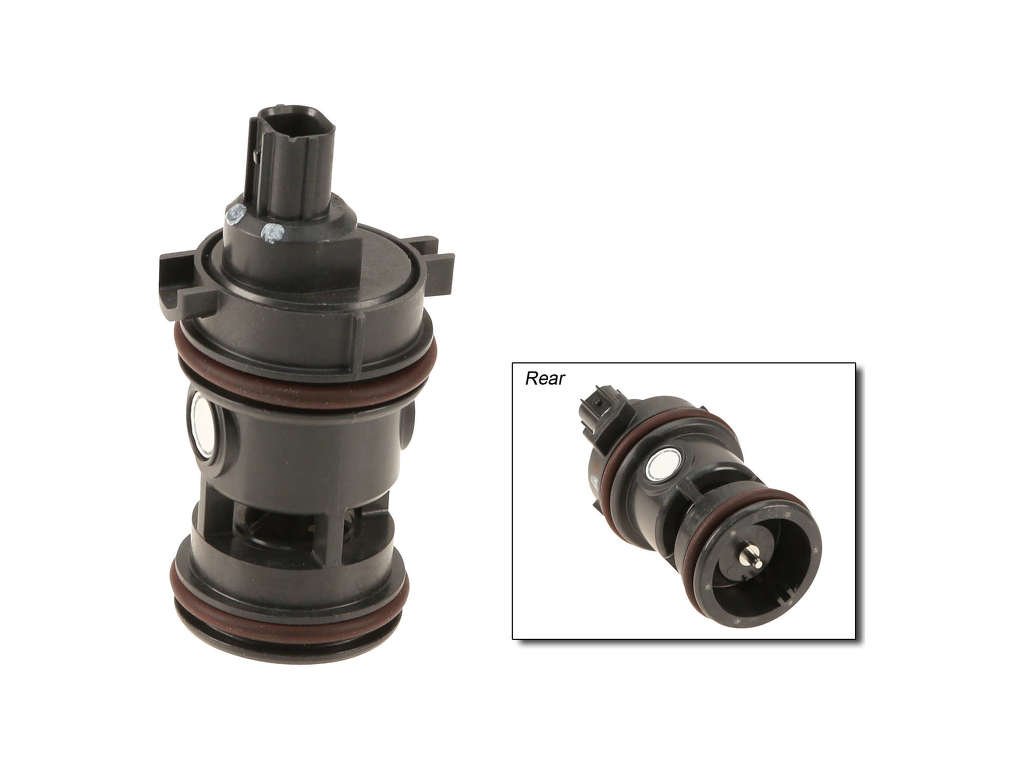
On a 2009-2015 Honda Pilot, code P0441 is most often caused by a faulty EVAP canister purge valve (solenoid) located in the engine bay. This component is a known failure point across many Honda models of this era. Replacing this part is a common, DIY-friendly fix costing between $40 and $90 for a quality aftermarket part.
- P0441 on a 2009-2015 Pilot almost always points to a faulty EVAP purge valve.
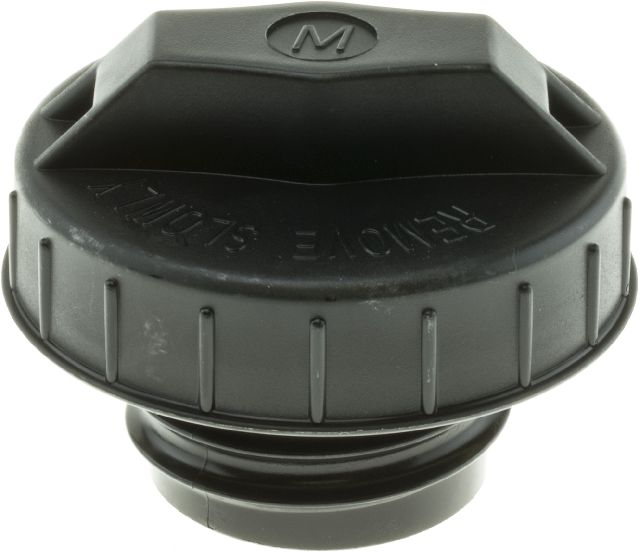
- Always check the gas cap first; make sure it's tight and the seal isn't cracked. Use an OEM cap if replacement is needed.
- Replacing the purge valve is a beginner-friendly DIY job that can be done in under an hour with basic tools.
- Do not replace more expensive parts like the charcoal canister unless the purge valve has been ruled out or there is clear evidence of another failure (like debris in the EVAP lines).
What's Unique About the 2009-2015 Honda Pilot
The 2009-2015 Honda Pilot, part of the second generation, commonly triggers the P0441 code due to a sticking EVAP purge valve. While Honda has issued technical service bulletins (TSBs) for this exact issue on newer Pilot models (e.g., TSB A23-091 for 2019-2022 models), confirming a known weakness in the valve's internal spring design, no official TSB for P0441 covers this specific year range. However, owner experiences and mechanic reports overwhelmingly confirm that the same purge valve failure mode is the primary suspect for this code on the second-generation Pilot as well.
Symptoms You May Notice
- Check Engine Light is on
- Slight fuel smell (occasional, especially if valve is stuck open)
- Rough idle (if purge valve is stuck open, causing a vacuum leak)
- Difficulty starting the engine immediately after refueling (less common)
- In some related Honda/Acura models, EVAP codes can sometimes trigger other seemingly unrelated warning lights, like for the braking system, though this is less documented for the Pilot.
- Replacing the charcoal canister or fuel tank pressure sensor before thoroughly testing the purge valve. The purge valve is the most common, least expensive, and easiest part to replace for this specific code.
- Replacing the gas cap without inspecting it first. While a bad cap can cause EVAP issues, it's less likely to be the sole cause of P0441 compared to the purge valve.
Most Likely Causes
- Faulty EVAP Canister Purge Valve (Solenoid) 🔴 High Probability → Shop Vapor Canister This component is a known failure point across many Honda models of the era. The internal valve, often due to a weak or unevenly wearing spring, can stick open or closed, causing incorrect vapor flow. This is the same failure mode described in TSBs for newer Honda models.
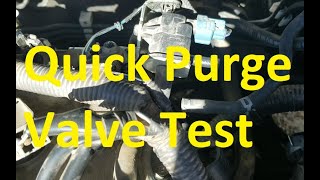
How to confirm: With the engine cold and running, disconnect the EVAP hose from the purge valve. There should be no vacuum felt at the valve's port. If you feel suction, the valve is stuck open and must be replaced. You can also remove the valve and try to blow through it; if air passes, it is stuck open.
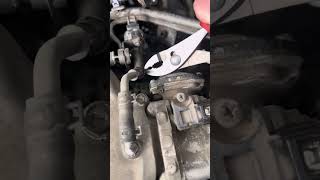
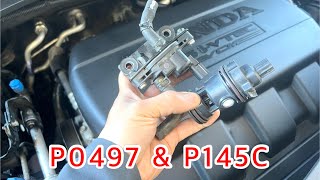
Typical fix: Replace the EVAP canister purge valve. It is located in the engine bay, typically mounted to the intake manifold, and is accessible for DIY replacement with basic tools 🎬 Watch: Step-by-step 2011 Honda Pilot purge valve replacement guide (e.g., a 10mm socket).
Est. part cost: $40-$90 - Loose or Faulty Gas Cap 🟡 Medium Probability → Shop Fuel Tank Cap A gas cap that is not tightened properly or has a cracked, worn-out seal will cause an EVAP system leak. While this more commonly triggers leak-specific codes (like P0455/P0456), it can sometimes contribute to a P0441 code and is the easiest item to check.
How to confirm: Inspect the gas cap for any visible cracks on the seal. Ensure it is tightened until it clicks at least once. If the seal is old and brittle, it's a likely culprit. Many owners recommend using an OEM Honda cap, as aftermarket versions can sometimes fail to seal properly.
Typical fix: Tighten the gas cap correctly. If the seal is damaged, replace the gas cap with a new OEM or high-quality aftermarket part.
Est. part cost: $15-$35 - Cracked or Disconnected EVAP Hose/Line ⚪ Low Probability Over time, the rubber and plastic hoses in the engine bay can become brittle from heat and age, leading to cracks or loose connections, particularly at the fittings for the purge valve and charcoal canister.
How to confirm: Visually inspect all accessible EVAP system hoses, especially those connected to the purge valve and intake manifold, for any signs of cracking, disconnection, or deterioration. A professional smoke test is the most effective way to find hard-to-see leaks.
Typical fix: Replace the damaged section of hose. Ensure all connections are secure.
Est. part cost: $10-$50
Rare But Worth Checking
- Faulty Canister Vent Solenoid: → Shop Vapor Canister This valve is located near the charcoal canister under the vehicle, toward the rear. If it sticks closed, 🎬 Watch: How to replace both the purge and vent valves it prevents the system from venting properly, which can disrupt the purge flow test and potentially trigger P0441.
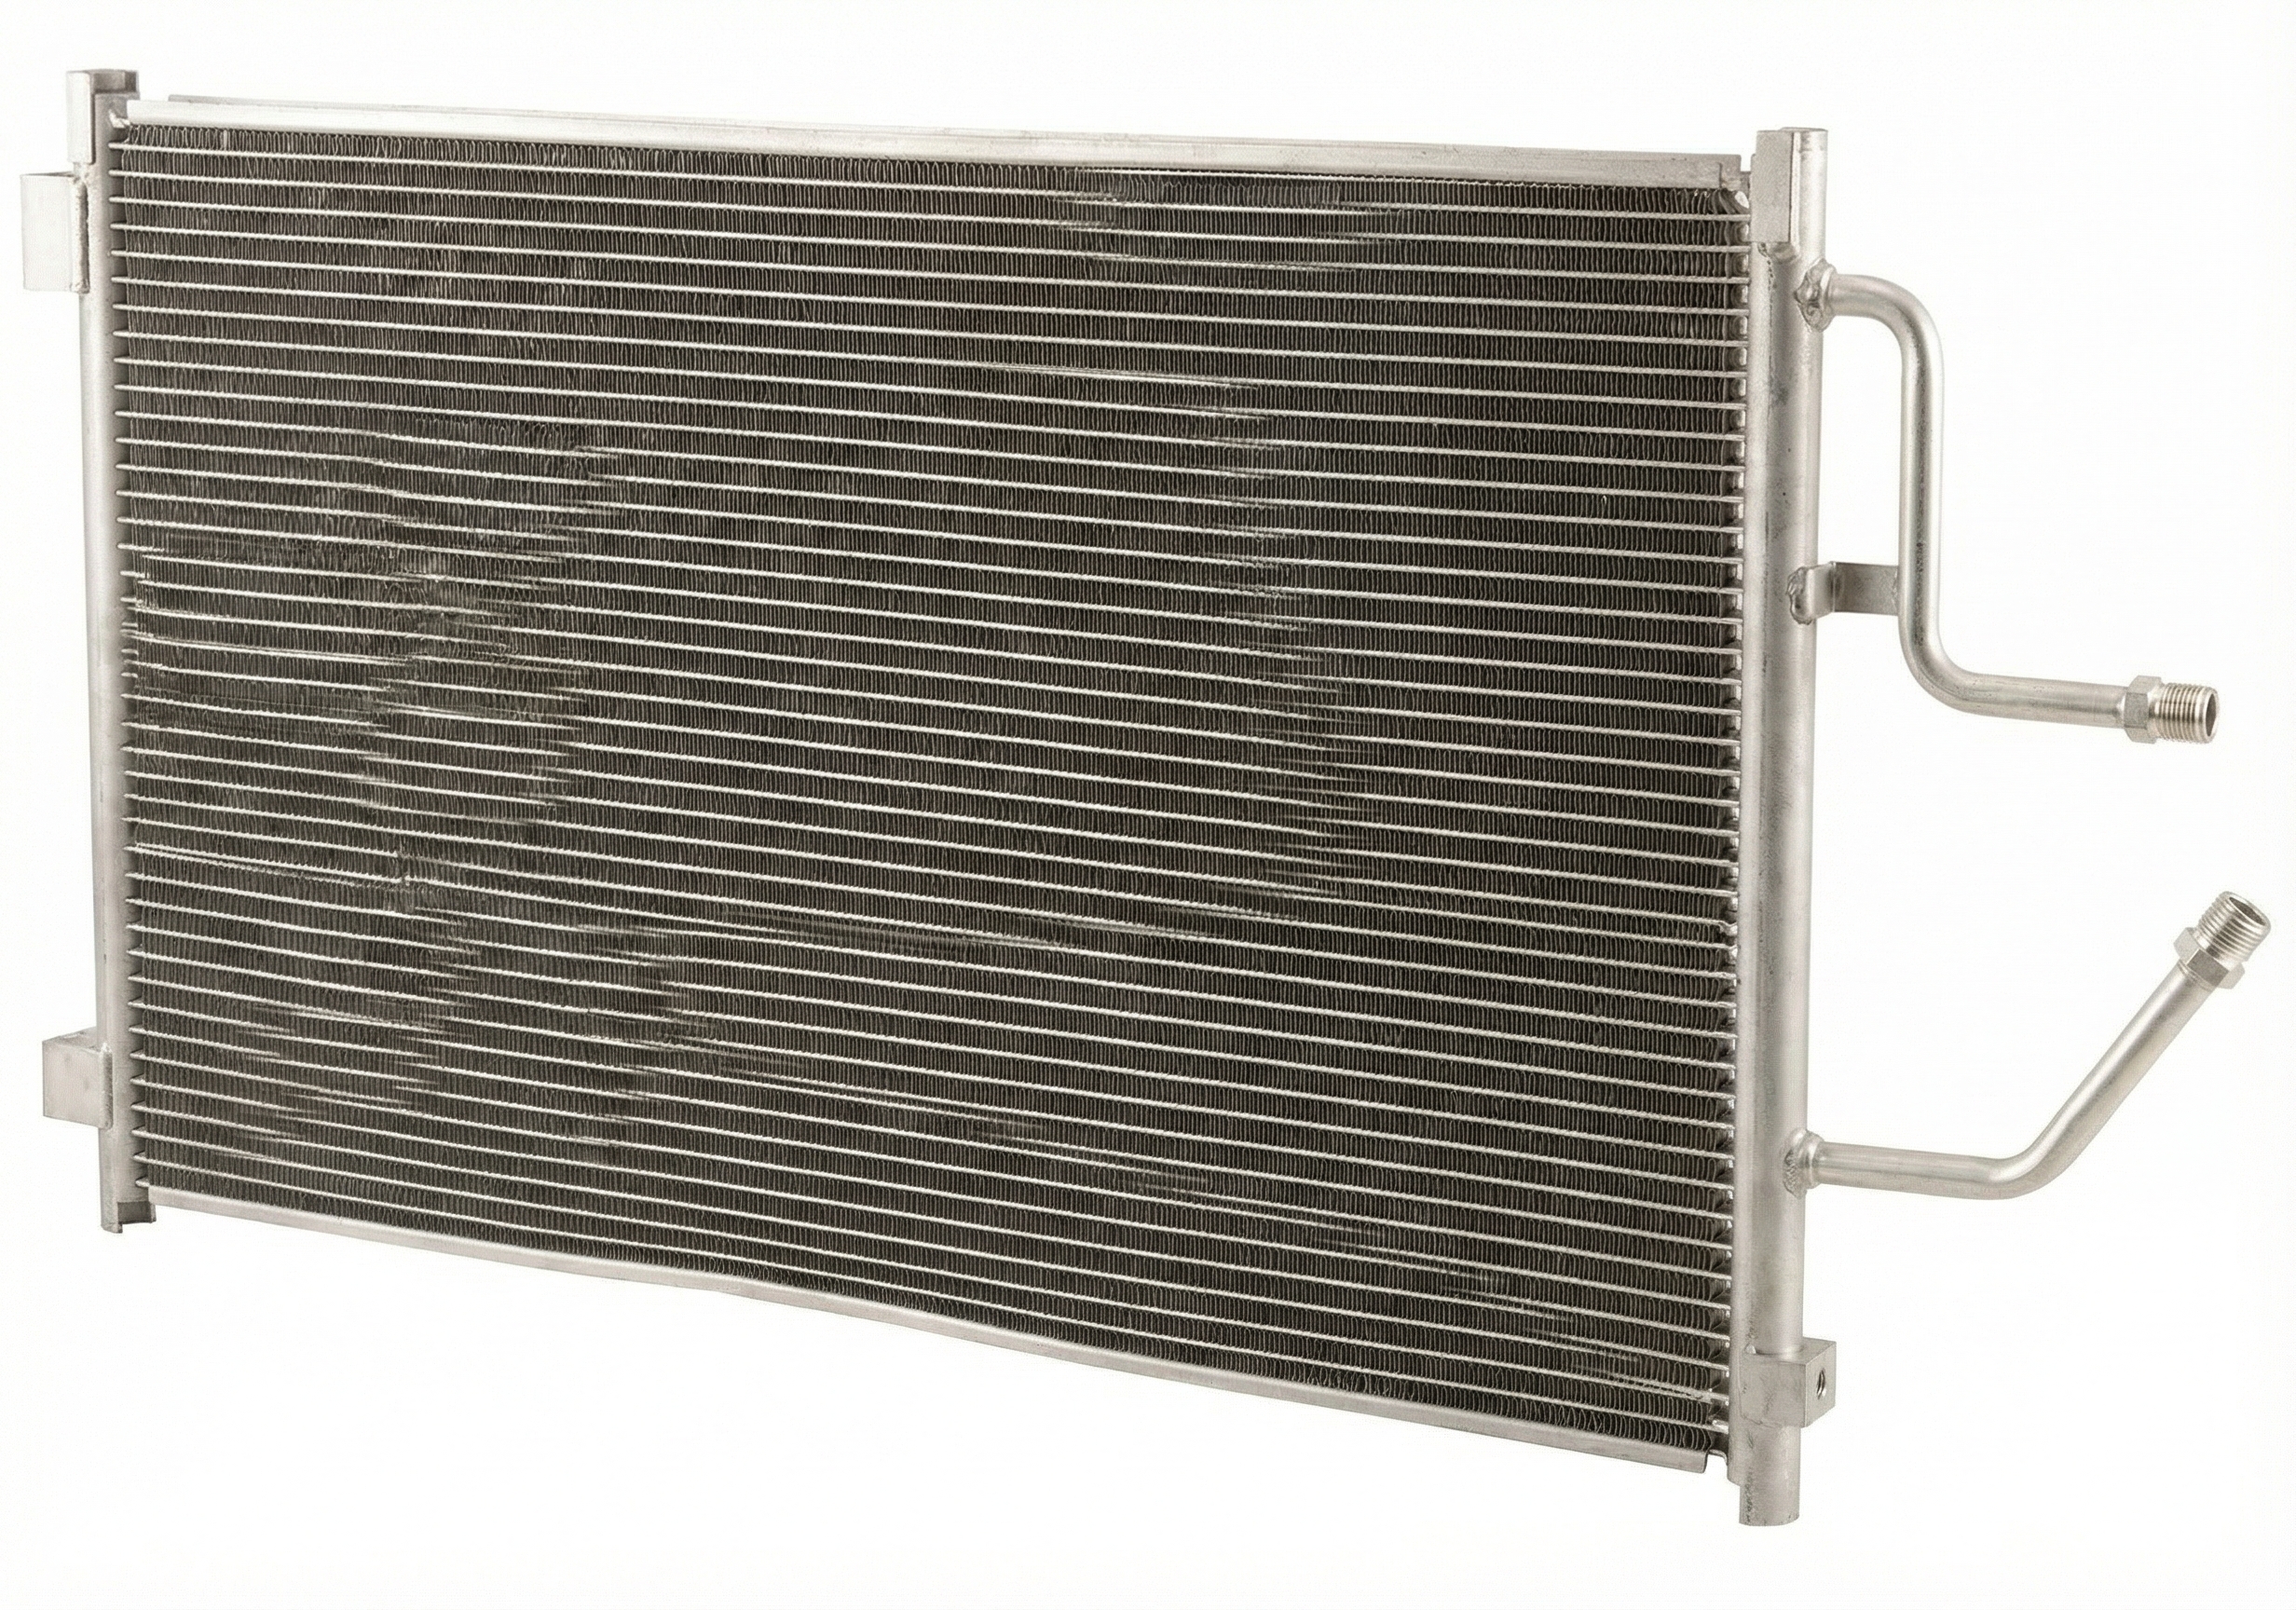
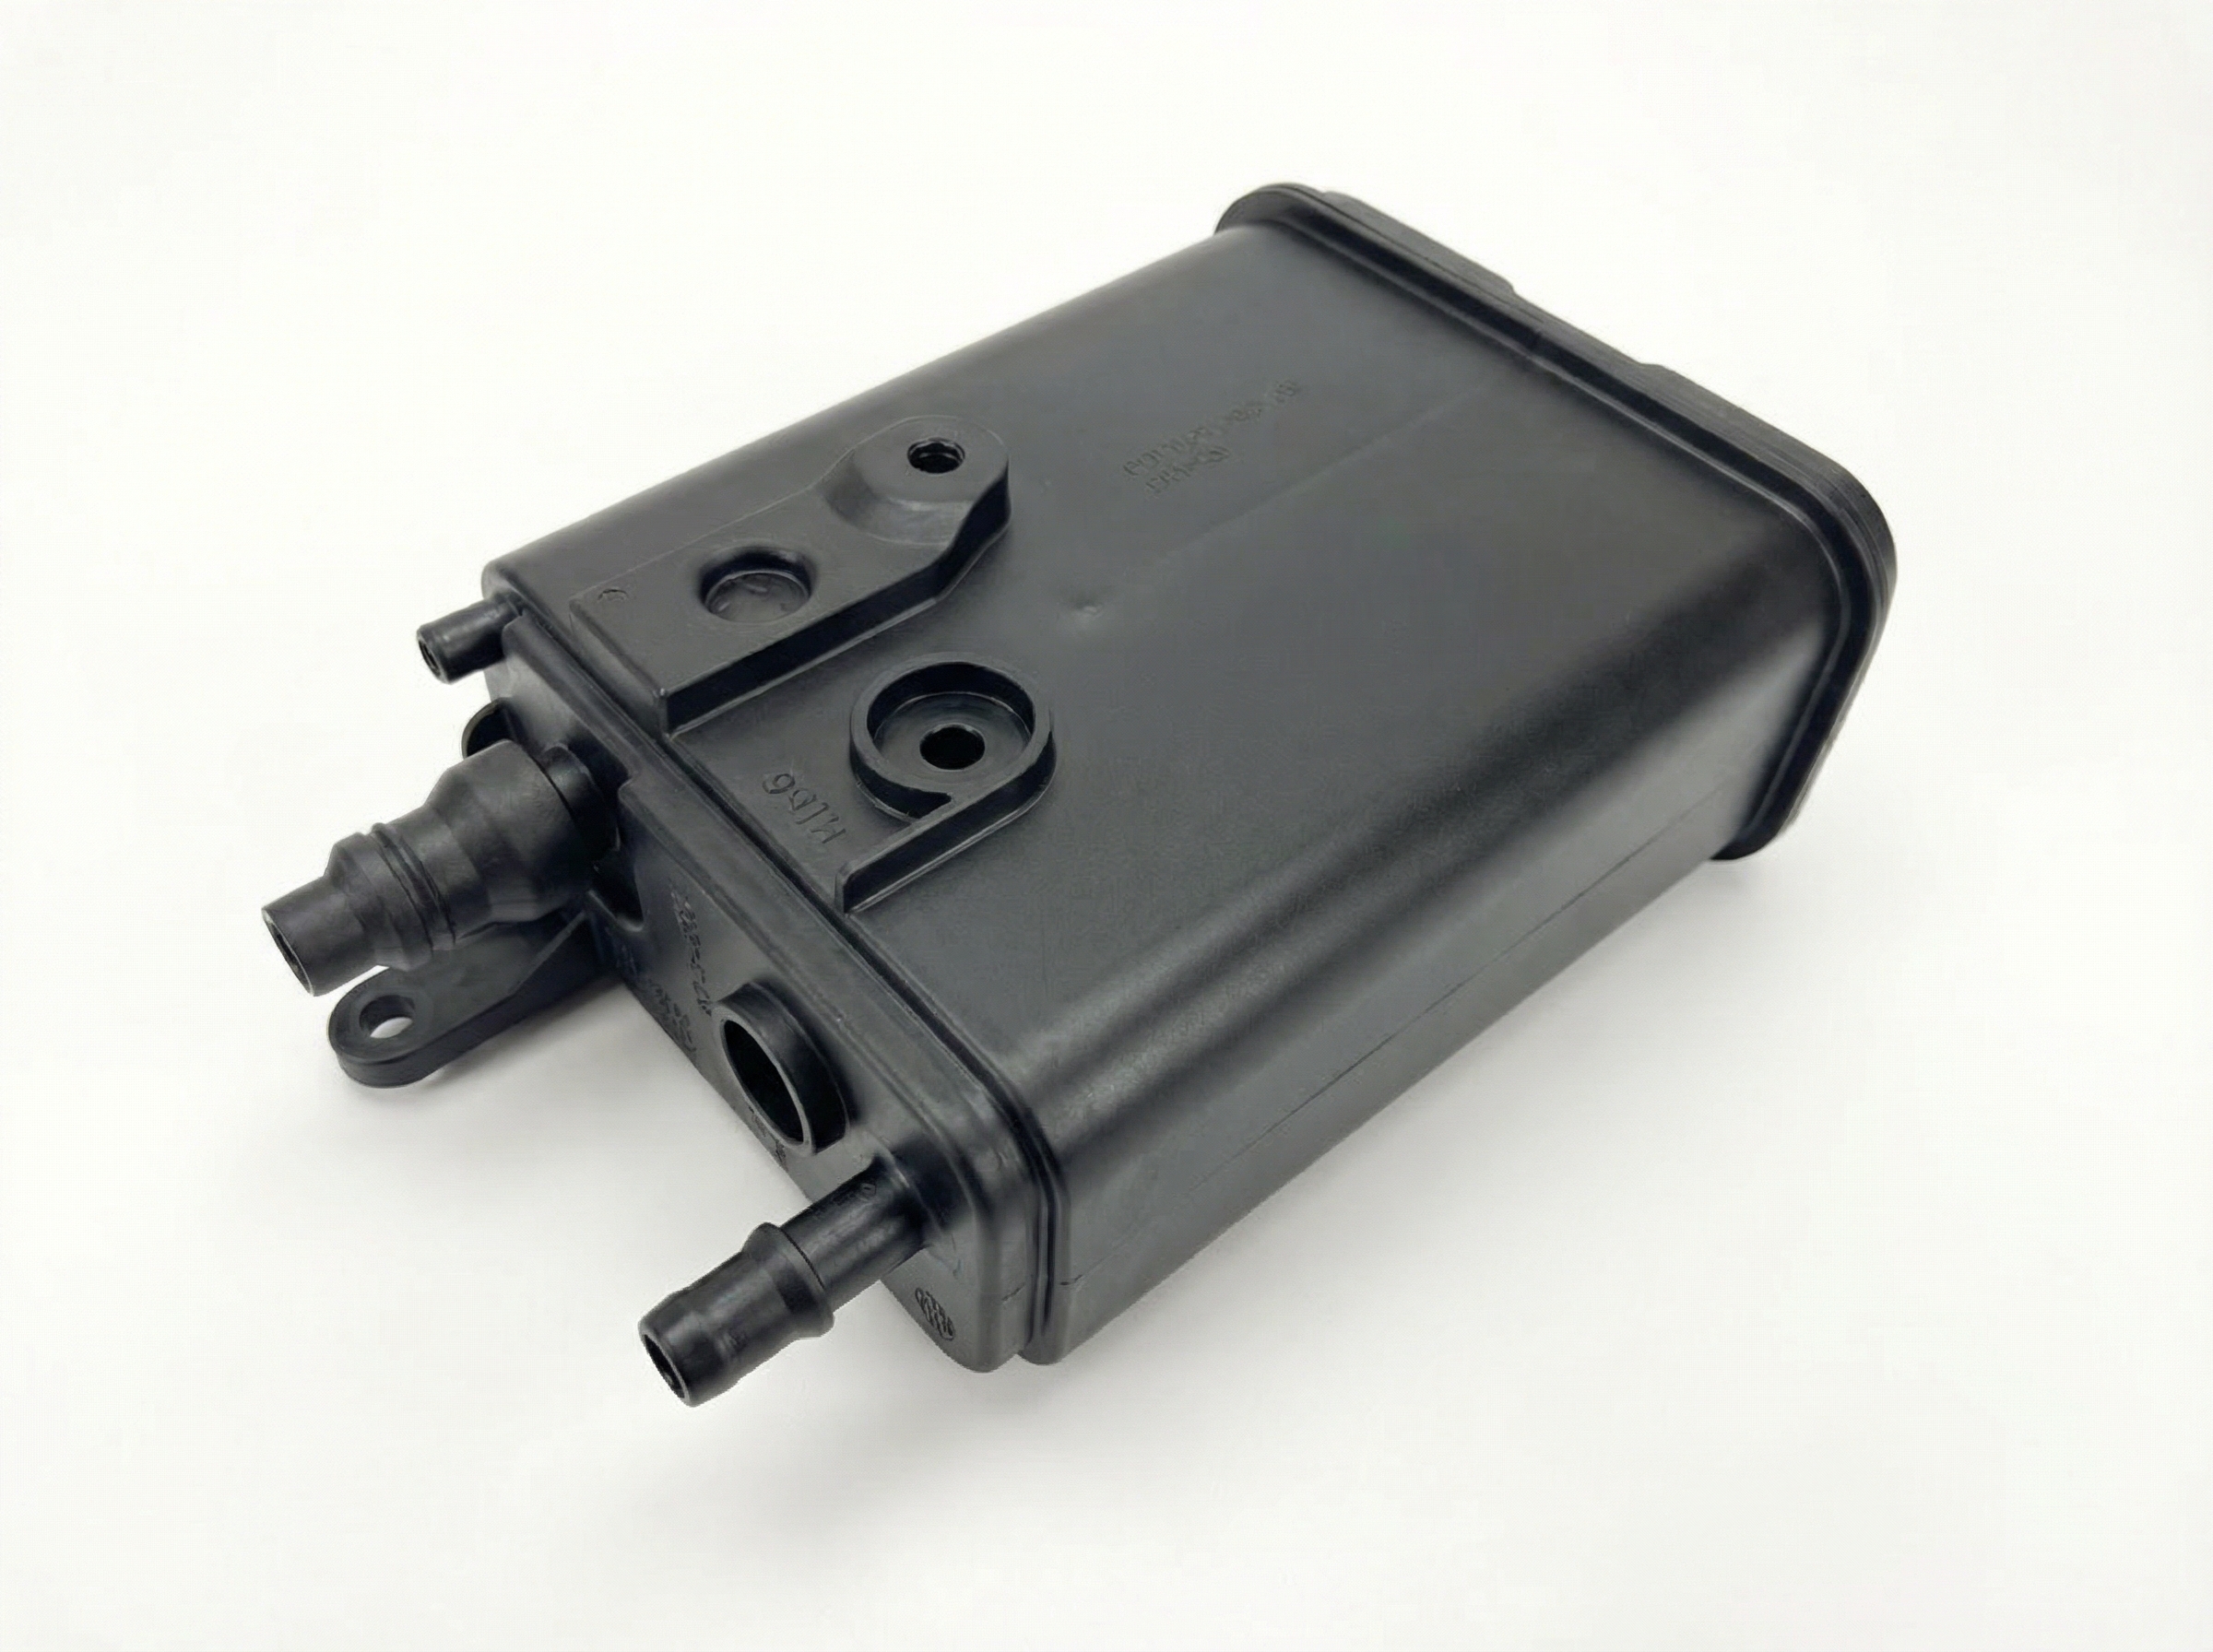
- Clogged or Failed Charcoal Canister: → Shop Vapor Canister This is often caused by consistently overfilling the fuel tank ('topping off'), which can force liquid gasoline into the canister, saturating the charcoal pellets and causing a blockage that restricts flow.
- Faulty Fuel Tank Pressure (FTP) Sensor: → Shop Fuel Tank The PCM relies on the FTP sensor to detect the change in vacuum when the purge valve opens. If the sensor is faulty and not reporting pressure changes correctly, it can mistakenly trigger a P0441 code.
Diagnosis Steps
- Retrieve the P0441 code using an OBD-II scanner.
- Inspect the gas cap. Ensure it is tight and the rubber seal is not cracked or worn. If in doubt, replace it with an OEM cap as it is an inexpensive first step.
- Locate the EVAP purge valve in the engine compartment, usually mounted on the intake manifold with two small hoses and an electrical connector.
- Start the engine when it is cold. Disconnect the vapor hose leading from the charcoal canister to the purge valve.
- Place your finger over the valve's inlet port. You should not feel any vacuum suction. If suction is present, the valve is stuck open and needs to be replaced.
- If no suction is felt, the valve may be stuck closed. This is harder to test without a scan tool that can command the valve to open. A simple alternative is to remove the valve and see if you can blow air through it; you should not be able to. 🎬 See how to test if your purge valve is bad without tools
- Visually inspect all EVAP hoses connected to the purge valve and intake manifold for obvious cracks, damage, or loose connections.
- If the purge valve and hoses appear fine, the next step would be a professional smoke test to check the entire EVAP system for hard-to-find leaks.
Parts You'll Likely Need
- EVAP Canister Purge Valve / Solenoid
(OEM #36162-RMX-A01 (Supersedes 17310-TA0-A01))— This is the most frequent failure point for code P0441 on this vehicle, typically due to sticking internally. The original part number 17310-TA0-A01 has been superseded.
Trusted brands: Honda (Genuine), Dorman (P/N: 911-769), Standard Motor Products (P/N: CP638), Wells (P/N: PV433)
OEM price range: $100-$140
Aftermarket price range: $40-$90 - Fuel Cap
(OEM #17670-SJA-013)— A worn seal on the gas cap can cause EVAP system faults and is an easy and inexpensive item to rule out. Owners strongly recommend OEM for a proper seal.
Trusted brands: Honda (Genuine), Gates, Stant
OEM price range: $25-$40
Aftermarket price range: $15-$25
Technical Service Bulletins (TSBs) & Recalls
- TSB 13-082: 'Warranty Extension: MIL Comes On With DTCs P0301 Through P0304' - Directly applies to 2009-2013 Pilots for issues related to VCM, piston rings, and oil consumption.
- TSB 11-033: 'Engine Oil Consumption; MIL May Be On With DTC P3400 and/or P3497' - Addresses VCM issues causing oil consumption and related trouble codes.
- TSB 16-063: 'Judder From the Torque Converter Lock-Up Clutch' - Pertains to transmission judder felt between 20-60 mph, recommending a transmission fluid flush as a fix.
- TSB Bulletin #A23-091: Notes that due to variations in the purge control solenoid valve spring, the valve wears unevenly and intermittently sticks, resulting in DTC P0441.
- TSB Bulletin #APaS04222021905: Indicates that manufacturer investigators have collected specific parts from vehicles where the Malfunction Indicator Light (MIL) is on with DTC P0441 stored to better understand the condition.
Mechanic-Grade Diagnostic Values
- EVAP Canister Purge Valve internal resistance — expected: 23 to 26 ohms at room temperature. Failure: A reading significantly outside this range indicates a damaged internal coil.
- EVAP Canister Vent Valve internal resistance — expected: 20 to 30 ohms. Failure: A reading outside this range suggests the solenoid winding is damaged.
- EVAP Canister Purge Valve power supply voltage — expected: Battery voltage at the power supply terminal with key on, engine off.. Failure: No voltage suggests a wiring issue or blown fuse.
Scan Tool Commands That Help
- Honda HDS (Honda Diagnostic System): EVAP FUNCTION TEST — This is the official dealer-level functional test used to verify the entire EVAP system is working correctly after a repair, such as replacing a purge valve or tightening the gas cap.
- Advanced Aftermarket Scan Tool (Autel, Thinkcar, etc.): Active Test / Bidirectional Control for EVAP Purge Valve (ON/OFF) — This command allows a technician to manually cycle the purge valve to confirm it is not stuck. While commanding it ON, you should hear an audible click and be able to verify that vacuum is now passing through the valve.
Wiring & Ground Locations
- G101 — On the engine, typically on or near the thermostat housing.. This is a primary ground termination point for the PCM and various engine sensors. A poor connection here due to corrosion or looseness can cause a wide range of erratic sensor readings and component behavior, potentially including incorrect operation of the EVAP purge valve, leading to a P0441 code.
- EVAP Canister Purge Valve Connector — On the EVAP purge valve, mounted to the intake manifold in the engine bay.. This 2-pin connector provides power and the control signal from the PCM. One pin should have battery voltage (power), and the other is the ground-side control wire to the PCM. Checking for voltage here is a key step in diagnosing a circuit fault versus a failed valve.
Real Owner Repair Stories
- MOTOR Information Systems (Honda Pilot (year not specified, but similar J35 engine)) — P1457 (EVAP leak code), but logic applies to flow codes like P0441.
❌ Tried (didn't work) Initial diagnosis pointed towards a standard EVAP leak.
✅ What actually fixed it The EVAP canister vent hose was completely blocked with a mud dauber (wasp) nest. The vent hose on the Pilot routes from the canister at the rear of the vehicle up to a port on the firewall in the engine bay. A smoke test was inconclusive because the blockage prevented smoke from flowing through the system to reveal an exit point. The technician found it by manually tracing and inspecting the entire vent line. - NHTSA ODI #11563010: An owner reported that the MIL came on with DTCs P0441 (EVAP System Purge Flow Malfunction) and P04F1 (EVAP System Low Purge Flow Detected), leading to the replacement of the purge flow valve.
"I Checked Everything" — The Actual Cause
- In a documented case on a Honda Pilot, the EVAP system passed a smoke test (or the test was inconclusive) because the vent line was completely obstructed by a wasp nest. A smoke test relies on finding where smoke *exits* the system, but a total blockage prevents smoke from flowing through the circuit at all, leading to a misdiagnosis. The root cause was only found by physically tracing the vent hose from the rear canister to the firewall.
OEM Part Supersession History
17310-TA0-A01→36162-RMX-A01— Standard part evolution and consolidation across multiple Honda platforms (Pilot, Odyssey, Ridgeline, Accord).
Model Year Variations Within This Range
- 2012-2015: Some parts catalogs list a different purge valve part number (36162-RN0-A01) specifically for the 2012-2015 models, which corresponds to the mid-generation refresh. While 36162-RMX-A01 is widely cited for the whole generation, it is critical to verify the part number with the vehicle's VIN before purchasing.
Diagnostic Flowchart
Other Known Issues on This Vehicle
Issues unrelated to this code that are worth knowing about as an owner of this generation:
- VCM-Related Oil Consumption & Piston Ring Failure 🔴 High — Very common. Can lead to fouled spark plugs (misfire codes P0301-P0304) and eventually engine damage. A class-action lawsuit led to a warranty extension. (Ref: TSB 13-082)
- Torque Converter Judder/Shudder 🟠 Medium — Common issue where a vibration or shudder is felt when driving between 20-60 mph. It is caused by deteriorated transmission fluid. (Ref: TSB 16-063)
- VCM (Variable Cylinder Management) Vibration 🟡 Low — Widespread complaint where owners feel a noticeable vibration or shudder as the VCM system activates/deactivates cylinders to save fuel. This is considered a design characteristic by some, but is annoying and can contribute to premature engine mount wear.
- Failing A/C Compressor Clutch Relay 🟠 Medium — A common issue where the A/C blows warm air because the compressor clutch relay fails. It's an inexpensive and easy part to replace.
Used vs. New Parts: Buying Guide for This Vehicle
When a used part is the smart pick: A used charcoal canister assembly from a low-mileage donor vehicle can be a cost-effective option, especially if the entire assembly (including the vent valve) needs replacement. This is a durable part unless physically damaged or saturated with fuel.
Donor-vehicle mileage cap: roughly under 75000 miles for the part to have meaningful remaining life.
What to inspect on the donor part:
- Check for any visible cracks or damage to the plastic housing.
- Ensure all hose ports are intact and not broken.
- Shake the canister; there should be no rattling sound, which could indicate broken internal charcoal pellets.
- If possible, inspect the ports for any black charcoal dust, which is a sign of internal failure.
OEM-only on this vehicle (don't cheap out):
- Fuel Cap
Aftermarket brands forum-validated for this vehicle:
- Dorman
- Standard Motor Products (SMP)
- Denso
Brands owners have reported issues with on this vehicle:
- Unbranded, no-name parts from online marketplaces are frequently reported to fail prematurely or not seal correctly, leading to the code returning.
Real Owner Stories
Aggregated from forums and TSBs cited above. Mileages and costs reflect what owners reported in those sources.
2011 Honda Pilot
Symptoms: Check engine code P0441 and an ABS U3006–16. Battery voltage reading 11.9 V while the engine is off; dash light says 'emissions system problem'.
What fixed it: The owner was investigating whether it was a battery issue or a purge valve issue based on the P0441 code.
Source hint: Reddit (r/hondapilot)
2011 Honda Pilot
Symptoms: Common transmission shudder felt while driving.
What fixed it: Using an additive with the OEM fluid.
Source hint: Reddit (r/hondapilot)
Related OBD-II Codes
Frequently Asked Questions
I have a P0441 and my 2011 Pilot is also vibrating between 20-60 mph. Are these related?
Could my P0441 code be caused by the VCM system issues mentioned in TSB 13-082?
Is there a specific purge valve part number recommended for the 2009-2015 Honda Pilot?
I'm seeing an 'Emissions System Problem' message and my battery voltage is low. Could the battery cause P0441?
Can I replace the purge valve myself to fix the P0441 code?
Helpful Videos
Used OEM Parts in Stock
New Aftermarket Parts Available


The information in this article is provided for general reference and educational purposes only. Vehicle specifications, procedures, and part compatibility can vary by production date, trim level, and region. Always consult your vehicle's factory service manual and verify part numbers before purchasing or performing repairs. Safety-critical components such as airbags, seat belts, and braking systems should be installed by a qualified professional.
- Honda Pilot:
- 🧭 Diagnostic Flowchart
- 🎬 Helpful Videos
- 🛍️ Shop This Part
- What's Unique About the 2009-2015 Honda Pilot
- Symptoms You May Notice
- Most Likely Causes
- Rare But Worth Checking
- Diagnosis Steps
- Parts You'll Likely Need
- Technical Service Bulletins (TSBs) & Recalls
- Mechanic-Grade Diagnostic Values
- Scan Tool Commands That Help
- Wiring & Ground Locations
- Real Owner Repair Stories
- "I Checked Everything" — The Actual Cause
- OEM Part Supersession History
- Model Year Variations Within This Range
- Other Known Issues on This Vehicle
- Used vs. New Parts: Buying Guide for This Vehicle
- Real Owner Stories
- 2011 Honda Pilot
- 2011 Honda Pilot
- Related OBD-II Codes
- Frequently Asked Questions
- 🎟️ Get 5% Off