
P0442 on 1995-2000 Ford Contour: EVAP Small Leak Causes and Fixes
For a 1995-2000 Ford Contour, the P0442 code almost always points to a simple, age-related failure in the EVAP system. The most likely culprit is a worn-out or loose gas cap, which is a very inexpensive fix. If that doesn't solve it, suspect cracked rubber vacuum hoses, particularly around the firewall-mounted purge valve, or the valve itself.
- Start with the simplest fix: check that your gas cap is tight. If that doesn't work, replace it. It's the most common cause for P0442 on this car.
- If the gas cap isn't the issue, visually inspect the rubber EVAP hoses in the engine bay for cracks, especially near the purge valve on the firewall.
- The canister purge valve itself is another likely culprit and is relatively easy to access and replace.
- For leaks that are hard to find, a professional smoke test is the fastest and most accurate diagnostic method.
What's Unique About the 1995-2000 Ford Contour
On an aging platform like the first-generation Contour, P0442 is overwhelmingly a problem of deterioration. Rubber and plastic components from the 1990s become brittle and fail. Unlike newer cars with complex electronic leak detection pumps, the Contour uses a simpler, vacuum-based system, making diagnosis more straightforward. Owners on forums like the Ford Contour Enthusiasts Group frequently report that simple items like the gas cap or easily accessible hoses are the cause, rather than more complex electronic failures.
Symptoms You May Notice
- Check Engine Light is on
- A faint smell of gasoline, possibly near the rear of the car or after refueling.
- No noticeable impact on drivability or fuel economy.
- Replacing the oxygen sensors. O2 sensors are not related to the EVAP system.
- Replacing the fuel injectors. While part of the fuel system, injectors will not cause an EVAP leak code.
Most Likely Causes
- Loose or Worn Gas Cap 🔴 High Probability → Shop Fuel Tank Cap The gas cap seal is made of rubber that degrades and hardens over 20+ years, preventing a proper seal. It's the most common failure point for any EVAP leak code and the first thing to check.
How to confirm: First, ensure the cap is tightened until it clicks. If the light returns, inspect the rubber O-ring on the cap for cracks, stiffness, or damage. A replacement is inexpensive and a good first step regardless.
Typical fix: Replace the gas cap with a new OEM-spec part. A Motorcraft gas cap is the recommended replacement.
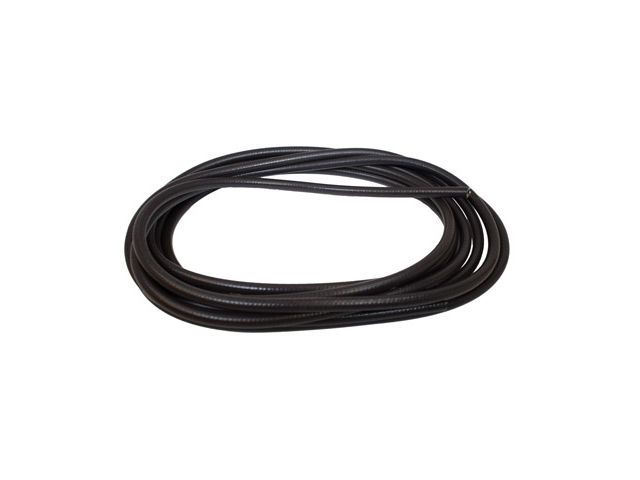
Est. part cost: $10-$25 - Cracked or Disconnected EVAP Hoses 🟡 Medium Probability The vacuum and vapor lines are made of rubber and plastic that become brittle and crack due to age and engine heat. Forum users on Contour.org specifically mention checking the lines on the firewall near the purge valve and the lines running to the charcoal canister under the rear of the car.
How to confirm: Visually inspect all accessible EVAP hoses in the engine bay, particularly around the canister purge valve, and near the charcoal canister under the car. Look for obvious cracks, splits, or loose connections. A smoke test is the definitive method to find a leak that isn't visually apparent.
Typical fix: Replace the damaged section of hose. In some cases, a specific molded hose assembly may be required.
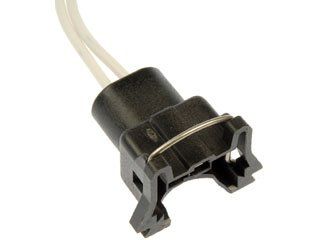
Est. part cost: $5-$50 - Faulty EVAP Canister Purge Valve 🟡 Medium Probability → Shop Vapor Canister This solenoid valve can get stuck partially open, creating a small, persistent leak path. It's a common failure item on many Ford vehicles of this era. On the Contour, it is a known failure point located on the firewall.
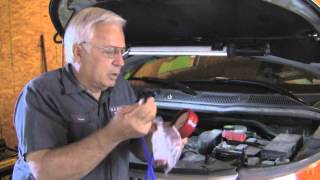
How to confirm: With the engine off, try to blow through the valve; it should be closed and not allow air to pass. 🎬 Watch: How to test the purge valve without any tools. You can also apply 12V power to it and listen for a click. A professional would use a scan tool to command it open and closed while monitoring system pressure. Forum users confirm its location on the firewall, sometimes described as a round, disc-like part.
Typical fix: Replace the canister purge valve. On the Contour, it is typically located on the firewall, behind the engine. The OEM part number may vary by year, with F7RZ-9C915-BA and F5TZ-9C915-A being possible candidates.
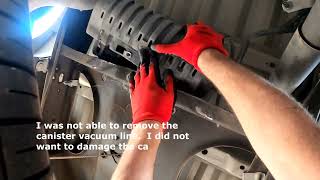
Est. part cost: $30-$70 - Leaking EVAP Charcoal Canister or Vent Solenoid ⚪ Low Probability → Shop Vapor Canister The plastic housing of the canister itself can develop cracks over time. The associated vent solenoid can also fail, similar to the purge valve. These components are located under the car, making them susceptible to road debris and corrosion.
How to confirm: A smoke test is the most effective way to confirm a leak in the canister or its associated vent valve. The canister is located under the car, beneath the spare tire well.
Typical fix: Replace the charcoal canister or the canister vent solenoid.
Est. part cost: $50-$150
Rare But Worth Checking
- Corroded Fuel Filler Neck: → Shop Fuel Filler Neck In regions where road salt is used, the metal fuel filler neck can rust through, creating a leak. This is a known issue on many older Ford vehicles. A smoke test will quickly reveal this issue, with smoke exiting near the rear wheel well. Some owners have reported the area feeling damp with a fuel smell.
- Leaking Fuel Tank: → Shop Fuel Tank While uncommon, a crack in the fuel tank or a leak at the fuel pump sending unit seal can trigger this code. This is usually accompanied by a strong fuel smell.
Diagnosis Steps
- Check the Gas Cap: Remove and reinstall the gas cap, ensuring it clicks several times. Clear the code and drive for a few days. If the code returns, proceed to the next step.
- Replace the Gas Cap: A new gas cap is an inexpensive and very common fix. It's often worth replacing it as a primary diagnostic step with an OEM Motorcraft part.
- Visual Inspection: Carefully inspect all visible EVAP hoses in the engine bay, especially those connected to the purge valve on the firewall. Also, inspect the hoses running to and from the charcoal canister under the rear of the car, near the fuel tank. Look for any signs of cracking, brittleness, or loose connections.
- Test the Purge Valve: Locate the EVAP canister purge valve on the firewall, behind the engine. Disconnect it and try to blow air through it. If air passes, the valve is stuck open and must be replaced.
- Perform a Smoke Test: This is the most effective way to find small leaks. A smoke machine forces low-pressure smoke into the EVAP system via the service port (often a green cap on the purge valve line). Smoke will exit from any cracks or leaks, making them easy to spot. This test is essential for finding hard-to-see leaks in hoses, the charcoal canister, the filler neck, or the fuel tank itself.
- Inspect Components Identified by Smoke Test: Based on the smoke test results, replace the leaking component, which could be a hose, the canister, the purge valve, or the fuel filler neck.
Parts You'll Likely Need
- Gas Cap — The seal is the most common failure point in the EVAP system due to age and wear.
Trusted brands: Motorcraft, Stant, Gates
OEM price range: $20-$35
Aftermarket price range: $10-$25 - EVAP Canister Purge Valve
(OEM #F7RZ-9C915-BA or F5TZ-9C915-A (Verify by VIN))— This solenoid is a moving part that fails over time, getting stuck open and causing a leak. It's a frequently discussed repair on Contour forums.
Trusted brands: Motorcraft, Bosch, Dorman
OEM price range: $50-$90
Aftermarket price range: $30-$70 - EVAP Vacuum Hoses — Rubber hoses become brittle and crack after decades of heat and exposure, creating vacuum leaks.
OEM price range: $20-$60 (for molded sections)
Aftermarket price range: $5-$20 (for bulk hose)
Related Codes That Often Appear With This One
- P0455 — Indicates a large EVAP leak. If a small leak (P0442) worsens, or if the gas cap is left off entirely, it may eventually be detected as a large leak.
- P0446 — Indicates a fault in the EVAP vent control circuit. A faulty vent solenoid can sometimes cause both a circuit code and a leak code.
Platform-Specific Known Issues
- Forum discussions on Contour.org highlight the EVAP purge valve on the firewall as a common point of failure and inspection. Some confusion exists in service manuals regarding its exact appearance and location, but owners confirm it's bolted to the firewall behind the engine.
- The service port for smoke testing is often a green cap located on one of the lines connected to the purge valve on the firewall.
Mechanic-Grade Diagnostic Values
- EVAP Canister Purge Valve Resistance — expected: 30 to 38 ohms (for standard valve). Failure: A reading significantly outside this range indicates a faulty solenoid coil.
- EVAP Canister Vent Solenoid Resistance — expected: 48 to 65 ohms. Failure: A reading outside this range suggests the vent solenoid coil is bad.
- Voltage to EVAP Canister Purge Valve (Key On, Engine Off) — expected: Battery voltage (approx. 12V). Failure: No voltage indicates a wiring issue or problem with the power supply (VPWR circuit).
Scan Tool Commands That Help
- Ford-specific Scan Tool (like IDS): Output Test Mode - Command CV (Canister Vent) Valve ON — This command is used to manually close the canister vent solenoid. This is a required step before performing a smoke test or a vacuum decay test to ensure the system is sealed for an accurate leak check.
Wiring & Ground Locations
- EVAP Canister Purge Valve — Bolted to the firewall, behind the engine, often near the power steering reservoir.. This is a primary failure point. Knowing its exact location is critical for inspection and testing. Forum users note that service manuals for early models can be misleading about its location and appearance.
- Powertrain Control Module (PCM) — Right rear of the engine compartment, behind the power steering reservoir.. The PCM controls and monitors the EVAP system. Technicians may need to access the PCM connector to test for continuity or shorts in the purge valve circuit.
- G100 (Ground) — Left front of the engine compartment.. This is a major engine compartment ground point. A poor connection here can cause erratic behavior in various electronic components, including EVAP solenoids.
- EVAP Charcoal Canister & Vent Solenoid — Under the car, mounted to the bottom of the spare tire well in the trunk area.. This component is susceptible to road debris and corrosion. A crack in the canister or a failed vent solenoid will cause a P0442. Access is from underneath the rear of the vehicle.
- EVAP Service Port — A line near the EVAP canister purge valve, often with a green cap.. This is the designated connection point for a smoke machine to test the system for leaks.
Real Owner Repair Stories
- Ford Contour Enthusiasts Group (Contour.org) user (2000 Ford Contour) — Inspection station reported a "broken evap canister hose."
❌ Tried (didn't work) Initial visual inspection was confusing due to not knowing the canister's location.
✅ What actually fixed it The nipple on the EVAP canister vent solenoid had broken off where the hose connects. The user replaced the vent solenoid located on the canister under the rear of the car. The repair involved dropping a metal pan held by two 8mm bolts, swapping the solenoid, and reattaching the hose. The total cost was about $46 for the part.
OEM Part Supersession History
F5TZ-9C915-A→F7RZ-9C915-BA (for 1998-2000 models)— Part redesign or supplier change over the model years.
Heads up: The purge valve for early models (approx. 1995-1997) may differ from later models. F7RZ-9C915-BA is specified for 1998-2000 2.0L Contours. Always verify the part number by VIN, as forum posts show confusion due to service manual errors.
Model Year Variations Within This Range
- 1995-1997: Service manuals for early models reportedly have incorrect illustrations and location descriptions for the EVAP canister purge valve. Owners of these years should rely on the physical location on the firewall behind the engine, even if the manual shows it elsewhere.
- 1998-2000: Later models are equipped with a dedicated EVAP service port (often with a green cap) near the purge valve for easier smoke testing. Earlier models may not have this port, requiring the technician to disconnect a hose to introduce smoke.
Diagnostic Flowchart
Other Known Issues on This Vehicle
Issues unrelated to this code that are worth knowing about as an owner of this generation:
- Automatic Transmission (CD4E) Failure 🔴 High — Common, especially in earlier models (1995-1997). Failures can occur as early as 60,000-70,000 miles, often requiring a full replacement or rebuild. Issues include internal hydraulic leaks, valve body wear, and gasket blowouts.
- Duratec V6 Water Pump Failure 🔴 High — A well-known issue on the 2.5L V6. The original plastic impeller can shatter, sending fragments into the cooling system and causing blockages and overheating. Later replacements use a metal impeller. Failure to retrieve all plastic pieces can lead to engine damage.
- Deteriorating Wiring Harness Insulation 🟠 Medium — The insulation on wiring harnesses, particularly in the engine bay, can become brittle and flake off due to heat and age, leading to shorts and various electrical gremlins. This was a noted problem on the Mercury Mystique as well.
- Suspension Mount and Bushing Wear 🟠 Medium — The rubber suspension mounts and bushings are prone to dry rot and wear, leading to noise, poor alignment, and compromised handling.
- Dashboard Peeling/Lifting 🟡 Low — The dashboard material, particularly near the windshield, is known to peel, lift, or warp from sun exposure over time. This is a common cosmetic complaint for the 1999 model year.
Used vs. New Parts: Buying Guide for This Vehicle
When a used part is the smart pick: For a vehicle of this age, used parts are a practical option for many components. Structural parts like the fuel filler neck or the plastic charcoal canister are excellent candidates, especially if sourced from a donor vehicle in a dry, rust-free climate. Hoses and hose assemblies can also be sourced used if they are still pliable and show no signs of cracking.
Donor-vehicle mileage cap: roughly under 150000 miles for the part to have meaningful remaining life.
What to inspect on the donor part:
- For hoses: Squeeze the hose to ensure it is still soft and pliable, not hard or brittle.
- For plastic parts (canister, solenoids): Inspect closely for hairline cracks, especially around mounting tabs and hose nipples.
- For fuel filler necks: Check for any bubbling paint or surface rust, particularly on the sealing lip and the lower tube section.
- For electrical connectors: Ensure the plastic isn't brittle and the locking tabs are intact.
OEM-only on this vehicle (don't cheap out):
- Gas Cap: Aftermarket gas caps are notoriously unreliable for maintaining a perfect seal. It is strongly recommended to use an OEM Motorcraft cap to avoid a recurring P0442 code.
Aftermarket brands forum-validated for this vehicle:
- Bosch (for solenoids)
- Dorman (often provides replacement hose assemblies and solenoids, quality can vary but they are a common source)
Brands owners have reported issues with on this vehicle:
- Unbranded, no-name gas caps from online marketplaces.
Real Owner Stories
Aggregated from forums and TSBs cited above. Mileages and costs reflect what owners reported in those sources.
Ford Contour
Symptoms: The owner noted a P0442 code and sought to identify the specific location of the purge valve due to conflicting information in service manuals.
What fixed it: Inspection and potential replacement of the EVAP purge valve located on the firewall.
Source hint: Ford Contour Enthusiasts Group (Contour.org) thread titled 'P0442 Code'
Ford Contour
Symptoms: Owner experienced a small EVAP leak code and investigated the charcoal canister and associated lines under the rear of the vehicle.
What fixed it: Checking the lines running to the charcoal canister under the rear of the car for cracks or loose connections.
Source hint: Ford Contour Enthusiasts Group (Contour.org) - Archives
Related OBD-II Codes
Frequently Asked Questions
Where is the EVAP purge valve located on my Ford Contour?
Which gas cap should I buy for my 1995-2000 Ford Contour to fix a P0442 code?
Where is the service port located if I need to perform a smoke test on my Contour?
Where is the charcoal canister located on this vehicle?
Are there specific part numbers for the purge valve on a Ford Contour?
Can I test the purge valve myself without a scan tool?
Helpful Videos
We Have This Part in Stock


The information in this article is provided for general reference and educational purposes only. Vehicle specifications, procedures, and part compatibility can vary by production date, trim level, and region. Always consult your vehicle's factory service manual and verify part numbers before purchasing or performing repairs. Safety-critical components such as airbags, seat belts, and braking systems should be installed by a qualified professional.
- Ford Contour:
- 🧭 Diagnostic Flowchart
- 🎬 Helpful Videos
- 🛍️ Shop This Part
- What's Unique About the 1995-2000 Ford Contour
- Symptoms You May Notice
- Most Likely Causes
- Rare But Worth Checking
- Diagnosis Steps
- Parts You'll Likely Need
- Related Codes That Often Appear With This One
- Platform-Specific Known Issues
- Mechanic-Grade Diagnostic Values
- Scan Tool Commands That Help
- Wiring & Ground Locations
- Real Owner Repair Stories
- OEM Part Supersession History
- Model Year Variations Within This Range
- Other Known Issues on This Vehicle
- Used vs. New Parts: Buying Guide for This Vehicle
- Real Owner Stories
- Ford Contour
- Ford Contour
- Related OBD-II Codes
- Frequently Asked Questions
- 🎟️ Get 5% Off