
P0442 on 2007-2011 GMC Sierra Denali: Causes and Fixes for Small EVAP Leaks
On a 2007-2011 GMC Sierra Denali, P0442 is most often caused by a loose gas cap or a failed EVAP purge or vent solenoid. Start by tightening the gas cap. If the light returns, the purge valve (on the engine) or vent valve (near the tank) are the next likely culprits, with parts costing between $25 and $60.
- P0442 means your truck has a small leak in the fuel vapor system.
- Always check that your gas cap is tight and its seal is intact before attempting any other repairs. This is the most common and cheapest fix.
- If the gas cap isn't the problem, the EVAP purge valve (on the engine) or the EVAP vent valve (by the tank) are the next most likely failures on a Sierra Denali.
- The vehicle is safe to drive with this code, but the Check Engine Light will remain on and it will fail an emissions test.
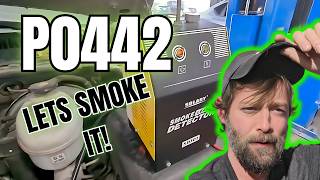
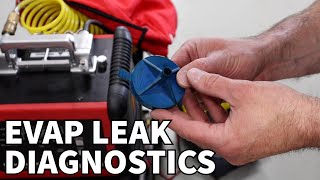
- For hard-to-find leaks, a professional smoke test is the fastest and most reliable diagnostic method.
What's Unique About the 2007-2011 Gmc SIERRA DENALI
While a loose gas cap is the most common cause on any vehicle, the GMT900 platform (which includes the 2007-2011 Sierra, Silverado, Tahoe, Escalade, etc.) is well-known for failures of the EVAP purge and vent solenoids. GM Service Bulletin 02-06-04-037J specifically recommends replacing the vent valve solenoid assembly and relocating its filter on Silverado and Sierra models to address P0442 and other EVAP codes. The vent solenoid, located under the truck near the spare tire, is particularly vulnerable to road debris, dust, and corrosion, which causes it to stick open and create a leak. GM TSB 15-06-04-002 also calls out dust and water intrusion at the vent solenoid as a cause for P0442. Many owners find that replacing one of these two valves is the ultimate fix after checking the gas cap.
Diagnostic Flowchart
Tap your situation to follow the diagnostic path that matches what you're seeing on this vehicle.
Symptoms You May Notice
- Check Engine Light is on.
- Vehicle will not pass an emissions test.
- A faint fuel smell may be noticeable in some cases.
- In rare instances of a stuck-open purge valve, a rough idle or difficulty starting immediately after refueling may occur.
- Replacing the charcoal canister when the actual problem is a much cheaper vent or purge solenoid.
- Repeatedly replacing the gas cap when the leak is actually from a rusted fuel filler neck or a cracked hose.
- Replacing parts without confirming the leak source with a smoke test, which can lead to unnecessary expense.
Most Likely Causes
- Loose or Faulty Gas Cap 🔴 High Probability → Shop Fuel Tank Cap This is the most common cause for any vehicle. The rubber O-ring on the cap can dry out and crack over time, or the cap may simply not have been tightened enough after refueling.
How to confirm: Ensure the gas cap is tightened until it clicks several times. Remove the cap and inspect the rubber O-ring seal for any cracks, stiffness, or damage. If it looks worn, it's a cheap first part to replace. Clear the code and drive for a few days to see if it returns.
Typical fix: Tighten the cap. If the seal is damaged or the code returns, replace the gas cap with a new OEM-spec part. Aftermarket caps are known to cause sealing issues.
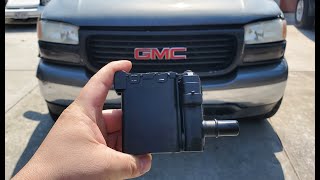
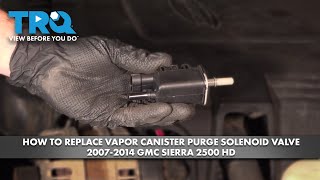
Est. part cost: $15-$30 - Failed EVAP Vent Valve Solenoid 🔴 High Probability → Shop Vapor Canister On GM trucks of this era, the vent solenoid is located under the vehicle near the fuel tank and spare tire, where it is highly exposed to road salt, water, and dirt. This debris can cause the valve to stick open, creating a persistent small leak. TSB #15-06-04-002 and TSB 02-06-04-037J directly address this issue, noting that dust and water intrusion is a primary cause of failure.
How to confirm: Visually inspect the valve and its hoses for damage or cracks. A definitive test requires a bi-directional scan tool to command the valve closed while performing a smoke test. If smoke exits the vent valve when commanded shut, it has failed. You can also test the valve with a 12V power source; it should click and close. If it doesn't click or remains open when power is applied, it's bad.
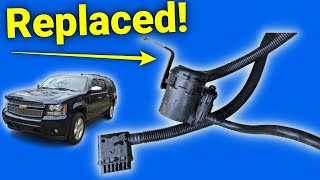
Typical fix: Replace the vent valve solenoid. This often requires lowering the spare tire for access. Many replacement parts, like the updated ACDelco 23481275, come as a kit that includes a new hose to relocate the air filter to a cleaner, more protected location away from the dust and debris under the truck.
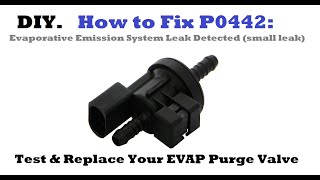
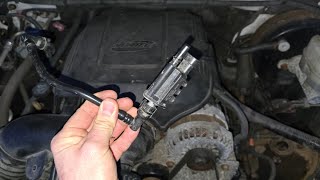
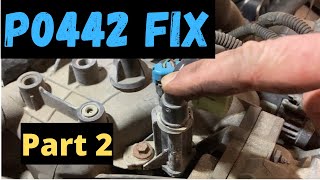
Est. part cost: $30-$120 - Failed EVAP Purge Valve Solenoid 🟡 Medium Probability → Shop Vapor Canister This valve is located on the engine's intake manifold and cycles frequently, leading to eventual wear. It can get stuck slightly open or fail to seal properly, causing a leak that the system detects. TSB #21-NA-124 lists a stuck purge valve as a potential cause after checking lines and the vent valve.
How to confirm: Remove the valve from the intake manifold (it's usually held by one bolt and easy to access). With the valve disconnected from power, try to blow through it. If any air passes, the valve is stuck open and must be replaced. A more sensitive test involves applying a hand vacuum pump to the intake side; it should hold vacuum without leaking down.
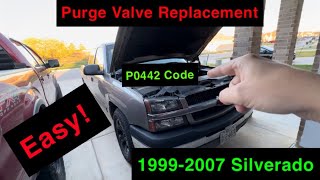
Typical fix: Replace the purge valve solenoid. This is a very common DIY repair that takes only a few minutes.
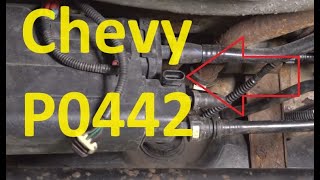
Est. part cost: $25-$60 - Cracked or Disconnected EVAP Hose ⚪ Low Probability The plastic and rubber lines that make up the EVAP system can become brittle with age and heat, leading to small cracks, especially at bends and connection points. A specific issue noted by owners is the hose connected to the vent solenoid can become kinked or stretched from the factory routing, causing a crack over time.
How to confirm: Perform a thorough visual inspection of all accessible EVAP lines from the engine bay to the charcoal canister. The most effective method is to have a professional perform a smoke test, which will force low-pressure smoke through the system and make even the smallest leak visible. One owner found a leak in the metal EVAP line where it was held by a frame clip.
Typical fix: Replace the cracked or broken section of the hose. In some cases, a simple modification to a bracket can relieve tension on a hose to prevent future failure.
Est. part cost: $10-$50
Rare But Worth Checking
- Fuel Tank Pressure (FTP) Sensor Failure: → Shop Fuel Tank This can be a frustrating cause because a smoke test will not find it. The sensor itself, usually located on top of the fuel pump module, can develop an internal leak or send false readings to the ECM, triggering a P0442 code even when no external leak exists. If all other components test good and no leaks are found, the FTP sensor becomes a suspect.
- Cracked Fuel Filler Neck: → Shop Fuel Filler Neck In regions with heavy road salt use, the metal fuel filler neck can rust where the gas cap seals or along the pipe itself. This creates a rough surface that prevents even a new gas cap from sealing properly or creates a hole in the neck. A smoke test is the best way to confirm a leak in this area.
- Cracked Charcoal Canister: → Shop Vapor Canister The plastic body of the charcoal canister itself can develop a hairline crack from age or impact from road debris, creating a system leak. This is less common than the valves failing, but a smoke test will quickly reveal a crack in the canister body.
Diagnosis Steps
- Check the Gas Cap: Ensure it is tight and clicks multiple times. Remove it and inspect the rubber seal for cracks or damage. If it looks worn, replace it with an OEM part as a first step.
- Clear the Code: Use an OBD-II scanner to clear the code after checking the cap.
- Drive the Vehicle: Drive for a few days to allow the EVAP monitor to run its self-test. If the code does not return, the loose cap was the issue.
- Visual Inspection: If the code returns, visually inspect the EVAP purge valve on the engine and all connected hoses for obvious cracks or loose connections.
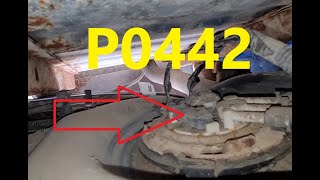
- Inspect Underneath: Safely raise the vehicle and inspect the EVAP vent solenoid, charcoal canister, and all associated hoses near the fuel tank for damage or corrosion. Pay close attention to the hoses connected to the vent solenoid, as they are known to crack.
- Test the Purge Valve: Disconnect and remove the purge valve from the engine. Try to blow air through it. If any air passes, it has failed and needs to be replaced. For a more sensitive test, use a hand vacuum pump.
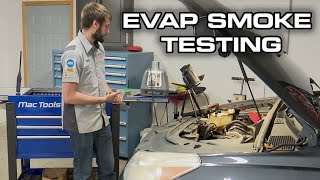
- Perform a Smoke Test: If no obvious issues are found, the most effective next step is a smoke test. This involves injecting vaporized mineral oil (smoke) into the EVAP service port (often near the purge valve). Smoke will exit from any leak point, revealing the source of the problem. This is the most accurate way to find small leaks in hoses or the fuel filler neck.
Parts You'll Likely Need
- Gas Cap
(OEM #20915990)— This is the most frequent cause of a P0442 code due to a worn seal or improper tightening. Always start here.
Trusted brands: ACDelco
OEM price range: $20-$35
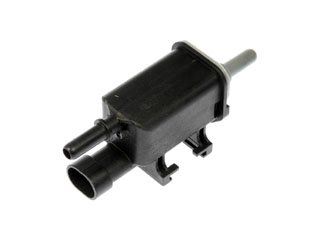
Aftermarket price range: $15-$25 - EVAP Vapor Canister Purge Valve
(OEM #12610560)— Located on the engine, this valve is a common failure point that can get stuck slightly open, causing a small leak. It's a quick and easy part to replace during diagnosis.
Related Codes That Often Appear With This One
- P0455 — This code indicates a large EVAP leak. It can appear with P0442 if a small leak worsens or if the testing parameters for both are met. TSB 21-NA-124 and 15-06-04-002 both mention P0442 and P0455 together.
- P0449 — This code specifically points to a fault in the EVAP vent solenoid valve control circuit. If you see P0449 along with P0442, the vent solenoid or its wiring is almost certainly the problem. TSB 15-06-04-002 groups these codes together.
- P0496 — This code indicates 'EVAP Flow During a Non-Purge Condition' and strongly suggests a purge valve that is stuck open or leaking internally. If seen with P0442, the purge valve is the primary suspect.
Technical Service Bulletins (TSBs) & Recalls
- Provides a general diagnostic order for P0442/P0455: 1) Inspect all EVAP lines for proper connection and damage. 2) Check the vent valve for a stuck-open condition. 3) Investigate the purge valve.
- Addresses customer complaints of a MIL on and difficulty filling the fuel tank, associated with DTCs P0442, P0446, P0449, or P0455. It points to dust or water intrusion at the EVAP canister vent solenoid valve as a likely cause.
- An older bulletin that directs technicians to use the specific GM-approved EVAP system tester (smoke machine) to diagnose a P0442 code, reinforcing the need for proper diagnostic tools.
Platform-Specific Known Issues
- The EVAP vent solenoid's location near the spare tire makes it extremely vulnerable to dirt, water, and road salt, leading to premature failure. TSB 15-06-04-002 confirms this is a known issue. Many owners on forums like silveradosierra.com report this as their fix.
- The hose attached to the vent solenoid can be under tension from its factory routing, causing it to kink and crack over time, creating a small leak that can be hard to spot without a smoke test or careful inspection.
Mechanic-Grade Diagnostic Values
- EVAP Purge Valve Solenoid Resistance — expected: 14-36 Ohms. Failure: A reading significantly outside this range, especially an open circuit (infinite resistance) or short (near zero ohms), indicates a failed solenoid coil.
- EVAP Vent Valve Solenoid Resistance — expected: 12-130 Ohms. Failure: A reading outside this general range suggests the solenoid coil is faulty. This is a wide range, so comparison to a new part is recommended.
- Fuel Tank Pressure (FTP) Sensor Voltage (KOEO, gas cap off) — expected: ~1.45 - 1.5 Volts. Failure: A voltage that is stuck and does not change when vacuum is applied to the tank, or a voltage that is significantly different from ~1.5V at atmospheric pressure, indicates a faulty sensor.
Scan Tool Commands That Help
- Tech2 / GDS2 / High-End Bidirectional Scanner: EVAP Service Bay Test / Purge/Seal — This is a guided test that commands the vent solenoid closed and the purge solenoid open to pull the system into a vacuum, then seals the system to monitor for vacuum decay. It's the ECM's own method for testing the system and can confirm a leak is present without a smoke machine, though it won't pinpoint the location.
- Tech2 / GDS2 / High-End Bidirectional Scanner: EVAP Vent Solenoid ON/OFF — This command is used during a smoke test. The technician commands the vent solenoid closed (ON) to seal the system. If smoke is still seen exiting the vent valve assembly when commanded closed, the valve itself is confirmed to be leaking or faulty.
- Tech2 / GDS2 / High-End Bidirectional Scanner: EVAP Purge Solenoid % Duty Cycle — Allows the technician to command the purge solenoid open to varying degrees. This can be used to check if the valve is physically stuck or not responding to the ECM's command. It's also used to introduce smoke from a smoke machine into the entire EVAP system via the service port.
Wiring & Ground Locations
- EVAP Canister Vent Solenoid — Under the rear of the vehicle, typically near the spare tire and charcoal canister.. This is the physical location of a primary failure point. The connector and wiring are exposed to road debris and corrosion, which can cause electrical faults (P0449) or prevent the valve from operating, leading to a P0442.
- EVAP Canister Purge Solenoid Valve — On the intake manifold.. Knowing its location on the engine is crucial for performing a quick blow-through or vacuum test to see if it's stuck open.
- G103 / G102 — G103 is on the front of the right cylinder head. G102 is on the lower left front of the engine.. These are primary engine grounds. A poor ground connection can cause erratic behavior in sensors and solenoids controlled by the ECM, potentially leading to incorrect diagnosis or intermittent faults.
- Underhood Fuse Block — Left side of the engine compartment, near the brake fluid reservoir.. This fuse block contains fuses for the EVAP system (specifically mentioned as fuses 4 and 5 in one source). A blown fuse would cause a circuit code, but checking for power supply starts here.
Real Owner Repair Stories
- Reddit user on r/Volkswagen (describing a GM-like issue) (2016 VW Passat (symptoms are universal)) — Strong gas smell after fill-ups and P0442 code immediately after fuel pump module replacement.
❌ Tried (didn't work) Ignoring the smell, assuming it was temporary after the repair.
✅ What actually fixed it The consensus was that the fuel pump tank seal was not installed correctly when the fuel pump module was replaced, creating a leak at the top of the tank. This is a common error after fuel pump service. - YouTube video by FreeAutoMechanic (Chevy Silverado (GMT800, but principle applies)) — P0442 code.
❌ Tried (didn't work) Visual inspection of hoses did not immediately reveal the issue.
✅ What actually fixed it A smoke test revealed a small leak in the metal EVAP line where it was held against the frame by a plastic clip. The clip had rubbed through the line over time, creating a pinhole leak that was not visible without smoke.
"I Checked Everything" — The Actual Cause
- A common scenario where a smoke test reveals no leaks is a faulty Fuel Tank Pressure (FTP) sensor. The sensor itself may be sending incorrect data to the ECM, making the computer believe there is a leak when the system is perfectly sealed. A technician noted that if the FTP sensor voltage is irrational (e.g., showing pressure in the tank when the gas cap is off), the sensor is likely bad.
- Another possibility when a smoke test passes is an intermittent leak from the purge or vent valve. The valve may seal perfectly when static (during the smoke test) but leak intermittently under specific vacuum or pressure conditions that occur during the EVAP self-test. Applying vacuum with a hand pump to the valves can sometimes reveal a slow leak that a pressure-based smoke test might miss.
OEM Part Supersession History
Multiple, including 19207763, 15138619, and others.→23481275— The original vent valve design was highly susceptible to dirt and water intrusion. The updated part, often sold as a kit, includes a new valve and a hose to relocate the filter/vent inlet to a higher, cleaner location (e.g., inside the frame rail or up near the fuel filler neck) to prevent premature failure.
Helpful Videos
![How to Fix P0442 Engine Code in 7 Minutes [6 DIY Methods / Under $3.67]](https://img.youtube.com/vi/KISPTedKJmQ/mqdefault.jpg)

We Have This Part in Stock


The information in this article is provided for general reference and educational purposes only. Vehicle specifications, procedures, and part compatibility can vary by production date, trim level, and region. Always consult your vehicle's factory service manual and verify part numbers before purchasing or performing repairs. Safety-critical components such as airbags, seat belts, and braking systems should be installed by a qualified professional.
- Gmc SIERRA DENALI:
- 🧭 Diagnostic Flowchart
- 🎬 Helpful Videos
- 🛍️ Shop This Part
- What's Unique About the 2007-2011 Gmc SIERRA DENALI
- Symptoms You May Notice
- Most Likely Causes
- Rare But Worth Checking
- Diagnosis Steps
- Parts You'll Likely Need
- Related Codes That Often Appear With This One
- Technical Service Bulletins (TSBs) & Recalls
- Platform-Specific Known Issues
- Mechanic-Grade Diagnostic Values
- Scan Tool Commands That Help
- Wiring & Ground Locations
- Real Owner Repair Stories
- "I Checked Everything" — The Actual Cause
- OEM Part Supersession History
- 🎟️ Get 5% Off