
P0442 on 2006-2011 Honda Civic: EVAP Small Leak Causes and Fixes
For a 2006-2011 Honda Civic, code P0442 almost always points to a loose or faulty gas cap. Before buying any parts, tighten your gas cap until it clicks several times. If the light returns, a new OEM gas cap (Part No. 17670-SNA-A02, around $25-$40) is the most likely fix and is a 1/5 difficulty DIY. If that fails, the next most common culprit is the EVAP purge valve in the engine bay.
- Start with the simplest fix: tighten your gas cap. If the light comes back, replace it with an OEM cap (17670-SNA-A02).
- This code does not indicate a serious problem and will not affect how your car drives, but it will cause you to fail an emissions test.
- The second most likely cause is a faulty purge valve (36162-RNA-A01), which is located in the engine bay and is a straightforward DIY replacement.
- Do not replace expensive components like O2 sensors or catalytic converters for this code.
What's Unique About the 2006-2011 Honda Civic
On the 8th generation Honda Civic, the EVAP system is straightforward and generally reliable, but certain components are known to cause this specific code. While many parts *can* fail, owner experiences overwhelmingly point to the gas cap as the first and most frequent culprit. The second most common failure is the purge control solenoid valve, located conveniently in the engine bay, making it a relatively easy part to access and replace compared to the vent valve located under the car near the fuel tank.
Symptoms You May Notice
- Check Engine Light is on.
- A faint fuel smell may be present, particularly when parked in an enclosed space like a garage, but this is not common.
- No noticeable difference in how the car drives.
- In rare cases where the purge valve has failed and is stuck open, you may experience a long crank time after refueling. This happens because excess fuel vapor is flooding the engine.
- Replacing the O2 sensors. O2 sensors are not part of the EVAP system and will not cause this code.
- Replacing the catalytic converter. This is a very expensive and incorrect repair for an EVAP system leak.
- Assuming a cheap aftermarket gas cap will work. Many forum users report that only the OEM Honda cap solved their issue after a cheap replacement failed to do so.
Most Likely Causes
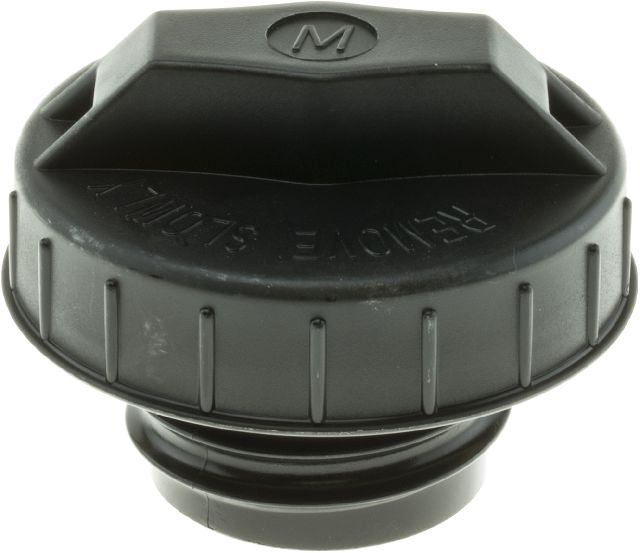
- Loose, Worn, or Incorrect Gas Cap 🔴 High Probability → Shop Fuel Tank Cap The gas cap seal is a simple rubber O-ring that degrades and hardens over time from exposure to fuel vapors and the elements, preventing a perfect seal. Aftermarket caps often don't meet the precise sealing requirements of the Honda EVAP system, leading to leaks.
How to confirm: First, ensure the cap is tightened until it clicks at least 3 times. Inspect the rubber seal for cracks, stiffness, or debris. Check the fuel filler neck for any rust or corrosion that could prevent a good seal. If the seal looks damaged or the cap is not an OEM part, it is suspect.
Typical fix: Replace the gas cap with a new, genuine Honda part (17670-SNA-A02). After replacing, you may need to drive for a few days for the light to turn off, or clear the code with a scanner.
Est. part cost: $25-$40 - Faulty EVAP Canister Purge Valve 🟡 Medium Probability → Shop Vapor Canister This solenoid, located in the engine bay, cycles frequently. Over thousands of cycles, its internal mechanism can wear out, causing it to stick open or not seal completely.
How to confirm: The valve is normally closed. With the engine off, disconnect the hose leading from the charcoal canister and try to blow through the valve. If air passes through, the valve is stuck open 🎬 Watch: How to test and replace the EVAP purge valve. and has failed. A professional can also command it open and closed with a scan tool to test its function. A long crank after refueling is another strong indicator of a stuck-open purge valve.
Typical fix: Replace the EVAP canister purge valve. It is typically mounted on the engine intake manifold with two hoses and an electrical connector. The OEM part number is 36162-RNA-A01.
Est. part cost: $50-$90 - Faulty EVAP Vent Solenoid ⚪ Low Probability → Shop Vapor Canister Located under the car near the charcoal canister, this valve is exposed to road grime, moisture, and road salt, which can cause it to fail or get stuck. A failure here can sometimes make it difficult to fill the gas tank because it can't properly vent pressure.
How to confirm: The vent solenoid is normally open and closes when powered. Diagnosis usually requires a scan tool to command the valve closed and a smoke machine to see if it's sealing properly. A DIY check involves removing it and applying 12V to see if the internal plunger actuates. You can also test the coil's resistance with a multimeter.
Typical fix: Replace the vent solenoid, which is often mounted directly on the charcoal canister.
Est. part cost: $50-$100
Rare But Worth Checking
- Cracked or Disconnected EVAP Hose: The small rubber or plastic lines, especially at connection points and bends, can become brittle and develop tiny cracks. These are often hard to see and are best found using a smoke machine. Pay close attention to the hoses connecting to the purge valve in the engine bay and the vent solenoid/canister under the car.
- Cracked Charcoal Canister: → Shop Vapor Canister While more likely to cause a large leak code (P0455), a small crack in the plastic body of the canister can happen, triggering a P0442. This is usually due to physical damage from road debris or age.
- Corroded Fuel Filler Neck: → Shop Fuel Filler Neck In regions with heavy road salt use, the top of the fuel filler neck where the gas cap seals can rust. This corrosion creates an uneven surface that the gas cap O-ring cannot seal against, causing a small leak.
Diagnosis Steps
- Check the Gas Cap: Remove and inspect the gas cap. Is the seal cracked or worn? Is it an OEM cap? Reinstall it and tighten until it clicks multiple times. Clear the code and drive for a few days.
- If the code returns, replace the gas cap with a genuine OEM part (17670-SNA-A02). This is the cheapest and most probable fix.
- Visually Inspect Hoses: Open the hood and inspect the EVAP hoses running near the engine, especially those connected to the purge valve. Look for obvious cracks, breaks, or loose connections.
- Test the Purge Valve: Locate the purge valve in the engine bay (Part No. 36162-RNA-A01). Disconnect the electrical connector and the two vacuum hoses. Try to blow through the valve. If air passes, it's faulty and needs to be replaced.
- Inspect Underneath: If the above steps don't find the issue, visually inspect the charcoal canister and vent solenoid under the car (near the fuel tank) for any obvious damage or rust.
- Professional Smoke Test: If the leak is still not found, the next step is a professional smoke test. A machine fills the EVAP system with visible smoke, and any leaks will be immediately obvious as smoke escapes from the crack or faulty seal.
Parts You'll Likely Need
- Fuel Filler Cap (Gas Cap)
(OEM #17670-SNA-A02)— This is the most common failure point. The seal wears out over time, causing a small leak that the system detects. Using an OEM cap is critical for a proper seal.
Trusted brands: Honda (Genuine OEM)
OEM price range: $25-$40
Aftermarket price range: $10-$25 - EVAP Canister Purge Valve
(OEM #36162-RNA-A01)— The second most likely part to fail. It gets stuck open, creating a constant small leak in the system. It's located in the engine bay and is relatively easy to replace. 🎬 Watch: Step-by-step walkthrough for replacing the purge valve solenoid.
Trusted brands: Honda (Genuine OEM), Dorman (911-763), Standard Motor Products
OEM price range: $60-$90
Aftermarket price range: $30-$60
Related Codes That Often Appear With This One
- P0455 — Indicates a large EVAP leak. If you see both, it might mean the leak is intermittent or on the borderline between small and large, but the diagnostic process is the same. It could also indicate a gas cap was left completely loose.
- P0456 — Indicates a very small EVAP leak. Seeing this with P0442 is uncommon but could point to a very minor, difficult-to-find leak that is getting slightly worse.
Mechanic-Grade Diagnostic Values
- EVAP Canister Vent Solenoid Coil Resistance — expected: 20 - 40 Ohms. Failure: A reading of infinite ohms indicates an open circuit (failed coil). A reading near 0 ohms indicates a short circuit.
- EVAP Canister Purge Valve Vacuum Test — expected: Should hold 5-7 inches of vacuum steadily.. Failure: If the valve cannot hold vacuum, it is leaking internally. If it holds vacuum but does not release it when 9V/12V is applied, it is stuck closed.
- Voltage at EVAP Vent Solenoid Connector (Power Pin) — expected: ~12V (Battery Voltage) with ignition key in the 'ON' position.. Failure: No voltage suggests a wiring issue, blown fuse, or a problem with the power distribution from the PCM/fuse box.
Scan Tool Commands That Help
- Honda Diagnostic System (HDS) or equivalent professional scanner: EVAP System Test Function — This is a guided diagnostic function that commands the various EVAP solenoids (purge and vent) to open and close, while monitoring the Fuel Tank Pressure (FTP) sensor to check for leaks and proper system operation. It is the dealer-level method for confirming the system's integrity after a repair or when a leak is difficult to find.
- Professional Bidirectional Scanner: EVAP Vent Valve ON/OFF — This command manually closes the normally-open vent valve. It is essential for sealing the system before performing a smoke test, preventing the smoke from immediately exiting through the vent.
- Professional Bidirectional Scanner: EVAP Purge Valve ON/OFF (or Duty Cycle %) — Used to test the function of the purge valve. By commanding it open while the engine is running and monitoring short-term fuel trims, a technician can confirm if it's allowing vapors into the intake as expected. A stuck-open valve can be diagnosed by commanding it closed and seeing if fuel trims return to normal.
Wiring & Ground Locations
- G101 — On the right rear of the engine for most 1.8L models.. This is a primary engine ground. While not directly for a single EVAP component, a poor connection here can cause erratic behavior in various engine sensors and actuators controlled by the ECM/PCM, potentially leading to incorrect diagnostic readings.
- G301 — Located in the engine compartment, near the left front headlight area.. This ground point serves several components in the front of the vehicle. Verifying it is clean and tight is a good practice when troubleshooting any electrical issue in the engine bay, including power or ground circuits for EVAP solenoids.
- EVAP Purge Valve Connector — On the back of the engine, near the throttle body, connected to the purge valve (36162-RNA-A01).. This is the electrical connection for the purge valve. Technicians test for voltage here and can apply voltage to the valve's pins to check for actuation (clicking). A corroded or damaged connector will cause a circuit fault code (like P0443) or prevent the valve from operating.
Real Owner Repair Stories
- 2CarPros Forum User (2001 Mitsubishi Eclipse (similar P0442 cause)) — Persistent P0442 code and a visible fuel leak around the filler neck only when actively pumping gas.
❌ Tried (didn't work) Initial diagnosis was difficult as the leak was not always present.
✅ What actually fixed it The metal fuel filler neck had rusted completely through on the bottom. Replacing the entire fuel filler neck assembly (OEM part MR573836) resolved both the fuel leak and the P0442 code.
Model Year Variations Within This Range
- 2006-early 2009: Certain 1.8L (R18A1) engines produced in this timeframe were susceptible to developing cracks in the engine block, leading to coolant leaks. This is a well-documented issue covered by a warranty extension, but it is entirely unrelated to the P0442 EVAP code.
Diagnostic Flowchart
Other Known Issues on This Vehicle
Issues unrelated to this code that are worth knowing about as an owner of this generation:
- Cracked Engine Block (R18 Engine) 🔴 High — Affects 2006-early 2009 models. A coolant leak develops on the back of the engine block. Most have been fixed under an extended warranty (TSB 10-048), but the warranty period has expired. (Ref: TSB 10-048)
- Defective Sun Visors 🟡 Low — Extremely common across all model years. The plastic housing splits at the seam, causing the visor to droop and not stay in place. A class-action lawsuit resulted in an extended warranty, which has since expired. (Ref: Warranty Extension (Expired))
- Failing Passenger-Side Engine Mount 🟠 Medium — The hydraulic passenger-side engine mount is prone to leaking and collapsing, causing excessive engine vibration at idle and clunking noises. (Ref: TSB 06-057)
- Defective Rear Upper Control Arms 🟠 Medium — The original rear upper control arms can cause premature and uneven inner tire wear ('cupping'). An updated part is available to correct the geometry. (Ref: TSB 13-047)
- A/C Compressor Clutch Failure 🟠 Medium — The clutch on the A/C compressor is a common failure point, leading to the A/C blowing warm air. Sometimes just the clutch relay is the culprit, which is a much cheaper fix.
Used vs. New Parts: Buying Guide for This Vehicle
When a used part is the smart pick: For this repair, a used EVAP Purge Valve (36162-RNA-A01) or EVAP Vent Solenoid from a low-mileage donor vehicle can be a cost-effective option. These are generally reliable parts, and failure is often due to high cycle count or environmental exposure, so a newer/lower-mileage part is likely to have significant life left.
Donor-vehicle mileage cap: roughly under 80000 miles for the part to have meaningful remaining life.
What to inspect on the donor part:
- For solenoids, ensure electrical connectors are free of corrosion or broken tabs.
- Check that vacuum ports are not cracked or blocked with debris.
- If buying a used fuel filler neck, inspect it meticulously for any signs of rust, especially on the sealing surface and along welded seams.
OEM-only on this vehicle (don't cheap out):
- Fuel Filler Cap (Gas Cap)
Aftermarket brands forum-validated for this vehicle:
- Standard Motor Products (SMP) for solenoids
- Dorman (often a budget-friendly option, but quality can be variable)
Brands owners have reported issues with on this vehicle:
- No-name, unbranded gas caps are a frequent cause of P0442 codes returning after a 'fix'.
Real Owner Stories
Aggregated from forums and TSBs cited above. Mileages and costs reflect what owners reported in those sources.
2008 Honda Civic
Symptoms: The owner experienced recurring sun visor failure where the plastic housing split at the seam, causing the visor to droop, even after a dealer replacement.
What fixed it: The issue was a design flaw in the replacement parts; however, for P0442 specifically, forum users on 8thcivic.com and Reddit confirm that the gas cap and purge valve are the primary fixes.
Source hint: Reddit r/Honda
Frequently Asked Questions
Which specific gas cap part number should I use for my 2006-2011 Honda Civic to fix P0442?
Is there a TSB for the cracked engine block issue on the R18 engine?
My Civic has a long crank time after I fill up the gas tank; is this related to P0442?
Can I use a used purge valve from a donor car to save money?
Why is my Civic vibrating at idle and clunking? Is it related to the EVAP system?
Does the Acura CSX share the same P0442 issues as the Honda Civic?
Helpful Videos

Used OEM Parts in Stock

New Aftermarket Parts Available


The information in this article is provided for general reference and educational purposes only. Vehicle specifications, procedures, and part compatibility can vary by production date, trim level, and region. Always consult your vehicle's factory service manual and verify part numbers before purchasing or performing repairs. Safety-critical components such as airbags, seat belts, and braking systems should be installed by a qualified professional.
- Honda Civic:
- 🧭 Diagnostic Flowchart
- 🎬 Helpful Videos
- 🛍️ Shop This Part
- What's Unique About the 2006-2011 Honda Civic
- Symptoms You May Notice
- Most Likely Causes
- Rare But Worth Checking
- Diagnosis Steps
- Parts You'll Likely Need
- Related Codes That Often Appear With This One
- Mechanic-Grade Diagnostic Values
- Scan Tool Commands That Help
- Wiring & Ground Locations
- Real Owner Repair Stories
- Model Year Variations Within This Range
- Other Known Issues on This Vehicle
- Used vs. New Parts: Buying Guide for This Vehicle
- Real Owner Stories
- 2008 Honda Civic
- Frequently Asked Questions
- 🎟️ Get 5% Off