
P0442 on 2001-2007 Toyota Highlander: EVAP Small Leak Causes and Fixes
For a 2001-2007 Highlander, P0442 is most often a loose gas cap or a cracked, age-brittled vacuum hose in the engine bay. Always check these two simple, cheap fixes before suspecting more expensive parts like the charcoal canister.
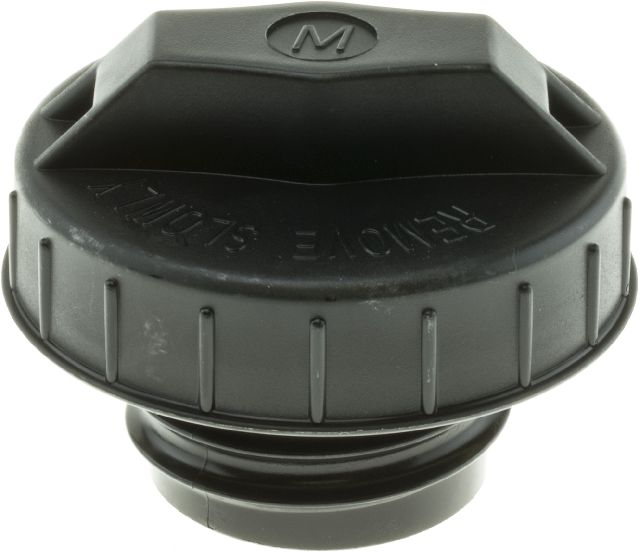
- Always start with the gas cap. Tighten it, clear the codes, and if it returns, replace it with an OEM cap.
- The second most likely culprit is a cracked vacuum hose under the plastic engine cover. This is a very common, cheap DIY fix.
- If the gas cap and hoses are good, a smoke test is necessary to find the leak efficiently before replacing more expensive parts like the purge valve or charcoal canister.
- In rust-prone areas, the fuel filler neck is a strong possibility and can be confirmed with a smoke test.
- The VSC/TRAC lights coming on with the Check Engine Light is normal for this vehicle and does not indicate a separate problem.
What's Unique About the 2001-2007 Toyota Highlander
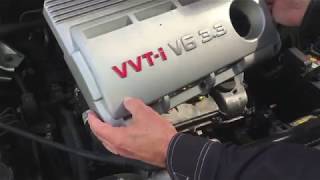
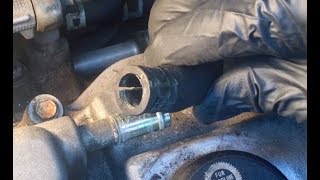
On the first-generation Highlander, this code is a classic sign of aging. After 15-20+ years, the rubber and plastic components in the EVAP system, particularly the vacuum hoses in the hot engine bay, become hard, brittle, and prone to cracking. While a loose gas cap is the number one cause on any car, these age-related hose failures are an extremely common runner-up on this specific vehicle. Many owners report finding a split hose directly under the plastic engine cover 🎬 Watch: Finding the common split hose under the engine cover after a new gas cap fails to solve the problem.
Symptoms You May Notice
- Check Engine Light is on
- VSC and/or TRAC OFF lights may also illuminate (a common Toyota feature to draw attention to the Check Engine Light)
- A faint fuel smell is possible, but not common with a small leak
- Replacing the expensive charcoal canister before thoroughly checking the gas cap, vacuum hoses, and purge valve. A smoke test should always be performed to confirm the canister is the source of the leak before replacing it.
Most Likely Causes
- Loose, Worn, or Incorrect Gas Cap 🔴 High Probability → Shop Fuel Tank Cap This is the most common cause on any vehicle. The cap's rubber O-ring seal degrades over time, and aftermarket caps often don't seal as well as the OEM part, triggering the code.
How to confirm: First, ensure the cap is tightened until it clicks multiple times. Inspect the rubber seal for cracks, stiffness, or deformities. If the light returns after clearing the code, replacing the cap is the cheapest and easiest next step.
Typical fix: Replace the gas cap with a new, genuine OEM part.
Est. part cost: $20-$40 - Cracked or Disconnected EVAP Vacuum Hoses 🔴 High Probability → Shop Vacuum Hose The rubber hoses, especially those in the engine bay connected to the purge valve and air filter housing, become brittle from years of heat cycles and will crack. This is a very common failure point found by many owners.
How to confirm: Visually inspect all accessible EVAP hoses in the engine bay for obvious cracks, splits, or disconnections. A smoke test is the definitive way to find a small hose leak that isn't visible.
Typical fix: Replace the cracked section of hose. It's often possible to buy bulk vacuum hose and cut it to length. Carefully slice the old, hard hose off plastic nipples to avoid breaking them.
Est. part cost: $5-$20 - Rusted or Corroded Fuel Filler Neck 🟡 Medium Probability → Shop Fuel Filler Neck In regions with road salt (the "Salt Belt"), the steel fuel filler neck can rust where the gas cap seals, creating an uneven surface that prevents a proper seal even with a new cap.
How to confirm: When the gas cap is off, inspect the lip of the filler neck for rust, pitting, or corrosion. A smoke test will show smoke billowing from the gas cap area, even with a new cap, if the neck is the problem.
Typical fix: The fuel filler neck must be replaced.
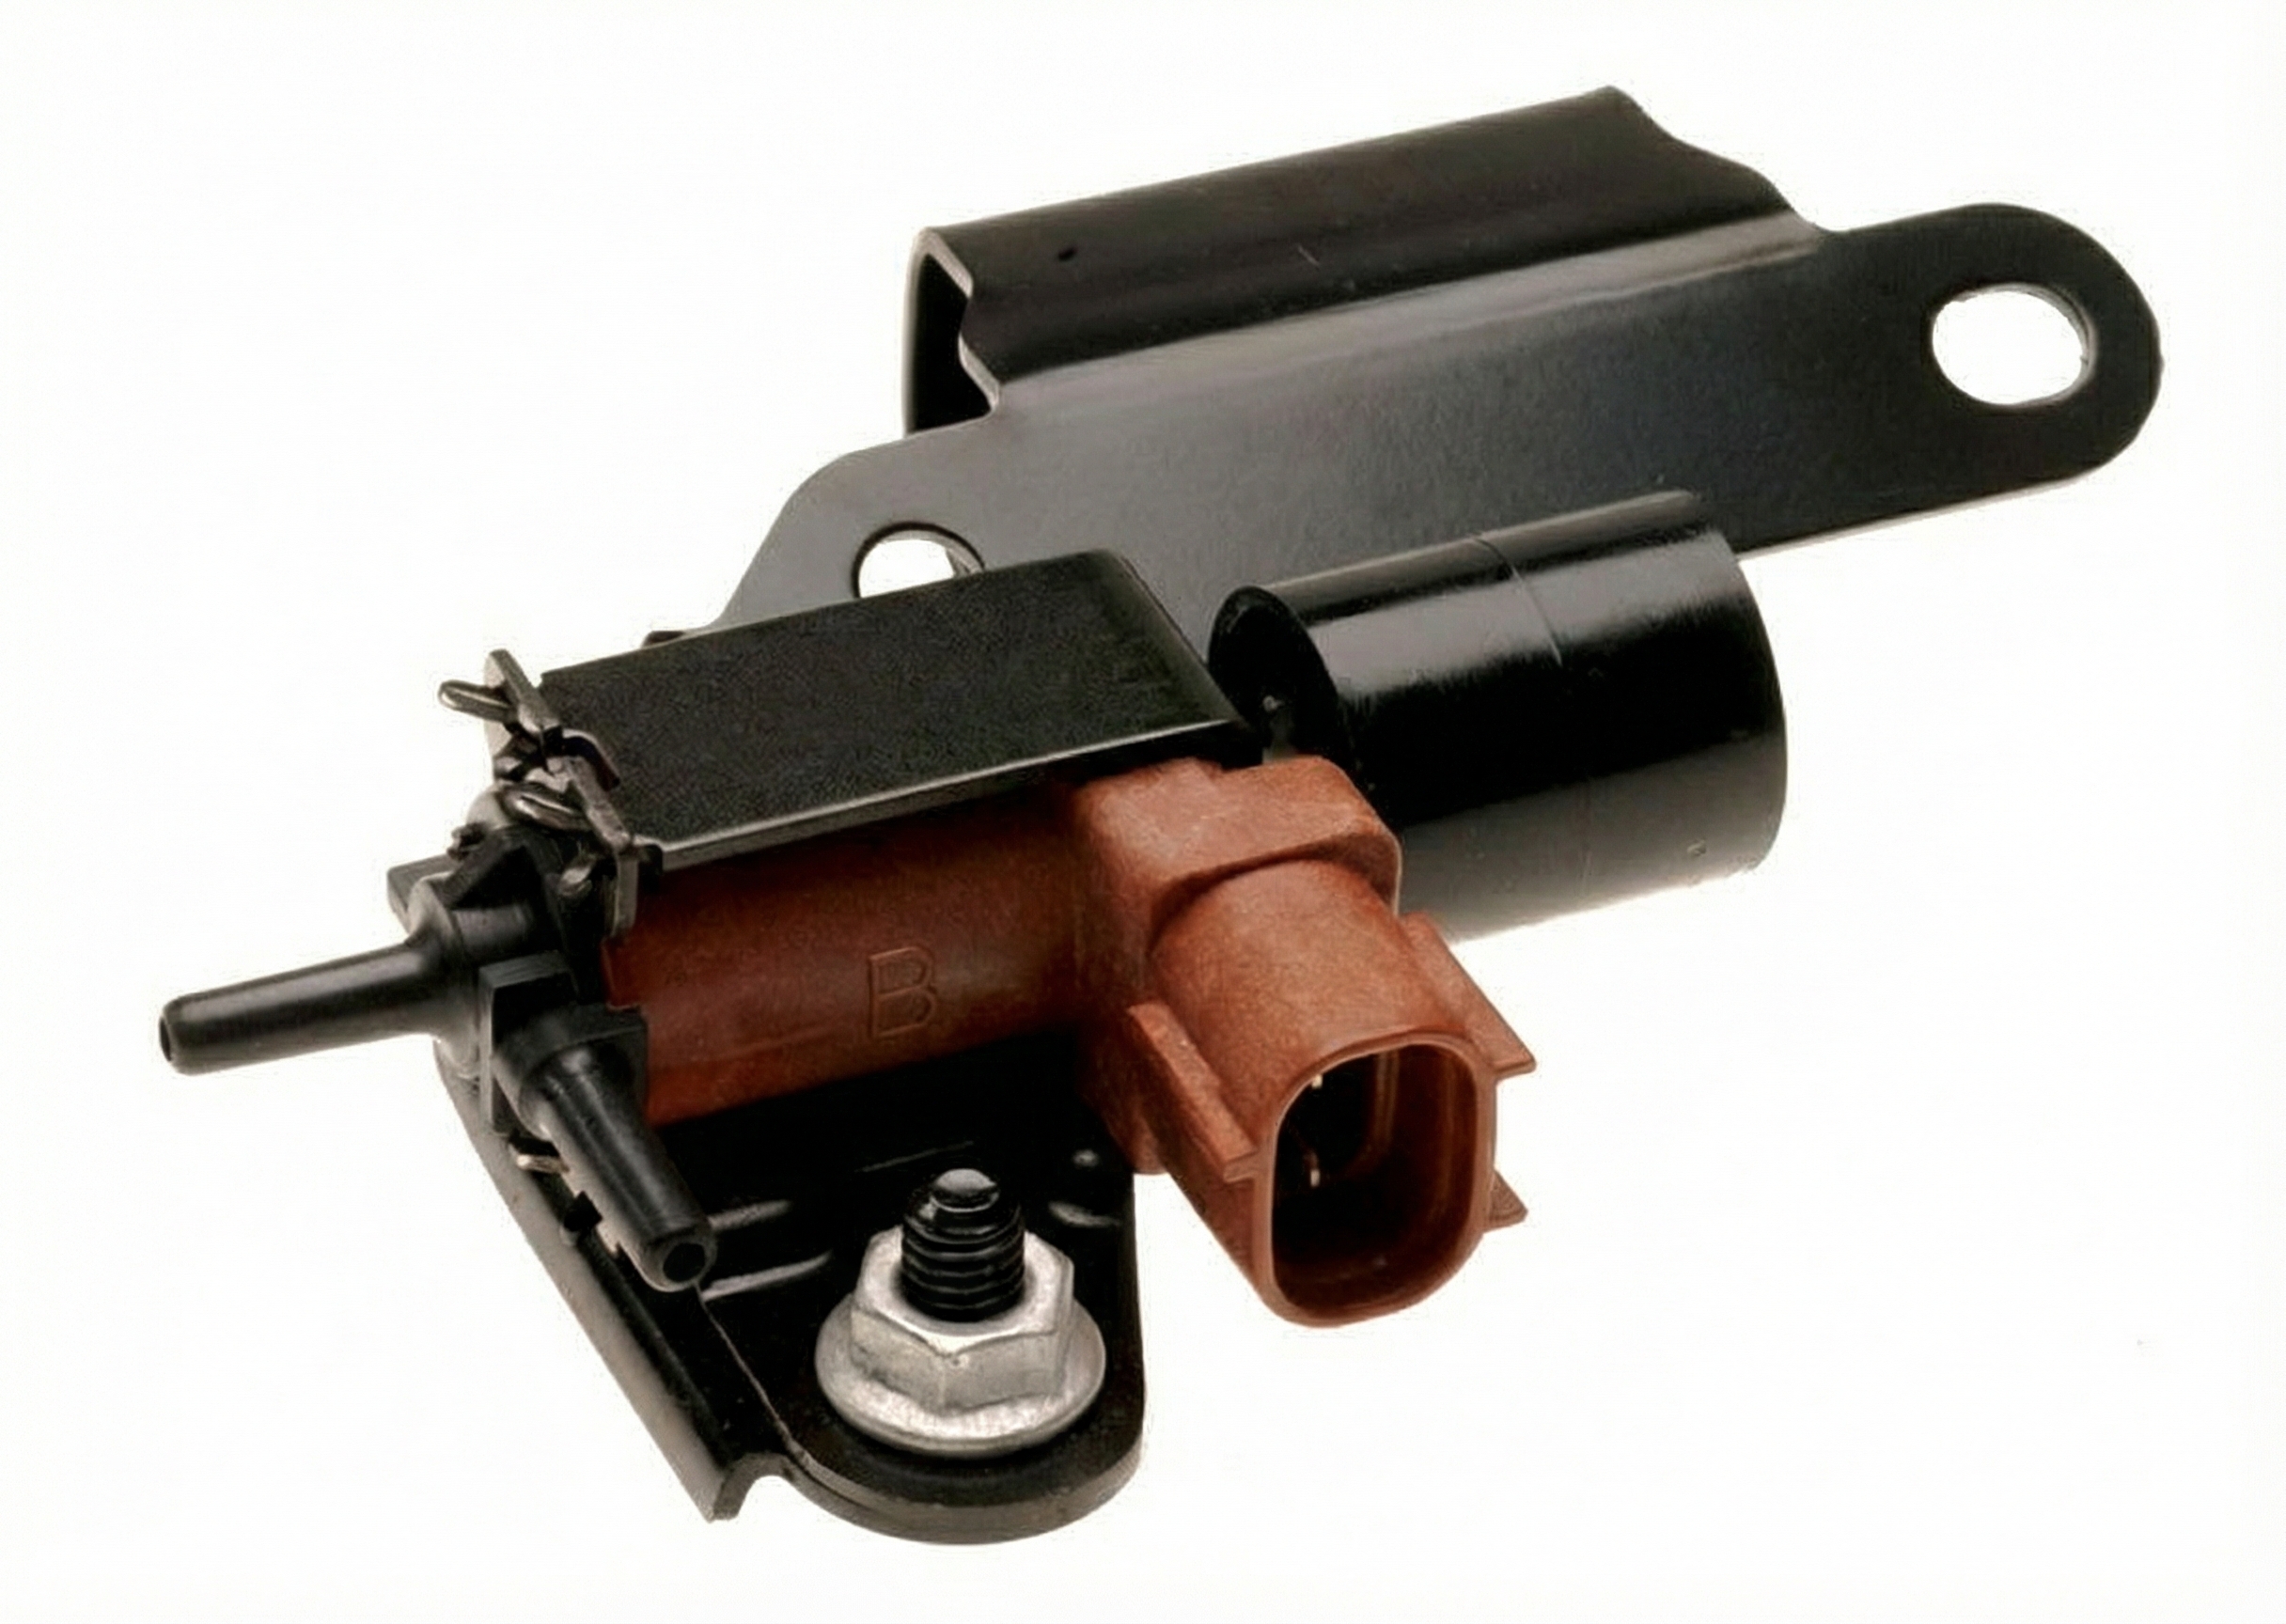
Est. part cost: $100-$250 - Faulty Vapor Canister Purge Valve / Solenoid 🟡 Medium Probability → Shop Vapor Canister This valve, located in the engine bay, can fail internally (stuck partially open) or the plastic nipples where hoses connect can crack from age.
How to confirm: With the engine off, try to blow through the valve; it should be closed. You can also apply 12V power to the terminals to see if it clicks open; a good valve will click audibly. A smoke test may show smoke leaking from the valve itself.
Typical fix: Replace the purge valve assembly.
Est. part cost: $40-$90 - Cracked Charcoal Canister or Faulty Vent Valve ⚪ Low Probability → Shop Vapor Canister The canister is located under the vehicle near the fuel tank and can be damaged by road debris or simply fail with age. The vent valve, often integrated with the canister, can also fail. This is often caused by repeatedly overfilling the fuel tank.
How to confirm: This usually requires a smoke test to confirm the leak is coming from the canister body or vent valve itself. It is one of the last parts to check due to its cost and location.
Typical fix: Replace the charcoal canister assembly. Some reports suggest replacing only the vacuum switching valve (VSV) on the canister can be a cheaper fix if that is the specific point of failure.
Est. part cost: $400-$600
Diagnosis Steps
- Check the gas cap. Remove it, inspect the seal for damage, and retighten it until it clicks several times. Clear the code and see if it returns.
- If the code returns, purchase a new OEM gas cap. This is the cheapest and most common fix.
- If the new cap doesn't fix it, remove the plastic engine cover. Perform a detailed visual inspection of all EVAP hoses in the engine bay, especially the U-shaped hoses connected to the purge solenoid. Bend the hoses slightly to reveal hidden cracks.
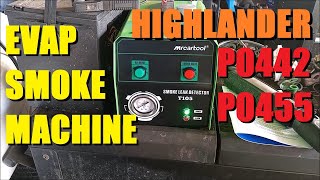
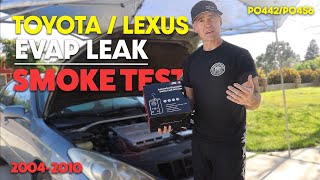
- If no visual faults are found, a smoke test is the next step. This involves introducing pressurized smoke into the EVAP system to quickly find the source of the leak. 🎬 See how to use a smoke machine to find leaks
- Connect the smoke machine to the EVAP service port in the engine bay (often a green cap).
- Watch for smoke from common leak points: engine bay hoses, the gas cap area (indicating a bad filler neck), the purge valve, or the charcoal canister area under the rear of the vehicle.
- Once the leak is identified, replace the faulty component.
Parts You'll Likely Need
- Fuel Tank Cap
(OEM #77300-47010)— This is the most frequent cause. The seal wears out over time, causing a leak. An OEM cap is highly recommended as aftermarket versions can have sealing issues. This part number fits 2004-2006 Highlanders.
Trusted brands: Toyota Genuine
OEM price range: $25-$40
Aftermarket price range: $15-$25 - Vacuum Hose — Aged and heat-damaged rubber hoses in the engine bay are the second most common failure point on this vehicle, leading to small cracks that cause leaks. Many owners solve P0442 by replacing a small section of hose.
Trusted brands: Continental, Gates
OEM price range: $10-$30
Aftermarket price range: $5-$15 - Vapor Canister Purge Valve / Solenoid
(OEM #90910-12271)— This valve can get stuck or the plastic housing can crack, causing a small leak. It's a common failure point after the gas cap and hoses have been ruled out. Note: This part number may be discontinued or superseded and fitment should be verified by VIN.
Trusted brands: Denso, Aisan, Dorman
OEM price range: $70-$110
Aftermarket price range: $30-$60
Related Codes That Often Appear With This One
- P0441 — Indicates incorrect purge flow. A failing component like a purge valve or a significant crack in a hose can cause both a leak (P0442) and a flow issue (P0441).
- P0446 — Indicates a fault in the vent control circuit. This often points to a problem with the charcoal canister or its associated vent valve, which can also present as a small leak.
- P0456 — Indicates a 'very small' EVAP leak. These codes are very similar, and sometimes a failing component can trigger one or the other depending on the test conditions. It's common to see P0442 and P0456 appear together, often pointing to the same cracked vacuum hose.
Technical Service Bulletins (TSBs) & Recalls
- T-SB-0015-11: Addresses the procedure for repairing stripped cylinder head bolt threads on the 2AZ-FE engine by installing Time-Sert® inserts. This is not directly related to P0442 but is a critical known issue for the 4-cylinder models.
Platform-Specific Known Issues
- Owner Experience: Cracked Hose Under Engine Cover: A YouTube video by a 2005 Highlander owner details solving a P0442 and P0456 code by finding a split vacuum hose directly under the plastic engine cover. The video notes that other owners of Toyota/Lexus vehicles with the 3.3L V6 engine (Sienna, Solara, RX330) commented that they found the leak in the exact same spot.
- Owner Experience: Second Cracked Hose Found Later: The same owner later posted a follow-up video after the codes returned, finding another, different cracked vacuum hose in the engine bay, this time on the hose running from the air breather assembly to the front valve cover. This highlights how multiple hoses can fail from age and heat.
- Forum Experience: Lexus RX330 Platform Mate Fix: A user on ClubLexus with a 2004 RX330 (a platform mate) and a P0442 code, after a new gas cap didn't work, found a cracked vacuum hose under the engine cover. Instead of buying the expensive OEM pre-formed hose assembly, they went to an auto parts store and matched it with bulk hose (Gates Part # 27044) for less than a dollar, which fixed the issue.
Mechanic-Grade Diagnostic Values
- EVAP System Pressure Hold Test (2.4L 2AZ-FE Engine) — expected: After applying 13.5 - 15.5 in.Aq of pressure at the service port, the system should hold over 7.7 - 8.8 in.Aq after 2 minutes.. Failure: Pressure dropping below 7.7 in.Aq within 2 minutes indicates a leak in the system.
- Vapor Canister Purge Valve / Solenoid Coil Resistance — expected: Approximately 28-34 Ohms at room temperature.. Failure: A reading significantly outside this range (e.g., open circuit/infinite resistance or a dead short/zero resistance) indicates a failed solenoid coil.
- Vapor Canister Purge Valve / Solenoid Functional Test — expected: When 12V is applied directly to the solenoid's two pins, an audible 'click' should be heard as the valve actuates.. Failure: No click indicates the valve is mechanically stuck or seized and needs replacement.
- Stuck-Open Purge Valve Test (Engine Idling) — expected: With the engine at idle and the purge valve electrical connector disconnected, there should be NO vacuum felt at the valve's inlet port (the side coming from the canister).. Failure: Feeling any vacuum suction on your finger indicates the valve is mechanically stuck open and is creating a constant vacuum leak.
Scan Tool Commands That Help
- Toyota Techstream: Utility -> Evaporative System Check — This is an automated, bidirectional test to command the EVAP system through its self-test sequence without waiting for the normal drive cycle conditions to be met. The technician can manually step through closing the canister vent valve (VSV for CCV) and opening the purge valve (VSV for Evap) to pull the system into a vacuum, then seal the system and monitor the pressure decay on-screen to confirm if a leak exists and isolate it between the tank and canister side.
Wiring & Ground Locations
- Engine Control Module (ECM) — Located behind the right side of the dashboard, typically behind the glove box.. The ECM is what receives signals from the EVAP pressure sensor and controls the purge and vent solenoids. While rare, a faulty ECM driver circuit could mimic a component failure.
- Ground Point EG — Located in the engine compartment, under the left headlight area.. This is a major engine harness ground point. A corroded or loose ground here can cause erratic behavior from various engine sensors and solenoids, including those in the EVAP system.
- Ground Point EF — Located on the left side of the cylinder block.. Another critical engine ground. Poor connection here can lead to incorrect sensor readings and intermittent electrical faults for components grounded to the engine block.
Real Owner Repair Stories
- YouTube - 'Toyota P0442/P0456 Vapor Canister Purge Solenoid' (2005 Toyota Highlander V6 3.3L with 284,000 miles) — Check Engine Light with codes P0442 (small leak) and P0456 (very small leak).
❌ Tried (didn't work) The owner went straight to investigating the purge solenoid based on research.
✅ What actually fixed it The vapor canister purge solenoid (purge valve) in the engine bay was faulty. The owner confirmed the old part was bad by applying 12V power and hearing no click, while the new part clicked. Replacing the solenoid for about $17 solved the codes. The owner also noted the plastic wiring harness connector was extremely brittle and shattered upon removal, requiring a zip tie for the new connection. - YouTube - 'Diagnosing a Code P0442 small EVAP leak detected' (2004 Toyota Highlander) — Check Engine Light and VSC light on with code P0442. The code returned after being cleared, ruling out a simple loose gas cap.
❌ Tried (didn't work) Initial smoke test showed a potential leak at the gas cap / filler neck, but this was a red herring.
✅ What actually fixed it The actual leak was a small, heat-brittled and cracked vacuum hose connected to the EVAP service port, hidden directly under the plastic engine cover. The technician found it with a smoke machine. Replacing the small section of hose sealed the system and fixed the code.
Model Year Variations Within This Range
- 2001-2003: The standard V6 engine was the 3.0L 1MZ-FE. These models did not have an option for a third-row seat.
- 2004-2007: The Highlander received a mid-cycle refresh. The standard V6 engine was upgraded to the 3.3L 3MZ-FE. The option for a third-row seat became available. Vehicle Stability Control (VSC) became standard.
- 2005-2007: A Hybrid model became available, which uses a different version of the 3.3L V6 (3MZ-FE) and a complex hybrid drive system, including an electric-only rear axle on AWD models.
Diagnostic Flowchart
Other Known Issues on This Vehicle
Issues unrelated to this code that are worth knowing about as an owner of this generation:
- Stripped Cylinder Head Bolt Threads (2AZ-FE 2.4L Engine) 🔴 High — A well-documented design flaw affecting 2001-2007 models. Often occurs after an overheating event or between 50,000-100,000 miles. Can lead to head gasket failure. (Ref: T-SB-0015-11)
- Engine Oil Sludging (V6 Models, especially 2001-2002) 🟠 Medium — More prevalent in early V6 models if oil change intervals were not strictly followed. Can lead to oil starvation and catastrophic engine damage.
- Water Pump Failure (V6 Models, especially 2006-2007) 🟠 Medium — Prone to developing coolant leaks, sometimes before 100,000 miles. Since the V6 has a timing belt, it's often recommended to replace the water pump during a timing belt service.
- Seizing Brake Calipers 🟡 Low — Common in regions with road salt or if brake maintenance is neglected. Leads to uneven brake pad wear and dragging brakes.
- Malfunctioning Climate Control Module 🟡 Low — Caused by loose solder joints on the circuit board behind the temperature knob, leading to erratic A/C and heat temperature control.
Used vs. New Parts: Buying Guide for This Vehicle
When a used part is the smart pick: For major structural components like a fuel filler neck (if sourced from a dry, rust-free climate) or a complete charcoal canister assembly if the failure is confirmed to be a crack in the canister body itself and a new one is prohibitively expensive. For all other common failure parts, new is strongly recommended.
Donor-vehicle mileage cap: roughly under 80000 miles for the part to have meaningful remaining life.
What to inspect on the donor part:
- For a filler neck, inspect for any signs of rust or corrosion, especially on the sealing surface and mounting tabs.
- For a canister assembly, check for physical cracks, broken tabs, or signs of being saturated with liquid fuel.
- Verify the donor vehicle is from a non-salt-belt region to minimize rust and corrosion issues.
OEM-only on this vehicle (don't cheap out):
- Gas Cap - Aftermarket caps are a frequent cause of P0442 codes due to improper sealing. Sticking with a genuine Toyota OEM cap is the safest bet to avoid a repeat failure.
Aftermarket brands forum-validated for this vehicle:
- Dorman (911-663)
- Duralast (PV705)
- Denso (First Time Fit)
Brands owners have reported issues with on this vehicle:
- Avoid unbranded, generic 'universal' purge valves or gas caps from online marketplaces. The calibration and seal quality are critical for the EVAP system's sensitive pressure tests, and cheap parts are a common cause of recurring codes.
Real Owner Stories
Aggregated from forums and TSBs cited above. Mileages and costs reflect what owners reported in those sources.
2005 Toyota Highlander 3.3L V6
Symptoms: Check Engine Light and P0442/P0456 codes present.
What fixed it: Found a split vacuum hose directly under the plastic engine cover. Later found a second cracked hose running from the air breather assembly to the front valve cover.
Source hint: YouTube - 'SOLVED: PO442/PO456 Toyota/Lexus: Split Vacuum Line'
2004 Lexus RX330 (3MZ-FE V6)
Symptoms: P0442 code and VSC light on; a new gas cap did not resolve the issue.
What fixed it: Replaced a cracked vacuum hose under the engine cover using bulk Gates Part # 27044 hose.
Cost: $0-$1
Source hint: ClubLexus - '2005 rx330 check engine code p0442 and VSC light on'
2006 Toyota Highlander
Symptoms: P0442 and P0455 codes.
What fixed it: A smoke test revealed pinholes in a rusted fuel filler neck.
Source hint: YouTube - 'How to Use a Smoke Machine to Find Evap Leaks P0442 P0455 Toyota Highlander'
Related OBD-II Codes
Frequently Asked Questions
Why are my VSC and TRAC OFF lights on along with the Check Engine Light?
Does TSB-0015-11 regarding cylinder head bolts apply to my P0442 code?
Can I use a generic gas cap to fix this on my Highlander?
Where is the most common place to find a vacuum leak on the 3.3L V6 engine?
I live in the 'Salt Belt'; is there a specific part I should check for P0442?
Is it possible to fix the vacuum hose leak without buying an expensive assembly?
Helpful Videos
Used OEM Parts in Stock

New Aftermarket Parts Available


The information in this article is provided for general reference and educational purposes only. Vehicle specifications, procedures, and part compatibility can vary by production date, trim level, and region. Always consult your vehicle's factory service manual and verify part numbers before purchasing or performing repairs. Safety-critical components such as airbags, seat belts, and braking systems should be installed by a qualified professional.
- Toyota Highlander:
- 🧭 Diagnostic Flowchart
- 🎬 Helpful Videos
- 🛍️ Shop This Part
- What's Unique About the 2001-2007 Toyota Highlander
- Symptoms You May Notice
- Most Likely Causes
- Diagnosis Steps
- Parts You'll Likely Need
- Related Codes That Often Appear With This One
- Technical Service Bulletins (TSBs) & Recalls
- Platform-Specific Known Issues
- Mechanic-Grade Diagnostic Values
- Scan Tool Commands That Help
- Wiring & Ground Locations
- Real Owner Repair Stories
- Model Year Variations Within This Range
- Other Known Issues on This Vehicle
- Used vs. New Parts: Buying Guide for This Vehicle
- Real Owner Stories
- 2005 Toyota Highlander 3.3L V6
- 2004 Lexus RX330 (3MZ-FE V6)
- 2006 Toyota Highlander
- Related OBD-II Codes
- Frequently Asked Questions
- 🎟️ Get 5% Off