
P0443 on 2010-2015 Toyota Prius: EVAP Purge Valve Circuit Malfunction Causes and Fixes
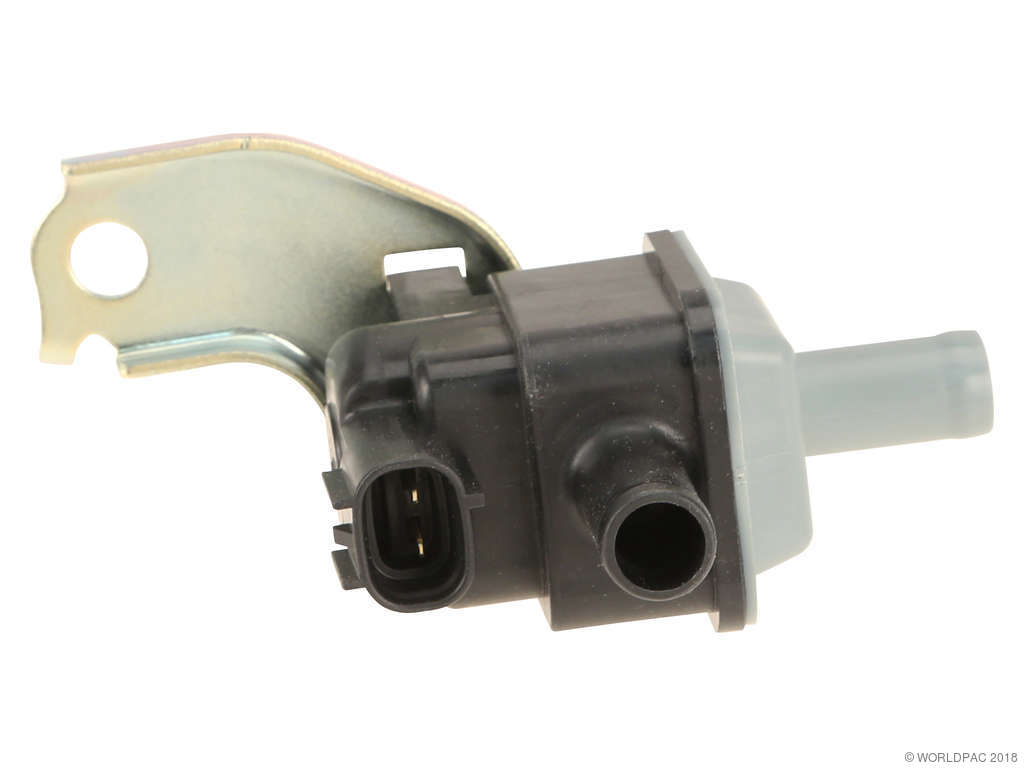
On a 2010-2015 Prius, code P0443 almost always means the EVAP purge valve has failed. This is an electrical circuit code, not a leak. Replacing the purge valve (OEM part #90910-12276, superseded by #90910-TC001) is the most common fix, costs about $40-$100, and is a simple DIY job.
- P0443 is an electrical circuit code, not a system leak code. Do not replace your gas cap.
- The most likely cause by a wide margin is a failed purge valve (solenoid), part number 90910-12276, which has been updated to 90910-TC001.
- This is a very DIY-friendly repair that requires basic tools and can be completed in under 30 minutes.
- Confirm the failure by testing for a 'click' with 12V power or checking resistance (spec: ~22-26 ohms) before ordering a new part.
What's Unique About the 2010-2015 Toyota Prius
For the third-generation Prius (2010-2015), the P0443 code is a very common and straightforward issue. Unlike other vehicles where this code could lead to a complex diagnostic path involving smoke tests and pressure sensors, on the Prius it almost invariably points to a failed purge valve, which Toyota often calls a Vacuum Switching Valve (VSV). The part is known to fail electrically over time, but is fortunately inexpensive and easily accessible in the engine bay for a quick repair.
Symptoms You May Notice
- Check Engine Light is on
- Slightly rough idle, especially when the engine is cold
- Minor decrease in fuel economy
- Potential for a faint fuel odor (less common)
- Difficulty starting the engine (rare, if valve is stuck open)
- Engine stalling (very rare)
- Replacing the gas cap. A faulty gas cap typically causes a large leak code like P0455 or a small leak code like P0456, not a circuit code like P0443.
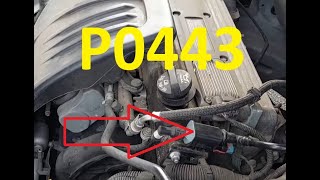
- Replacing other EVAP components like the charcoal canister or vent valve. P0443 specifically points to an electrical fault in the purge valve circuit, not other parts of the system. 🎬 Watch: A deep dive into P0443 causes and common fixes.
Most Likely Causes
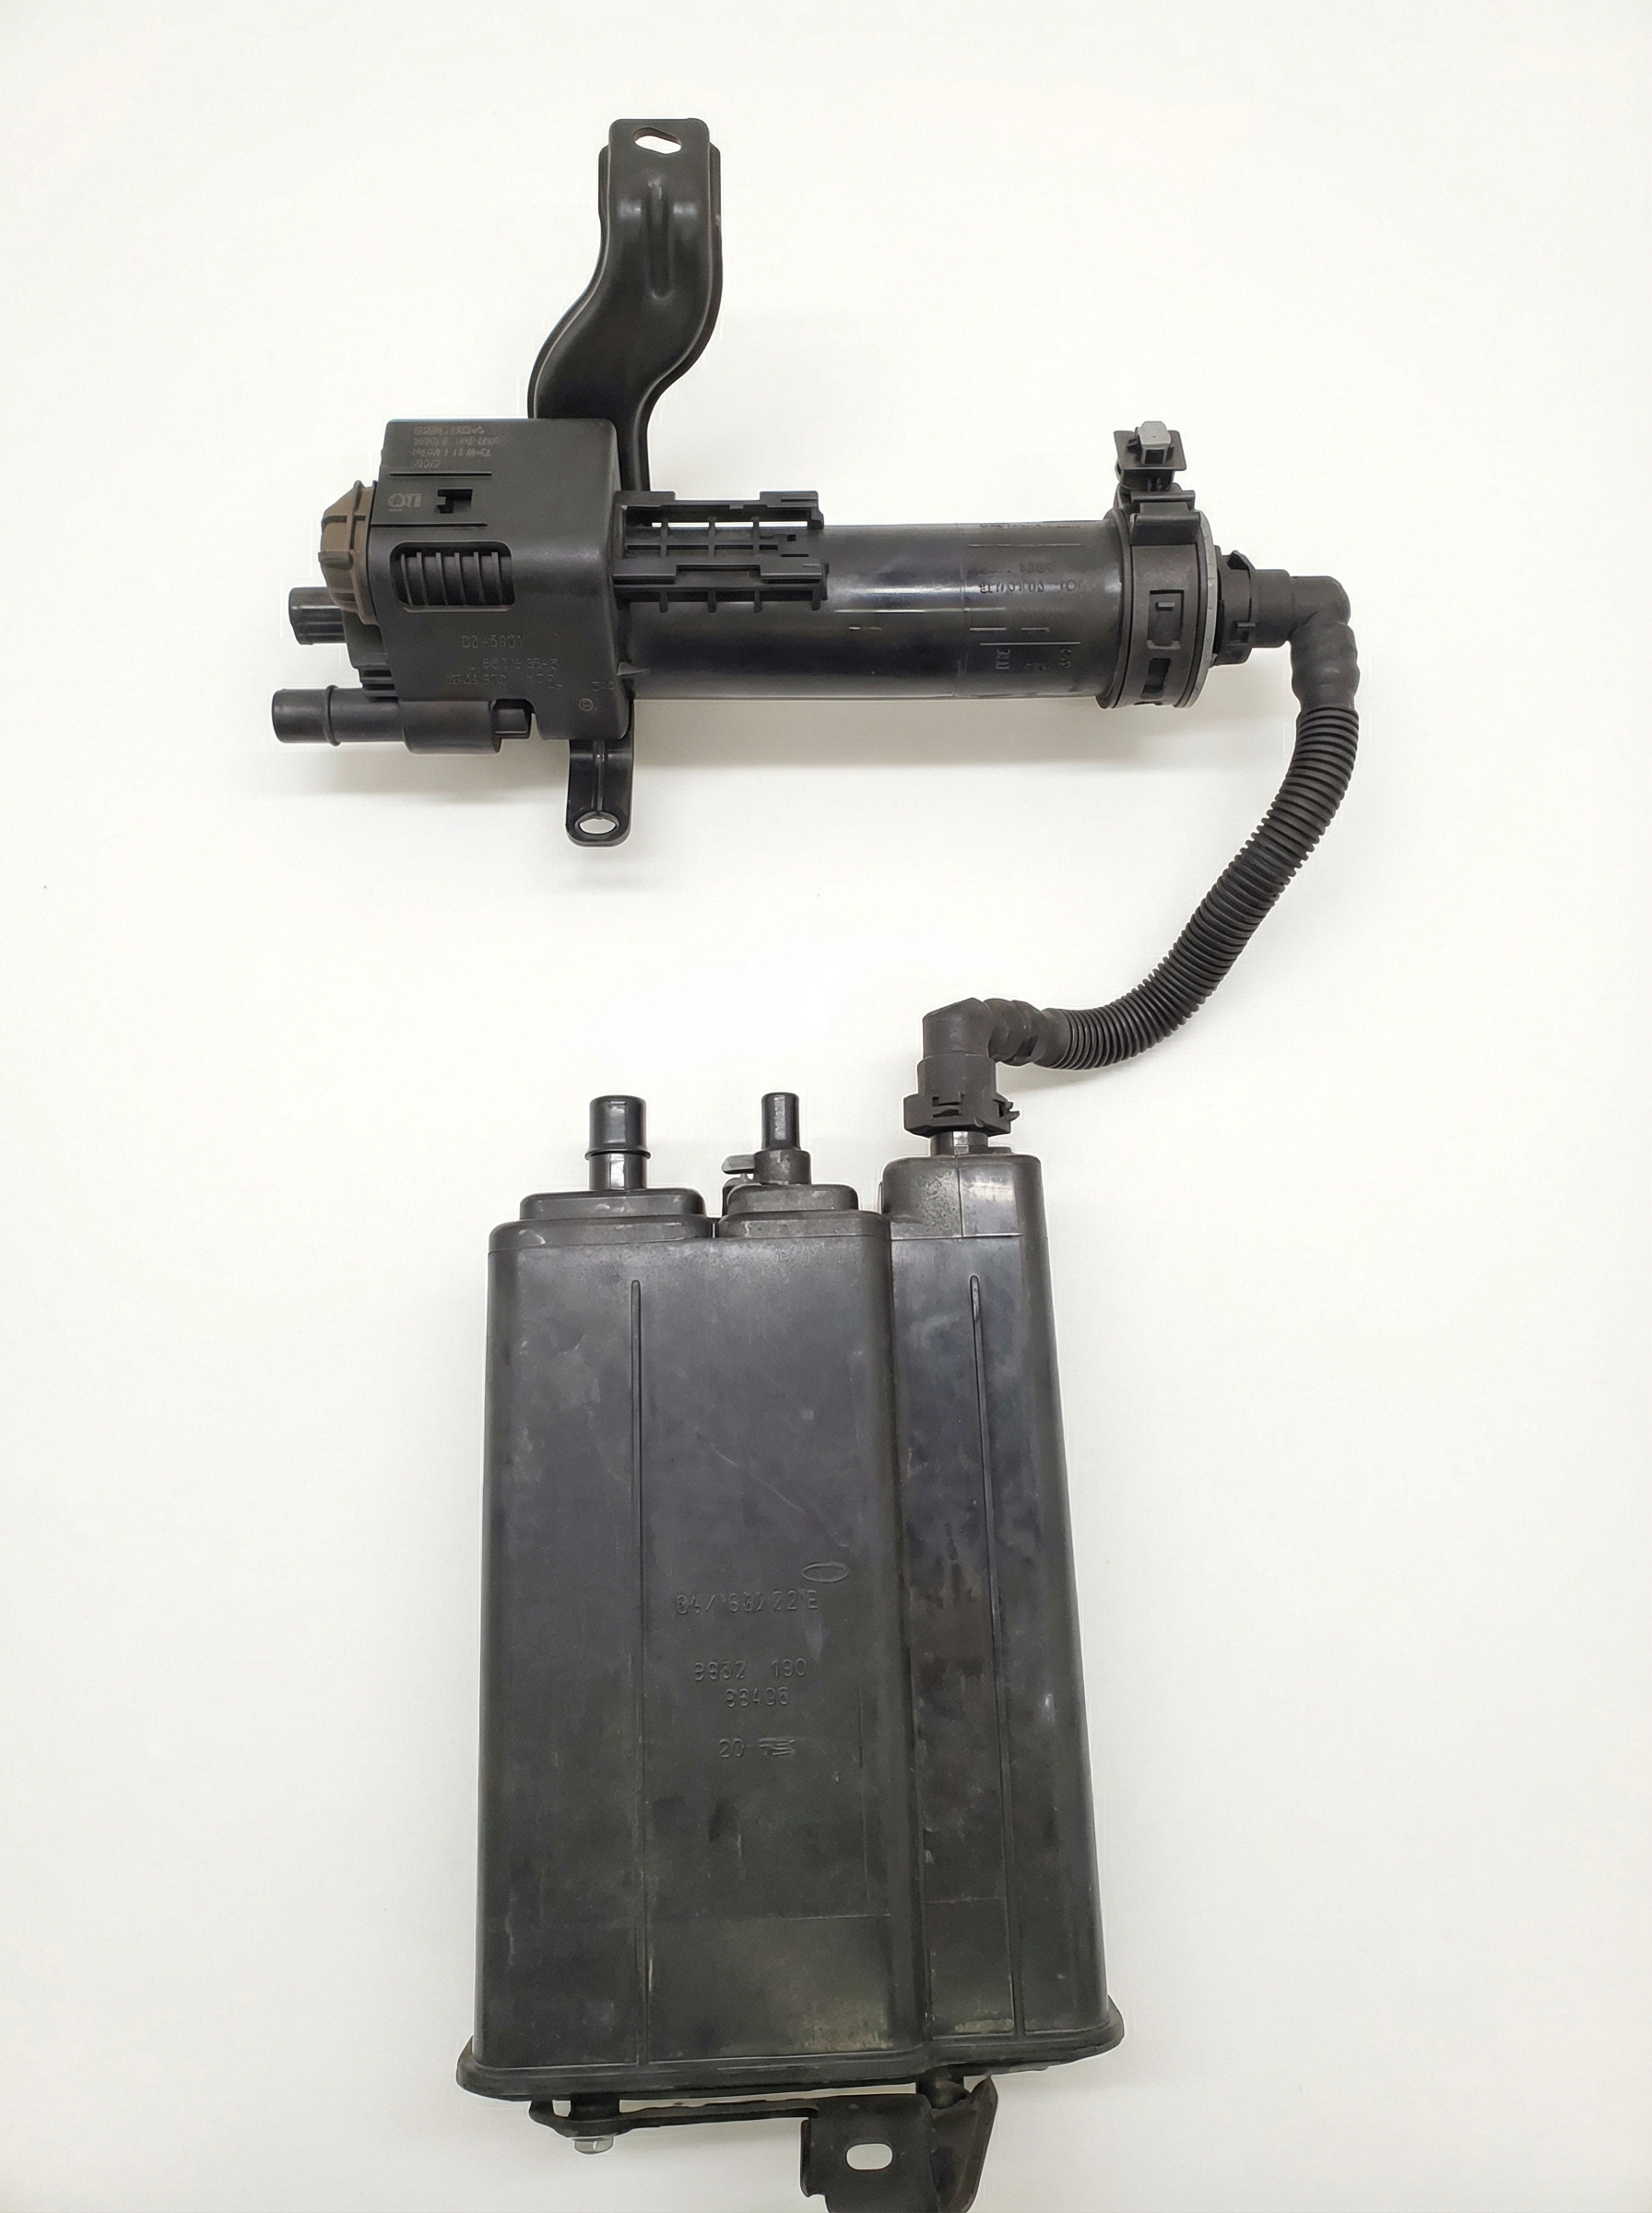
- Faulty EVAP Purge Valve / Solenoid 🔴 High Probability → Shop Vapor Canister The internal coil of the solenoid is a common failure point on this part after many years and heat cycles in the engine bay. The winding can break, creating an open circuit.
How to confirm: Locate the valve in the engine bay. Disconnect the electrical connector and apply 12V directly to the two pins on the valve. A healthy valve will make an audible 'click'. If it is silent, it has failed. You can also test for resistance across the pins with a multimeter; a healthy valve should have a resistance between 20-40 ohms (a more specific range for some Toyota models is 22-26 ohms at room temperature). An open circuit (infinite resistance) or a short (near-zero resistance) indicates failure.
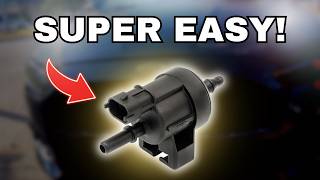
Typical fix: Replace the purge valve. It is typically held in place by a single 10mm bolt and has two vacuum hoses and one electrical connector. 🎬 Watch: How to replace your purge valve like a pro.
Est. part cost: $40-$100 - Damaged Wiring or Connector 🟡 Medium Probability Wiring in the engine bay is exposed to heat and vibration, which can cause it to become brittle or frayed over time. Rodents can also chew on the wires. The connector itself can become corroded or the locking tab can break.
How to confirm: Visually inspect the wiring harness and connector leading to the purge valve. Look for any breaks, chafing, or corrosion on the connector pins. Use a multimeter to check for battery voltage (~12V) at the power wire in the connector with the key on. Then check for continuity on the ground wire from the connector back to the ECM.
Typical fix: Repair the broken section of wire or replace the connector pigtail.
Est. part cost: $5-$25 - Blown Fuse ⚪ Low Probability
How to confirm: Check the fuse box diagrams in your owner's manual to locate the fuse related to the emissions or EVAP system (often labeled 'EFI' or 'AM2'). Pull the fuse and visually inspect if the internal filament is broken. Test with a multimeter for continuity.
Typical fix: Replace the blown fuse. If the new fuse blows immediately, it indicates a short circuit in the system that needs to be diagnosed, possibly in the purge valve itself or the wiring harness.
Est. part cost: $1-$5
Rare But Worth Checking
- Faulty Engine Control Module (ECM): → Shop Engine Control Module (ECM) This is extremely rare. The ECM's internal driver for the purge valve circuit can fail, but this should only be considered as the cause after all other possibilities (valve, wiring, fuses) have been exhaustively tested and ruled out.
Diagnosis Steps
- Read the code with an OBD-II scanner to confirm P0443 is the only code present.
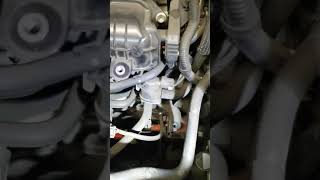
- Locate the purge valve (VSV) in the engine bay. On the 2010-2015 Prius, it is near the top of the engine, under the plastic engine cover and near the air filter housing. 🎬 See this quick video to help you locate the valve.
- Visually inspect the electrical connector and wiring going to the valve for any visible damage, corrosion, or loose connections.
- Disconnect the electrical connector. Test the valve's internal coil resistance with a multimeter. A good valve should read between 22-26 ohms. An infinite reading (OL) means it's open and bad. A reading near zero means it's shorted and bad.
- As an alternative test, apply 12V power and ground directly to the valve's two terminals using jumper wires. A good valve will produce a distinct click. No click means the valve is bad.
- If the valve tests good, check the connector for power. Turn the ignition ON (engine off) and use a multimeter to check for battery voltage between one of the connector's pins and a good chassis ground. One pin should have ~12V.
- If power and the valve are good, check the fuse for the EVAP system circuit (often labeled EFI or AM2). If it's blown, replace it and see if the code returns. If it blows again, there is a short circuit to ground.
- If the valve, wiring, and power supply are good, the issue could be with the ECM, but this is highly unlikely.
Parts You'll Likely Need
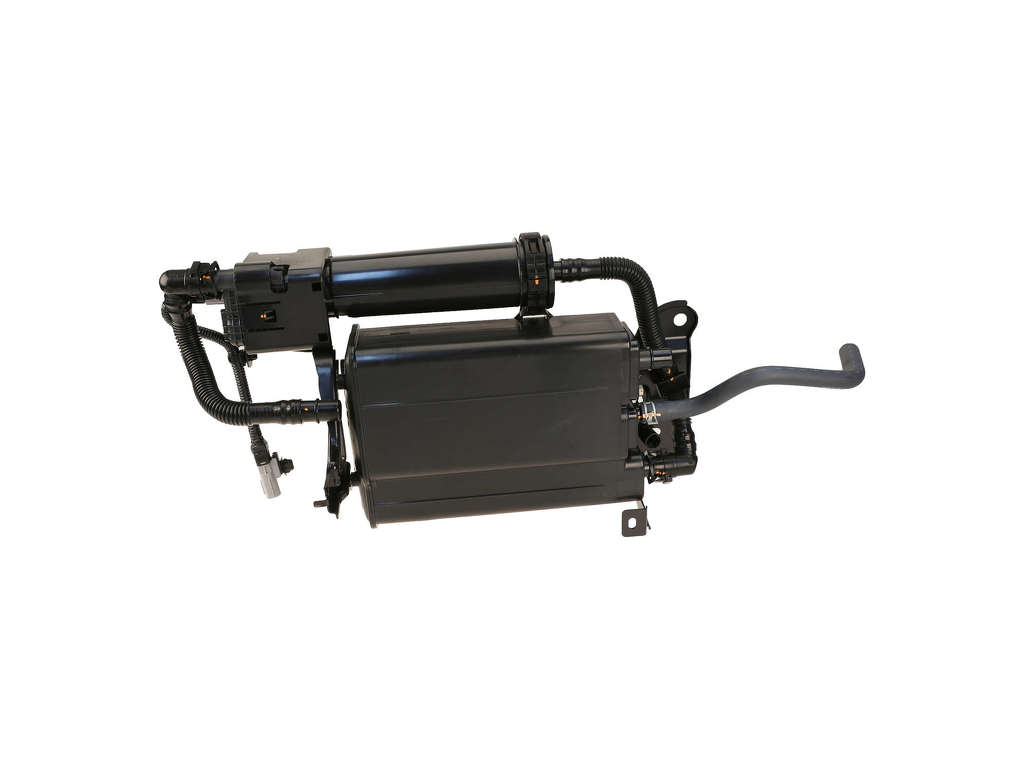
- Vapor Canister Purge Valve / Vacuum Switching Valve (VSV)
(OEM #90910-12276)— This is the most common failure point for code P0443 on this generation of Prius. The internal solenoid fails electrically, causing the circuit fault. The original part 90910-12276 has been superseded by 90910-TC001.
Trusted brands: Denso (OEM Manufacturer), Aisin, Standard Motor Products (SMP), Dorman
OEM price range: $70-$100
Aftermarket price range: $40-$70
Platform-Specific Known Issues
- Real Owner Experience: Simple Swap Fix: A user on PriusChat with a Gen 2 Prius (which uses a similar EVAP setup) reported fixing code P0443 after confirming the old valve no longer clicked when applying 9V from a battery. A salvaged part from eBay for £15 resolved the issue, highlighting the simplicity and low cost of the repair.
Mechanic-Grade Diagnostic Values
- Purge VSV Coil Resistance — expected: 22 to 26 ohms at 68°F (20°C). Failure: Infinite resistance (open) or near-zero resistance (short).
- Voltage at Purge VSV Connector (Power Pin) — expected: 9 to 14 V with ignition switch ON. Failure: 0V indicates a blown fuse or open in the power circuit.
- ECM Control Signal Waveform (PRG Pin) — expected: A duty cycle waveform should be visible on an oscilloscope when the ECM commands the purge valve to open.. Failure: A flat line at battery voltage (when commanded on) or 0V suggests an ECM driver issue or a short/open in the control wire.
Scan Tool Commands That Help
- Toyota Techstream: Active Test: 'Activate the VSV for Evap Control' — This command allows a technician to manually cycle the purge valve on and off. It's used to verify if the valve clicks audibly and if the circuit itself is capable of being controlled by the ECM. This is the primary bidirectional test to confirm valve and circuit function before replacement.
- Toyota Techstream: Data List: 'EVAP Purge VSV' — After performing a repair, monitoring this data parameter while driving allows the technician to confirm that the ECM is commanding the purge valve to open under normal operating conditions (e.g., engine warmed up, not at idle).
Wiring & Ground Locations
- D11 (Purge VSV Connector) — On the purge valve itself, located on the left side of the engine near the intake manifold.. This is the primary connector to inspect for corrosion, damage, or loose pins. All electrical testing of the valve and its immediate circuit begins here.
- ECM Pin B28 (PRG) — On the Engine Control Module (ECM), which is located on the left side of the engine compartment.. This is the specific pin on the ECM that sends the control signal to the purge valve. A technician would back-probe this pin to verify the ECM is sending a signal, which is the final step before condemning the ECM itself. The wire color is typically Light Green (LG).
- EFI MAIN Relay / EFI NO. 2 Fuse — Located in the engine room relay block (J/B) on the left side of the engine compartment.. This relay and fuse supply the battery voltage to the purge valve. A failure here would result in no power at the valve's connector and would prevent the valve from operating.
Real Owner Repair Stories
- PriusChat Forum User (2012 Toyota Prius) — Check Engine Light with code P0443.
❌ Tried (didn't work) Replacing the purge valve (VSV) with a new OEM part. The code returned shortly after.
✅ What actually fixed it The wiring harness connector for the purge valve was faulty. The user reported that wiggling the connector would cause the valve to click, indicating an intermittent connection. Replacing the connector pigtail permanently resolved the issue. - Reddit User r/prius (2004 (Gen 2) Toyota Prius) — Check Engine Light with P0443.
✅ What actually fixed it The user tested the original purge valve by applying 9V from a battery and heard no click. A used, salvaged part was purchased from eBay for a low price, which did click when tested. Installing the salvaged part fixed the code.
OEM Part Supersession History
90910-12276→90910-TC001— Standard part revision by Toyota. Often for minor manufacturing process improvements, material changes, or consolidation.
Heads up: None. The parts are fully interchangeable for all specified applications.
Diagnostic Flowchart
Other Known Issues on This Vehicle
Issues unrelated to this code that are worth knowing about as an owner of this generation:
- Excessive Oil Consumption 🔴 High — Common in 2010-2014 models, especially over 100,000 miles. Caused by faulty piston ring design. (Ref: T-SB-0168-16 (Inspection) and T-SB-0169-16 (Repair) were issued, but repairs were typically only covered under the 60k mile powertrain warranty.)
- Clogged EGR System & Head Gasket Failure 🔴 High — Extremely common. The EGR cooler, valve, and intake manifold passages clog with carbon, leading to engine knock, misfires, and eventual head gasket failure if not cleaned regularly (e.g., every 60-90k miles). (Ref: T-SB-0027-16 addresses a sticking EGR valve and recommends an updated part and ECU reflash.)
- Brake Actuator / Booster Failure 🔴 High — A very common and expensive failure. The actuator fails internally, causing a loud, repetitive buzzing noise, a stiff or spongy brake pedal, and multiple warning lights (ABS, Brake, VSC). (Ref: Toyota issued a Warranty Enhancement Program (ZJB) extending coverage for this issue. Common DTCs are C1391, C1252, C1256.)
- Hybrid Inverter Failure 🔴 High — The Intelligent Power Module (IPM) within the inverter can fail from thermal stress, causing the car to stall, sometimes while driving at speed. (Ref: Multiple recalls were issued (e.g., 14V053000, 18V684000) to update software or replace the IPM.)
- Center Multi-Function Display (MFD) Failure 🟡 Low — The main screen can go blank or become unresponsive due to poorly soldered internal connections. (Ref: No recall, but a common issue discussed in owner forums. Repair often involves sending the unit to a specialist for re-soldering.)
Used vs. New Parts: Buying Guide for This Vehicle
When a used part is the smart pick: A used OEM (Denso-branded) purge valve from a low-mileage donor vehicle is a very reasonable and cost-effective repair. Since the failure mode is a simple electrical coil burnout, a functional used part is likely to have significant remaining life. The low cost and ease of replacement make it a low-risk gamble.
Donor-vehicle mileage cap: roughly under 120000 miles for the part to have meaningful remaining life.
What to inspect on the donor part:
- Ask the seller to test the valve with a 9V or 12V source to confirm it 'clicks' before shipping.
- Inspect the plastic housing for cracks or signs of extreme heat stress.
- Ensure the electrical connector pins are clean, straight, and free of corrosion.
- Verify the vacuum ports are clear of debris.
Aftermarket brands forum-validated for this vehicle:
- Denso (Original Equipment Manufacturer)
- Aisin (Reputable OEM supplier)
Brands owners have reported issues with on this vehicle:
- Unbranded or 'white-box' parts from online marketplaces should be treated with caution. While they may work, their long-term durability is unproven, and for a part this inexpensive, sticking with a known good brand is a safer bet.
Real Owner Stories
Aggregated from forums and TSBs cited above. Mileages and costs reflect what owners reported in those sources.
Gen 2 Toyota Prius
Symptoms: The old valve no longer clicked when applying 9V from a battery.
What fixed it: Replacing the purge valve with a salvaged part from eBay.
Cost: £15-£15
Source hint: PriusChat: 'FIXED: Gen 2 Prius P0443...'
Toyota Prius
Symptoms: Check Engine Light with code P0443; valve failed the click test when power was applied.
What fixed it: Replacing the purge valve.
Source hint: Reddit user confirmation of P0443 fix
Related OBD-II Codes
Frequently Asked Questions
Where is the EVAP purge valve located on my 2010-2015 Prius?
Can I test the purge valve myself before buying a new one?
Is P0443 caused by a loose gas cap on my Prius?
Which fuse should I check for a P0443 code?
Does my Prius share this purge valve with other Toyota models?
What are the symptoms of a failing purge valve on a Gen 3 Prius?
Helpful Videos
Used OEM Parts in Stock
New Aftermarket Parts Available


The information in this article is provided for general reference and educational purposes only. Vehicle specifications, procedures, and part compatibility can vary by production date, trim level, and region. Always consult your vehicle's factory service manual and verify part numbers before purchasing or performing repairs. Safety-critical components such as airbags, seat belts, and braking systems should be installed by a qualified professional.
- Toyota Prius:
- 🧭 Diagnostic Flowchart
- 🎬 Helpful Videos
- 🛍️ Shop This Part
- What's Unique About the 2010-2015 Toyota Prius
- Symptoms You May Notice
- Most Likely Causes
- Rare But Worth Checking
- Diagnosis Steps
- Parts You'll Likely Need
- Platform-Specific Known Issues
- Mechanic-Grade Diagnostic Values
- Scan Tool Commands That Help
- Wiring & Ground Locations
- Real Owner Repair Stories
- OEM Part Supersession History
- Other Known Issues on This Vehicle
- Used vs. New Parts: Buying Guide for This Vehicle
- Real Owner Stories
- Gen 2 Toyota Prius
- Toyota Prius
- Related OBD-II Codes
- Frequently Asked Questions
- 🎟️ Get 5% Off