
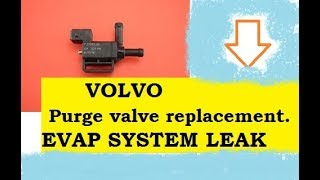
P0443 on 2000-2007 Volvo V70: EVAP Purge Valve Circuit Malfunction Causes and Fixes
On a 2000-2007 Volvo V70, code P0443 is almost always caused by a failed EVAP purge valve solenoid. It's a straightforward DIY replacement, with the part costing between $45 and $75. The valve's location varies by year, so confirm before starting.
- P0443 on a P2 Volvo V70 points directly to an electrical issue with the purge valve circuit, not a system leak.
- The most likely culprit by a wide margin is a failed purge valve solenoid, which either has an internal electrical fault or is mechanically stuck.
- Diagnosis is simple: test the valve with a multimeter for resistance (spec is ~21-30 ohms) or apply 12V to see if it clicks.
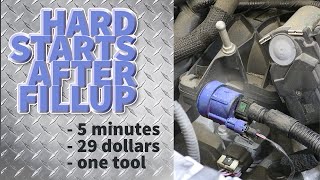
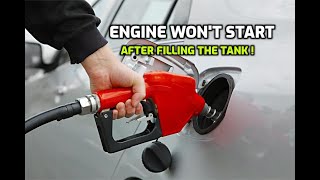
- A hard start after refueling is a classic symptom of a purge valve stuck open.
- The part is relatively inexpensive and accessible for DIY replacement, typically taking less than an hour.
- Before ordering a part, double-check its location on your specific car, as it can be on the radiator shroud (early P2), behind the headlight, or under the intake manifold (later P2).
- It's wise to replace the small, connected vacuum hoses at the same time, as they are often brittle and cracked.
What's Unique About the 2000-2007 Volvo V70
On the P2 platform V70, this code is very common and overwhelmingly points to the purge valve solenoid itself failing internally. While the code's definition is generic, the cause on these Volvos is quite specific. The location of the valve can vary slightly by year: on earlier 2001-2002 models it is often on the radiator shroud, while on 2003 and newer models it is typically found under the intake manifold or behind the driver-side headlight.
Generation note: The 2000-2007 Volvo V70 is part of a single generation, known as the P2 platform. However, there are minor variations in the location of the purge valve depending on the model year and engine within this generation. For example, on a 2005 V70, it's often found behind the left headlamp, while on early 2001-2002 models, it's commonly on the radiator fan shroud.
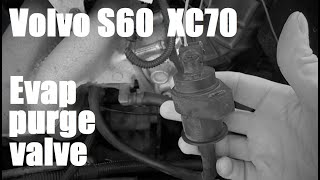
🎬 Watch: How to locate and check the purge valve on these models.Symptoms You May Notice
- Check Engine Light is on.
- Slightly rough idle, especially after a cold start or refueling (if the valve is stuck open).
- Hard starting immediately after filling the gas tank (a strong indicator of a stuck-open purge valve flooding the intake with vapor). 🎬 See why a stuck valve makes your Volvo hard to start after refueling.
- Minor reduction in fuel economy.
- A faint fuel odor near the engine bay (uncommon).
- Vehicle will fail an emissions test.
- Replacing the gas cap. A loose or faulty gas cap will typically cause an EVAP leak code (like P0442 or P0455), not a circuit code like P0443.
Most Likely Causes
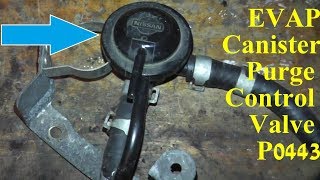
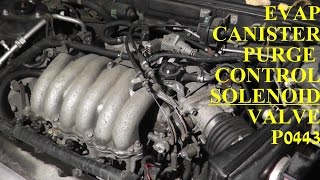
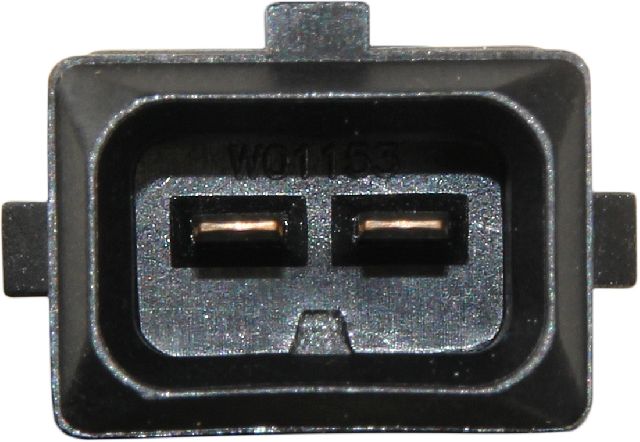
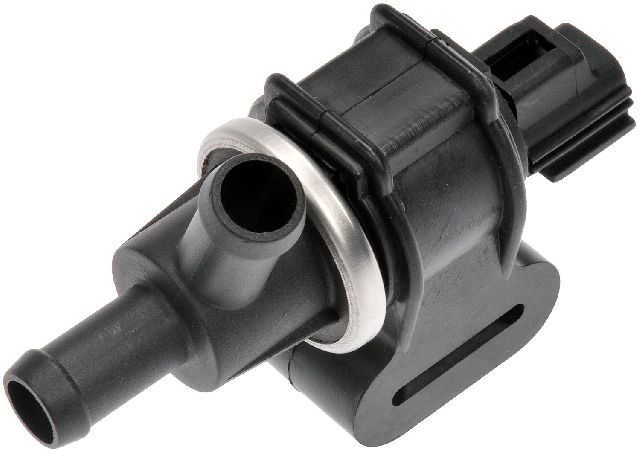
- Failed EVAP Purge Valve Solenoid 🔴 High Probability → Shop Vapor Canister The internal coil of the solenoid can fail over time, creating an open or short circuit. The valve can also become clogged with dirt or carbon, causing it to stick open or closed, which is a common failure point on these vehicles.
How to confirm: Disconnect the valve's electrical connector and use a multimeter to check the resistance across the two pins. A healthy valve should read between 21-30 ohms. Alternatively, apply 12V directly to the pins; a healthy valve will make an audible 'click'. If it doesn't click, the resistance is out of spec, or you can blow air through it when it's supposed to be closed, it has failed.
Typical fix: Replace the EVAP purge valve solenoid.
Est. part cost: $45-$75 - Damaged Wiring or Connector 🟡 Medium Probability Engine bay heat and vibrations can cause the wiring leading to the purge valve to become brittle and crack, or the connector pins can corrode. The locking tab on the connector can also become brittle and break.
How to confirm: Visually inspect the wiring harness and the electrical connector for any signs of cracking, fraying, or green/white corrosion on the pins. Use a multimeter to check for 12V power at the connector with the key on. Wiggle the harness while testing to check for intermittent breaks.
Typical fix: Repair the damaged section of wire or clean/replace the electrical connector.
Est. part cost: $5-$25 - Cracked or Disconnected Vacuum Hoses at the Valve ⚪ Low Probability → Shop Vacuum Hose The small rubber vacuum hoses attached to the purge valve can become hard, brittle, and crack with age. This is often discovered when replacing the valve itself. A cracked hose can cause a vacuum leak that may contribute to performance issues.
How to confirm: Visually inspect the small rubber hoses connected directly to the purge valve for any cracks, splits, or loose connections. Squeeze them to check for hardness or brittleness.
Typical fix: Replace the cracked vacuum hose sections. This is often done at the same time as valve replacement.
Est. part cost: $5-$15
Rare But Worth Checking
- Blown Fuse: A fuse in the circuit that powers the EVAP system could have blown, though this is uncommon. Check the fuse box diagram for any fuse related to emissions components.
- Kinked EVAP Hose: In some cases, particularly on the XC90 V8, a hose connected to the purge valve can become kinked, restricting flow. While not an electrical fault, this can sometimes trigger EVAP system codes. This is often found during a visual inspection.
- Faulty Engine Control Module (ECM): → Shop Engine Control Module (ECM) This is extremely rare. The ECM driver for the purge valve can fail, but this should only be considered as the cause after all other possibilities (valve, wiring, fuses) have been exhaustively ruled out.
Diagnosis Steps
- Read the code with an OBD-II scanner to confirm P0443 is the primary code present.
- Locate the EVAP purge valve. On 2001-2002 models, check the radiator fan shroud. On 2003+ models, check under the intake manifold or behind the driver's side headlight.
- Visually inspect the electrical connector and wiring going to the valve for any obvious damage, corrosion, or loose connections.
- Inspect the small vacuum hoses attached to the valve for cracks, kinks, or deterioration.
- Disconnect the electrical connector. With the ignition on, use a multimeter to verify that one of the pins in the connector has 12V power.
- Test the valve itself. Measure the resistance between the two pins on the valve. A typical reading is between 21-30 ohms. If it reads as an open circuit (infinite resistance) or a short (zero resistance), the valve is bad.
- As an alternative test, use jumper wires to apply 12V from the battery directly to the valve's pins. You should hear a distinct 'click'. If there is no click, the valve is faulty.
- With no power applied, try to blow through the valve. It should be closed. If you can blow through it, it is stuck open and needs replacement. This condition often causes hard starting after refueling.
- If the wiring and valve both test good, the issue may be in the ground signal wire leading back to the ECM, or, in very rare cases, the ECM itself.
Parts You'll Likely Need
- EVAP Vapor Canister Purge Valve
(OEM #8653908, 9135444)— This is the most common failure point for code P0443 on this vehicle. The internal solenoid coil fails or the valve sticks, causing an electrical or functional fault.
Trusted brands: Genuine Volvo, Bosch, Pierburg, Dorman
OEM price range: $65-$80
Aftermarket price range: $45-$65
Platform-Specific Known Issues
- Cracked/Kinked Hoses Found During Replacement: It is very common for owners to discover that the small vacuum hoses attached to the purge valve are brittle, cracked, or even kinked upon removal. It is a best practice to replace these small sections of hose when replacing the valve to prevent future vacuum leaks.
Mechanic-Grade Diagnostic Values
- EVAP Purge Valve Solenoid Resistance — expected: 21.3 ohms. Failure: An open circuit (infinite ohms) or a direct short (near zero ohms) indicates a failed coil.
- Vacuum Hold Test — expected: When disconnected and no voltage is applied, the valve should hold vacuum (e.g., 15-17 inHg) without dropping for several minutes.. Failure: If the valve cannot hold a vacuum, it is stuck open or has an internal leak.
Hidden / Shadow Codes Worth Checking
- ECM-211A: This is the Volvo-specific Diagnostic Trouble Code (DTC) for 'EVAP canister purge (CP) valve - Signal too high / Signal too low / Signal missing'. It directly corresponds to the generic P0443 code and points to an electrical fault in the purge valve circuit. (see via This code is visible using Volvo-specific diagnostic tools like VIDA/DICE.)
Scan Tool Commands That Help
- Volvo VIDA: Component Activation: EVAP Canister Purge (CP) Valve — This bidirectional test allows a technician to command the purge valve to open and close while monitoring circuit voltage and listening for the valve's audible 'click'. It is the definitive way to test the entire circuit, from the ECM's command to the valve's mechanical response, without manually applying voltage.
- Volvo VIDA: Advanced > Quick test of fuel tank system — While primarily for leak testing (P0442/P0455), running this test can sometimes help diagnose related EVAP system faults. The test actuates various EVAP components, and a failure here could provide additional clues, though P0443 is specifically a circuit fault.
Wiring & Ground Locations
- EVAP Valve Component Designator — In official Volvo wiring diagrams for this platform, the EVAP Purge Valve is designated as component 8/18.. Knowing the component designator (8/18) is essential for correctly identifying the valve and its associated wires (power and ECM ground signal) on a complex vehicle wiring diagram, which is necessary for tracing an open or short circuit.
- Main Engine Ground Strap — A large ground strap runs from the transaxle to the vehicle frame on the P2 chassis.. A corroded or loose main engine ground can cause a host of intermittent and bizarre electrical issues, including sensor and actuator faults. While not a direct cause of P0443, poor grounding can create voltage drops and unstable signals that might be misinterpreted by the ECM as a circuit fault.
- Valve Cover to Firewall Ground — A smaller ground cable connects the engine valve cover to the firewall/bulkhead.. This ground point is known to corrode on the valve cover side. A user on a Volvo forum traced multiple intermittent electronic faults to corrosion at this specific point. Cleaning this ground and ensuring a solid connection can resolve unexplained electrical codes.
Real Owner Repair Stories
- Turbobricks Forum user 'Janspeed' (Volvo V70 P2 (year not specified, but 2000-2007 platform)) — Multiple, inconsistent errors including 'DSTC service needed', varying idle, CEL on, and cam adjuster errors.
❌ Tried (didn't work) Initial confusion over the source of the many codes.
✅ What actually fixed it The user found significant corrosion on the ground cable between the valve cover and the firewall. After cleaning the contact point on the valve cover, adding a star washer for better contact, and re-securing the ground cable, the multiple intermittent errors disappeared. - AliExpress Verified Purchase Review (Volvo (model not specified, but part fits V70)) — P0443 code.
❌ Tried (didn't work) A previous aftermarket replacement valve failed very quickly.
✅ What actually fixed it The user noted that one aftermarket purge valve lasted 50,000 km, but a second one failed very shortly after installation, getting stuck in the open position. This highlights the variable quality of non-OEM parts for this component.
OEM Part Supersession History
31104896→8653908— Standard part number update by Volvo. The parts are functionally identical.
Heads up: Part number 8653908 is the correct and current replacement for P2 platform vehicles requiring this valve. While some earlier P80 platform valves may look similar, their electrical characteristics or hose connections may differ.
Model Year Variations Within This Range
- 2000-2002: The EVAP purge valve is most commonly located on the radiator fan shroud, making it very easy to access.
- 2003-2007: The valve was relocated to a position under the intake manifold (for many 5-cylinder non-turbo and T5 models) or behind the driver's side headlight assembly (on some later models). This can make access more difficult, particularly the under-manifold location.
Diagnostic Flowchart
Used vs. New Parts: Buying Guide for This Vehicle
When a used part is the smart pick: A used OEM (Bosch/Genuine Volvo) purge valve from a reputable dismantler is a reasonable choice for this repair. The part is not a high-wear item, but its internal coil can fail. A used part can be easily tested with a multimeter (for resistance) and a 12V source (to hear it click) before installation.
Donor-vehicle mileage cap: roughly under 120000 miles for the part to have meaningful remaining life.
What to inspect on the donor part:
- Check that the plastic housing is not cracked or brittle.
- Ensure the electrical connector pins are clean and free of corrosion.
- Ask the seller to test it for resistance (should be ~21-30 ohms) and function (should click with 12V applied).
- Verify the part number (8653908) matches.
OEM-only on this vehicle (don't cheap out):
- Engine Control Module (ECM) - requires specific software and programming that makes used units difficult to implement.
Aftermarket brands forum-validated for this vehicle:
- Bosch (often the original OEM supplier)
- Pierburg
Brands owners have reported issues with on this vehicle:
- Unbranded/No-name parts (from sites like AliExpress or eBay) have reports of very short service life, sometimes failing almost immediately or being dead on arrival.
- Dorman has mixed reviews for this type of electronic component; some users report success while others recommend sticking to OEM or Bosch.
Real Owner Stories
Aggregated from forums and TSBs cited above. Mileages and costs reflect what owners reported in those sources.
1999 V70 XC
Symptoms: The Check Engine light came on and the P0443 code would return the second time the car was started after being cleared.
What fixed it: The owner swapped the purge control valve, which was located under the intake horn to the air cleaner housing.
Source hint: volvoXC.com - OBD II Code P0443 - Purge Control Valve Malfunction
2005 V70
Symptoms: The vehicle had a P0443 code, which was determined to be from an internal break in the EVAP purge valve.
What fixed it: Replacing the EVAP purge valve, which on this model year was located on a hose just behind the left headlight.
Source hint: jagrullar.se: 'Felkod P0443'
2004 XC70
Symptoms: Check engine light was on with codes P0496 and P0443. The valve was found to be clogged with dirt.
What fixed it: Replacing the purge valve and securing a separated vent line with clamps resolved the check engine light.
Source hint: FCP Euro Product Reviews: Real-world fix story
P2 Platform Volvo
Symptoms: A persistent P0443 code that would reappear almost immediately after being reset.
What fixed it: The forum consensus pointed directly to replacing the purge control valve as the solution.
Source hint: Volvo Owners Club Forum: 'P0443 Evaporative Emission Control System Purge Control Valv'
Related OBD-II Codes
Frequently Asked Questions
Where is the EVAP purge valve located on my 2000-2007 Volvo V70?
My V70 is hard to start right after I fill up with gas. Is this related to the P0443 code?
How can I test the purge valve on my Volvo myself before buying a new one?
I'm replacing the purge valve for a P0443 code. Is there anything else I should replace at the same time?
What does an out-of-spec resistance reading on the purge valve mean?
Is this P0443 problem common on other Volvos from the same era, like the S60 or XC90?
Helpful Videos

We Have This Part in Stock


The information in this article is provided for general reference and educational purposes only. Vehicle specifications, procedures, and part compatibility can vary by production date, trim level, and region. Always consult your vehicle's factory service manual and verify part numbers before purchasing or performing repairs. Safety-critical components such as airbags, seat belts, and braking systems should be installed by a qualified professional.
- Volvo V70:
- 🧭 Diagnostic Flowchart
- 🎬 Helpful Videos
- 🛍️ Shop This Part
- What's Unique About the 2000-2007 Volvo V70
- Symptoms You May Notice
- Most Likely Causes
- Rare But Worth Checking
- Diagnosis Steps
- Parts You'll Likely Need
- Platform-Specific Known Issues
- Mechanic-Grade Diagnostic Values
- Hidden / Shadow Codes Worth Checking
- Scan Tool Commands That Help
- Wiring & Ground Locations
- Real Owner Repair Stories
- OEM Part Supersession History
- Model Year Variations Within This Range
- Used vs. New Parts: Buying Guide for This Vehicle
- Real Owner Stories
- 1999 V70 XC
- 2005 V70
- 2004 XC70
- P2 Platform Volvo
- Related OBD-II Codes
- Frequently Asked Questions
- 🎟️ Get 5% Off