
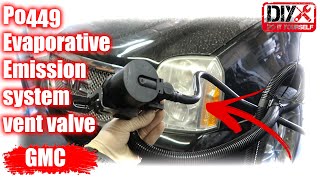
P0449 on 2007-2014 GMC Yukon: EVAP Vent Solenoid Circuit Malfunction Causes and Fixes
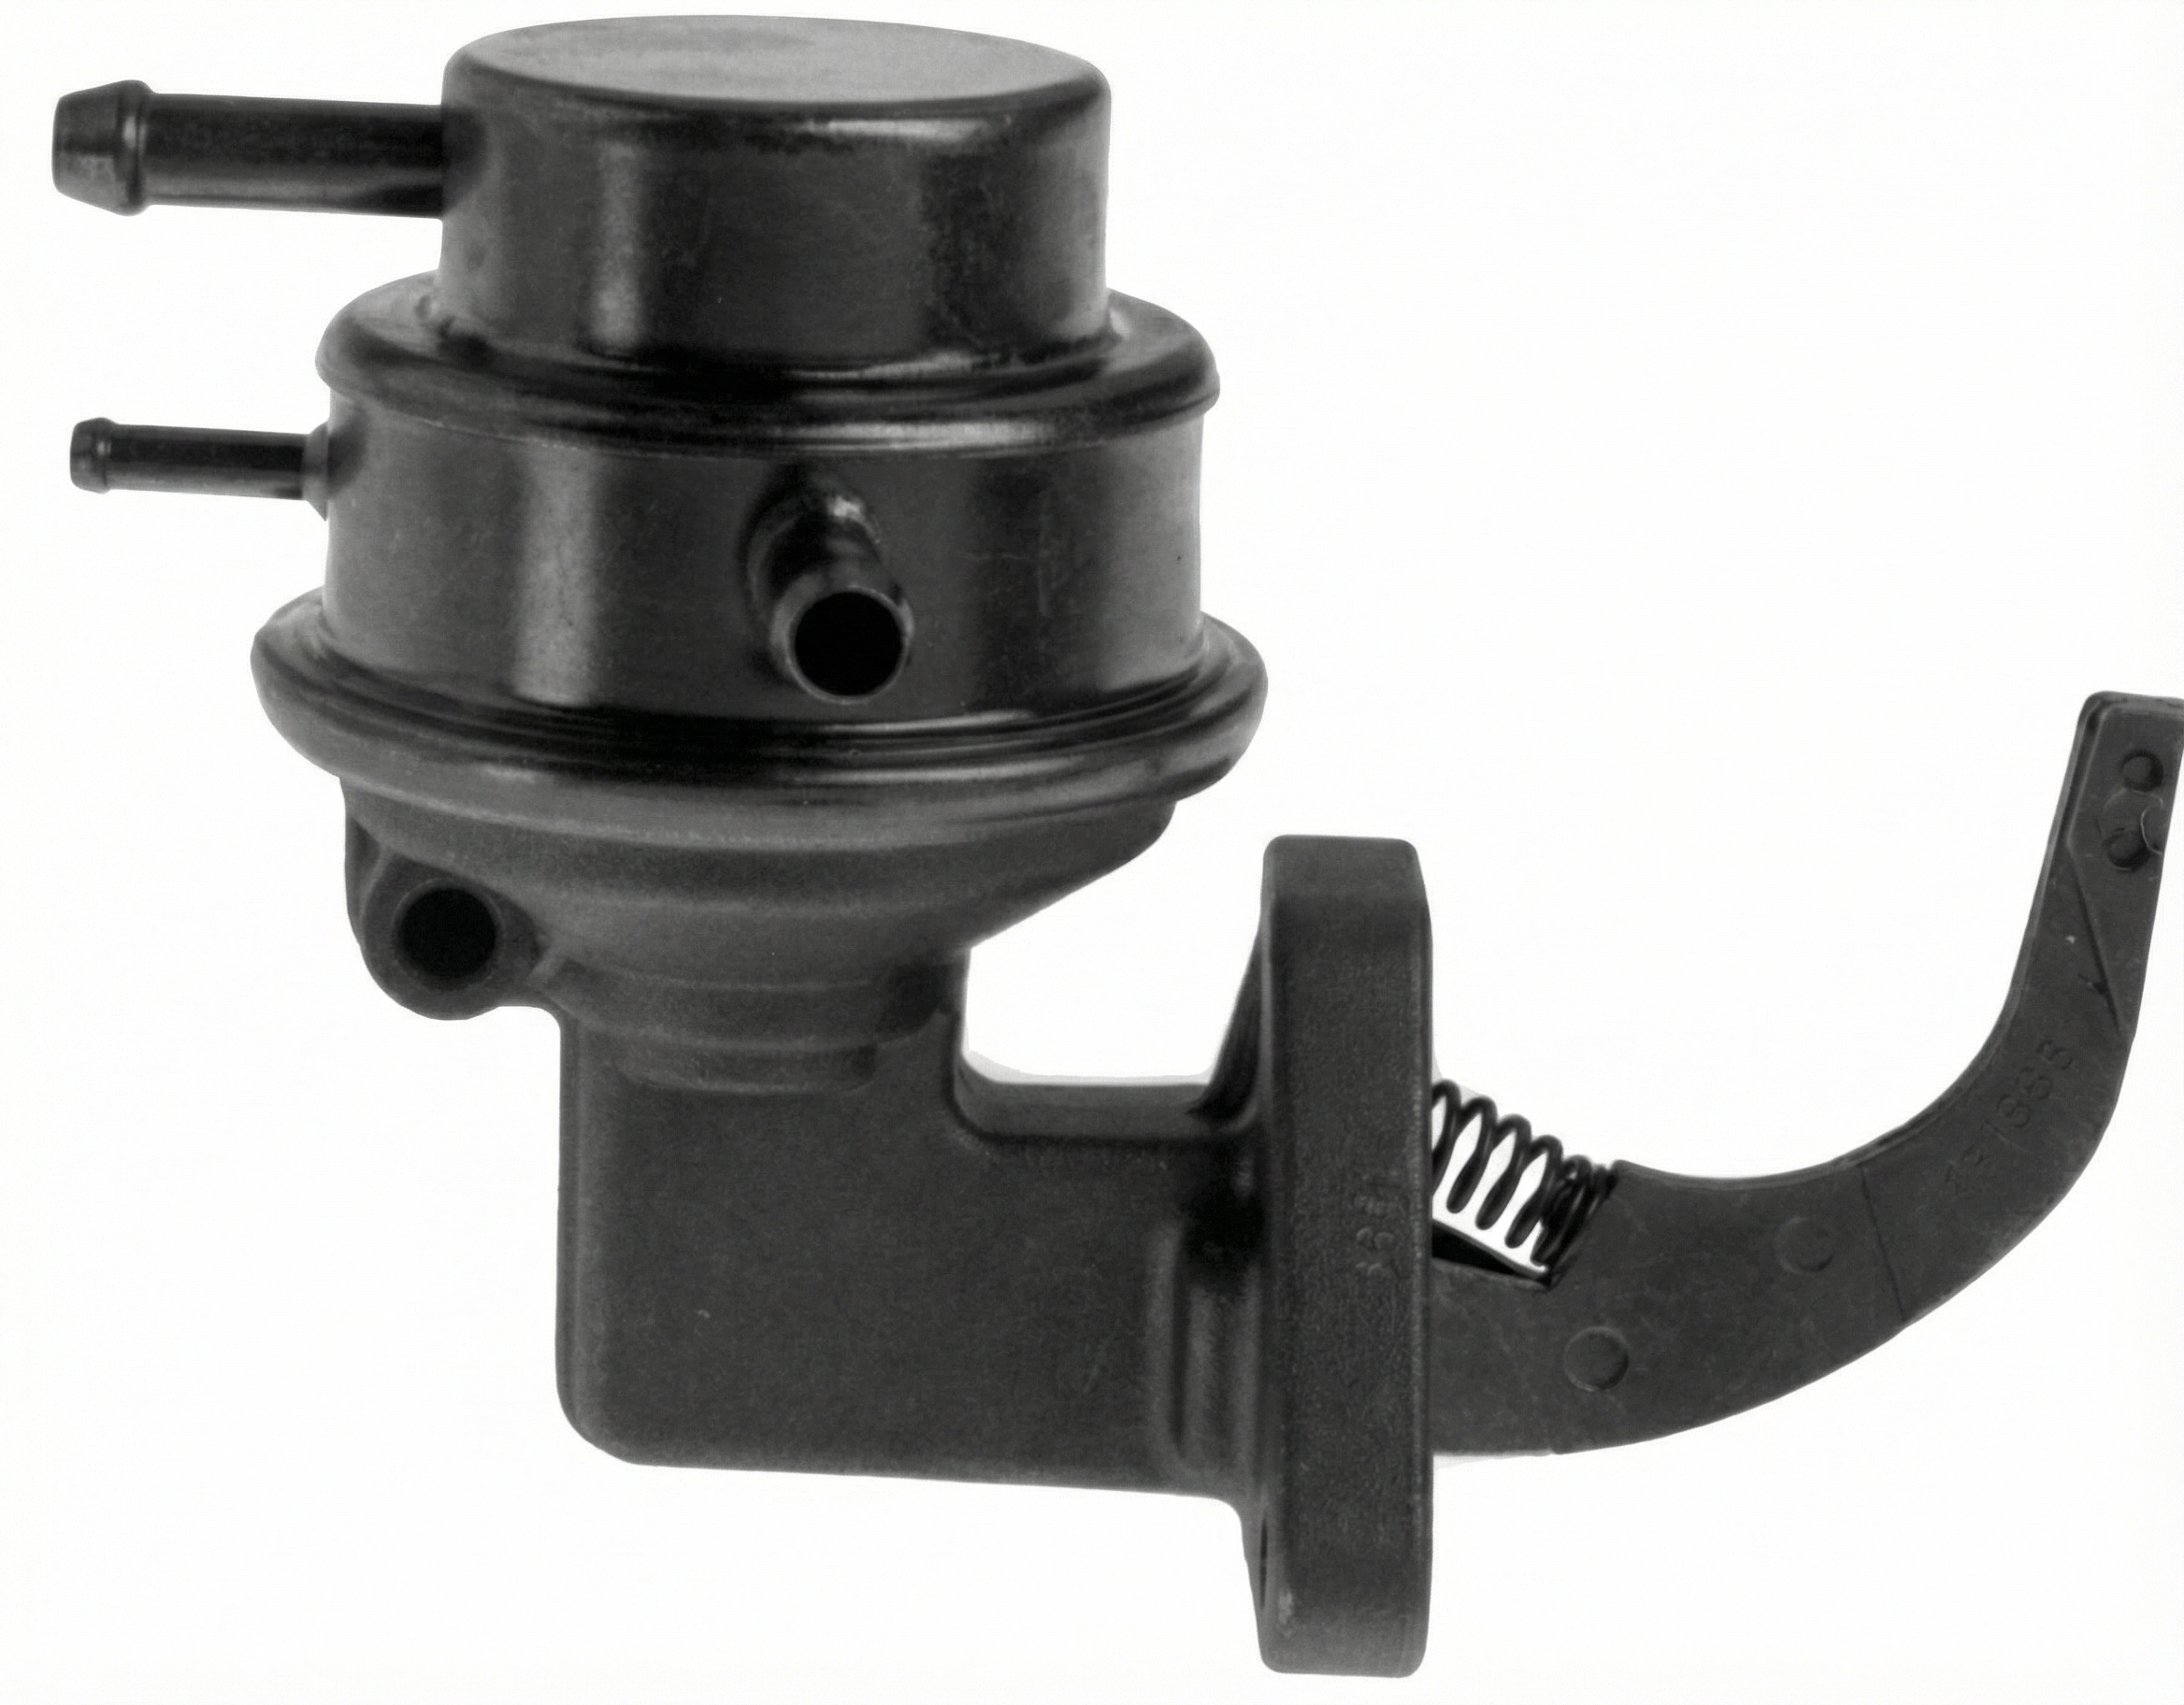
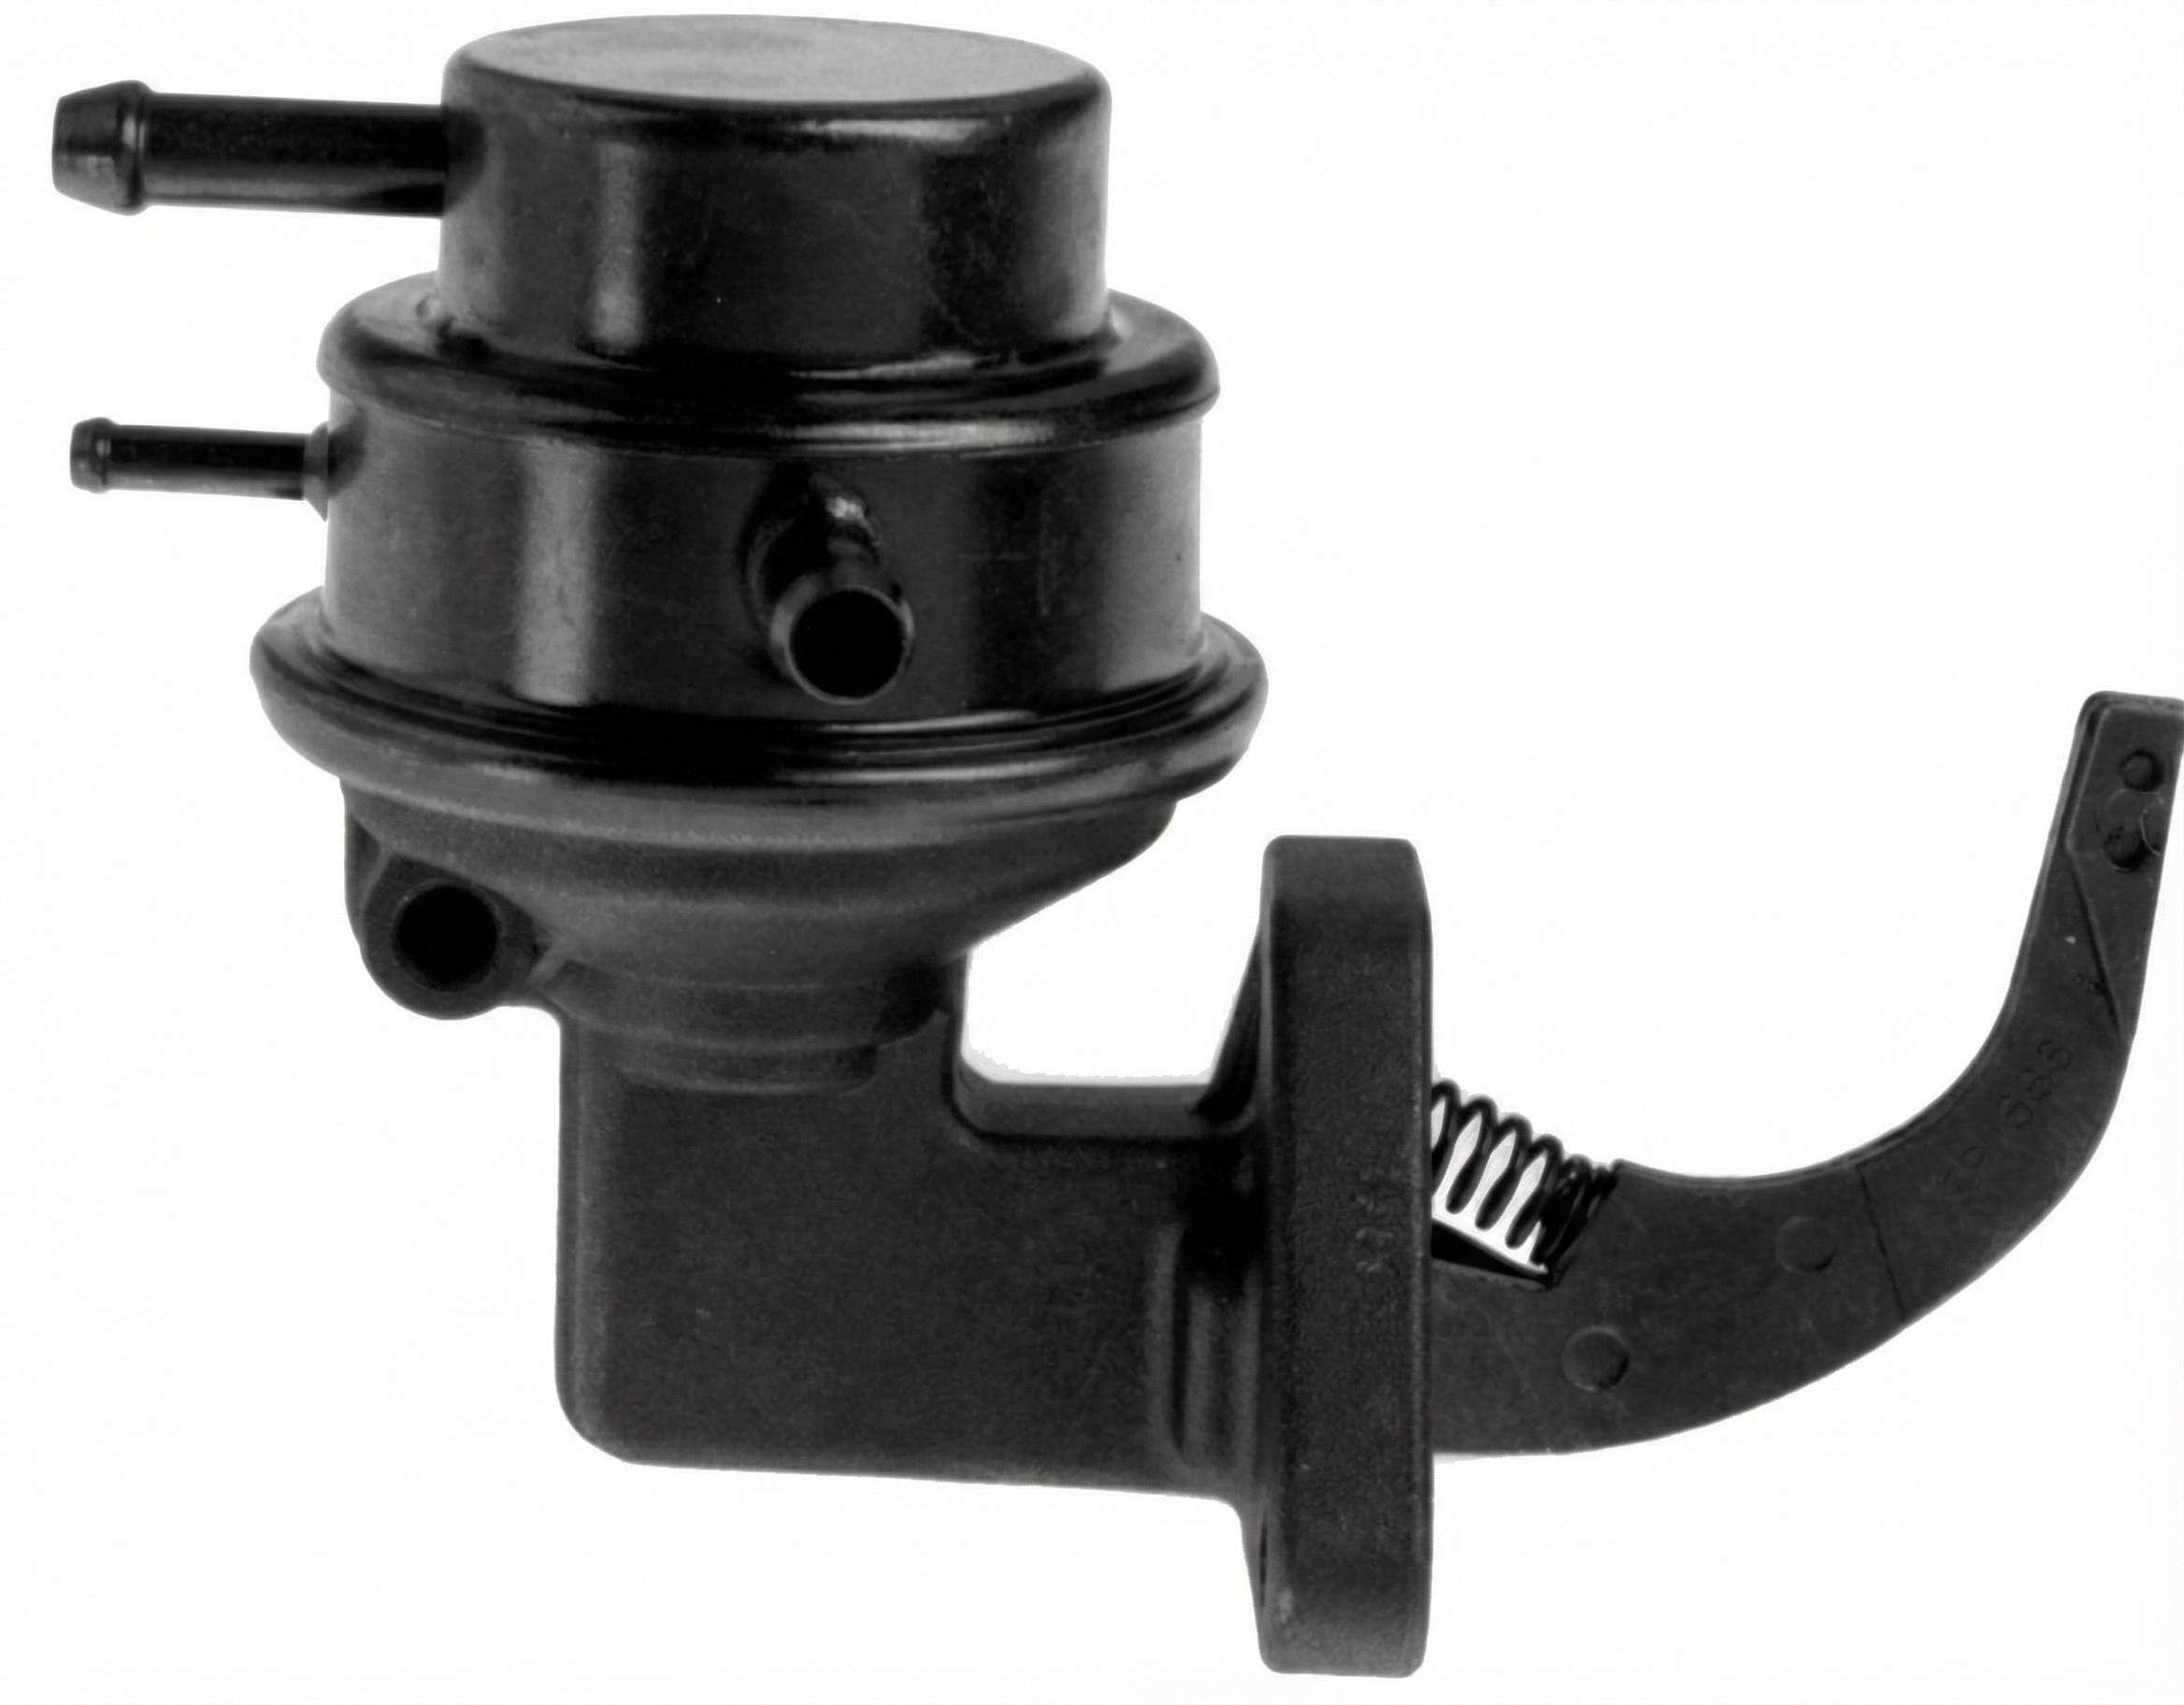
For a 2007-2014 GMC Yukon, the P0449 code almost always means the EVAP vent solenoid has failed. It's located near the fuel tank, is a notoriously common failure on this platform, and is a DIY-friendly repair. An OEM replacement part (ACDelco 214-2149) costs around $50-$90, with aftermarket options available for less.
- P0449 on a 2007-2014 Yukon almost always points to a problem with the EVAP vent solenoid or its wiring, not the gas cap or purge valve.
- The most likely culprit is the vent solenoid itself (ACDelco 214-2149), which fails due to its exposed location under the truck where it is subject to water and debris.
- This is a very DIY-friendly repair that can be done in about an hour with basic tools, typically requiring the spare tire to be lowered for access.
- GM has acknowledged the design flaw with TSB 09-06-04-028D, which recommends a kit to relocate the air filter for the solenoid to a more protected location.
What's Unique About the 2007-2014 GMC Yukon
On the GMT900 platform, which includes the 2007-2014 Yukon, Tahoe, Silverado, and Escalade, the EVAP vent solenoid is a notoriously common failure point. Its location near the fuel tank and spare tire exposes it to road debris, moisture, and corrosion, leading to premature failure of the solenoid itself or its electrical connector. The fix is so common that many owners consider it a regular maintenance item, and GM has issued technical service bulletins (TSBs) related to relocating the filter to a less exposed area.
Symptoms You May Notice
- Check Engine Light is on.
- Difficulty filling the fuel tank (gas pump nozzle clicks off repeatedly).
- Slightly rough idle in some cases.
- A 'whoosh' sound of pressure releasing when opening the gas cap.
- Possible fuel odor.
- Failure to pass an emissions (smog) test.
- Inability to use remote start, as it is often disabled when a Check Engine Light is active.
- Replacing the gas cap. A bad gas cap typically causes a leak code (like P0455 or P0442), not a circuit code like P0449. Many owners replace the cap first to no effect.
- Replacing the EVAP Purge Solenoid. The P0449 code specifically points to the VENT solenoid circuit (by the tank), not the PURGE solenoid, which is located in the engine bay and would set a different code, such as P0443 or P0496.
Most Likely Causes
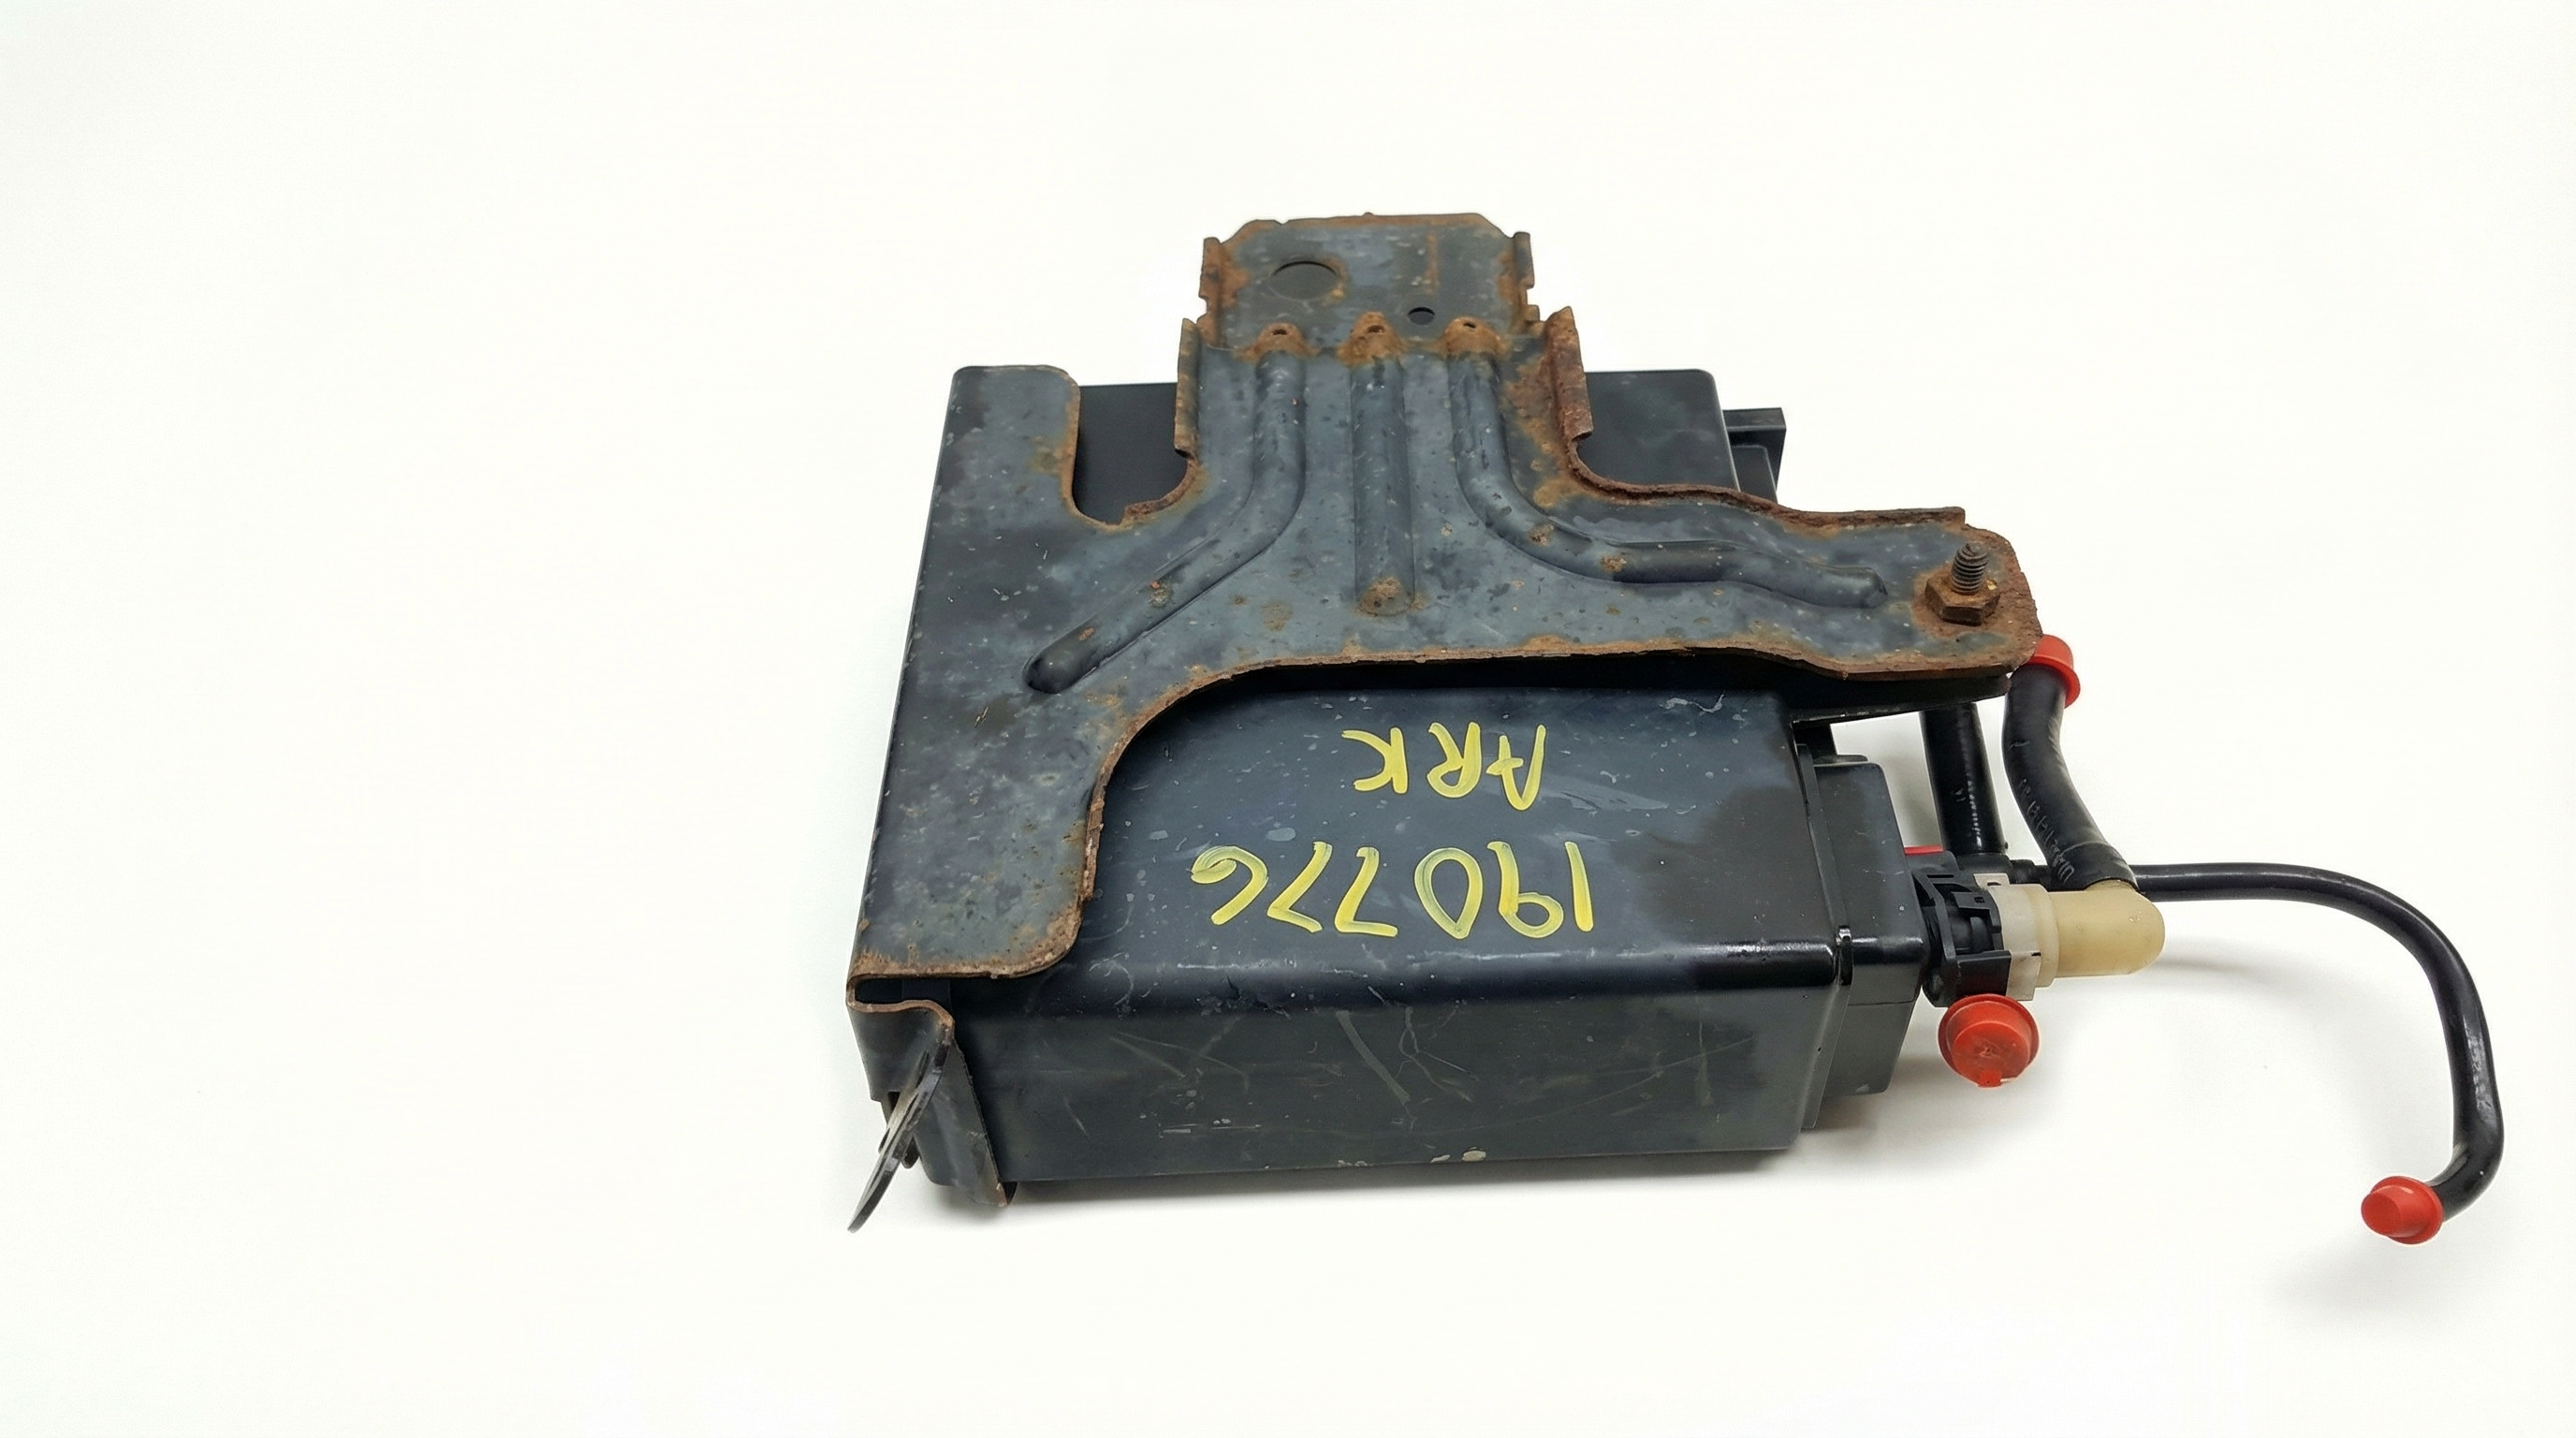
- Faulty EVAP Canister Vent Solenoid 🔴 High Probability → Shop Vapor Canister The solenoid is located under the truck near the spare tire, making it highly susceptible to corrosion and damage from road debris and weather. Water intrusion from wheel spray is a common cause of failure.
How to confirm: Using a scan tool with bidirectional controls, command the vent solenoid to open and close; you should hear a clicking sound. Alternatively, apply 12V power directly to the solenoid's pins and listen for the click. You can also test the solenoid's internal coil with a multimeter; a healthy solenoid should have a resistance between 20-30 ohms. 🎬 See how to properly test the vent valve using a multimeter. An open circuit (infinite resistance) indicates a failed coil.
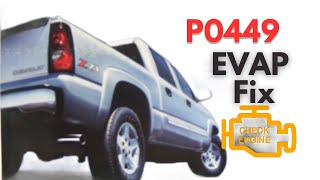
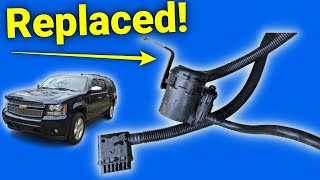
Typical fix: Replace the EVAP vent solenoid assembly. This part is often sold as a kit with a new hose and sometimes a new filter box. The OEM part is ACDelco 214-2149 (which supersedes GM part # 25932571). 🎬 Watch: A complete walkthrough for fixing the P0449 code on GM trucks.
Est. part cost: $40-$120 - Damaged Wiring or Corroded Connector 🟡 Medium Probability The same location that damages the solenoid also affects its wiring harness connector. Wires can become frayed, or the connector pins can corrode, causing an open or shorted circuit.
How to confirm: Visually inspect the wiring harness and connector leading to the vent solenoid for any signs of corrosion, breaks, or damage. Use a multimeter to check for 12V power on the power wire and check the control wire for continuity back to the ECM. With the key on, you should see 12V on both wires at the connector if the circuit is healthy and the solenoid coil is intact. A reading of 12V on the power wire and 0V on the control wire (with the solenoid plugged in) points to an open in the solenoid's coil.
Typical fix: Repair the damaged section of wiring. If the connector is corroded, it may need to be cleaned or replaced. GM often provides an adapter harness with the new solenoid because the connector design was updated. NHTSA ODI #11533936 describes a case where the EVAP vent solenoid valve circuit was open due to a loose pin at terminal 1 in the connector.
Est. part cost: $15-$40 for a pigtail connector - Blown Fuse ⚪ Low Probability While not specific to the vehicle, it's a basic electrical check that should not be overlooked. A short in the solenoid or wiring can cause the fuse to blow. Corrosion in the fuse box itself can also cause a voltage drop, mimicking a circuit fault.
How to confirm: Check the fuse for the EVAP system, often labeled 'EVAP' (Fuse #4, 15A in the under-hood fuse block for some models) or sometimes 'ECM BATT' in the under-hood fuse block. A visual inspection or a multimeter can confirm if the fuse is blown.
Typical fix: Replace the blown fuse. If the fuse blows again immediately, it indicates a short circuit in the system that needs to be traced.
Est. part cost: $1-$5
Rare But Worth Checking
- Faulty Engine Control Module (ECM): → Shop Engine Control Module (ECM) This is extremely rare. The ECM should only be considered after all other possibilities, including the solenoid, wiring, and fuses, have been exhaustively tested and ruled out. A user on the ScannerDanner forum traced their issue to a faulty ECM after confirming the wiring and solenoid were good.
- Clogged or Disintegrated Charcoal Canister: → Shop Vapor Canister While less common for a P0449 circuit code, a physically damaged or internally failed charcoal canister can sometimes contribute to EVAP system issues. If the canister breaks apart internally, charcoal pellets can clog the vent solenoid and lines, causing it to malfunction. This is more often associated with leak codes (P0455) or flow codes (P0446), but it's a possibility if replacing the solenoid doesn't fix the issue. TSB Bulletin #23-NA-073 notes that dust intrusion into the evaporative canister can cause DTCs including P0449.
Diagnosis Steps
- Read the code with an OBD-II scanner to confirm P0449 is present.
- Inspect the gas cap to ensure it is tight and the seal is not cracked, though this is rarely the cause for this specific code.
- Locate the EVAP vent solenoid under the vehicle, near the spare tire and fuel tank. It is often necessary to lower the spare tire for access.
- Visually inspect the solenoid, its connector, and the wiring harness for any obvious signs of damage, corrosion, or breaks.
- Check the relevant fuse in the under-hood fuse block (e.g., 'EVAP' fuse #4).
- If the wiring looks good, test the solenoid. Use a scan tool to command it on/off while listening for a click. If a scan tool is unavailable, apply 12V power and a ground to the solenoid pins and listen for a click.
- If the solenoid does not click, or if a multimeter test across its pins shows an open circuit (infinite resistance), it has failed and needs to be replaced.
- If the solenoid clicks, the problem is likely in the wiring or ECM. With the key on and solenoid connected, check for voltage on both wires at the connector. A healthy circuit will show 12V on both the power and control wires. A reading of 12V on power and 0V on control indicates an open solenoid coil.
- Repair any wiring faults found. If the connector is corroded, replace it. Many replacement solenoids come with an adapter harness for this purpose.
- After the repair, clear the code with the scanner and drive the vehicle to ensure the Check Engine Light does not return.
Parts You'll Likely Need
- EVAP Vapor Canister Vent Valve Solenoid
(OEM #ACDelco 214-2149 (supersedes GM 25932571))— This is the most common failure point for code P0449 on this vehicle due to its exposed location under the truck.
Trusted brands: ACDelco (OEM), Dorman (e.g., 911-064), Standard Motor Products, TRQ
OEM price range: $50-$90
Aftermarket price range: $30-$60 - Vent Solenoid Connector Adapter Harness
(OEM #Included with many replacement kits)— The original connector is prone to corrosion, and the updated replacement solenoid often uses a different connector design. This adapter is frequently included with the new solenoid or sold separately.
Trusted brands: ACDelco, Dorman
OEM price range: $20-$30
Aftermarket price range: $10-$20
Technical Service Bulletins (TSBs) & Recalls
- TSB 09-06-04-028D: Addresses MIL illumination for codes P0449, P0442, P0446, or P0455 due to moisture and corrosion at the EVAP vent solenoid. The procedure involves replacing the valve and relocating the fresh air intake filter to a less exposed area to prevent water intrusion from wheel spray.
- TSB Bulletin #23-NA-073: Provides repair information for evaporative DTCs including P0449, specifically caused by dust intrusion into the evaporative canister.
Platform-Specific Known Issues
- The location of the vent solenoid near the spare tire makes it necessary to lower the spare tire for easy access during replacement. 🎬 Watch this video to see the vent valve replacement process in detail.
- GM issued Technical Service Bulletin 09-06-04-028D, which addresses this code (among others) caused by water intrusion. The fix involves replacing the solenoid and installing a new filter box/hose assembly, relocating the fresh air intake to a more protected location.
Mechanic-Grade Diagnostic Values
- EVAP Vent Solenoid Coil Resistance — expected: 20-30 Ohms. Failure: Infinite resistance (Open Loop) or 0 Ohms (short).
- Voltage at EVAP Vent Solenoid Connector (Key On, Solenoid Plugged In) — expected: Approximately 12V on the power wire AND 12V on the control wire.. Failure: If you have 12V on the power wire but 0V on the control wire, the solenoid coil is open internally. This is because with no current flowing through the open coil, there is no voltage on the other side.
- Voltage at EVAP Vent Solenoid Connector (Key On, Solenoid Unplugged) — expected: Approximately 12V on the power supply pin.. Failure: 0V indicates a problem upstream, such as a blown fuse or broken wire.
Scan Tool Commands That Help
- GM Tech 2 / GDS2 or equivalent bidirectional scanner: EVAP Vent Solenoid On/Off Command (or Close/Open) — This is a primary diagnostic step. Commanding the solenoid 'On' (closed) should cause an audible click. It is also used to test the control circuit; with the solenoid unplugged and a test light connected from battery positive to the control wire pin, commanding the solenoid 'On' should light the test light, confirming the ECM driver and wiring are good.
- Generic OBD-II Scanner: Clearing Diagnostic Trouble Codes (DTCs) — After replacing the solenoid or repairing the wiring, clearing the code and performing a key cycle is necessary. A simple diagnostic trick is to clear the code with a faulty solenoid, cycle the key, and see if the P0449 code returns immediately, which it often does, confirming a circuit fault.
Wiring & Ground Locations
- EVAP Fuse — In the under-hood fuse block, often labeled 'EVAP'. For some GMT900 trucks, this is Fuse #4 (15 Amp).. This fuse provides the 12V power to the vent solenoid circuit. If it's blown, the solenoid will have no power, triggering P0449.
- EVAP Vent Solenoid Connector — Under the vehicle, near the spare tire, plugged into the vent solenoid.. This is the primary test point. The power wire (often Red/White or Pink) should have 12V with the key on. The control wire (often White) is ground-side switched by the ECM. Corrosion here is common.
- G401 — In the chassis harness, on the spare tire hoist assembly cross-member.. This is a major ground point for components at the rear of the vehicle chassis. While the vent solenoid is controlled via a ground-side switch in the ECM, a poor chassis ground in this area can cause a variety of strange electrical issues.
Real Owner Repair Stories
- YouTube channel 'Angry Mechanic' (GM Vehicle (procedure applies to Yukon)) — Check Engine Light with code P0449, sometimes accompanied by P0455.
❌ Tried (didn't work) Clearing the code; it would return immediately after a key cycle.
✅ What actually fixed it The technician diagnosed a bad vent solenoid by substituting a test light for the solenoid. After clearing the code, he plugged the test light into the vehicle's harness connector. He then started the vehicle and re-scanned, and the P0449 code did NOT return. The ECM saw the resistance of the test light bulb and interpreted the circuit as complete. This definitively proved the vehicle's wiring and ECM were good, isolating the fault to the solenoid itself. - YouTube channel 'ScannerDanner' (GM Vehicle with P0449 (procedure applies to Yukon)) — Check Engine Light with code P0449.
✅ What actually fixed it The technician diagnosed an open coil inside the vent solenoid. With the key on and solenoid connected, he measured 12V on the power wire but 0V on the control wire. He explained this indicates an open coil. To prove the rest of the circuit was good, he unplugged the solenoid, connected a test light from battery positive to the control wire terminal, and used a scan tool to command the solenoid on. The test light illuminated, proving the ECM driver and the control wire were capable of providing a ground. This isolated the fault 100% to an open circuit inside the solenoid.
Documented NHTSA Reports
- An owner reported in NHTSA ODI #11696792 that their check engine light illuminated with DTCs P0449 and P0498, and noted the failure was related to a Special Coverage Adjustment.
- In NHTSA ODI #11143587, an owner reported that after a 100-mile trip, the gauges began malfunctioning and code P0449 appeared, which was not present before the trip.
OEM Part Supersession History
GM 25932571→ACDelco 214-2149 / GM 23481275— The original design was prone to failure from water and dust intrusion. The updated parts often come with a kit to relocate the air filter to a more protected location.
Heads up: The electrical connector on the updated solenoid is often different from the original vehicle harness. Because of this, many replacement kits (including the OEM ACDelco kit) include a pigtail adapter harness that must be used.
Diagnostic Flowchart
Other Known Issues on This Vehicle
Issues unrelated to this code that are worth knowing about as an owner of this generation:
- Active Fuel Management (AFM) Lifter Failure 🔴 High — Common, especially on 5.3L V8s. Can occur anywhere from 75,000 to 150,000 miles. Often presents as a misfire (e.g., P0300) and a ticking/chirping noise.
- Cracked Dashboard 🟠 Medium — Extremely common across all GMT900 models and years. Cracks typically form on the driver's side near the instrument cluster and/or around the passenger airbag cover. (Ref: No recall, but subject of class-action lawsuits due to safety concerns about airbag deployment.)
- Excessive Oil Consumption 🟠 Medium — Common issue on the 5.3L V8, often linked to the AFM system and piston ring design, leading to fouled spark plugs and low oil levels between changes. (Ref: Subject of lawsuits, but no general recall was issued.)
- Broken Interior/Exterior Door Handles 🟡 Low — Very common. The plastic mounting points for the exterior handles and the chrome plating on interior handles are known to break or peel.
- Throttle Body Failure 🟠 Medium — A common failure causing reduced engine power mode, erratic idle, and codes like P2135.
Used vs. New Parts: Buying Guide for This Vehicle
When a used part is the smart pick: For this specific part, a used part from a junkyard is NOT recommended. The failure is due to exposure to the elements and wear over time. A used part has the same vulnerabilities and likely has limited remaining life.
What to inspect on the donor part:
- Not applicable as used parts are not advised.
OEM-only on this vehicle (don't cheap out):
- While not strictly 'OEM-only', using the OEM ACDelco part (214-2149) is highly recommended. It is a known high-failure item, and the OEM part has gone through revisions to improve reliability.
Aftermarket brands forum-validated for this vehicle:
- Standard Motor Products (SMP)
- TRQ
Brands owners have reported issues with on this vehicle:
- Dorman: While Dorman offers a replacement (911-064), forum discussions frequently show mixed reviews regarding the long-term reliability of their electronic components and sensors compared to OEM. Some users have success, but others report premature failure. Given the labor of accessing the part, it's often worth spending slightly more for a part with a better reputation.
Real Owner Stories
Aggregated from forums and TSBs cited above. Mileages and costs reflect what owners reported in those sources.
2007 GMC Yukon Denali
Symptoms: Check Engine Light with code P0449. Received a dealer quote of nearly $250 for the repair.
What fixed it: Owner performed a DIY repair in 45 minutes by replacing the EVAP vent solenoid.
Cost: $55-$55
Source hint: TahoeYukonForum.com - 'FIXED my P0449 code on 07 Denali'
2007 GMC Yukon 5.3L Flex Fuel
Symptoms: Persistent P0449 code even after the owner had already replaced the vent solenoid.
What fixed it: After extensive electrical diagnosis, the problem was traced to low voltage at the ECM pin, indicating a rare ECM failure was the root cause.
Source hint: ScannerDanner Forum - 'p0449 on a 2007 GMC YUKON 5.3flex'
2007-2014 GMC Yukon
Symptoms: Check Engine Light on for codes P0449, P0442, P0446, or P0455, caused by moisture and corrosion at the EVAP vent solenoid.
What fixed it: The official GM procedure involves replacing the EVAP vent valve and relocating the fresh air intake filter to an area less exposed to water from wheel spray.
Source hint: TSB 09-06-04-028D
Related OBD-II Codes
Frequently Asked Questions
Where is the EVAP vent solenoid located on my 2007-2014 GMC Yukon?
Is there an official GM TSB for the P0449 code on this Yukon?
What is the correct replacement part number for the EVAP vent solenoid?
Why did my remote start stop working when the P0449 code appeared?
I replaced the vent solenoid but the P0449 code is still on. What should I check next?
How can I test the vent solenoid to confirm it's bad?
Helpful Videos

Used OEM Parts in Stock

New Aftermarket Parts Available


The information in this article is provided for general reference and educational purposes only. Vehicle specifications, procedures, and part compatibility can vary by production date, trim level, and region. Always consult your vehicle's factory service manual and verify part numbers before purchasing or performing repairs. Safety-critical components such as airbags, seat belts, and braking systems should be installed by a qualified professional.
- GMC Yukon:
- 🧭 Diagnostic Flowchart
- 🎬 Helpful Videos
- 🛍️ Shop This Part
- What's Unique About the 2007-2014 GMC Yukon
- Symptoms You May Notice
- Most Likely Causes
- Rare But Worth Checking
- Diagnosis Steps
- Parts You'll Likely Need
- Technical Service Bulletins (TSBs) & Recalls
- Platform-Specific Known Issues
- Mechanic-Grade Diagnostic Values
- Scan Tool Commands That Help
- Wiring & Ground Locations
- Real Owner Repair Stories
- Documented NHTSA Reports
- OEM Part Supersession History
- Other Known Issues on This Vehicle
- Used vs. New Parts: Buying Guide for This Vehicle
- Real Owner Stories
- 2007 GMC Yukon Denali
- 2007 GMC Yukon 5.3L Flex Fuel
- 2007-2014 GMC Yukon
- Related OBD-II Codes
- Frequently Asked Questions
- 🎟️ Get 5% Off