
P0455 on 2011-2018 Cadillac CTS: EVAP Large Leak Causes and Fixes
For a 2011-2018 Cadillac CTS, a P0455 code is most often caused by a loose or faulty gas cap. If tightening or replacing the cap ($20-$40) doesn't fix it, the next most likely causes are a failed EVAP purge valve or vent solenoid. A smoke test is the most definitive way to locate the leak if it's not one of these common parts.
- Always check the gas cap first for a P0455 code. A loose or worn cap is the most frequent and cheapest fix.
- If the gas cap is not the issue, the EVAP purge valve (in the engine bay) and the vent valve (near the gas tank) are the next most likely culprits.
- A symptom of hard starting after getting gas is a strong indicator that the purge valve is stuck open.
- The 2011-2018 CTS spans two generations; always verify part numbers with your car's VIN before ordering.
- If a simple visual inspection and gas cap replacement don't solve the problem, a smoke test is the most effective way to find the exact location of the leak.
What's Unique About the 2011-2018 Cadillac CTS

The 2011-2018 Cadillac CTS spans two generations, the second-gen (2011-2013 sedan, through 2014 for coupe/wagon) and the third-gen (2014-2019 sedan). While the causes for P0455 are similar, the specific part numbers and locations for components like the purge and vent valves can differ between these generations. The 3.6L V6 engine, common in this range, is noted in many GM vehicles for having purge valve failures that can lead to a P0455 code, often accompanied by difficulty starting after fueling.
🎬 Watch: How to fix a CTS that won't start after fueling.Diagnostic Flowchart

Tap your situation to follow the diagnostic path that matches what you're seeing on this vehicle.
Generation note: The 2011-2018 range covers the end of the second generation (Sigma II platform, 2008-2013/14) and the majority of the third generation (Alpha platform, 2014-2019). While the EVAP system functions the same, part numbers for the purge valve and vent solenoid differ. For example, a common purge valve for the 3.6L V6 in the second generation is ACDelco #12610560, while third-gen models may use #12690512 or #12632174. Always verify parts with your vehicle's VIN before purchasing.
Symptoms You May Notice
- Check Engine Light is on
- A noticeable fuel smell, especially around the rear of the car or after filling up.
- Difficulty starting immediately after refueling (this strongly points to a stuck-open purge valve).
- Remote start feature may be disabled due to the active Check Engine Light.
- Replacing the purge valve in the engine bay when the actual failure is the vent valve near the fuel tank. A Reddit user reported this exact scenario, only fixing the code after moving on to the vent valve.
- Replacing other EVAP components before checking for a loose or worn-out gas cap, which is the most common and cheapest fix.
Most Likely Causes


- Loose, Damaged, or Incorrect Gas Cap 🔴 High Probability → Shop Fuel Tank Cap This is the most common cause for P0455 on any vehicle due to frequent use and seal degradation over time.
How to confirm: Check if the cap is loose. Inspect the rubber seal on the cap for cracks, stiffness, or damage. Ensure you hear it click multiple times when tightening. If in doubt, it's an inexpensive part to replace as a first step.
Typical fix: Tighten or replace the fuel filler cap.
Est. part cost: $20-$40 - Faulty EVAP Purge Valve/Solenoid 🟡 Medium Probability → Shop Vapor Canister The purge valve on GM's 3.6L V6 is a well-documented failure point that can get stuck open, causing various EVAP codes and often a hard-start condition after refueling.
How to confirm: The purge valve is normally closed. It is located in the engine bay on the passenger side of the 3.6L engine. With the engine off, remove the valve and try to blow through it. If air passes, it is stuck open and must be replaced. A stuck-open valve allows un-metered fuel vapors into the intake, causing the rough start after filling the tank.
Typical fix: Replace the purge valve solenoid. This is typically held by one 10mm bolt and has two hose connections and an electrical connector.
Est. part cost: $30-$90 - Faulty EVAP Vent Valve/Solenoid 🟡 Medium Probability → Shop Vapor Canister Located near the fuel tank and charcoal canister, this valve is exposed to road debris, moisture, and dust, which can cause it to fail and get stuck open. GM has issued TSBs for dust intrusion causing this failure in certain environments.
How to confirm: This valve is normally open and closes when the ECM tests the system. A scan tool that can command the valve closed is the best way to test it. If it fails to close or seal, it will cause a large leak. A smoke test is often used to confirm a leak at the vent valve, as smoke will be seen exiting the valve when it is commanded shut.
Typical fix: Replace the vent valve solenoid. This often requires safely lifting the vehicle for access, as it's located near the fuel tank.
Est. part cost: $30-$50 - Cracked or Disconnected EVAP Hose ⚪ Low Probability Over time, the plastic and rubber hoses in the EVAP system can become brittle and crack, especially at connection points or areas of high heat in the engine bay.
How to confirm: A visual inspection may reveal obvious cracks or disconnected lines. The most effective method is to use an automotive smoke machine to fill the EVAP system with smoke and look for where it escapes. Pay close attention to the lines connecting the purge valve, canister, and fuel tank.
Typical fix: Replace the cracked section of hose or reconnect it securely with a new clamp if needed.
Est. part cost: $10-$50
Rare But Worth Checking
- Cracked EVAP Charcoal Canister: → Shop Vapor Canister The plastic housing of the canister can crack from age or impact from road debris, creating a large leak. This is usually found during a smoke test. For the CTS, the canister is located above the rear subframe, making it difficult to access or remove without lowering the subframe.
- Damaged Fuel Filler Neck: → Shop Fuel Filler Neck Rust or damage to the metal filler neck where the gas cap seals can prevent a proper seal, even with a new cap. A smoke test will quickly reveal a leak in this area.
- Leaking Fuel Tank Gasket/Seal: → Shop Fuel Tank The seal for the fuel pump module on top of the gas tank can fail, creating a large EVAP leak and a strong fuel smell. This was the ultimate culprit in one heavily documented case after multiple other parts were replaced.
- Faulty Fuel Tank Pressure (FTP) Sensor: → Shop Fuel Tank A faulty FTP sensor can provide incorrect readings to the ECM, causing it to believe there is a large leak when there isn't one. This can happen even if the sensor doesn't set its own specific trouble code.
Diagnosis Steps
- Check the Gas Cap: Ensure it is tight and clicks at least once. Remove it and inspect the seal for cracks or damage. If it looks worn, replace it, clear the code, and drive for a few days to see if the light returns. This is the cheapest and most common fix.
- Visual Inspection: Look over the EVAP hoses in the engine bay and as much as you can see under the car for any obvious cracks, breaks, or disconnections. Pay special attention to the lines connected to the purge valve.
- Check the Purge Valve: Locate the purge valve on the passenger side of the engine. With the engine off, disconnect it and try to blow through it. If air passes through, the valve is bad and needs to be replaced. If the car is hard to start after refueling, this part is highly suspect.
- Check the Vent Valve: If the above steps don't find the issue, the vent valve near the tank is the next suspect. It is harder to access and test without a scan tool to command it closed. It is a normally open valve, so it must be commanded shut to test for leaks.
- Perform a Smoke Test: If the leak source is still not found, the most reliable method is to have a smoke test performed. A mechanic will inject low-pressure smoke into the EVAP system's service port, and the leak will be revealed by the escaping smoke. Diagnostic costs for this typically range from $60 to $150.
Parts You'll Likely Need
- Fuel Tank Cap
(OEM #23368720)— This is the most common failure point. The seal wears out, causing a large leak. Always try this first.
Trusted brands: ACDelco, Gates
OEM price range: $20-$40
Aftermarket price range: $15-$25 - Vapor Canister Purge Valve
(OEM #12610560 (Gen 2) / 12690512 (Gen 3))— A very common failure on GM vehicles. It gets stuck open, causing a constant leak and sometimes hard starting after refueling.
Trusted brands: ACDelco, Dorman, SKP
OEM price range: $50-$90
Aftermarket price range: $25-$60 - Vapor Canister Vent Solenoid
(OEM #22865590)— This valve gets stuck open due to its location under the car, exposed to dirt and moisture.
Trusted brands: ACDelco, Dorman, URO Parts
OEM price range: $40-$60
Aftermarket price range: $25-$45
Related Codes That Often Appear With This One
- P0442 — P0442 is for a small EVAP leak. Sometimes a component is beginning to fail and may initially set a P0442 before the leak worsens and triggers a P0455. The same faulty parts can cause either code.
- P0496 — This code indicates 'EVAP Flow During a Non-Purge Condition,' which almost always points directly to a faulty purge valve that is stuck open. If you see P0496 with P0455, the purge valve is the primary suspect.
- P0449 — This code specifically indicates a fault in the EVAP vent valve solenoid circuit. If seen with P0455, it strongly suggests the problem is with the vent valve or its wiring, not the purge valve or gas cap.
Technical Service Bulletins (TSBs) & Recalls
- Bulletin #21-NA-124: Provides diagnostic tips for testing EVAP leaks related to DTCs P0442 and P0455, advising a specific order of operations for diagnosis.
- Bulletin #09-06-04-028D: Addresses EVAP DTCs caused by dust intrusion into the canister and vent solenoid for vehicles in dusty environments.
Platform-Specific Known Issues
- GM Technical Service Bulletin #21-NA-124 provides diagnostic advice for technicians dealing with EVAP codes P0442 and P0455, indicating this is a recognized issue by the manufacturer. The recommended diagnostic order is to first check all EVAP lines and connections, then investigate the vent valve, and finally, the purge valve.
- Another TSB, #09-06-04-028D, notes that vehicles operated in extremely dusty environments can experience dust intrusion into the EVAP canister and vent solenoid, leading to codes like P0455.
Mechanic-Grade Diagnostic Values
- Fuel Tank Pressure (FTP) Sensor Voltage (Key On, Engine Off) — expected: ~1.3V to 1.7V (at atmospheric pressure, e.g., gas cap removed). Failure: A voltage that is stuck high (e.g., near 5V) or low (e.g., near 0.2V) and does not change with pressure indicates a faulty sensor or wiring issue.
- EVAP Purge Valve Solenoid Coil Resistance — expected: 20 - 30 Ohms. Failure: A reading that is significantly higher, lower, or infinite (open circuit) indicates a faulty solenoid coil.
- FTP Sensor 5V Reference Circuit — expected: 5 Volts. Failure: If the 5V reference wire at the FTP sensor connector does not show 5V, there is an open in the wiring from the ECM.
Scan Tool Commands That Help
- GDS2/Tech2: EVAP System Test — This function automatically commands the vent and purge solenoids to seal the system and monitors the FTP sensor to verify if a leak is present. It's the primary diagnostic step after a visual inspection.
- GDS2/Tech2: EVAP Purge/Seal — Allows the technician to manually command the EVAP Vent Solenoid ON (closed) and the EVAP Purge Solenoid ON (open) to check the function of individual components and monitor the FTP sensor's response.
Wiring & Ground Locations
- EVAP Canister Purge Solenoid — In the engine bay, on the passenger side of the 3.6L engine.. This is a primary component for controlling vapor flow. A faulty valve or bad connection at its 2-pin connector is a common cause of P0455 and P0496.
- EVAP Canister Vent Solenoid — On or near the EVAP charcoal canister, which is located above the rear subframe, near the fuel tank.. This valve must close and seal properly for the system to build vacuum during its self-test. A broken wire or failed solenoid will cause a large leak code. Wires can break inside the insulation near the connector due to exposure under the vehicle.
- Fuel Tank Pressure (FTP) Sensor — On top of the fuel tank or fuel pump module. Access typically requires lowering the fuel tank.. This sensor reports the system's vacuum/pressure to the ECM. A faulty sensor can give false readings, leading to a P0455 code even if no leak exists. Its 3-wire connector provides a 5V reference, ground, and signal.
Real Owner Repair Stories
- YouTube channel 'Fixin It' (2009 Cadillac CTS 3.6L V6) — Car cranks but won't start immediately after filling up with gas.
❌ Tried (didn't work) Not specified, but the symptom strongly pointed to a specific component.
✅ What actually fixed it Replacing the EVAP purge valve solenoid located on the passenger side of the engine bay resolved the hard-starting issue after refueling.
"I Checked Everything" — The Actual Cause
- In some cases, a P0455 can be triggered not by a physical leak, but by a faulty Fuel Tank Pressure (FTP) sensor. The sensor may incorrectly report a pressure drop to the computer, causing it to fail the EVAP test, even though the system is perfectly sealed and would pass a smoke test.
OEM Part Supersession History
12610560→12690512, 12737252— Standard part evolution and updates by the manufacturer.
Heads up: Part 12610560 is commonly associated with the Gen 2 CTS (up to 2013/2014), while 12690512 is more common on Gen 3. Always verify with VIN.25932573→22865590— Standard part evolution for the EVAP Vent Solenoid.
Model Year Variations Within This Range
- 2011-2014 (Gen 2): The purge valve is commonly part number 12610560. The charcoal canister and vent valve are located above the rear subframe.
- 2014-2018 (Gen 3): The purge valve is more commonly part number 12690512. While the EVAP system function is identical, component locations and harness routing may differ slightly due to the change to the Alpha platform.
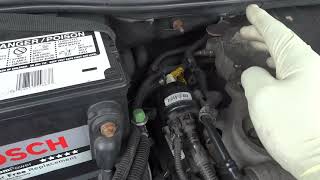
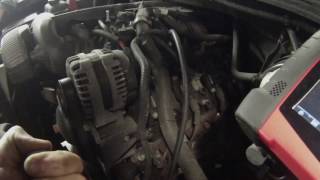
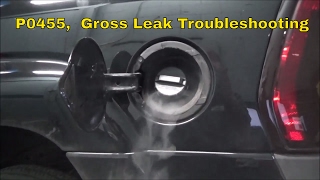
Helpful Videos


Used OEM Parts in Stock
New Aftermarket Parts Available


The information in this article is provided for general reference and educational purposes only. Vehicle specifications, procedures, and part compatibility can vary by production date, trim level, and region. Always consult your vehicle's factory service manual and verify part numbers before purchasing or performing repairs. Safety-critical components such as airbags, seat belts, and braking systems should be installed by a qualified professional.
- Cadillac CTS:
- 🧭 Diagnostic Flowchart
- 🎬 Helpful Videos
- 🛍️ Shop This Part
- What's Unique About the 2011-2018 Cadillac CTS
- Symptoms You May Notice
- Most Likely Causes
- Rare But Worth Checking
- Diagnosis Steps
- Parts You'll Likely Need
- Related Codes That Often Appear With This One
- Technical Service Bulletins (TSBs) & Recalls
- Platform-Specific Known Issues
- Mechanic-Grade Diagnostic Values
- Scan Tool Commands That Help
- Wiring & Ground Locations
- Real Owner Repair Stories
- "I Checked Everything" — The Actual Cause
- OEM Part Supersession History
- Model Year Variations Within This Range
- 🎟️ Get 5% Off