
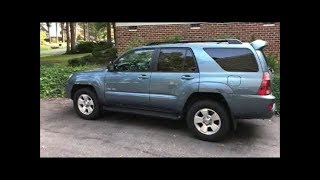
P0462 on 2003-2009 Toyota 4Runner: Fuel Level Sensor Causes and Fixes
On a 2003-2009 4Runner, P0462 almost always means the fuel level sending unit inside the gas tank has failed. This will cause an incorrect or empty fuel gauge reading. Replacing the sender itself is the common fix, with the part costing around $120-$180 for an OEM unit.
- P0462 on a 4th Gen 4Runner means your fuel gauge is unreliable because the fuel level sensor has almost certainly failed.
- The vehicle remains safe to drive, but you must manually track your fuel consumption to avoid running out.
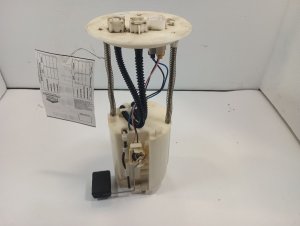
- The most common fix is to replace the 'Gauge Assembly, Fuel Sender' (Part No. 83320-60440), which is located inside the fuel tank.
- This repair requires dropping the fuel tank, as the under-seat access panel is too small for removing the pump assembly.
- It is highly recommended to use a Genuine Toyota or Denso brand replacement part to avoid premature failure.
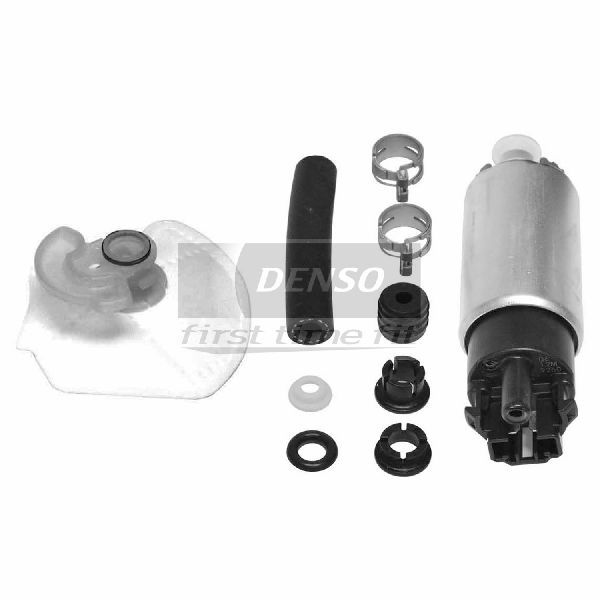
- Always replace the fuel pump gasket (Part No. 77169-60010) when performing this repair to prevent leaks.
What's Unique About the 2003-2009 Toyota 4Runner
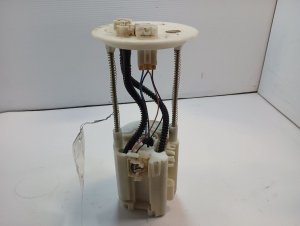
For the 4th generation Toyota 4Runner (2003-2009), this code is straightforward and very commonly points to a single part. Unlike some vehicles where the entire fuel pump assembly must be replaced, Toyota offers the fuel level sending unit as a separate, serviceable part. This makes the repair less expensive, as you don't need to replace a perfectly good fuel pump to fix the faulty gauge sensor. However, a key vehicle-specific point is that while there is an access panel under the rear passenger-side seat, it is too small to remove the fuel pump assembly. It only allows for disconnecting the electrical harness and fuel lines. To replace the sender, the fuel tank must be dropped, a significant labor step. Some DIY owners cut a larger access panel in the floor to avoid this in the future.
Symptoms You May Notice
- Check Engine Light is on
- Fuel gauge reads empty or is stuck in one position (most common symptom)
- Fuel gauge fluctuates erratically
- Low fuel warning light stays on despite having fuel in the tank
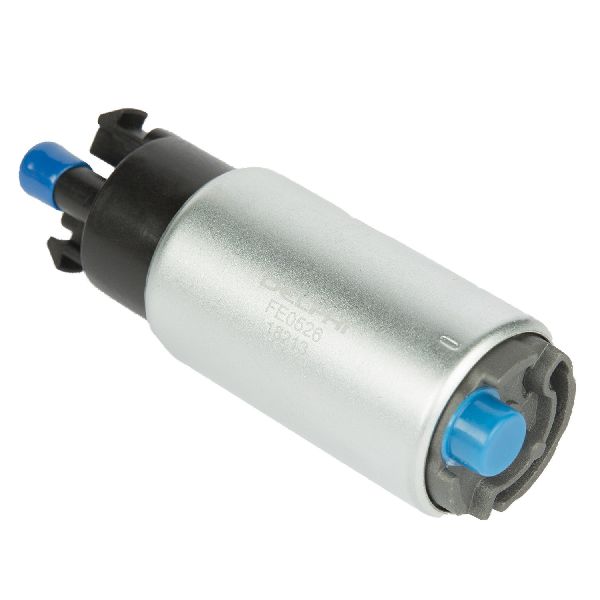
- Replacing the entire fuel pump assembly when only the sending unit has failed. On this 4Runner, the sender is a separate part.
- Replacing the instrument cluster without first testing the sending unit and its wiring circuit.
- Assuming the repair can be done through the under-seat access panel. This panel is too small; the tank must be dropped.
Most Likely Causes
- Failed Fuel Level Sending Unit 🔴 High Probability → Shop Fuel Tank Sending Unit The sending unit is a mechanical component with a resistor strip that can wear out over time from the float arm's constant movement. This wear creates an open or short in the circuit, leading to the 'low' voltage reading. This is the most common failure point by a wide margin for P0462 on this vehicle.
How to confirm: Access the top of the fuel pump assembly and use a multimeter to test the resistance of the sending unit's terminals. As you manually move the float arm, the resistance should change smoothly. A reading of near-zero ohms or an open circuit (infinite resistance) confirms failure. This test requires removing the unit from the tank.
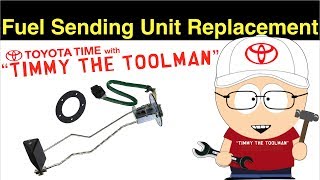
Typical fix: Replace the fuel level sending unit (also called the fuel sender gauge assembly). 🎬 See how to replace the fuel sending unit. This requires dropping the fuel tank to access the fuel pump module.
Est. part cost: $120-$180 - Wiring or Connector Issue 🟡 Medium Probability The wiring and connector are located on top of the fuel tank, exposing them to potential moisture and corrosion, which can cause a short to ground. While less common than sender failure, it's a critical check before dropping the tank.
How to confirm: Visually inspect the wiring harness and connector leading to the fuel pump assembly for any signs of corrosion, damage, or loose pins. The connector is accessible via the small service panel under the rear seat. Perform a continuity test on the signal wire between the PCM and the fuel pump connector.
Typical fix: Repair the damaged section of wiring or clean/replace the corroded connector.
Est. part cost: $5-$50
Rare But Worth Checking
- Stuck Fuel Float Arm: The float arm itself can become mechanically stuck in the lowest position due to debris in the tank or a bent arm. This would cause the sensor to continuously report an 'empty' reading, triggering the P0462 code. This is rare but possible, especially if the vehicle has been sitting for a long time.
- Instrument Cluster Failure: → Shop Instrument Cluster This is very rare. Before suspecting the cluster, all other possibilities (sender, wiring) must be definitively ruled out. A faulty cluster might also present other gauge-related symptoms. Forum discussions rarely point to this as the solution for an isolated P0462 code.
- Powertrain Control Module (PCM) Fault: This is extremely unlikely and should only be considered after every other diagnostic step has been completed and all other components are confirmed to be working correctly.
Diagnosis Steps
- Scan the vehicle with an OBD-II scanner to confirm P0462 is the only code present. Note any other codes.
- Check for any Technical Service Bulletins (TSBs). No specific TSBs for P0462 are widely reported for this model.
- Access the fuel pump connector under the passenger-side rear seat by removing the small metal service cover.
- Inspect the connector for corrosion, moisture, or damage. Ensure it is seated securely.
- Using a multimeter and a wiring diagram, check for the correct reference voltage and a good ground at the connector. A short to ground on the signal wire is a common cause.
- If wiring appears okay from the access panel, the next step is to test the sender itself. This requires dropping the fuel tank.
- After dropping the tank and removing the fuel pump assembly, disconnect the sender and test its resistance with a multimeter. Move the float arm through its range of motion. The resistance should sweep smoothly without dropouts or open/short readings. A failure here confirms a bad sender.
- If the sender and local wiring test good, a more thorough inspection of the harness between the tank and the PCM is needed for a short to ground, though this is less common.
Parts You'll Likely Need
- Gauge Assembly, Fuel Sender
(OEM #83320-60440)— This is the component that fails most frequently, causing the P0462 code by sending a low voltage signal. It fits all 2003-2009 4Runners (V6 & V8).
Trusted brands: Toyota Genuine, Denso
OEM price range: $120-$180
Aftermarket price range: $70-$120 - Fuel Pump Gasket / O-Ring
(OEM #77169-60010)— This seal should always be replaced when the fuel pump module is removed from the tank to ensure a proper seal and prevent fuel vapor leaks.
Trusted brands: Toyota Genuine
OEM price range: $10-$20
Aftermarket price range: $5-$15
Platform-Specific Known Issues
- Real-world experience from owner forums strongly suggests that while cheaper aftermarket sending units are available, they have a much higher premature failure rate than the OEM Toyota or Denso parts. Many owners report having to do the job twice after trying to save money with a low-cost aftermarket part.
- The job requires dropping the fuel tank. 🎬 Watch a walkthrough on dropping the fuel tank. There is no factory access panel large enough to remove the fuel pump assembly from inside the vehicle.
Mechanic-Grade Diagnostic Values
- Fuel Level Sender Resistance — expected: Approximately 4-5 Ohms at FULL, and ~110 Ohms at EMPTY. The resistance should sweep smoothly as the float arm is moved.. Failure: A reading of infinite resistance (Open Loop), near-zero resistance (short), or erratic jumps in the reading as the float is moved indicates a failed sender.
- Fuel Level Sensor Signal Voltage at PCM — expected: On a 5V reference system, voltage should be between ~0.5V (empty) and ~4.5V (full).. Failure: A reading consistently below 0.2V confirms a low circuit condition, triggering P0462.
Wiring & Ground Locations
- Fuel Pump Assembly Connector — On top of the fuel tank, accessible through a small service panel under the rear passenger-side seat.. This is the primary connection point for the fuel level sender. The three wires for the sender are Brown/Black, Yellow/Red, and Orange with silver bands. Inspecting this connector for corrosion or damage is a key first step.
- Fuel Pump Circuit Ground — The ground for the fuel pump and sender assembly is located at a body ground splice pack. On a Gen 2 Sequoia (similar architecture), this is under the rear seat area, bolted to the body with a 10mm bolt. On the 4Runner, a key ground point is 'BN' located on the left rear of the frame.. A corroded or loose ground connection can cause high resistance or an open circuit, leading to incorrect voltage readings from the sender and potentially triggering a P0462 code.
Real Owner Repair Stories
- YouTube user 'Rick's Tid-Bits' (2005 Toyota 4Runner) — Gas gauge was erratic and reading empty prematurely. At 280 miles on a tank, the gauge would read empty.
❌ Tried (didn't work) The owner lived with the issue, tracking mileage. The core of the diagnosis was confirming the failure before performing the repair.
✅ What actually fixed it The owner dropped the fuel tank and replaced the fuel level sending unit (Part No. 83320-60440). Testing the old unit out of the tank showed its resistance was erratic and pitted, while the new one swept smoothly from 4.2 to 110 ohms. After replacement, the gauge read correctly and the owner was able to get a full 400 miles of range per tank again.
OEM Part Supersession History
83320-60440→83320-60620— Standard part number update/revision by the manufacturer.
Heads up: The new part number (83320-60620) is a direct replacement for the original and is fully compatible with all 2003-2009 4Runners.
Diagnostic Flowchart
Other Known Issues on This Vehicle
Issues unrelated to this code that are worth knowing about as an owner of this generation:
- Cracked Dashboard 🟡 Low — Extremely common, especially in sun-exposed vehicles. Cracks often start near vents or the passenger airbag area. (Ref: Toyota issued a Warranty Enhancement Program (ZE6) for 2003-2005 models, but the issue affects the entire generation.)
- Seized/Frozen Brake Calipers 🟠 Medium — Very common, particularly the front calipers. Pistons can seize, causing brake drag, uneven pad wear, and pulling to one side. Often requires caliper replacement.
- Cracked Exhaust Manifolds (V8 Models) 🟠 Medium — A well-known issue on the 4.7L 2UZ-FE V8. Causes an audible 'ticking' sound, especially when the engine is cold, that may disappear as the metal expands.
- Head Gasket Failure (V6 Models) 🔴 High — Affects a percentage of early 1GR-FE V6 engines (primarily 2003-2006 models). Often presents as a slow coolant loss or misfire in cylinder #6. (Ref: Toyota updated the head gasket design in later years, but no formal recall was issued.)
- Frame Rust 🔴 High — Significant issue, especially for vehicles operated in the 'salt belt'. Can lead to structural integrity problems. A class-action lawsuit was filed. (Ref: Toyota initiated a Limited Service Campaign (LSC) for certain vehicles, but not all were covered.)
Used vs. New Parts: Buying Guide for This Vehicle
When a used part is the smart pick: For this repair, a used part from a junkyard is NOT recommended. The failure is due to wear and age on the resistor strip, so a used part has a high likelihood of failing soon after installation, forcing you to drop the fuel tank again.
Donor-vehicle mileage cap: roughly under 50000 miles for the part to have meaningful remaining life.
What to inspect on the donor part:
- If forced to buy used, source from the lowest-mileage donor vehicle possible.
- Visually inspect the resistor strip for pitting, corrosion, or dark burn-like marks.
- Test the resistance with a multimeter before purchase; it must sweep smoothly without any dropouts.
OEM-only on this vehicle (don't cheap out):
- Gauge Assembly, Fuel Sender
Aftermarket brands forum-validated for this vehicle:
- Denso (DENSO is the original equipment manufacturer for Toyota, so a Denso-branded part is equivalent to Toyota Genuine).
Brands owners have reported issues with on this vehicle:
- Multiple forum and Reddit threads mention that unbranded or low-cost aftermarket sending units (e.g., from eBay or Amazon) have a very high rate of premature failure, often within months. Owners strongly advise against them due to the high labor cost of doing the job twice.
Real Owner Stories
Aggregated from forums and TSBs cited above. Mileages and costs reflect what owners reported in those sources.
2003-2009 Toyota 4Runner
Symptoms: The fuel gauge was acting problematic and the P0462 code was triggered.
What fixed it: Replacement of the fuel sending unit with an OEM part.
Source hint: T4R.org thread titled 'Fuel gauge problem - P0462 code'
2003-2009 Toyota 4Runner
Symptoms: The owner described the repair process as a 'PITA' (pain in the tail) because it required dropping the fuel tank.
What fixed it: Replacing the fuel level sensor. The owner reinforced the recommendation to use an OEM/Denso sender after an aftermarket part failed.
Source hint: T4R.org thread titled 'P0462 Fuel Level Sensor - What a PITA'
2003-2009 Toyota 4Runner
Symptoms: Attempted to access the fuel pump through the rear seat panel to avoid dropping the tank.
What fixed it: The owner learned the under-seat panel is for connections only; some owners resort to cutting a larger access hole in the floor pan, though the standard fix is dropping the tank.
Source hint: 4Runners.com thread titled 'How to remove the rear seat to get to the fuel pump'
Related OBD-II Codes
Frequently Asked Questions
Is there a Technical Service Bulletin (TSB) for the P0462 code on my 2003-2009 Toyota 4Runner?
Can I access the fuel pump and sending unit through the service panel under the rear seat?
Should I use an aftermarket fuel level sending unit to save money?
Will a used sending unit from a junkyard be a reliable fix?
Does the Lexus GX 470 share this same fuel gauge problem?
What is the estimated part cost for fixing the P0462 code on this vehicle?
Helpful Videos

Used OEM Parts in Stock
New Aftermarket Parts Available


The information in this article is provided for general reference and educational purposes only. Vehicle specifications, procedures, and part compatibility can vary by production date, trim level, and region. Always consult your vehicle's factory service manual and verify part numbers before purchasing or performing repairs. Safety-critical components such as airbags, seat belts, and braking systems should be installed by a qualified professional.
- Toyota 4Runner:
- 🧭 Diagnostic Flowchart
- 🎬 Helpful Videos
- 🛍️ Shop This Part
- What's Unique About the 2003-2009 Toyota 4Runner
- Symptoms You May Notice
- Most Likely Causes
- Rare But Worth Checking
- Diagnosis Steps
- Parts You'll Likely Need
- Platform-Specific Known Issues
- Mechanic-Grade Diagnostic Values
- Wiring & Ground Locations
- Real Owner Repair Stories
- OEM Part Supersession History
- Other Known Issues on This Vehicle
- Used vs. New Parts: Buying Guide for This Vehicle
- Real Owner Stories
- 2003-2009 Toyota 4Runner
- 2003-2009 Toyota 4Runner
- 2003-2009 Toyota 4Runner
- Related OBD-II Codes
- Frequently Asked Questions
- 🎟️ Get 5% Off