
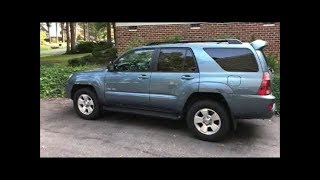
P0463 on 2003-2009 Toyota 4Runner: Fuel Level Sensor Circuit High Input Causes and Fixes
On a 2003-2009 4Runner, P0463 almost always means the fuel level sending unit inside the gas tank has failed. The most common fix is to replace the sender, which is often sold with the fuel pump assembly. This repair requires dropping the fuel tank as there is no factory access panel. Expect to pay $100-$200 for an aftermarket part or $250-$400 for an OEM Denso unit.
- P0463 on a 4th Gen 4Runner is overwhelmingly caused by a failed fuel level sending unit in the gas tank.
- The vehicle is safe to drive, but you must track your mileage to avoid running out of fuel, as the gauge will be unreliable.
- Diagnosis involves testing the sender's resistance with a multimeter at the fuel tank connector. An open circuit (infinite resistance) confirms the failure.
- The repair requires dropping the fuel tank, as there is no factory access panel. This is a labor-intensive but DIY-possible job for those with mechanical experience.
- To save money, you can often replace just the sender unit instead of the entire fuel pump assembly. Using an OEM-quality brand like Denso is highly recommended for longevity.
What's Unique About the 2003-2009 Toyota 4Runner
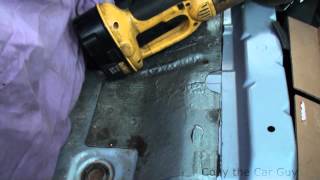
The 4th Generation 4Runner is known for the fuel sending unit failing as the vehicle ages. The variable resistor contacts on the sender simply wear out over time, creating an open circuit. This failure pattern is very common on high-mileage 4Runners. While the part is often integrated into the fuel pump assembly, some manufacturers offer the sender as a separate, more affordable component, which is a popular repair in the 4Runner community. Unlike some earlier 4Runner generations, the 2003-2009 models do not have a factory-installed fuel pump access panel under the rear seats, meaning the fuel tank must be dropped for this service. Some owners choose to cut their own access hatch in the floor pan to simplify future service.
🎬 Watch: How to cut a custom fuel pump access hatchSymptoms You May Notice
- Check Engine Light is on
- Fuel gauge reads incorrectly (stuck on Full, Empty, or fluctuates wildly)
- Low fuel warning light may be illuminated constantly
- Fuel gauge reading does not change after filling the tank
- Replacing the entire fuel pump assembly when only the less expensive sending unit has failed.
- Replacing the instrument cluster gauge before properly diagnosing the sending unit and wiring.
Most Likely Causes
- Failed Fuel Level Sending Unit 🔴 High Probability → Shop Fuel Tank Sending Unit The resistor contacts on the sending unit are a known wear item on 4th generation 4Runners, especially on higher mileage vehicles. The constant movement of the float arm wears down the resistive strip, eventually causing an open circuit. Sulfur content in gasoline can also contribute to corrosion and failure of the sender contacts.
How to confirm: Access the fuel pump assembly connector at the top of the fuel tank. Use a multimeter to measure the resistance across the two sender pins. An infinite resistance reading (OL) confirms a failed sender. A working sender should show resistance that changes as the fuel level changes. One factory service manual states a range of approx. 12Ω at Empty to 184Ω at Full, while another Toyota source suggests a range of 4.2Ω (Full) to 110Ω (Empty) for a new OEM sender. The critical finding is a measurable resistance value that changes smoothly, not an open circuit or dead spots.
Typical fix: Replace the fuel level sending unit. This requires dropping the fuel tank to access the fuel pump assembly. The sender can sometimes be purchased separately from the entire fuel pump module, which is a more cost-effective repair.
Est. part cost: $80-$400 - Damaged Wiring or Connector 🟡 Medium Probability The wiring harness runs underneath the vehicle to the fuel tank, making it susceptible to corrosion from road salt, moisture, and physical damage from road debris over time. The connector on top of the fuel pump assembly is a common point for corrosion. A poor ground connection is also a frequent cause of erratic gauge behavior.
How to confirm: Visually inspect the wiring harness leading to the fuel tank for any obvious cuts, abrasions, or corrosion, paying close attention to the connector on top of the fuel pump assembly. Perform a continuity test from the sender connector back to the PCM if the sender itself tests good. Check the ground strap for the fuel tank for corrosion or looseness. A common DIY fix involves adding a new, redundant ground wire from the sender's ground wire directly to the chassis.
Typical fix: Repair the damaged section of wire or clean/replace the corroded connector. Add a new ground wire from the sender harness to a clean chassis point.
Est. part cost: $5-$50
Rare But Worth Checking
- Faulty Instrument Cluster: → Shop Instrument Cluster This is very rare. The fuel gauge itself could fail, but this is far less common than the sending unit failing. This should only be considered after the sending unit and wiring have been confirmed to be in good working order.
- Faulty Powertrain Control Module (PCM): This is extremely unlikely. A PCM failure would typically present with multiple other, more severe symptoms and codes. It should be the absolute last item to consider.
Diagnosis Steps
- Confirm the presence of code P0463 using an OBD-II scanner.
- Note the fuel gauge reading. Does it read Full, Empty, or is it erratic?
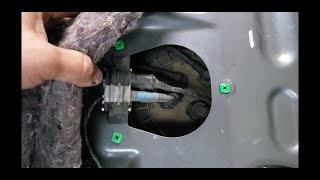
- Visually inspect the wiring harness and connector at the top of the fuel tank for any signs of damage, corrosion, or loose connections. The connector is accessible through a small service panel under the rear driver's side seat, but the pump cannot be removed through this opening.
- Disconnect the fuel pump electrical connector. Identify the pins for the fuel level sender (refer to a vehicle-specific wiring diagram).
- Set a multimeter to Ohms (Ω) and measure the resistance between the sender pins. A reading of 'OL' or infinite resistance indicates an open circuit and a failed sender.
- For reference, a working 4th Gen 4Runner sender should have a resistance that varies with fuel level. Common ranges are approx. 12Ω (E) to 184Ω (F) or 4.2Ω (F) to 110Ω (E). The key is seeing a measurable resistance, not an open circuit.
- If resistance is within a plausible range, have a helper gently rock the vehicle side-to-side while you watch the multimeter. The resistance reading should fluctuate as fuel sloshes in the tank. If it does, the sender is likely working.
- If the sender tests good, the next step is to check the wiring between the tank and the PCM for continuity and shorts to ground. Pay special attention to the ground wire (typically Brown with a Black stripe) as a poor ground is a known issue.
- Only if the sender and wiring are confirmed to be good should you investigate the instrument cluster or PCM.
Parts You'll Likely Need
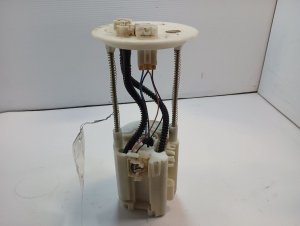
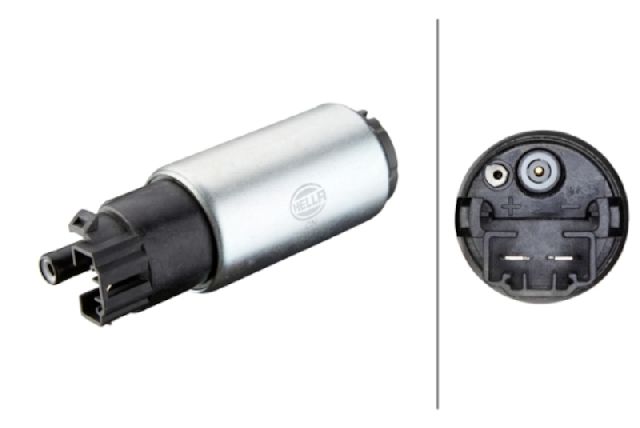
- Fuel Sender Gage Assembly
(OEM #83320-35130, 83320-60390)— This is the component that fails most frequently, causing the P0463 code. The internal resistor wears out, creating an open circuit. Part number can vary by specific model year and configuration.
Trusted brands: Denso (OEM), Aisin
OEM price range: $250-$400
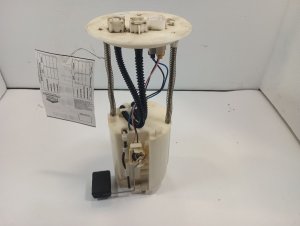
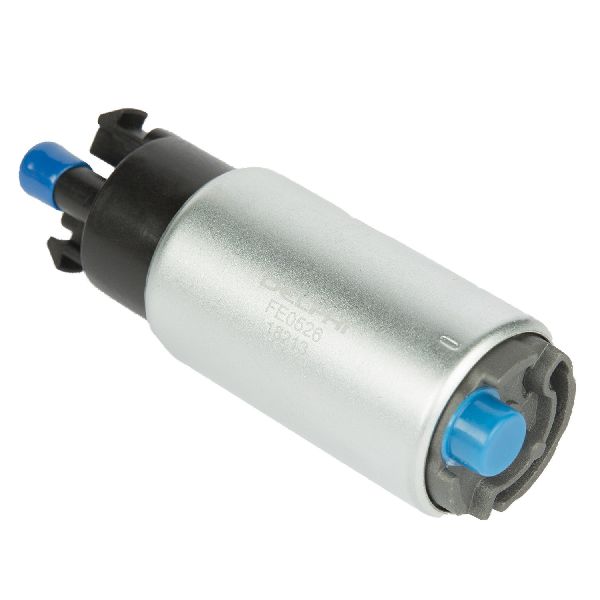
Aftermarket price range: $80-$150 - Fuel Pump and Sender Assembly — For a more comprehensive repair, or if the fuel pump is also old, many owners choose to replace the entire assembly which includes the fuel pump, sender, filter, and float. This is a good preventative measure on a high-mileage vehicle.
Trusted brands: Denso, Bosch
OEM price range: $300-$500
Aftermarket price range: $150-$250
Platform-Specific Known Issues
- There was a major recall on fuel pumps for later model Toyotas, including the 2018-2019 4Runner, but this recall for stalling issues does not apply to the 2003-2009 generation.
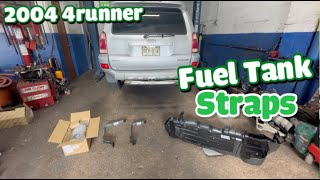
- The 4th Gen 4Runner does NOT have a fuel pump access panel under the rear seat for removing the pump assembly, unlike some earlier generations. The tank must be dropped. 🎬 Watch: Replacing fuel tank straps and under covers
Mechanic-Grade Diagnostic Values
- Fuel Level Sender Resistance (New OEM Part) — expected: 4.2Ω (Full) to 110Ω (Empty). Failure: An open circuit (OL), dead spots, or readings outside the expected range.
- Fuel Level Sender Circuit Voltage at Harness (to Combination Meter) — expected: 10-14V when testing between pin 2 of the harness connector and body ground with the key ON.. Failure: No voltage present, indicating a wiring or instrument cluster issue upstream of the tank.
Scan Tool Commands That Help
- Toyota Techstream: Active Test: Combination Meter / Fuel Gauge — After verifying the sender and wiring are good, this command can be used to sweep the fuel gauge needle. If the needle moves correctly during the test, it confirms the gauge itself is functional and points the diagnosis back towards the sending unit, wiring, or the signal processing in the cluster.
Wiring & Ground Locations
- Fuel Pump/Sender Ground Wire — In the wiring harness accessible under the driver's side rear seat, leading to the fuel pump assembly connector.. The ground wire for the sending unit is a Brown wire with a Black stripe and White/Silver dots. This ground can become weak or corroded over time, causing erratic readings or a P0463 code even if the sending unit itself is functional. A common and effective field repair is to tap into this wire and run a new, dedicated ground to a clean spot on the vehicle's chassis under the seat.
- F14 Connector — The main electrical connector on top of the fuel pump assembly, under the access plate beneath the rear driver's side seat.. This is the primary test point for diagnosing the sending unit without dropping the tank. Technicians test for resistance and voltage at the pins of this connector to isolate the fault between the sending unit, the wiring to the front of the vehicle, or the instrument cluster.
Real Owner Repair Stories
- YouTube user 'phorunner' (3rd Gen Toyota 4Runner (similar wiring and issue to 4th Gen)) — Fuel gauge was inaccurate and would not go below 1/4 tank, leading to uncertainty about the actual fuel level.
❌ Tried (didn't work) Purchased a new fuel sending unit but returned it after testing showed it might not be the problem.
✅ What actually fixed it The owner identified the ground wire for the fuel sender (Brown with Black stripe) in the harness under the rear seat. He used a wire tap to connect a new wire from the factory ground wire to a new grounding point, which he created using a self-tapping screw into the sheet metal of the floor pan. This provided a fresh, solid ground and restored correct fuel gauge function. - Reddit user on r/4thGen4Runner (2006 V6 SR5 2WD 4Runner) — When filling the tank, the gauge would only read 3/4 full. The gauge would drop to empty after only 150 miles, but the owner could drive for another 200 miles, indicating a sender issue.
❌ Tried (didn't work) Using Chevron Techron fuel system cleaner temporarily fixed the issue for about two months, but it returned.
✅ What actually fixed it Multiple users confirmed this is a classic symptom of a failing sending unit. One user recommended replacing the sending unit with an OEM part and the fuel pump with an OEM Denso unit while the tank was dropped to solve the problem permanently. The temporary fix from Techron suggests the issue is related to deposits or corrosion on the sender's contacts.
OEM Part Supersession History
83320-35130→N/A, still an active part number for certain years/models.— Part for specific V6/V8 configurations within the 2003-2009 range.
Heads up: Always verify part number with VIN. There are multiple senders for this generation.83320-60390→83320-60440— Part revision or consolidation by Toyota.
Heads up: 83320-60440 is listed as the replacement for 83320-60390 and fits 2003-2009 models.
Model Year Variations Within This Range
- 2003-2009: The 4th Gen 4Runner was available with two engine options: the 4.0L 1GR-FE V6 and the 4.7L 2UZ-FE V8. While the P0463 code is common to both, the fuel pump and sender assemblies may have different part numbers depending on the engine and model year. The V8 models feature a full-time 4WD system, while V6 4WD models have a multi-mode system. This does not directly affect the P0463 cause but is a key vehicle difference.
- 2005-2009: Starting in 2005, both the V6 and V8 engines were paired with a 5-speed automatic transmission. Earlier 2003-2004 V6 models used a 4-speed automatic. This does not change the diagnosis for P0463 but is a notable powertrain variation within the generation.
Diagnostic Flowchart
Other Known Issues on This Vehicle
Issues unrelated to this code that are worth knowing about as an owner of this generation:
- Cracked/Melting Dashboard 🟡 Low — Extremely common, especially in 2003-2005 models exposed to heat and humidity. Toyota issued a Warranty Enhancement Program (ZE6), but it has since expired. (Ref: Warranty Enhancement Program ZE6 (Expired))
- Seized Front Brake Calipers 🟠 Medium — Very common, particularly in regions using road salt. The caliper pistons corrode and stick, causing brake drag, pulling, and overheating.
- Cracked Exhaust Manifolds (V8 Models) 🟠 Medium — A well-known flaw on the 4.7L 2UZ-FE V8 engine. The thin-walled manifolds crack due to thermal stress, causing an exhaust tick noise, especially when cold. (Ref: An official TSB was issued, though many owners opt for aftermarket headers as a permanent fix.)
- Leaking/Failed X-REAS Suspension 🟠 Medium — Common on Sport Edition and Limited models equipped with this system. The hydraulic shocks and lines are prone to leaking, leading to a harsh ride. The system is expensive to replace, so many owners convert to conventional shocks.
- Frame Rust 🔴 High — Significant issue, especially for vehicles in the salt belt. Frames can suffer from severe corrosion, leading to safety concerns and costly repairs. A class-action lawsuit was filed regarding this issue.
- Head Gasket Failure (V6 Models) 🔴 High — Affects the 4.0L 1GR-FE V6, typically after 125,000 miles. Symptoms include coolant loss, overheating, and gurgling sounds from the dashboard.
Used vs. New Parts: Buying Guide for This Vehicle
When a used part is the smart pick: For this repair, a used part is generally NOT recommended. The fuel sending unit is a known wear item, and a used part from a junkyard vehicle likely has significant wear and an unknown history. The labor to drop the fuel tank is substantial, making it unwise to risk having to do the job again with a questionable part.
Donor-vehicle mileage cap: roughly under 50000 miles for the part to have meaningful remaining life.
What to inspect on the donor part:
- If forced to use a donor part, source it from the lowest-mileage vehicle possible.
- Visually inspect the resistor strip for any signs of dark spots, corrosion, or physical wear on the contacts.
- Test the used part with a multimeter before installation. The resistance should sweep smoothly from full to empty without any dropouts or open spots.
OEM-only on this vehicle (don't cheap out):
- Fuel Sender Gage Assembly
Aftermarket brands forum-validated for this vehicle:
- Denso (OEM supplier)
- Aisin (OEM supplier)
Brands owners have reported issues with on this vehicle:
- Unnamed, low-cost 'Amazon' or 'eBay' brands. While some owners have had short-term success, others report inaccurate readings or premature failure, requiring the labor-intensive job to be repeated.
Real Owner Stories
Aggregated from forums and TSBs cited above. Mileages and costs reflect what owners reported in those sources.
2009 Toyota 4Runner
Symptoms: The check engine light illuminated, and the engine occasionally stalls at idle. The error code was P0463.
What fixed it: The owner was in the process of diagnosing the fuel level sensor after pulling the P0463 code.
Source hint: owner_reports - Carly
2003-2009 Toyota 4Runner
Symptoms: Erratic gauge behavior and P0463 code; the user wanted to avoid dropping the tank for future repairs.
What fixed it: The user described the process of cutting a custom access panel under the rear seat to reach the fuel pump without dropping the tank.
Source hint: 4Runners.com Forum - A user describes the process of cutting a custom access panel
Related OBD-II Codes
Frequently Asked Questions
Can I access the fuel pump through the service panel under the rear seat of my 2003-2009 4Runner?
Does the 2018-2019 Toyota fuel pump recall apply to my 4th Generation 4Runner?
What resistance should I see when testing the fuel level sender on a 2003-2009 4Runner?
Is there a common wiring fix for erratic fuel gauges on this vehicle?
Is the cracked exhaust manifold on my V8 4Runner covered by a recall?
Was there a program to fix the melting dashboard on 2003-2005 models?
Helpful Videos

Used OEM Parts in Stock
New Aftermarket Parts Available


The information in this article is provided for general reference and educational purposes only. Vehicle specifications, procedures, and part compatibility can vary by production date, trim level, and region. Always consult your vehicle's factory service manual and verify part numbers before purchasing or performing repairs. Safety-critical components such as airbags, seat belts, and braking systems should be installed by a qualified professional.
- Toyota 4Runner:
- 🧭 Diagnostic Flowchart
- 🎬 Helpful Videos
- 🛍️ Shop This Part
- What's Unique About the 2003-2009 Toyota 4Runner
- Symptoms You May Notice
- Most Likely Causes
- Rare But Worth Checking
- Diagnosis Steps
- Parts You'll Likely Need
- Platform-Specific Known Issues
- Mechanic-Grade Diagnostic Values
- Scan Tool Commands That Help
- Wiring & Ground Locations
- Real Owner Repair Stories
- OEM Part Supersession History
- Model Year Variations Within This Range
- Other Known Issues on This Vehicle
- Used vs. New Parts: Buying Guide for This Vehicle
- Real Owner Stories
- 2009 Toyota 4Runner
- 2003-2009 Toyota 4Runner
- Related OBD-II Codes
- Frequently Asked Questions
- 🎟️ Get 5% Off