
P0463 on 2016-2023 Volkswagen Jetta: Fuel Level Sensor Circuit High Input Fixes
This code means your Jetta's computer is getting an impossibly high voltage reading from the fuel level sensor. The most common fix is replacing the fuel level sensor, which is usually part of the in-tank fuel pump assembly. Expect to pay $250-$500 for the part.
- P0463 on a 2016-2023 Jetta almost always points to a problem with the fuel level sensor.
- The primary symptom will be an incorrect fuel gauge reading and an illuminated Check Engine Light.
- The fix typically involves replacing the entire in-tank fuel pump assembly, as the sensor is integrated.
- Wiring issues are a possible but less common cause.
- The vehicle remains drivable, but the risk of running out of fuel is high.
What's Unique About the 2016-2023 Volkswagen JETTA
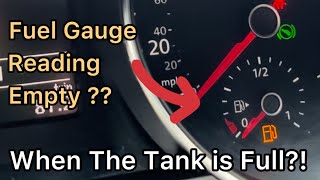
For the 2016-2023 Jetta, this code is often a straightforward indicator of a failing fuel level sending unit. Volkswagen Technical Service Bulletins (TSBs) for 2022 and 2023 models directly link P0463 to customer complaints about the fuel gauge not reading full after a fill-up. 🎬 Watch: Why your Jetta gauge reads empty when the tank is full. The fuel level sensor is almost always integrated into the main fuel pump assembly inside the tank, meaning the whole unit is typically replaced to fix the issue. This is a common design across many modern vehicles, not just Volkswagen.
Diagnostic Flowchart
Tap your situation to follow the diagnostic path that matches what you're seeing on this vehicle.
Generation note: This range covers two Jetta generations: the A6 (2016-2018, on the PQ35 platform) and the A7 (2019-2023, on the MQB platform). While the cause of P0463 is consistent, the fuel pump assembly and related part numbers are different between these generations. For example, A6 models may use a pump assembly like 1K0919051, while A7 models use a 5Q0919051 series part. Always verify parts with your vehicle's VIN.
Symptoms You May Notice
- Check Engine Light is on
- Fuel gauge is inaccurate, fluctuating, or stuck on full or empty
- Fuel gauge does not read full immediately after filling the tank
- Low fuel warning light may stay on or come on unpredictably
- Replacing the fuel pump for a drivability issue when the only problem is the integrated level sensor.
- Replacing the instrument cluster before thoroughly testing the sensor and wiring.
- Assuming the smell of gas is related to P0463; a fuel smell indicates a physical leak that must be inspected separately.
Most Likely Causes
- Faulty Fuel Level Sensor 🔴 High Probability → Shop Fuel Tank Sending Unit The sensor is a common failure point across many makes and models. On Jettas, it is integrated with the fuel pump module, requiring replacement of the entire assembly. Wear and tear on the variable resistor's sliding contact is a frequent cause of failure.
How to confirm: Use an OBD-II scanner to monitor live data for the fuel level sensor. The voltage will be stuck high (often >4.8V) and will not change as fuel is used. You can also test the sensor's resistance with a multimeter while moving the float arm; it should sweep smoothly without dead spots or open circuits. For older VWs, a common range is ~73 Ohms at empty and ~10 Ohms at full, though this can vary. Newer models may differ, so vehicle-specific data is ideal.
Typical fix: Replace the entire fuel pump and sending unit assembly inside the fuel tank.
Est. part cost: $250-$500 - Wiring or Connector Issue 🟡 Medium Probability Wiring to the fuel tank can be exposed to moisture and road salt, leading to corrosion. The connector on top of the fuel pump assembly or the chassis ground point are common problem areas. A short in the signal wire to a power source or a bad ground can cause the high voltage reading.
How to confirm: Visually inspect the wiring harness and connector going to the fuel pump module for any signs of corrosion (green or white powder), damage, or loose pins. Test the signal wire for a short to voltage and check the integrity of the ground circuit using a multimeter.
Typical fix: Repair the damaged section of the wiring harness or clean/replace the corroded connector. Applying dielectric grease can prevent future corrosion.
Est. part cost: $10-$50
Rare But Worth Checking
- Faulty Fuel Pump Control Module (FPCM): → Shop Fuel Pump On A7 Jettas (2019+), the FPCM (Part No. 5Q0906093x) can fail. While it usually throws other codes, its location under the rear seat makes it prone to moisture damage which could affect related circuits. A failed FPCM requires programming by a dealer or specialist.
- Faulty Instrument Cluster or ECM: → Shop Instrument Cluster It is very rare, but the instrument cluster that displays the gauge or the Engine Control Module (ECM) itself could be at fault. This should only be considered after all other possibilities, especially the sensor and wiring, have been thoroughly eliminated. A scan tool output test can command the gauge to sweep, helping to isolate the cluster as the problem.
Diagnosis Steps
- Scan for Codes: Use an OBD-II scanner to confirm P0463 is the primary code and check for others like P0461 or P0462.
- Check Live Data: Observe the 'Fuel Level Sensor' voltage PID. A reading stuck above 4.5V confirms a high input condition.
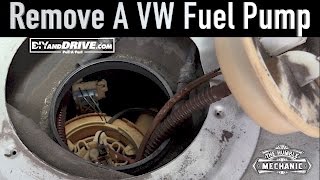
- Inspect Wiring: Access the top of the fuel tank (usually under the rear seat cushion). Unplug the fuel pump connector and inspect for green or white corrosion, bent pins, or melted plastic.
- Test the Circuit: With the key on, use a multimeter to check for a 5V reference and a good ground at the connector. Check the signal wire for any shorts to a power source.
- Test the Sensor: If the wiring is good, the sensor is the likely culprit. You can confirm by measuring its resistance across the sender pins on the pump assembly. The resistance should change smoothly as the float arm is moved. An infinite or OL reading indicates an open circuit in the sender.
- Replace the Component: If the sensor is confirmed bad, replace the fuel pump/sender assembly. If wiring is the issue, repair it.
- Clear Codes and Test: After the repair, clear the DTC and drive the vehicle to ensure the fuel gauge reads correctly and the code does not return.
Parts You'll Likely Need
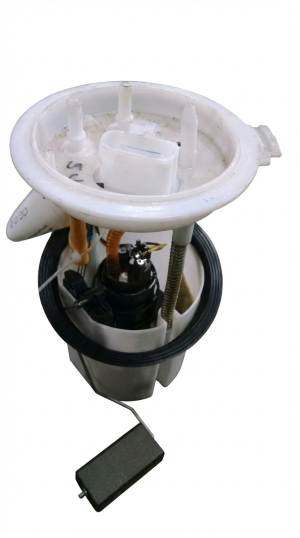
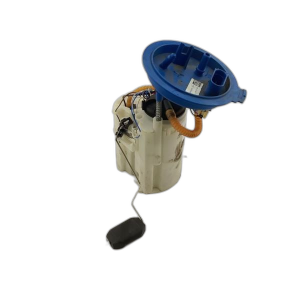
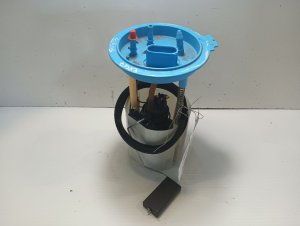
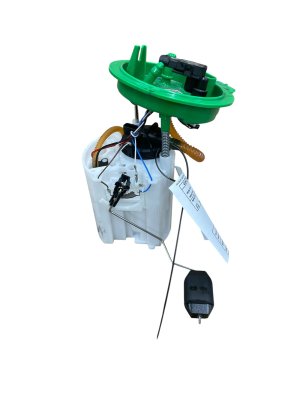
- Fuel Pump and Sending Unit Assembly
(OEM #Varies by VIN. A6 (2016-18) may use 1K0919051 series. A7 (2019+) may use 5Q0919051 series.)— This is the most common cause of P0463, as the fuel level sensor is integrated into this assembly. Part numbers differ between A6 (pre-2019) and A7 (2019+) generations, so verifying by VIN is essential.
Trusted brands: Bosch, VDO, Delphi, Genuine Volkswagen
OEM price range: $400-$600
Aftermarket price range: $250-$450
Related Codes That Often Appear With This One
- P0462 — This code means 'Fuel Level Sensor Circuit Low Input.' Seeing it alongside P0463 suggests an intermittent wiring problem or a sensor that is failing erratically, with the signal swinging from one extreme to the other.
- P0461 — This code means 'Fuel Level Sensor Circuit Range/Performance.' It can be stored along with P0463 if the sensor's output is erratic or not changing as expected with fuel level changes.
Technical Service Bulletins (TSBs) & Recalls
- VIN4APIN20240410: Mentions customer complaint of fuel gauge not reading full and P0462 and/or P0463 stored in ECM memory for 2023 models.
- VIN4APIN20240523: Mentions customer complaint of fuel gauge not reading full and P0462 and/or P0463 stored in ECM memory for 2022 models.
Platform-Specific Known Issues
- Volkswagen has issued TSBs for 2022-2023 models that explicitly mention P0463 in relation to complaints that the fuel gauge does not read full after filling the tank.
- Certain 2019-2020 Jetta models were recalled (NHTSA 24V110000) for a defective seal on the suction jet pump within the fuel tank, indicating known issues with fuel system components in the A7 generation.
- Owners on forums like VWVortex and Reddit frequently report this code. A common owner experience involves the fuel gauge getting stuck on full or empty, with the eventual fix being a complete fuel pump assembly replacement after confirming the wiring is intact.
Mechanic-Grade Diagnostic Values
- Fuel Level Sensor Resistance (older VWs) — expected: Approximately 73 Ohms at empty and 10 Ohms at full.. Failure: Readings that are infinite (Open/OL), do not change when moving the float arm, or are significantly outside the expected range.
- Fuel Level Sensor Resistance (some newer VWs) — expected: Some systems use a three-wire sensor where the total resistance between two pins is constant (e.g., ~510-520 Ohms), and the resistance to ground on each pin changes proportionally as the level changes.. Failure: The total resistance between the two signal pins is not constant, or the individual resistance to ground does not sweep smoothly.
Scan Tool Commands That Help
- VCDS (VAG-COM): Instrument Cluster (17) -> Output Tests (03) — To verify if the instrument cluster's fuel gauge is functional. The test commands a full sweep of all gauges, including the fuel gauge, which should move to specific positions (e.g., half-tank). This helps rule out a faulty gauge motor before replacing the in-tank sensor.
- VCDS (VAG-COM): Instrument Cluster (17) -> Adaptation (10) -> Channel for Tank Characteristics/Calibration — After replacing a fuel level sender, if the gauge reading is slightly off. This allows for fine-tuning the gauge calibration by adjusting the stored value (typically from a base of 128) to match the new sender's output. This is not a fix for a P0463 code but is used for calibration after the repair.
Wiring & Ground Locations
- Fuel Pump Control Module (J538) — For MQB platform Jettas (2019+), the module is located under the rear seat on the right (passenger) side, near the fuel pump access cover.. This module powers and controls the in-tank fuel pump and processes the signal from the level sensor. A failure in this module or its ground connection can cause various fuel system codes, including P0463.
- Fuel Pump Connector — On top of the fuel pump assembly, accessible under the rear passenger-side seat cushion after removing a black metal cover.. This is the primary connection point for the fuel level sensor. Corrosion or damage here is a common cause of P0463. The brown wire is typically the ground for the pump/sensor assembly.
- Chassis Ground Point — While specific ground points vary, common locations for rear components are under the rear seat (sometimes using a seat rail bolt) or in the trunk near the taillights. On older Jettas (Mk4/5), a key ground point is listed as 'in luggage compartment, left' (point 50) or 'in rear wiring harness' (point 86).. A corroded or loose ground connection for the fuel pump module or the sensor itself can cause a floating voltage, leading to a high input reading and triggering P0463.
Real Owner Repair Stories
- Reddit user in r/jetta (2013 Jetta GLI (A6 generation)) — Parasitic battery drain. The fuel pump module under the rear seat was hot to the touch hours after the car was off. The owner also experienced hot-start issues where the car would sputter and die after a short stop, but this was less frequent.
❌ Tried (didn't work) Initial diagnosis focused on finding the source of the battery drain via multimeter testing.
✅ What actually fixed it The user identified that the fuel pump module was staying on constantly, causing the drain. The implied fix, though not explicitly stated as complete, is the replacement of the faulty fuel pump module which was stuck in an 'on' state.
OEM Part Supersession History
1K0919051AQ, 1K0919051BH, 1K0919051CL→1K0919051DB— Standard part evolution for the A6/PQ35 platform fuel pump assembly, likely for improved reliability or supplier changes.
Heads up: These parts are for the A6 generation and are not compatible with the A7 (2019+) Jetta, which uses a different fuel system architecture (e.g., 5Q0-prefix parts).
Model Year Variations Within This Range
- 2019-2023 (A7/MQB Platform): These models use a dedicated Fuel Pump Control Module (J538) located under the rear seat that is responsible for controlling the in-tank pump and processing the level sensor signal. This adds another potential point of failure compared to older systems where control might be more directly integrated into the main vehicle electrical system controller.
Helpful Videos
![How to Fix P0463 Engine Code in 2 Minutes [1 DIY Method / Only $11.5]](https://img.youtube.com/vi/vmZ6y3GoXH4/mqdefault.jpg)

![Testing Audi TT gauges [with VCDS] Part3/3](https://img.youtube.com/vi/F9iCTKUn9ks/mqdefault.jpg)

Used OEM Parts in Stock
New Aftermarket Parts Available


The information in this article is provided for general reference and educational purposes only. Vehicle specifications, procedures, and part compatibility can vary by production date, trim level, and region. Always consult your vehicle's factory service manual and verify part numbers before purchasing or performing repairs. Safety-critical components such as airbags, seat belts, and braking systems should be installed by a qualified professional.
- Volkswagen JETTA:
- 🧭 Diagnostic Flowchart
- 🎬 Helpful Videos
- 🛍️ Shop This Part
- What's Unique About the 2016-2023 Volkswagen JETTA
- Symptoms You May Notice
- Most Likely Causes
- Rare But Worth Checking
- Diagnosis Steps
- Parts You'll Likely Need
- Related Codes That Often Appear With This One
- Technical Service Bulletins (TSBs) & Recalls
- Platform-Specific Known Issues
- Mechanic-Grade Diagnostic Values
- Scan Tool Commands That Help
- Wiring & Ground Locations
- Real Owner Repair Stories
- OEM Part Supersession History
- Model Year Variations Within This Range
- 🎟️ Get 5% Off