
P0504 on 2008-2013 Toyota Highlander: Brake Switch Correlation Causes and Fixes
On a 2008-2013 Highlander, code P0504 almost always points to a faulty or misadjusted brake light switch. This is a simple, low-cost DIY fix, with an aftermarket switch costing around $20-$30 and an OEM part costing about $45. The failure of this switch can cause the brake lights to fail, disable cruise control and VSC, and prevent the vehicle from shifting out of Park.
- P0504 on a 2008-2013 Highlander is a straightforward code pointing directly to the brake light switch circuit.
- The most likely fix is replacing the brake light switch, a task that is very DIY-friendly and can be completed in under 30 minutes with basic tools, though access is physically awkward.
- Before buying a new switch, check the 10A 'STOP' fuse and ensure the existing switch is properly adjusted.
- Driving with this code is a safety risk as your brake lights may not work, and it will disable key safety systems like VSC, so a prompt repair is highly recommended.
What's Unique About the 2008-2013 Toyota Highlander
There is nothing particularly unique about the P0504 code on the second-generation Highlander; it uses a standard Toyota dual-circuit stop lamp switch design common across many of their vehicles from this era, including the Camry, Sienna, and Lexus RX350. 🎬 See this Sienna brake switch replacement walkthrough The cause is overwhelmingly a simple component failure of the switch itself rather than a complex systemic issue. The repair is straightforward and does not typically require special tools or software.
Symptoms You May Notice
- Check Engine Light is on
- Cruise control cannot be set or is disabled
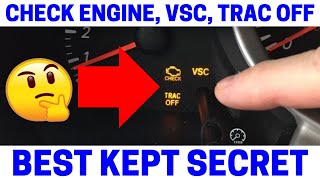
- Vehicle Stability Control (VSC) or Traction Control (TRAC) warning light may be on 🎬 Watch: How a faulty brake switch triggers these warning lights
- Brake lights do not turn on when the pedal is pressed
- Brake lights stay on continuously
- Difficulty shifting the transmission out of Park
- On models with push-button start, may be unable to start the vehicle without holding the key fob to the start button, as the system doesn't detect the brake pedal is pressed.
- Replacing brake light bulbs when the lights don't work. While a burnt-out bulb is possible, it will not cause a P0504 code.
- Assuming a transmission issue when the vehicle won't shift out of Park, without first checking the brake switch signal which is required for the shift interlock.
Most Likely Causes
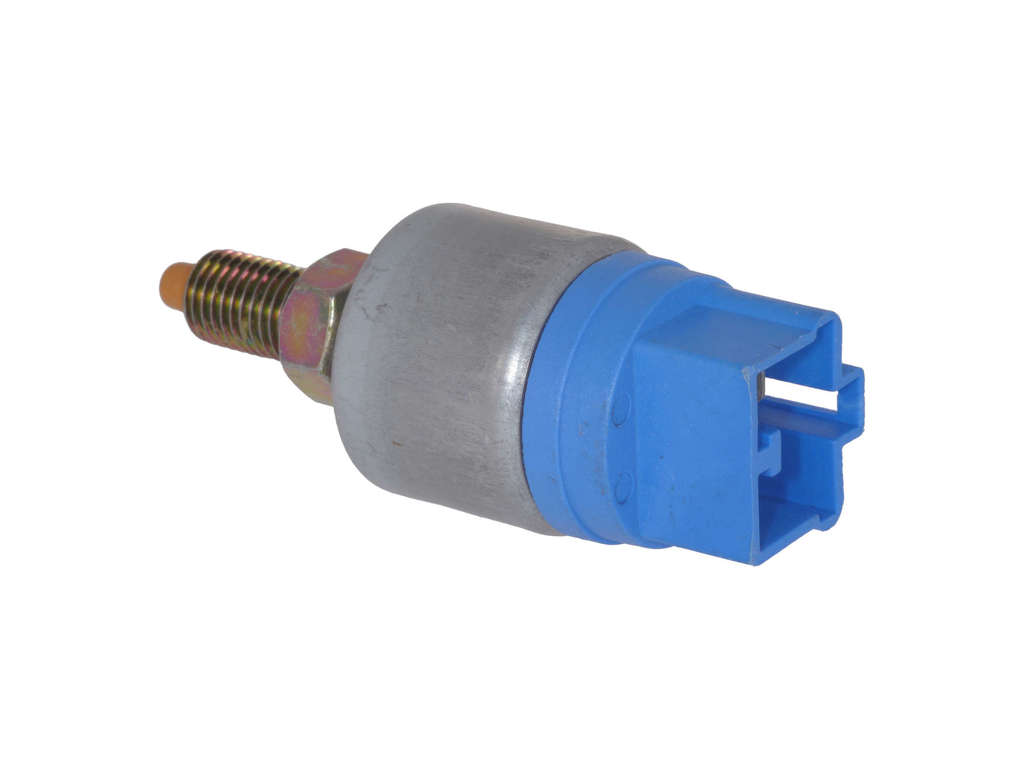
- Faulty Brake Light Switch (Stop Lamp Switch) 🔴 High Probability → Shop Brake Light Switch The switch is a small electro-mechanical part with plastic components and internal contacts that can wear out, corrode, or fail over time, leading to inconsistent signals. It is the most common failure point for this code across all Toyota platforms of this era.
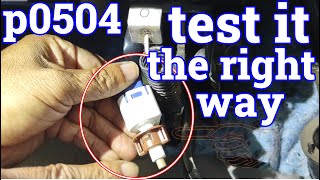
How to confirm: Use a multimeter to test the continuity of the switch's four pins. With the plunger released (pedal pressed), one pair of pins should have continuity, and the other should not. With the plunger depressed (pedal released), the states should reverse. Alternatively, use a scan tool to monitor the 'Stop Light SW' (STP) and 'ST1-' signals while pressing and releasing the brake pedal; they should change state logically and not be contradictory.
Typical fix: Replace the brake light switch assembly. This is often easier than confirming the failure, given the low cost of the part.
Est. part cost: $20-$50 - Improperly Adjusted Brake Light Switch 🟡 Medium Probability → Shop Brake Light Switch The switch's position relative to the brake pedal arm is adjustable. If it's too close or too far, it may not be fully activated or deactivated when the pedal moves, causing a signal correlation error. This can happen after brake work or if the locknut loosens.
How to confirm: Visually inspect the switch at the top of the brake pedal arm. Ensure the plunger is being correctly depressed when the pedal is released and fully released when the pedal is pressed. There should be minimal to no free play before the switch activates.
Typical fix: Loosen the 14mm locknut on the switch and rotate the switch body to achieve the correct clearance and operation, then tighten the locknut.
Est. part cost: $0 - Blown 'STOP' Fuse ⚪ Low Probability
How to confirm: Locate the fuse box in the driver's side instrument panel. Inspect the 10A fuse labeled 'STOP'. If the fuse is blown, it will interrupt one of the circuits for the switch.
Typical fix: Replace the blown fuse. If the new fuse blows immediately, it indicates a short circuit in the wiring that must be diagnosed.
Est. part cost: $1-$5
Rare But Worth Checking
- Damaged Wiring or Connector: In rare cases, the wiring harness or the connector for the brake light switch can become damaged, corroded, or even melt from a short circuit, causing signal issues. One owner on YouTube documented a case on a Toyota Yaris where the wiring had completely melted, requiring a new harness section to be spliced in. This should be suspected if a new switch and fuse do not resolve the problem.
- Faulty ECM: This is extremely rare. The Engine Control Module itself could theoretically fail to interpret the signals correctly, but all other possibilities should be exhausted before considering ECM replacement.
- Aftermarket LED Brake Lights: In some cases, installing low-quality or non-CANBUS-compatible LED bulbs in the brake lights can alter the circuit's resistance enough to cause intermittent signal issues that the ECM interprets as a fault. If the problem started after installing LEDs, try reinstalling standard incandescent bulbs.
Diagnosis Steps
- Verify Symptoms: Confirm the operation of the brake lights. Do they work at all, stay on constantly, or work intermittently? Check if cruise control and VSC are inoperative.
- Scan for Codes: Use an OBD-II scanner to confirm P0504 is the primary code. Note any other codes, especially P0571.
- Inspect the Fuse: Check the 10A 'STOP' fuse in the driver's side fuse panel. Replace if blown.
- Inspect Switch Adjustment: Visually inspect the brake light switch located on the bracket above the brake pedal. Ensure it is securely mounted and that the plunger is being correctly actuated by the pedal arm. Loosen the 14mm locknut to adjust if needed.
- Test the Switch: The most definitive test is to use a scan tool to view live data for the 'Stop Light SW' or the 'STP' and 'ST1-' PIDs. Watch their status change from ON to OFF as you press and release the brake pedal. They should not be the same value at the same time (i.e., both ON or both OFF).
- Test with a Multimeter: If a scan tool is unavailable, disconnect the switch's electrical connector. Use a multimeter to test continuity across the four pins as you depress and release the plunger. The resistance should change from near zero (continuity) to infinite (open circuit) on each pair of terminals.
- Inspect Wiring: If the switch tests good, inspect the connector and visible wiring for signs of damage, corrosion, or melting. A user on YouTube with a P0504 code found the connector and wiring had completely burned out, requiring a replacement pigtail from a junkyard.
- Replace the Part: If the switch is faulty or adjustment doesn't fix the issue, replace the stop lamp switch assembly. Given the low cost, many owners choose to do this as a first step after checking the fuse. 🎬 Watch: Step-by-step guide to replacing the switch
Parts You'll Likely Need
- Stop Lamp Switch Assembly
(OEM #84340-69025 (may be superseded by 84340-0E010 or other numbers, always verify with VIN))— This is the component that contains the dual-circuit switches. Internal failure is the most common cause of code P0504.
Trusted brands: Toyota (Genuine OEM), Denso, Standard Motor Products (SMP), Dorman, Intermotor
OEM price range: $40-$65
Aftermarket price range: $20-$40
Related Codes That Often Appear With This One
- P0571 - Brake Switch 'A' Circuit Malfunction (often appears with P0504)
Technical Service Bulletins (TSBs) & Recalls
- T-SB-0034-13: While not for P0504, this TSB is for a related common issue on this platform, a clunking noise from the steering column, fixed by replacing the intermediate steering shaft.
Mechanic-Grade Diagnostic Values
- Stop Lamp Switch Continuity (Pins 1-2) — expected: Below 1 Ω with plunger not pushed (pedal pressed); 10 kΩ or higher with plunger pushed (pedal released).. Failure: Readings do not change with plunger movement or are outside of the specified resistance ranges.
- Stop Lamp Switch Continuity (Pins 3-4) — expected: 10 kΩ or higher with plunger not pushed (pedal pressed); Below 1 Ω with plunger pushed (pedal released).. Failure: Readings do not change with plunger movement or are outside of the specified resistance ranges.
- Voltage at ECM Connector (ST1- terminal to ground) — expected: 9 to 14 V with brake pedal released; 0 to 3 V with brake pedal depressed.. Failure: Voltage is stuck high or low, or does not change when the pedal is operated.
- Voltage at ECM Connector (STP terminal to ground) — expected: 0 to 3 V with brake pedal released; 9 to 14 V with brake pedal depressed.. Failure: Voltage is stuck high or low, or does not change when the pedal is operated.
Hidden / Shadow Codes Worth Checking
- Freeze Frame Data: While not a hidden code, Toyota's Techstream software allows technicians to view Freeze Frame Data. This data captures a snapshot of the vehicle's operating conditions (speed, engine temp, etc.) at the exact moment the P0504 code was triggered, which is critical for diagnosing intermittent faults. (see via Professional scan tool like Toyota Techstream or equivalent.)
Scan Tool Commands That Help
- Toyota Techstream: Data List Monitoring — This is the primary scan tool function for P0504. Navigate to 'Powertrain / Engine and ECT / Data List' and monitor the 'Stop Light SW' and 'ST1-' parameters. Pressing and releasing the brake pedal should show these values changing state logically and without delay. This confirms if the ECM is receiving the correct signals from the switch.
Wiring & Ground Locations
- Stop Lamp Switch Connector — At the top of the brake pedal arm, under the driver's side dashboard.. This is the 4-pin connector for the switch itself. It's the primary point for voltage and continuity tests and is a potential failure point due to damage or corrosion.
- ECM Connector (STP signal) — On the Engine Control Module (ECM), which is located behind the right side of the dash. The STP signal is a Red wire.. This is the termination point for the primary brake signal. Testing voltage here confirms the entire circuit's integrity from the switch to the ECM.
- ECM Connector (ST1- signal) — On the Engine Control Module (ECM), located behind the right side of the dash. The ST1- signal is a Light Green wire.. This is the termination point for the secondary, redundant brake signal. Testing voltage here is crucial for diagnosing the 'correlation' fault.
- Ground Point IA — On the left cowl side panel, behind the driver's kick panel.. This is a major instrument panel ground point. A loose or corroded ground here could cause a variety of electrical issues, including erratic signals from the brake switch circuit.
- Instrument Panel J/B — Behind the left end of the dashboard.. The 'STOP' fuse is located here, and power for the brake light switch circuits runs through this junction block.
Real Owner Repair Stories
- YouTube - 'P0504 Brake Switch A/B Correlation on Toyota Echo / Yaris DIY repair car flip' (Toyota Yaris (similar platform and P0504 logic)) — No brake lights at all, P0504 code stored.
❌ Tried (didn't work) Initial assumption was a simple bad brake light switch.
✅ What actually fixed it The brake light switch connector and a section of the wiring harness had completely melted. The fix required obtaining a replacement connector pigtail from a salvage yard and splicing it into the vehicle's harness.
OEM Part Supersession History
84340-69025→84340-0E010 (unconfirmed, but widely cited)— Standard part evolution or consolidation.
Heads up: No known incompatibilities. The original part number 84340-69025 is still widely sold and listed as compatible for the 2008-2013 Highlander. Always verify fitment with a VIN.
Diagnostic Flowchart
Other Known Issues on This Vehicle
Issues unrelated to this code that are worth knowing about as an owner of this generation:
- Rupturing VVT-i Oil Line 🔴 High — Common on early 2GR-FE engines (approx. 2006-2010). The original rubber hose section becomes brittle and can rupture without warning, causing catastrophic oil loss and engine seizure. (Ref: Toyota issued TSBs and a Warranty Enhancement Program (ZE2) to replace the rubber line with an all-metal part (P/N 15772-31030).)
- Sticky / Melting Dashboard 🟡 Low — Very common in high-heat, high-humidity climates. The dashboard surface degrades, becoming shiny, sticky, and prone to cracking. (Ref: Toyota initiated a Warranty Enhancement Program (ZE6) to replace affected dashboards for numerous models, including the Camry and Sienna of this era, which shared the issue.)
- Intermediate Steering Shaft Clunk 🟠 Medium — A common issue where a clunk or pop is felt and heard through the steering wheel, especially during low-speed turns. (Ref: Toyota TSB-0034-13 addresses this condition with an improved intermediate shaft assembly (P/N 45220-48170).)
- Water Pump Failure 🟠 Medium — The internal water pump is a known weak point, often failing between 80,000 and 150,000 miles. Failure often begins as a slow, hard-to-detect internal seep before becoming a major leak or causing noise.
Used vs. New Parts: Buying Guide for This Vehicle
When a used part is the smart pick: A used part is a smart choice ONLY for the wiring connector pigtail if the original has melted or been damaged. The switch itself is an inexpensive wear item and should always be purchased new.
Donor-vehicle mileage cap: roughly under 100000 miles for the part to have meaningful remaining life.
What to inspect on the donor part:
- For a connector pigtail, ensure there is no melting, charring, or discoloration on the plastic.
- Check that the wire insulation is flexible and not brittle or cracked.
- Verify the terminal pins inside the connector are clean and free of corrosion.
- Ensure you get at least 4-6 inches of wire to make splicing easier.
OEM-only on this vehicle (don't cheap out):
- None for this specific repair. The brake light switch is a simple component with reliable aftermarket options.
Aftermarket brands forum-validated for this vehicle:
- Denso (often the OEM supplier)
- Standard Motor Products (SMP)
- Dorman
Brands owners have reported issues with on this vehicle:
- No-name, ultra-low-cost switches from online marketplaces may have lower quality internal contacts and a shorter lifespan.
Real Owner Stories
Aggregated from forums and TSBs cited above. Mileages and costs reflect what owners reported in those sources.
2010 Toyota Highlander 3.5L V6
Symptoms: VSC, TRAC OFF, and Check Engine lights all illuminated simultaneously. The owner noted the repair required awkward access under the dash.
What fixed it: Replacement of the brake light switch (part 84340-0E010).
Source hint: ToyotaNation Forums - Thread Title: 'VSC, TRAC OFF, Check Engine lights on, P0504 code'
Toyota Sequoia (Similar Platform)
Symptoms: ABS and VSC lights on along with error codes P0571 and P0504.
What fixed it: Replacing the brake light switch, even though the brake lights appeared to be functioning correctly.
Source hint: Reddit r/toyotasequoia - Thread: 'first gen error codes p0571 and p0504 with abs/vsc lights'
Toyota Yaris / Echo (Generic Toyota Logic)
Symptoms: P0504 Brake Switch A/B Correlation code where a simple switch replacement did not work.
What fixed it: Replacing a completely melted switch connector and wiring harness pigtail sourced from a salvage yard.
Source hint: YouTube - 'P0504 Brake Switch A/B Correlation on Toyota Echo / Yaris DIY repair car flip'
Related OBD-II Codes
Frequently Asked Questions
My 2010 Highlander has the Check Engine, VSC, and TRAC OFF lights all on at once. Is this related to P0504?
I'm hearing a clunking noise in my steering wheel along with these lights; does TSB-0034-13 fix the P0504 code?
Can I adjust the brake switch on my Highlander instead of buying a new one?
Why won't my push-button start Highlander start unless I hold the key fob to the button when P0504 is present?
Is there a specific fuse I should check for P0504 on a 2008-2013 Highlander?
What part number do I need to fix the P0504 code on my 2010 Highlander?
Helpful Videos
We Have This Part in Stock


The information in this article is provided for general reference and educational purposes only. Vehicle specifications, procedures, and part compatibility can vary by production date, trim level, and region. Always consult your vehicle's factory service manual and verify part numbers before purchasing or performing repairs. Safety-critical components such as airbags, seat belts, and braking systems should be installed by a qualified professional.
- Toyota Highlander:
- 🧭 Diagnostic Flowchart
- 🎬 Helpful Videos
- 🛍️ Shop This Part
- What's Unique About the 2008-2013 Toyota Highlander
- Symptoms You May Notice
- Most Likely Causes
- Rare But Worth Checking
- Diagnosis Steps
- Parts You'll Likely Need
- Related Codes That Often Appear With This One
- Technical Service Bulletins (TSBs) & Recalls
- Mechanic-Grade Diagnostic Values
- Hidden / Shadow Codes Worth Checking
- Scan Tool Commands That Help
- Wiring & Ground Locations
- Real Owner Repair Stories
- OEM Part Supersession History
- Other Known Issues on This Vehicle
- Used vs. New Parts: Buying Guide for This Vehicle
- Real Owner Stories
- 2010 Toyota Highlander 3.5L V6
- Toyota Sequoia (Similar Platform)
- Toyota Yaris / Echo (Generic Toyota Logic)
- Related OBD-II Codes
- Frequently Asked Questions
- 🎟️ Get 5% Off