
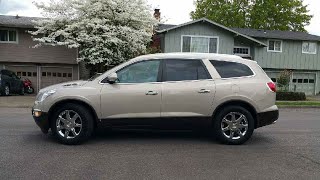
P0520 on 2008-2017 Buick Enclave 3.6L: Engine Oil Pressure Sensor Circuit Guide
This code usually means the oil pressure sensor has failed. On the 3.6L V6, it's a common and relatively inexpensive part to replace, but labor can be tricky due to its location. Expect to pay around $40-$70 for an OEM sensor and tackle it yourself if you have a special socket, or face a higher shop bill due to labor. Oil leaking from the sensor into its electrical connector is a classic sign of failure.
- P0520 on a 2008-2017 Enclave almost always points to a bad oil pressure sensor.
- Before replacing the sensor, ALWAYS check your oil level and condition first.
- To be certain, verify actual oil pressure with a mechanical gauge to rule out a serious internal engine problem.
- You MUST use a special thin-walled 1-1/16" oil pressure sensor socket for the job; a regular socket won't fit.
- If you see oil inside the sensor's electrical connector, you've found the problem—the sensor needs to be replaced.
- Consider replacing the small filter screen underneath the sensor at the same time, as it is a known point of failure.
What's Unique About the 2008-2017 Buick Enclave
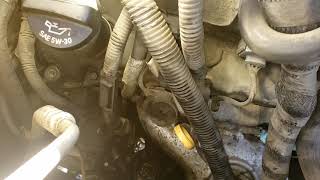
On the first-generation Buick Enclave with the 3.6L V6 (found in LY7 and LLT variants), the P0520 code is a frequent issue, often pointing directly to a failed oil pressure sensor. While the code is generic, the sensor's location on this specific engine—tucked between the oil filter housing and the alternator on the front of the engine block—makes replacement more difficult than on other vehicles. This accessibility issue is a common complaint among owners and mechanics, often turning a simple part swap into a more labor-intensive job that may require removing other components for access.
🎬 Watch: Buick Enclave oil pressure sensor replacement walkthroughSymptoms You May Notice
- Check Engine Light is on
- Oil pressure warning light on the dashboard, possibly with a "Oil Pressure Low - Stop Engine" message
- Oil pressure gauge reading zero, fluctuating erratically, or stuck at maximum
- Engine may run rough or make ticking/knocking noises if actual oil pressure is low
- Visible oil leak from the sensor itself, often contaminating the electrical connector
- Replacing the oil pump without first verifying low oil pressure with a mechanical gauge.
- Replacing the PCM when the actual fault is in the wiring or the sensor itself.
- Replacing camshaft or crankshaft sensors, which are unrelated to this specific code.
Most Likely Causes
- Faulty Engine Oil Pressure Sensor 🔴 High Probability The sensor is exposed to significant heat cycles and vibration, leading to internal failure. A very common failure mode is the internal seal breaking down, allowing pressurized oil to leak through the sensor's body and into the electrical connector, shorting the circuit.
How to confirm: After verifying correct oil level and pressure with a mechanical gauge, inspect the sensor's electrical connector. If oil is present inside the connector, the sensor's internal seal has failed and it must be replaced. This is a definitive sign. 🎬 Watch: How to diagnose and fix a P0520 code
Typical fix: Replace the engine oil pressure sensor and thoroughly clean the oil from the connector pigtail with electrical contact cleaner. If the connector is damaged or heavily saturated, replace the pigtail.
Est. part cost: $30-$75 - Low, Dirty, or Incorrect Engine Oil 🟡 Medium Probability The 3.6L V6 engine family is known to be sensitive to oil quality and level. Extended oil change intervals, especially those dictated by early versions of the Oil Life Monitor (OLM), can lead to sludge buildup that may affect sensor readings or clog passages.
How to confirm: Check the engine oil level using the dipstick. Inspect the oil's condition for sludge or debris. Verify that the oil viscosity matches the manufacturer's recommendation (typically 5W-30 meeting GM Dexos1 specifications).
Typical fix: Perform an oil and filter change using the correct grade of full synthetic oil and a quality filter.
Est. part cost: $50-$100 - Damaged Wiring or Connector ⚪ Low Probability The wiring harness is located in a hot, tight area near the front of the engine, making it susceptible to heat damage, brittleness, or abrasion over time. The connector lock tab can also become brittle and break during sensor replacement.
How to confirm: Visually inspect the wiring harness leading to the oil pressure sensor for any signs of cracking, melting, or frayed wires. Wiggle the connector with the engine running; if the gauge reading flickers, a poor connection is likely. Check for corrosion or loose pins inside the connector.
Typical fix: Repair the damaged section of wiring with solder and heat shrink tubing. Replace the connector pigtail if it is damaged or the locking tab is broken.
Est. part cost: $15-$50
Rare But Worth Checking
- Clogged Oil Pressure Sensor Screen: The 3.6L engine has a small, thimble-shaped filter screen (GM Part #12585328) in the block directly under the sensor. This screen can clog with sludge, restricting oil flow to the sensor and causing false low-pressure readings. It is highly recommended to replace this screen when replacing the sensor. This issue is documented in GM TSB PIP4786C.
- Failing Oil Pump or Clogged Oil Passages: If a mechanical oil pressure gauge confirms low pressure, the problem is internal to the engine. This is a much more serious issue than a bad sensor and requires professional diagnosis.
- Faulty Powertrain Control Module (PCM): → Shop Engine Control Module (ECM) This is extremely rare. The PCM should only be considered after all other possibilities, including the sensor, its screen, wiring, and actual oil pressure, have been thoroughly ruled out.
Diagnosis Steps
- Check the engine oil level and condition. Ensure it is full and clean. Top off or change the oil if necessary, using 5W-30 synthetic oil meeting Dexos1 specs.
- Scan for any other trouble codes that may be present.
- Crucially, verify the actual engine oil pressure. Connect a mechanical oil pressure gauge to the sensor port. Per GM specifications for the 3.6L, minimum pressure should be around 10 psi at hot idle and 20 psi at 2,000 RPM. If pressure is good, the problem is in the sensor circuit. If pressure is low, stop and diagnose a mechanical engine issue.
- Assuming oil pressure is good, inspect the oil pressure sensor's electrical connector for oil contamination, corrosion, or damage. Oil inside the connector is a definitive sign of a failed sensor and is a very common failure.
- Inspect the wiring harness leading to the sensor for any visible damage like chafing, melting, or brittle insulation.
- If no wiring damage is found and oil pressure is confirmed to be good, the oil pressure sensor is the most likely culprit. Replace it.
- When replacing the sensor, it is best practice to also remove and replace the small filter screen (GM Part #12585328) located in the port beneath it.
- Clear the trouble codes and perform a test drive to ensure the code does not return.
Parts You'll Likely Need
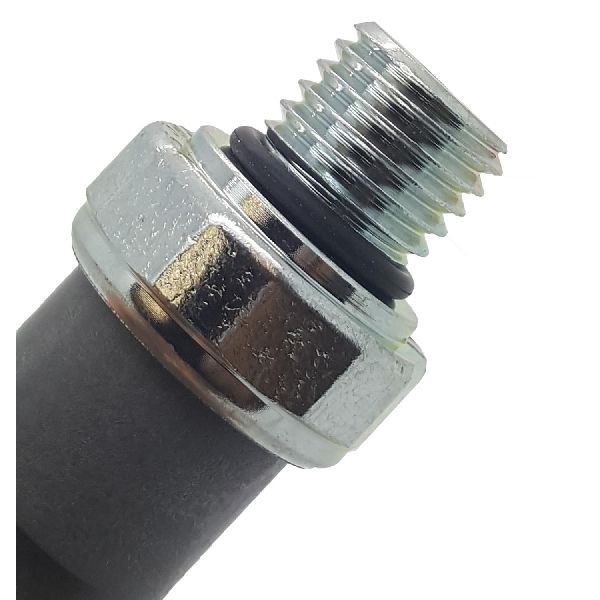
- Engine Oil Pressure Sensor
(OEM #12673134)— This is the most common failure point for code P0520 on this vehicle. The sensor fails internally, leading to incorrect readings or leaks into the connector. The original part number 12621234 was superseded by 12673134.
Trusted brands: ACDelco (GM Original Equipment), Standard Motor Products, Dorman
OEM price range: $40-$75
Aftermarket price range: $25-$50 - Oil Pressure Sensor Socket — A special thin-walled 1-1/16 inch (27mm) socket is required to access and remove the sensor due to tight clearances. A standard deep socket will not fit. The Lisle 13250 is a commonly cited tool for this job. 🎬 See: The easy way to replace the sensor using a special tool
Trusted brands: Lisle (Part #13250), Performance Tool, OEMTOOLS
OEM price range: $10-$20
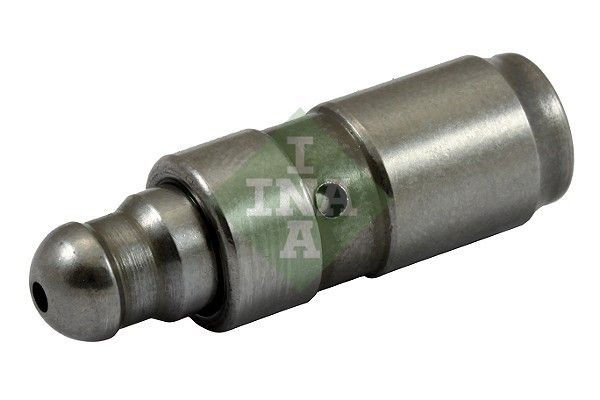
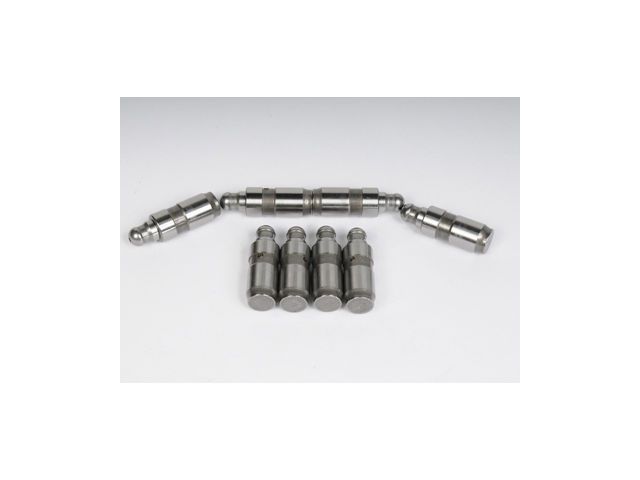
Aftermarket price range: $10-$20 - Valve Lifter Oil Filter Screen
(OEM #12585328)— This small screen sits below the sensor and is prone to clogging with sludge, causing false pressure readings. It is best practice to replace it when servicing the sensor, as noted in TSB PIP4786C.
Trusted brands: ACDelco (GM Original Equipment)
OEM price range: $5-$15
Aftermarket price range: $5-$10
Related Codes That Often Appear With This One
- P0521 — P0521 indicates an issue with the sensor's performance/range, not just the circuit. It's often triggered by the same root causes, such as a failing sensor, clogged screen, or incorrect oil filter, and frequently appears with P0520.
- P0522 — This code for 'Sensor Circuit Low Voltage' points to a short to ground or an internal sensor failure, which are common failure modes that also trigger P0520.
- P0523 — This code for 'Sensor Circuit High Voltage' can be triggered by an open circuit, a short to voltage, or an internal failure of the sensor, which are also root causes for P0520.
Technical Service Bulletins (TSBs) & Recalls
- PIP4786C: While not for P0520 specifically, this TSB is highly relevant as it addresses low oil pressure codes (like P0521) on similar GM engines caused by a clogged 'Valve Lifter Oil Filter' screen located directly under the pressure sensor, confirming it's a known issue.
Platform-Specific Known Issues
- The location of the sensor on the 3.6L V6 is on the front of the engine block, between the oil filter housing and the alternator. Access is very tight, and some mechanics may remove the alternator for better access, increasing labor time.
- A user on enclaveforum.net described the repair as being 'doable but frustrating,' confirming that a special thin-walled socket was absolutely necessary and that they had to use a combination of extensions and a universal joint to reach the sensor from above.
Mechanic-Grade Diagnostic Values
- Sensor Signal Voltage — expected: 0.5V (low pressure) to 4.5V (high pressure), varying with engine RPM.. Failure: Voltage is stuck at 0V, 5V, or does not change when engine RPM increases. A reading over ~4.8V can trigger P0523 (Circuit High).
- Sensor Reference Voltage (at harness connector) — expected: 5 Volts (with key on, engine off).. Failure: Significantly less than 5V or 0V indicates a wiring issue or a problem with the PCM's 5V reference circuit.
- Sensor Low Reference/Ground (at harness connector) — expected: 0 Volts / good continuity to ground.. Failure: Any significant voltage reading indicates a bad ground connection, which can cause erratic sensor readings.
- Sensor Internal Resistance — expected: Varies by manufacturer, but should not be an open circuit (OL) or a dead short (near 0 ohms) between the signal and ground pins.. Failure: An 'OL' reading on a multimeter indicates an open internal circuit, requiring sensor replacement.
Scan Tool Commands That Help
- GDS2 / Tech2 / High-End Scan Tool: Live Data Monitoring for 'Engine Oil Pressure Sensor' PID — This is a primary diagnostic step. Use it to compare the pressure reading reported by the sensor to the reading from a mechanical gauge. A large discrepancy confirms a fault in the sensor or its circuit, while a matching low reading confirms a mechanical engine problem.
Wiring & Ground Locations
- Oil Pressure Sensor Connector — On the front of the engine block, below the alternator and next to the oil filter housing.. This is the direct connection to the faulty component. Pin A (Gray wire) is the 5V reference, Pin B (Tan/White wire) is the signal, and Pin C (Orange/Black wire) is the low reference/ground. Testing voltages at these pins is a core diagnostic step.
- G103 — A primary engine block ground, often located on the front of the right-hand (passenger side) cylinder head.. The Engine Control Module (ECM) relies on clean ground connections like G103 to get accurate readings from its sensors. A loose or corroded G103 can introduce electrical noise and cause erratic readings from the oil pressure sensor, potentially triggering a P0520 code even with a good sensor.
Real Owner Repair Stories
- Forum reports on platforms like enclaveforum.net and acadiaforum.net (2009-2012 Buick Enclave / GMC Acadia / Chevy Traverse with 3.6L V6) — P0520 code, oil pressure gauge reading zero, "Low Oil Pressure" warning.
❌ Tried (didn't work) Just replacing the sensor without addressing the underlying cause.
✅ What actually fixed it Replacing both the oil pressure sensor AND the small filter screen (GM Part #12585328) located in the block underneath it. The screen was found to be completely clogged with sludge, starving the new sensor of oil pressure and causing the code to persist. - DIY repair forums and YouTube comments (2011 Chevy Traverse with 3.6L V6) — P0520 and P0523 codes returned shortly after sensor replacement.
❌ Tried (didn't work) Replacing the oil pressure sensor (twice)., Replacing the sensor screen.
✅ What actually fixed it A detailed wiring inspection revealed the signal wire (Tan/White) had chafed against a bracket near the alternator, causing an intermittent short. Repairing the damaged section of the wire with solder and heat shrink permanently resolved the codes. - AutoZone.com customer review (GM vehicle with 3.6L engine) — P0520 code.
❌ Tried (didn't work) Replacing the original sensor with an aftermarket sensor.
✅ What actually fixed it The aftermarket sensor failed within three weeks. The code was permanently fixed by replacing the faulty aftermarket part with a genuine GM (ACDelco) sensor.
OEM Part Supersession History
12621234→12673134— Improved design for durability and reliability.
Heads up: Part number 12596951 is also listed in the supersession history. Using the latest part, 12673134, is the best practice.
Model Year Variations Within This Range
- 2009-2017 (LLT Engine): The 2009 model year introduced the direct-injection (DI) 3.6L LLT engine, replacing the 2008's port-injected LY7. While the P0520 fault is common to both, the LLT engine is generally considered more susceptible to sludge buildup if high-quality synthetic oil and appropriate change intervals are not strictly followed. This increases the likelihood of the oil pressure sensor screen becoming clogged on 2009 and newer models.
Diagnostic Flowchart
Other Known Issues on This Vehicle
Issues unrelated to this code that are worth knowing about as an owner of this generation:
- Premature Timing Chain Stretch 🔴 High — Common on earlier models (especially 2009), typically appearing between 40,000 and 120,000 miles. Often triggers codes like P0008, P0017, P0018, P0019. (Ref: Special Coverage Adjustment #11340C was issued for 2009 models, but has since expired.)
- Cracked 3-5-R Transmission Wave Plate 🔴 High — Most prevalent in 2008-2011 models with the 6T75 transmission. Failure results in sudden loss of 3rd, 5th, and Reverse gears. (Ref: Special Coverage Adjustment #14404B extended warranty coverage for this specific failure to 10 years/120,000 miles, but has now expired for all vehicles.)
- Leaking Power Steering Rack/Lines 🟠 Medium — Common across all first-generation model years. Owners report fluid leaks from the rack and pinion assembly itself or associated hoses, leading to stiff steering or pump noise. (Ref: Various TSBs were issued for specific leaks, but no widespread recall for the rack itself.)
- Water Pump Failure 🟠 Medium — The water pump is a common failure point, often leading to coolant leaks from the front of the engine or overheating. Failure can occur at various mileages, often before 100,000 miles.
Used vs. New Parts: Buying Guide for This Vehicle
When a used part is the smart pick: For this repair, a used part is almost never a smart choice. The primary failure is an electronic sensor that degrades with heat cycles and vibration. A used sensor has unknown remaining life and carries a high risk of premature failure. A used wiring pigtail is acceptable if the plastic is not brittle and the locking tab is intact.
Donor-vehicle mileage cap: roughly under 20000 miles for the part to have meaningful remaining life.
What to inspect on the donor part:
- For a wiring pigtail: check for flexibility (not stiff or brittle), absence of cracks in the wire insulation, and a functional locking tab on the connector.
OEM-only on this vehicle (don't cheap out):
- Engine Oil Pressure Sensor: Given the high failure rate and multiple forum/review accounts of aftermarket sensors being dead-on-arrival or failing within weeks, using an OEM ACDelco/GM Genuine part is strongly recommended to avoid repeat repairs.
- Oil Filter: To avoid the edge case of filter collapse, using an OEM ACDelco PF2130G or equivalent high-quality filter is a wise investment.
Aftermarket brands forum-validated for this vehicle:
- Standard Motor Products (SMP) is often cited as a reliable aftermarket alternative for sensors, though some mixed reviews exist.
Brands owners have reported issues with on this vehicle:
- Generic, unbranded sensors from online marketplaces should be avoided due to inconsistent quality control. Some reviews mention issues with Dorman sensors for this application, though they are a major supplier.
Real Owner Stories
Aggregated from forums and TSBs cited above. Mileages and costs reflect what owners reported in those sources.
2008-2017 Buick Enclave 3.6L V6
Symptoms: The repair was described as 'doable but frustrating' due to the tight location of the sensor on the front of the engine block.
What fixed it: Replacement of the oil pressure sensor using a special thin-walled socket, extensions, and a universal joint to reach the sensor from above.
Source hint: enclaveforum.net
Related OBD-II Codes
Frequently Asked Questions
Does TSB PIP4786C apply to my Buick Enclave's P0520 code?
Can I use an aftermarket oil pressure sensor for my 3.6L V6 Enclave?
Is it necessary to remove the alternator to fix the P0520 code on an Enclave?
What specific oil should I use in my 2008-2017 Enclave to prevent oil-related codes?
Should I replace any other parts while replacing the oil pressure sensor?
Could my P0520 code be related to the timing chain issues common on the 2009 Enclave?
Helpful Videos
We Have This Part in Stock


The information in this article is provided for general reference and educational purposes only. Vehicle specifications, procedures, and part compatibility can vary by production date, trim level, and region. Always consult your vehicle's factory service manual and verify part numbers before purchasing or performing repairs. Safety-critical components such as airbags, seat belts, and braking systems should be installed by a qualified professional.
- Buick Enclave:
- 🧭 Diagnostic Flowchart
- 🎬 Helpful Videos
- 🛍️ Shop This Part
- What's Unique About the 2008-2017 Buick Enclave
- Symptoms You May Notice
- Most Likely Causes
- Rare But Worth Checking
- Diagnosis Steps
- Parts You'll Likely Need
- Related Codes That Often Appear With This One
- Technical Service Bulletins (TSBs) & Recalls
- Platform-Specific Known Issues
- Mechanic-Grade Diagnostic Values
- Scan Tool Commands That Help
- Wiring & Ground Locations
- Real Owner Repair Stories
- OEM Part Supersession History
- Model Year Variations Within This Range
- Other Known Issues on This Vehicle
- Used vs. New Parts: Buying Guide for This Vehicle
- Real Owner Stories
- 2008-2017 Buick Enclave 3.6L V6
- Related OBD-II Codes
- Frequently Asked Questions
- 🎟️ Get 5% Off