
P0520 on 2011-2019 Ford Explorer: Engine Oil Pressure Sensor Circuit Malfunction Guide
P0520 on a 2011-2019 Ford Explorer most often indicates a faulty engine oil pressure sensor (switch) or a wiring issue. It's a common and relatively inexpensive DIY fix, with the genuine Motorcraft part (SW-8368 for the 3.5L V6) costing between $18-$48. Do not drive until actual oil pressure is verified with a mechanical gauge.
- Do not drive the vehicle with a P0520 code until you have verified the actual engine oil pressure with a mechanical gauge.
- The most common cause is a failed, inexpensive oil pressure sensor, often confirmed by finding oil inside its electrical connector.
- Always check your oil level first; it's the simplest check and can sometimes be the root cause.
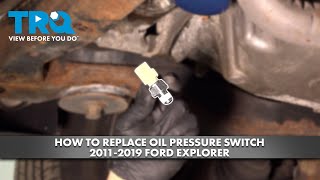
- For the 3.5L V6, the sensor is in a tight spot behind the oil filter, requiring a 21mm deep socket with a swivel for access from below.
- Consider using the OEM Motorcraft sensor, as some owners report issues with aftermarket parts.
What's Unique About the 2011-2019 Ford Explorer
For the fifth-generation Ford Explorer (2011-2019), the P0520 code is a fairly common issue that typically points directly to the failure of the oil pressure sensor, which functions more like a simple on/off switch. These sensors are known to fail over time, either by leaking oil internally through the sensor body and into the electrical connector, or by simply failing electrically. Unlike some other manufacturers who had specific TSBs for this code due to faulty sensor batches, Ford's issues seem to be more related to normal wear and tear. The location of the sensor, often tucked near the oil filter housing and alternator, can make it susceptible to oil and heat damage over the years.
Symptoms You May Notice
- Check Engine Light is on
- Oil pressure warning light on the dashboard is illuminated or flickering
- Oil pressure gauge reads zero, is stuck in one position, or fluctuates wildly
- In some cases, no symptoms other than the Check Engine Light will be present.
- In rare cases of actual low oil pressure, you may hear engine knocking or notice poor performance.
- Replacing the oil pump before verifying actual oil pressure with a mechanical gauge.
- Replacing the PCM without thoroughly testing the sensor and wiring circuit first.
- Replacing the sensor with a cheap aftermarket part that is not calibrated correctly, causing the code to persist. Some owners report needing to use the OEM Motorcraft part to resolve the issue.
Most Likely Causes
- Faulty Engine Oil Pressure Sensor/Switch 🔴 High Probability The sensor is a common failure point due to age, heat cycles, and a known tendency for internal oil leaks through the sensor body, which contaminates the electrical connector.
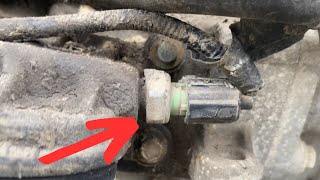
How to confirm: After verifying oil level, inspect the sensor's electrical connector for the presence of engine oil. If oil is found inside the connector, the sensor has failed internally and must be replaced. If no oil is present, testing the sensor's circuit for proper voltage and resistance is the next step. However, given the low cost of the part, replacement is often the most practical diagnostic step.
Typical fix: Replace the engine oil pressure sensor and clean the electrical connector thoroughly with electrical contact cleaner. Replace the pigtail connector if it is oil-fouled or damaged.
Est. part cost: $18-$48 - Damaged Wiring or Electrical Connector 🟡 Medium Probability The sensor's location near the oil filter and exhaust components exposes its wiring to heat, oil, and vibration, leading to brittle insulation, corrosion, or loose connections over time.
How to confirm: Visually inspect the wiring harness and connector leading to the oil pressure sensor for any signs of fraying, melting, corrosion, or oil contamination. Wiggle the connector with the engine running to see if the oil light flickers or the gauge reading changes, indicating a loose connection.
Typical fix: Repair the damaged section of wiring or replace the pigtail connector.
Est. part cost: $10-$30 - Low Engine Oil Level or Dirty/Incorrect Oil ⚪ Low Probability This is not specific to the vehicle but a general cause. If oil is extremely low, sludged, or the wrong viscosity, it can cause intermittent low pressure, but this will typically set other codes like P0524.
How to confirm: Check the engine oil dipstick for proper level and condition. If the oil is low, milky, or very sludgy, this is your issue.
Typical fix: Perform an oil and filter change using the correct viscosity oil specified for your engine. Address the cause of the oil loss or contamination.
Est. part cost: $40-$80
Rare But Worth Checking
- Failing Oil Pump or Clogged Oil Passages: This is a major mechanical failure. If you've confirmed with a mechanical gauge that the oil pressure is genuinely low, the problem is internal to the engine. This is rare but catastrophic.
- Faulty Powertrain Control Module (PCM): → Shop Engine Control Module (ECM) A PCM failure is extremely rare. This should only be considered after all other possibilities, including the sensor, wiring, and actual oil pressure, have been exhaustively ruled out.
Diagnosis Steps
- Check the engine oil level and condition. Top off or change if necessary.
- Scan for any other related trouble codes. Address those first if they are present.
- CRITICAL STEP: Connect a mechanical oil pressure gauge to the engine and verify the actual oil pressure. Compare the reading to Ford's specifications for your specific engine at idle and higher RPMs. If pressure is good, the problem is in the sensor circuit. If pressure is low, you have a serious mechanical issue that needs immediate attention.
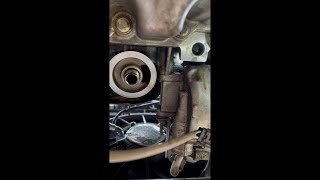
- Locate the oil pressure sensor. On the 3.5L V6, it is typically found right behind/above the oil filter housing. 🎬 Watch: 3.5L EcoBoost oil pressure sensor replacement walkthrough On the 2.0L EcoBoost, it is on the front of the engine block, passenger side, above the oil filter. Disconnect the 🎬 See: 2.0L EcoBoost oil pressure switch location and replacement electrical connector.
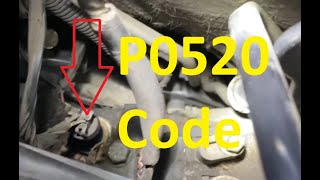
- Inspect the sensor's electrical connector and the sensor itself for any signs of engine oil. If oil is present, the sensor has failed internally and must be replaced.
- If no oil is found, inspect the wiring for damage, corrosion, or loose pins.
- If the wiring looks good and actual oil pressure is confirmed to be okay, the most likely culprit is the oil pressure sensor itself. Given its low cost, replacing it is the most common and logical fix.
- After replacing the sensor, clear the trouble codes and perform a drive cycle to see if the code returns.
Parts You'll Likely Need
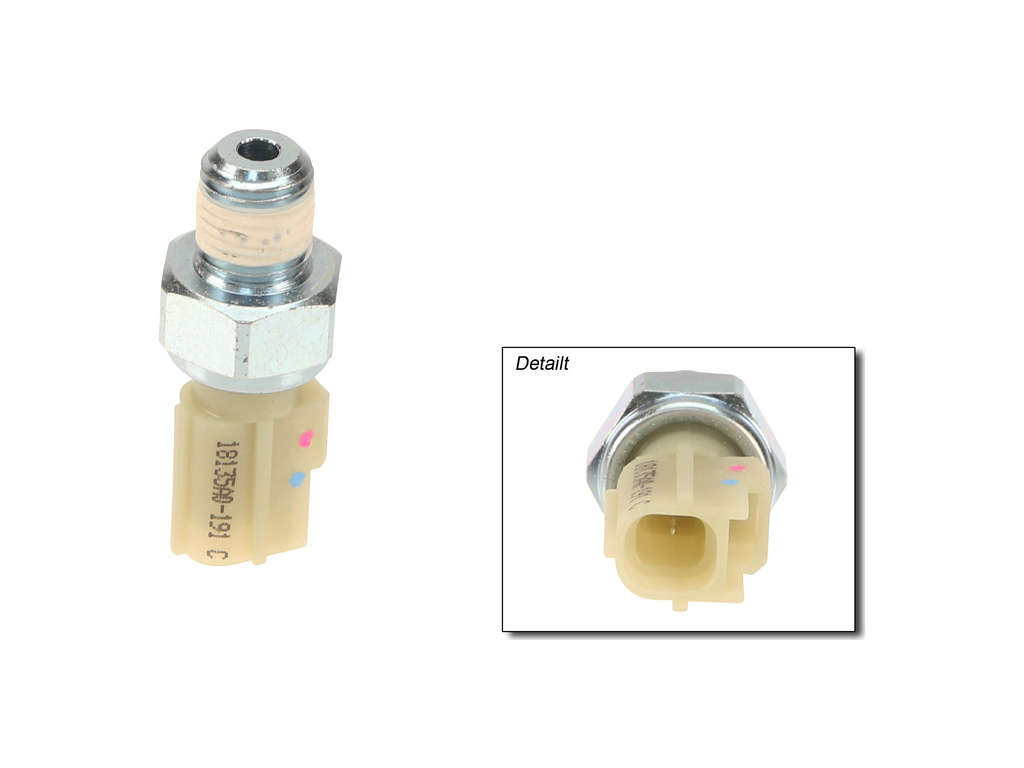
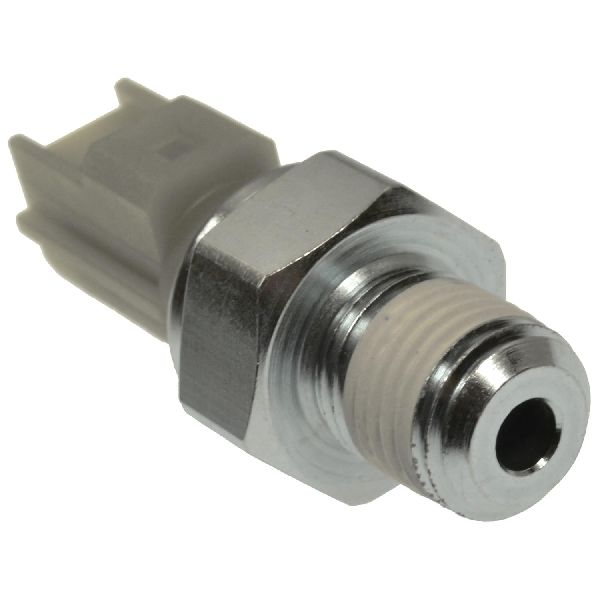
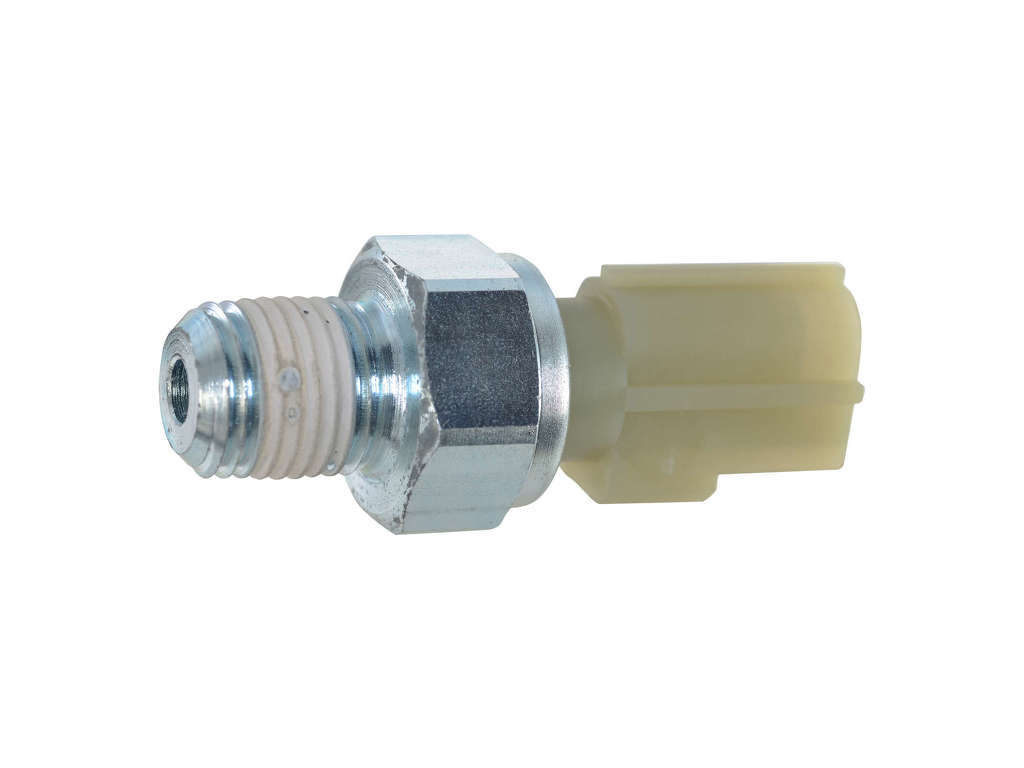
- Engine Oil Pressure Sensor/Switch
(OEM #Motorcraft SW-8368 (for 3.5L V6, verify for your specific engine))— This is the most common failure point for the P0520 code on this vehicle. They can fail electrically or develop internal leaks.
Trusted brands: Motorcraft, Standard Motor Products (SMP), Delphi
OEM price range: $25-$48
Aftermarket price range: $10-$35
Related Codes That Often Appear With This One
- P0521 — Indicates Engine Oil Pressure Sensor/Switch Performance, suggesting the sensor's readings are erratic or out of the expected range, often caused by the same internal sensor leak.
- P0522 — Indicates Engine Oil Pressure Sensor/Switch Circuit Low, pointing to a signal voltage that is below the specified threshold, which can happen if the sensor shorts internally.
- P0523 — Indicates Engine Oil Pressure Sensor/Switch Circuit High, pointing to a signal voltage that is above the specified threshold, which can happen with an open circuit or certain sensor failures.
Platform-Specific Known Issues
- The oil pressure sensor on the 3.5L V6 is located in a tight spot right behind the oil filter, near the A/C compressor. Access is challenging and typically requires a 21mm or 13/16 inch deep socket and a swivel or universal joint. It is easiest to access from underneath the vehicle after removing the splash shield.
- Owner experiences confirm that using a non-OEM sensor can sometimes fail to fix the issue. One owner reported having to replace an aftermarket sensor with a genuine Motorcraft part and cleaning the connector to finally resolve the code.
Mechanic-Grade Diagnostic Values
- Mechanical Oil Pressure (General Spec) — expected: 20-25 PSI at hot idle, 45-70 PSI at 2,500 RPM.. Failure: Pressure significantly below these ranges indicates a mechanical engine problem (e.g., oil pump, worn bearings), not a sensor circuit issue.
- Mechanical Oil Pressure (3.5L EcoBoost w/ Two-Stage Pump) — expected: Approx. 20-25 PSI at idle/low-load (low pressure stage) and 50-60 PSI above ~2000 RPM/high-load (high pressure stage).. Failure: Failure to switch to high pressure stage or pressure below 20 PSI at idle points to a mechanical or control issue.
- Sensor Reference Voltage (Key On, Engine Off) — expected: Approx. 5.0 Volts at the sensor connector's reference wire.. Failure: No voltage or low voltage suggests a problem with the PCM or the wiring between the PCM and the sensor.
- Sensor Ground Circuit Resistance — expected: Near 0 Ohms resistance between the ground pin at the connector and a known good chassis ground.. Failure: High resistance (OL) indicates an open or corroded ground wire.
- Sensor Signal (for switch-type sensor) — expected: The signal wire should switch between 0V and 5V (or vice-versa) when the engine starts and builds oil pressure.. Failure: A signal that is stuck high, low, or shows an intermediate voltage indicates a failed sensor or wiring short.
Scan Tool Commands That Help
- Ford IDS (or equivalent high-end scanner): Live Data PID Monitoring: 'EOP_SW' (Engine Oil Pressure Switch State) — Use this to verify if the PCM is seeing the switch change state (e.g., from 'Low' to 'OK' or 'Not Low') when the engine is started. If the mechanical pressure is good but the PID doesn't change, it confirms the fault is in the sensor or wiring, not the PCM's interpretation.
Wiring & Ground Locations
- Oil Pressure Sensor Connector — On the sensor body, located between the alternator and oil filter housing on the 3.5L V6, or on the front passenger side of the block on the 2.0L EcoBoost.. This connector is a primary failure point. It can become saturated with oil from an internally leaking sensor, or the pins can corrode, causing the P0520 circuit fault. The pigtail (Ford P/N 3U2Z-14S411-MHA) may need replacement if damaged.
- G104 (Example Engine Bay Ground) — Typically located on the right front corner of the engine compartment.. While the specific ground for the EOP sensor circuit may vary, a corroded or loose main engine bay ground like G104 can cause various sensor circuit faults. Inspecting major grounds in the vicinity is a valid diagnostic step if a direct circuit test points to a grounding issue.
Real Owner Repair Stories
- Reddit user in r/FordExplorer (2017 Ford Explorer) — Low engine oil pressure warning light, P0520 code.
❌ Tried (didn't work) Replacing the oil pressure sensor with a non-Motorcraft (aftermarket) part.
✅ What actually fixed it The issue was resolved only after replacing the sensor with a genuine OEM Motorcraft part and thoroughly cleaning the oil-fouled electrical connector with electrical contact cleaner. - YouTube video by 'TUTORIALS & REPAIRS' (2011-2019 Ford Explorer (specific year not stated, 3.5L engine)) — Low engine oil pressure warning on the dashboard.
✅ What actually fixed it The video documented that the original sensor was leaking oil through its body and into the electrical connector. Replacing the faulty sensor and cleaning the connector resolved the warning light. - Ford Truck Enthusiasts Forum user (2014 F-150 with 3.5L EcoBoost (same engine family), 179k miles) — Low Oil Pressure warning at idle, loss of power, and codes P0012, P0022, P0217.
❌ Tried (didn't work) Owner driving the vehicle to a dealer.
✅ What actually fixed it This was not a sensor issue. The dealer performed a mechanical gauge test and found the oil pressure was 20 PSI at warm idle, below the 30 PSI specification. This indicated a true mechanical failure, leading to a recommendation for engine replacement. This serves as a critical counter-example.
When the Usual Fixes Don't Work
- While the vast majority of P0520 codes on the 5th Gen Explorer are resolved by replacing the sensor and/or pigtail, it must not be assumed. A real-world case on a 3.5L EcoBoost with an oil pressure warning involved a dealer confirming with a mechanical gauge that the pressure was genuinely low (20 PSI vs. a 30 PSI spec at idle). This led to a diagnosis of a major mechanical failure requiring an engine replacement, completely bypassing the sensor as the root cause. This underscores the absolute necessity of the mechanical gauge test before replacing any parts.
OEM Part Supersession History
Motorcraft SW-8368→GC3Z-9278-B— Part number consolidation and potential design revision by Ford.
Heads up: SW-8368 also replaces older part numbers 1U5Z-9278-DA, 6U5Z-9278-D, and SW-6357. While the new part GC3Z-9278-B is the official replacement, SW-8368 is still widely sold and fits.CM5Z-9278-A→CM5Z-9D290-B (listed as an alternate OEM number)— Unspecified.
Heads up: The existence of different base part numbers (BB5Z, CM5Z) for the same generation suggests that verifying the correct part by VIN is critical, as there may be differences between engine types or model years.N/A→3U2Z-14S411-MHA— This is the service part number for the pigtail connector harness.
Heads up: This is a common repair part for when the original connector becomes oil-soaked, brittle, or corroded.
Model Year Variations Within This Range
- 2011-2019 (3.5L V6 / 3.5L EcoBoost): The oil pressure sensor is located in a difficult-to-access position between the alternator and the oil filter housing, requiring removal of the engine cover and often access from below.
- 2011-2015 (2.0L EcoBoost): The oil pressure sensor is in a more accessible location on the front of the engine block, on the passenger side, just above the oil filter.
- Mid-generation onward (especially EcoBoost models): Some engines may be equipped with a two-stage variable pressure oil pump. This system varies oil pressure based on engine RPM and load, with distinct low and high pressure modes. This is a critical diagnostic consideration, as expected pressure is not static.
Diagnostic Flowchart
Other Known Issues on This Vehicle
Issues unrelated to this code that are worth knowing about as an owner of this generation:
- Internal Water Pump Failure (3.5L V6) 🔴 High — Common after 80,000-120,000 miles. A wear item, but its failure is catastrophic due to its location. (Ref: No recall, but subject of a dismissed class-action lawsuit. When the internal pump fails, it leaks coolant directly into the engine oil, which can quickly lead to complete engine seizure.)
- Power Transfer Unit (PTU) Failure (AWD Models) 🔴 High — Can occur as early as 60,000 miles. Caused by the 'lifetime' fluid overheating due to proximity to the exhaust. (Ref: TSB 19-2017 was issued for a fluid leak from the PTU seal. Failure symptoms include a burning smell, grinding noises, and eventual seizure of the unit.)
- Exhaust Odor / Carbon Monoxide in Cabin 🔴 High — Common on 2011-2017 models, leading to numerous complaints and an NHTSA investigation. (Ref: Ford issued multiple TSBs (e.g., TSB 16-0166) and a Field Service Action (17B25) to seal body seams and address the issue, but no full recall was issued for civilian models.)
- Coolant Intrusion into Cylinders (2.3L EcoBoost) 🔴 High — Can occur at various mileages (reports from 30k to 120k miles) due to a design flaw in the engine block/head. (Ref: TSB 19-2346 and 22-2229 address this issue on the related 2.0L engine, but the 2.3L is widely known to suffer the same failure, often requiring a long block replacement.)
- Cracked/Bubbling Aluminum Hood 🟡 Low — Cosmetic issue common on earlier 5th gen models (2011-2015) where corrosion forms under the paint on the hood's leading edge. (Ref: Subject of a class-action lawsuit but no official recall.)
- Failing Throttle Body 🟠 Medium — Common issue that can cause the vehicle to enter 'limp mode' with sudden loss of power.
Used vs. New Parts: Buying Guide for This Vehicle
When a used part is the smart pick: For this repair, a used part is NOT recommended for the sensor itself. It is a low-cost electronic component that fails from heat and internal wear; a used part has unknown remaining life. A used pigtail connector from a low-mileage donor vehicle could be acceptable if a new one is not readily available.
Donor-vehicle mileage cap: roughly under 50000 miles for the part to have meaningful remaining life.
What to inspect on the donor part:
- For a pigtail connector: Wires must be flexible, not brittle or stiff.
- Connector housing must be free of cracks.
- Locking tab must be present and engage with a click.
- Pins inside the connector must be clean and free of any green or white corrosion.
OEM-only on this vehicle (don't cheap out):
- Engine Oil Pressure Sensor/Switch
Brands owners have reported issues with on this vehicle:
- Generic or unbranded 'white-box' sensors. Forum reports indicate these can be improperly calibrated or have a high premature failure rate, often causing the P0520 code to return shortly after repair.
Real Owner Stories
Aggregated from forums and TSBs cited above. Mileages and costs reflect what owners reported in those sources.
2016 Ford Explorer
Symptoms: The low-pressure warning light appeared on the dashboard.
What fixed it: Replaced the leaking oil pressure sensor/switch with an OEM Motorcraft part (SW-8368) and cleaned the electrical connector.
Source hint: Reddit r/FordExplorer - Thread titled '2016 Low Engine Oil Pressure.'
2011-2019 Ford Explorer 3.5L V6
Symptoms: Check Engine Light on with P0520; oil found inside the electrical connector during inspection.
What fixed it: Replaced the engine oil pressure sensor and cleaned the electrical connector with electrical contact cleaner.
Source hint: vehicle_specific_issues /
Related OBD-II Codes
Frequently Asked Questions
Where is the oil pressure sensor located on my 2011-2019 Ford Explorer with the 3.5L V6?
What tools do I need to replace the oil pressure switch on a 3.5L Explorer?
Should I use an aftermarket sensor or a genuine Ford part for P0520?
Where is the oil pressure sensor located on the 2.0L EcoBoost Explorer?
My oil light is flickering but my oil level is fine; what should I check first?
Is there a TSB for the exhaust smell in my 2011-2017 Explorer?
Helpful Videos
![How to Fix P0520 Engine Code in 4 Minutes [2 DIY Methods / Only $6.92]](https://img.youtube.com/vi/BgVFr_19gZY/mqdefault.jpg)
We Have This Part in Stock


The information in this article is provided for general reference and educational purposes only. Vehicle specifications, procedures, and part compatibility can vary by production date, trim level, and region. Always consult your vehicle's factory service manual and verify part numbers before purchasing or performing repairs. Safety-critical components such as airbags, seat belts, and braking systems should be installed by a qualified professional.
- Ford Explorer:
- 🧭 Diagnostic Flowchart
- 🎬 Helpful Videos
- 🛍️ Shop This Part
- What's Unique About the 2011-2019 Ford Explorer
- Symptoms You May Notice
- Most Likely Causes
- Rare But Worth Checking
- Diagnosis Steps
- Parts You'll Likely Need
- Related Codes That Often Appear With This One
- Platform-Specific Known Issues
- Mechanic-Grade Diagnostic Values
- Scan Tool Commands That Help
- Wiring & Ground Locations
- Real Owner Repair Stories
- When the Usual Fixes Don't Work
- OEM Part Supersession History
- Model Year Variations Within This Range
- Other Known Issues on This Vehicle
- Used vs. New Parts: Buying Guide for This Vehicle
- Real Owner Stories
- 2016 Ford Explorer
- 2011-2019 Ford Explorer 3.5L V6
- Related OBD-II Codes
- Frequently Asked Questions
- 🎟️ Get 5% Off