
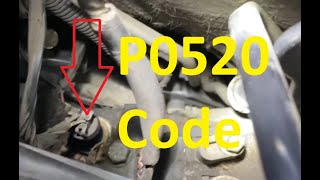
P0520 on 2011-2019 Ford Explorer 3.5L EcoBoost: Engine Oil Pressure Sensor Circuit Fixes
P0520 on a 2011-2019 Ford Explorer almost always points to a faulty engine oil pressure sensor/switch or its wiring. The most common fix is replacing the sensor, which is a relatively inexpensive part and a manageable DIY job for those comfortable working in tight spaces. Oil leaking from the sensor and contaminating the electrical connector is a very common failure mode.
- P0520 points to an electrical fault in the oil pressure sensor circuit, not necessarily a mechanical oil pressure problem.
- The most common cause on the 3.5L EcoBoost is a failed sensor that leaks oil into its own electrical connector.
- Always verify actual oil pressure with a mechanical gauge before performing major repairs.
- Replacing the sensor and the connector pigtail together is the most robust repair.
What's Unique About the 2011-2019 Ford Explorer
On the 3.5L EcoBoost engine, the oil pressure sensor is a known common failure point. It is located in a tight spot on the engine block, tucked behind the alternator and above the oil filter housing. Due to high heat and vibration in this area, the sensor can fail internally and leak oil through its body, which contaminates the electrical connector and causes the P0520 code. Some owners have also noted that its location below the oil fill cap makes it susceptible to contamination from sloppy oil changes.
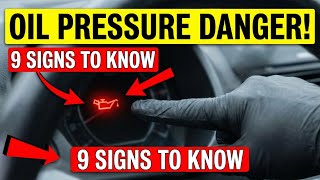
Symptoms You May Notice
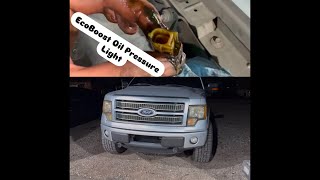
- Check Engine Light is on.
- Oil pressure warning light is on or flickering.
- Oil pressure gauge reads zero or fluctuates erratically.
- In some cases, the engine may enter a reduced power "limp mode".
- Engine may stall or run poorly.
- Audible chimes or "Low Oil Pressure" message on the instrument cluster display.
- Replacing the oil pump when the issue is just a simple sensor or wiring fault.
- Assuming the engine is failing without first verifying actual oil pressure with a mechanical gauge.
- Replacing the sensor but failing to replace the oil-soaked connector pigtail, leading to a quick return of the code.
Most Likely Causes
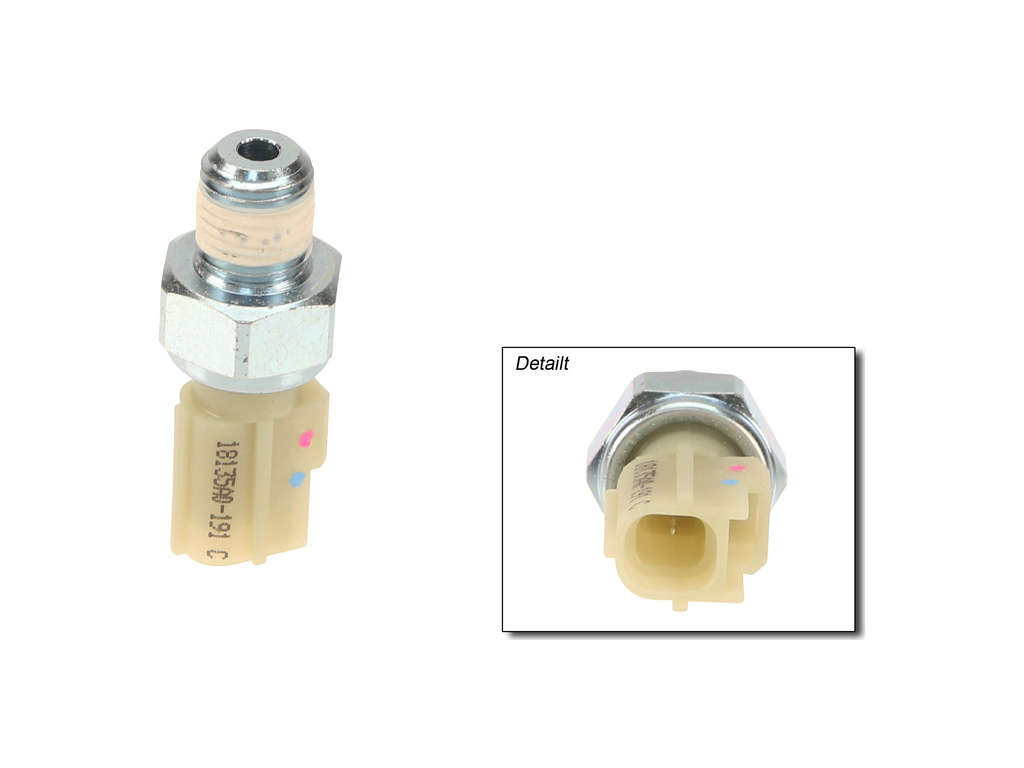
- Faulty Engine Oil Pressure Sensor/Switch 🔴 High Probability The sensor is located in a high-heat area of the engine bay and is a known failure item on this platform. They can leak oil internally through the connector, causing a bad reading or short circuit.
How to confirm: Visually inspect the sensor for oil leakage, especially inside the electrical connector after unplugging it. Test the sensor's voltage output with a multimeter; it should be around 0.5V with the key on and engine off. The definitive test is to compare the sensor's reading to a mechanical oil pressure gauge.
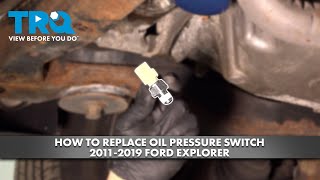
Typical fix: Replace the engine oil pressure sensor. This is a common DIY repair, though access is tight. Some owners find it easier to access from below after removing the splash shield.
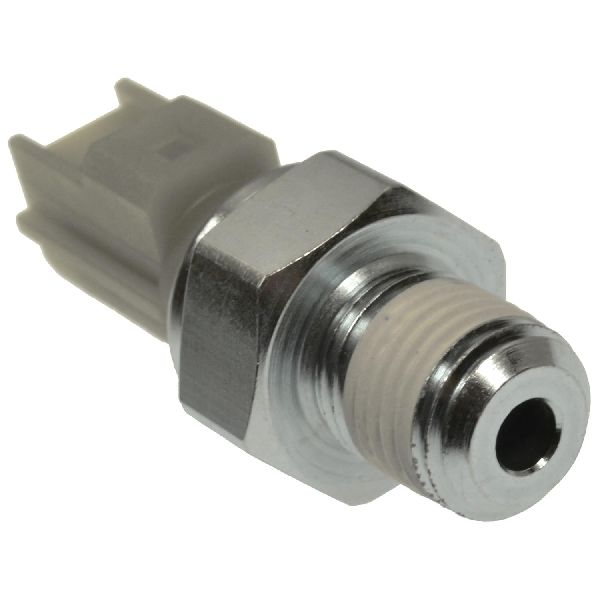
Est. part cost: $20-$55 - Damaged Wiring or Connector 🟡 Medium Probability The wiring harness to the sensor is exposed to intense heat and vibration, which can cause wires to become brittle, cracked, or corroded over time. Oil leaking from a failed sensor can also saturate and ruin the connector.
How to confirm: Visually inspect the wiring harness leading to the oil pressure sensor for any signs of cracking, melting, or corrosion. Check for oil saturation inside the connector. Wiggle the connector with the engine running to see if the oil pressure gauge reading flickers.
Typical fix: Repair the damaged section of the wiring or replace the connector pigtail. It is highly recommended to replace the pigtail if it is contaminated with oil.
Est. part cost: $15-$40 - Low Engine Oil Level ⚪ Low Probability While the code is for an electrical fault, extremely low oil levels can sometimes cause erratic pressure readings that the PCM may interpret as a circuit fault. This engine is not known for excessive oil consumption, but leaks can occur.
How to confirm: Check the engine oil level using the dipstick. Ensure the level is between the MIN and MAX marks.
Typical fix: Top off or change the engine oil to the correct level using the manufacturer-specified oil (SAE 5W-30 for the 3.5L EcoBoost).
Est. part cost: $50-$90 for a full oil change
Rare But Worth Checking
- Failing Oil Pump: While rare, a failing oil pump can cause genuine low oil pressure, which might trigger various oil-related codes. This is a major mechanical issue that would likely be accompanied by engine knocking noises.
- Clogged Oil Filter or Passages: → Shop Engine Oil Filter Adapter Using a low-quality oil filter or extending oil change intervals can lead to sludge and blockages, restricting oil flow and potentially causing pressure reading issues.
- Faulty Powertrain Control Module (PCM): → Shop Engine Control Module (ECM) This is extremely rare, but the PCM's internal circuits that process the oil pressure signal can fail. This should only be considered after all other possibilities have been exhausted.
Diagnosis Steps
- Check the engine oil level and condition. Top off or change if necessary.
- Scan the vehicle for any other trouble codes that may be present.
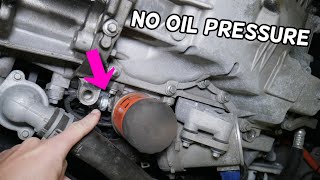
- Visually inspect the oil pressure sensor and its electrical connector for leaks, damage, or corrosion. The sensor is located on the engine block, between the alternator and oil cooler. Access may be easier from below.
- CRITICAL STEP: Connect a mechanical oil pressure gauge to the engine to verify the actual oil pressure. This will determine if you have a real pressure problem or just a sensor/circuit issue. This is the only way to be 100% sure the engine is healthy.
- If mechanical pressure is good, the problem lies in the electrical circuit. Unplug the sensor and inspect the connector for oil saturation. If oil is present, the sensor has failed internally and both the sensor and connector pigtail should be replaced.
- If the connector is dry, test the sensor's voltage and resistance with a multimeter. Check for a 5-volt reference signal and a good ground at the connector.
- Inspect the wiring harness for continuity and shorts. Pay close attention to areas where the harness might rub against engine components.
- If the sensor and wiring test good, the issue may be with the PCM, but this is highly unlikely.
Parts You'll Likely Need
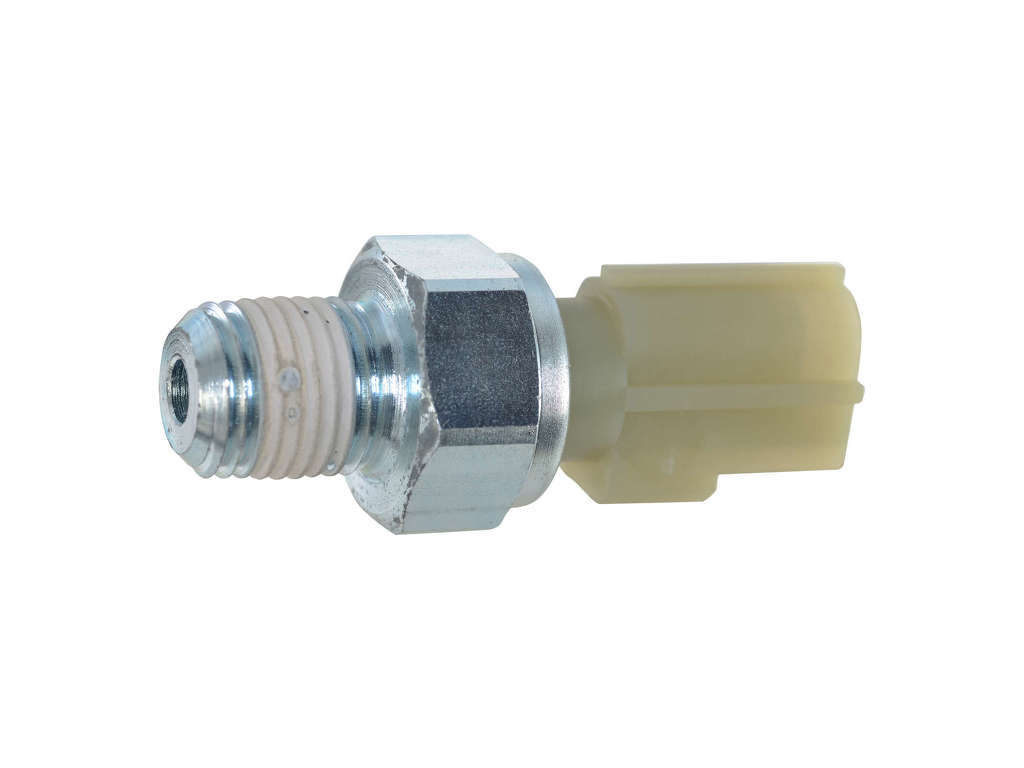
- Engine Oil Pressure Sensor/Switch
(OEM #SW-8368)— This is the most common cause of P0520. The original sensor is prone to failure from heat and vibration, often leaking oil through the connector and causing an electrical fault.
Trusted brands: Motorcraft
OEM price range: $20-$35
Aftermarket price range: $15-$30 - Oil Pressure Sensor Connector Pigtail
(OEM #WPT-1135)— If the original sensor has leaked oil into the connector, the plastic and seals can be damaged, and the terminals will have a poor connection. Replacing the pigtail ensures a clean, secure connection to the new sensor. Simply cleaning the old one is often not a permanent fix.
Trusted brands: Motorcraft
OEM price range: $25-$75
Aftermarket price range: $15-$25
Related Codes That Often Appear With This One
- P0521 — This code indicates 'Engine Oil Pressure Sensor/Switch Range/Performance,' suggesting the sensor's readings are out of the expected range, often appearing alongside P0520 during sensor failure.
- P0522 — This code for 'Engine Oil Pressure Sensor/Switch Low' can be triggered if the circuit shorts to ground, which is a common failure mode for the sensor or its wiring.
- P0523 — This code for 'Engine Oil Pressure Sensor/Switch High' can be triggered if the signal wire has an open circuit or shorts to power.
Platform-Specific Known Issues
- Tight Access to Sensor: The sensor is located in a difficult-to-reach spot behind the alternator. While some mechanics remove the alternator for access, many DIYers have successfully replaced it from underneath the vehicle by removing the splash shield, which provides a clearer line of sight.
- Tool Size Discrepancy: Owners have reported that the original factory sensor may require a different socket size (e.g., 13/16") than the replacement Motorcraft part (e.g., 21mm). It is wise to have both a deep socket and potentially a crow's foot wrench available.
Mechanic-Grade Diagnostic Values
- Sensor 5V Reference Voltage (VREF) — expected: 4.8 - 5.2 Volts with key on, engine off.. Failure: Voltage significantly lower than 5V or absent suggests a wiring issue or a problem with the PCM.
- Sensor Signal Voltage (Live Data) — expected: Typically ranges from ~0.5V (low pressure) to ~4.5V (high pressure), varying with engine RPM.. Failure: A fixed voltage that does not change with RPM, or a voltage outside the expected range, points to a faulty sensor or wiring issue.
- Sensor Circuit Resistance — expected: Below 10.0 ohms for each of the three sensor circuits between the sensor connector and the PCM harness connector.. Failure: Resistance above 10.0 ohms indicates an open or high resistance in the wiring harness that requires repair.
- Mechanical Oil Pressure (at operating temperature) — expected: Minimum 20 psi at 1500 RPM.. Failure: Pressure significantly below 20 psi at 1500 RPM indicates a mechanical fault like a failing oil pump or worn bearings, not a sensor circuit issue.
Wiring & Ground Locations
- Oil Pressure Sensor Connector — On the engine block, tucked between the back of the alternator and the oil cooler/filter housing.. This 3-wire connector is the primary point of failure due to heat and oil contamination from the sensor leaking internally. Inspecting for oil inside this connector is a critical diagnostic step.
- G104 — Engine support ground, typically located on the right front corner of the engine compartment.. This is a major engine ground point. While not exclusive to the oil pressure sensor, a poor connection at G104 can cause erratic readings and various sensor circuit codes from the PCM, including P0520.
Real Owner Repair Stories
- Ford F150 Forum (2017 Ford F-150 3.5L EcoBoost, 19,442 miles) — Sudden "Low Engine Oil Pressure" message on the dashboard; no unusual engine noises.
❌ Tried (didn't work) An initial replacement of the oil pressure sensor by the dealership did not resolve the issue.
✅ What actually fixed it The dealer found a fault within the main engine wiring harness that was causing the incorrect reading. Repairing the harness resolved the code.
OEM Part Supersession History
SW-8368→GC3Z-9278-B— Part number has been updated by Ford. This is common for parts that are revised or sourced from a new supplier.
Heads up: The new part number GC3Z-9278-B is the correct service replacement for SW-8368.BU2Z-14S411-JA→WPT-1135— WPT-1135 is the service pigtail kit number corresponding to the original connector part number.
Model Year Variations Within This Range
- 2011-2012 vs 2013-2016: The Gen1 3.5L EcoBoost engine received updates in 2013, including larger turbochargers and a switch from a Hitachi to a Bosch direct injection fuel system. While the oil pressure sensor itself remained largely the same, surrounding components and engine management parameters may differ slightly.
- 2017-2019: Starting in 2017, the F-150 (a sister platform) received the Gen2 3.5L EcoBoost, which was a significant redesign. While the Explorer Sport/Platinum continued with the Gen1-based design, some running changes or part revisions from the Gen2 program may have been incorporated in later model years. The Gen2 engine featured a dual-injection system (port and direct) and a variable-pressure oil pump, making its oil pressure strategy different.
Diagnostic Flowchart
Other Known Issues on This Vehicle
Issues unrelated to this code that are worth knowing about as an owner of this generation:
- Internal Water Pump Failure 🔴 High — Common after 80,000-120,000 miles. A major design flaw where the pump is driven by the timing chain. When it fails, it can leak coolant into the engine oil, causing catastrophic engine failure. (Ref: Subject of class-action lawsuits, but no universal recall was issued in the US.)
- Power Transfer Unit (PTU) Overheating/Failure 🔴 High — Common on AWD models. The PTU fluid overheats due to proximity to the exhaust, breaks down, and leads to gear failure. Symptoms include a burning smell, grinding noises, and leaks. (Ref: Ford considered the fluid 'lifetime,' which was incorrect. Frequent fluid changes (every 30k miles) are recommended for prevention.)
- Electronic Throttle Body Malfunction 🟠 Medium — Common on 5th generation Explorers. Can cause sudden loss of power, hesitation, and the vehicle entering 'limp mode'. (Ref: Often triggers codes P2111 or P2112.)
- Suspension Component Wear 🟠 Medium — Premature wear of rear suspension toe links, ball joints, and control arm bushings is common. (Ref: A recall was issued for rear toe link fractures on 2011-2017 models.)
- Carbon Monoxide / Exhaust Fumes in Cabin 🔴 High — A well-documented issue, particularly on Police Interceptor Utility models but also reported by civilian owners. Can be caused by cracked exhaust manifolds or poor body sealing. (Ref: Ford initiated service programs to address the issue, but complaints persist.)
Used vs. New Parts: Buying Guide for This Vehicle
When a used part is the smart pick: For this repair, a used part is only recommended for the connector pigtail (WPT-1135). If you can find a donor vehicle at a junkyard with a clean, non-brittle, and oil-free connector, it can be a cost-effective alternative to a new pigtail.
Donor-vehicle mileage cap: roughly under 80000 miles for the part to have meaningful remaining life.
What to inspect on the donor part:
- For a pigtail: Inspect for any signs of oil saturation, which indicates the donor vehicle's sensor was also leaking.
- Check if the plastic is brittle or cracked from heat cycles.
- Ensure the locking tab is intact and functional.
- Cut the wires as far back from the connector as possible to leave plenty of room for splicing.
OEM-only on this vehicle (don't cheap out):
- Engine Oil Pressure Sensor (SW-8368 / GC3Z-9278-B)
Aftermarket brands forum-validated for this vehicle:
- Standard Motor Products (for connector pigtail)
Brands owners have reported issues with on this vehicle:
- Unnamed or 'white-box' oil pressure sensors. Given the high failure rate of the original part and the critical function it performs, using a non-reputable aftermarket sensor is a significant risk. Stick with Motorcraft for the sensor itself.
Real Owner Stories
Aggregated from forums and TSBs cited above. Mileages and costs reflect what owners reported in those sources.
2016 Ford Explorer Sport 3.5L EcoBoost
Symptoms: The low oil pressure light was coming on. Upon inspection, there was oil contamination found inside the electrical connector of the sensor.
What fixed it: Replaced the oil pressure sensor. Note that the new Motorcraft sensor required a 21mm socket, whereas the factory one was 13/16".
Source hint: YouTube - "Ford Explorer Sport Oil Pressure Sensor Replacement - 3.5 EcoBoost" by user "zbestwun"
2011-2017 Ford F-150 3.5L EcoBoost
Symptoms: Low oil pressure warning. The owner emphasized the importance of listening for actual engine noise to determine if the failure was mechanical or just a sensor fault.
What fixed it: Replacement of the oil pressure switch located near the oil filter and alternator.
Source hint: YouTube - "How to change the Oil Pressure Switch! (12th Gen F-150... 3.5 Ecoboost...)" by user "SmashingPunkFan"
Related OBD-II Codes
Frequently Asked Questions
Where is the oil pressure sensor located on my 3.5L EcoBoost Explorer?
Why is my oil pressure gauge fluctuating erratically even though my oil level is full?
Do I need a special tool to replace the sensor on my 2016 Explorer Sport?
Can I just clean the connector if I find oil inside it?
Could this code be related to the internal water pump issue on the 3.5L EcoBoost?
What is the correct oil type for my 3.5L EcoBoost V6 if I need to top it off?
Helpful Videos
We Have This Part in Stock


The information in this article is provided for general reference and educational purposes only. Vehicle specifications, procedures, and part compatibility can vary by production date, trim level, and region. Always consult your vehicle's factory service manual and verify part numbers before purchasing or performing repairs. Safety-critical components such as airbags, seat belts, and braking systems should be installed by a qualified professional.
- Ford Explorer:
- 🧭 Diagnostic Flowchart
- 🎬 Helpful Videos
- 🛍️ Shop This Part
- What's Unique About the 2011-2019 Ford Explorer
- Symptoms You May Notice
- Most Likely Causes
- Rare But Worth Checking
- Diagnosis Steps
- Parts You'll Likely Need
- Related Codes That Often Appear With This One
- Platform-Specific Known Issues
- Mechanic-Grade Diagnostic Values
- Wiring & Ground Locations
- Real Owner Repair Stories
- OEM Part Supersession History
- Model Year Variations Within This Range
- Other Known Issues on This Vehicle
- Used vs. New Parts: Buying Guide for This Vehicle
- Real Owner Stories
- 2016 Ford Explorer Sport 3.5L EcoBoost
- 2011-2017 Ford F-150 3.5L EcoBoost
- Related OBD-II Codes
- Frequently Asked Questions
- 🎟️ Get 5% Off