
P0521 on 2005-2012 Cadillac CTS: Oil Pressure Sensor Performance Causes and Fixes
This code usually means the oil pressure sensor has failed, you're using the wrong type of oil filter, or the small screen under the sensor is clogged. Replacing the sensor and screen is the most common fix. Expect to pay $40-$80 for the OEM part, and it's a moderately difficult DIY job due to its tight location requiring a special socket.
- P0521 on a 2005-2012 CTS is most often caused by a failed oil pressure sensor.
- Before replacing the sensor, verify you are using the correct ACDelco oil filter (PF48 is recommended over PF48E).
- Always replace the small filter screen located underneath the sensor at the same time.
- While it's usually an electrical/sensor fault, you must rule out a true low oil pressure condition to avoid severe engine damage.
What's Unique About the 2005-2012 Cadillac CTS

On this generation of Cadillac CTS with the 3.6L V6, the P0521 code is notoriously common. The issue is frequently caused by one of three things: the oil pressure sensor itself failing, the use of an incorrect aftermarket or 'E-core' oil filter, or sludge clogging the tiny filter screen located directly beneath the sensor. GM issued several Technical Service Bulletins (TSBs) about this, sometimes with conflicting advice on filters, adding to the confusion. The sensor is a very common failure point, often leaking oil into its own electrical connector or simply failing internally, leading to incorrect gauge readings (stuck at zero or max) and this specific trouble code.
Diagnostic Flowchart

Tap your situation to follow the diagnostic path that matches what you're seeing on this vehicle.
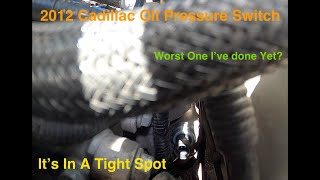
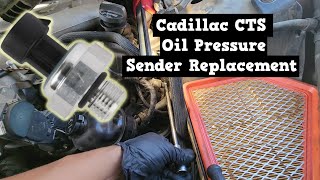
Generation note: This range covers the end of the first generation (2005-2007) with the LY7 engine and the beginning of the second generation (2008-2012) with the updated direct-injection LLT engine. 🎬 Watch: A complete walkthrough for replacing the oil pressure switch. The P0521 code is a common issue on all V6 engines (3.6L LY7, 3.0L LF1, 3.6L LLT) found in these generations. The physical location of the sensor and the diagnostic process are very similar across these years.
Symptoms You May Notice

- Check Engine Light is on
- Low Oil Pressure warning message on the Driver Information Center (DIC)
- Oil pressure gauge reading erratically (e.g., stuck at zero, maxed out at 100+ PSI, or fluctuating wildly)
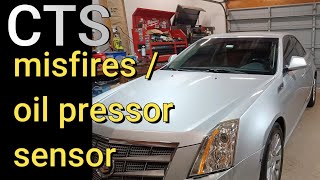
- In some cases, rough running or unusual engine noises (ticking, knocking) 🎬 Watch: Diagnosing a Cadillac CTS with misfires and oil pressure codes. if the problem is actual low oil pressure.
- On some GM vehicles, the Active Fuel Management (AFM) or Displacement on Demand (DOD) system may be disabled by the ECM as a precaution.
- Replacing the oil pump when the issue is only a faulty sensor, a clogged screen, or the wrong oil filter.
- Replacing the instrument cluster because the gauge is reading incorrectly.
- Assuming the engine is failing without first verifying actual oil pressure with a mechanical gauge.
Most Likely Causes

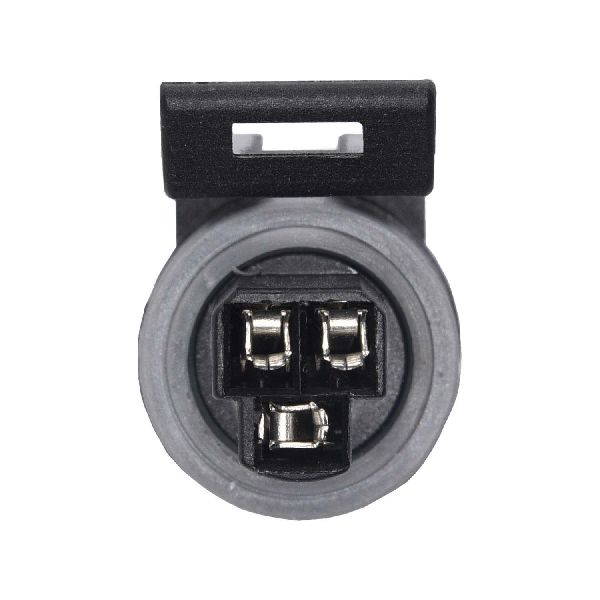
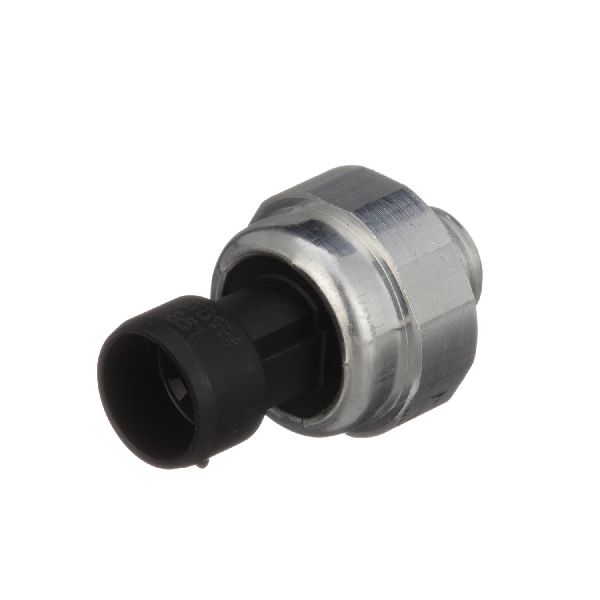
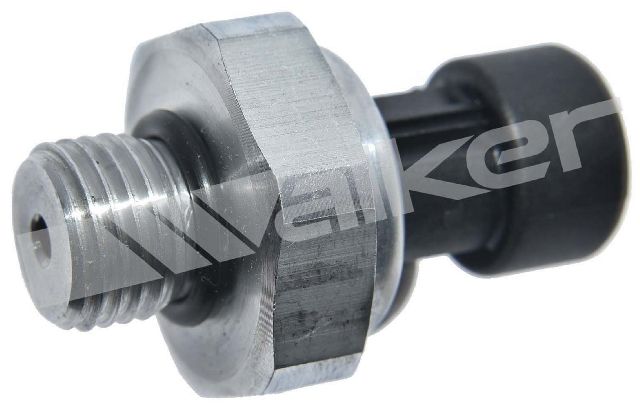
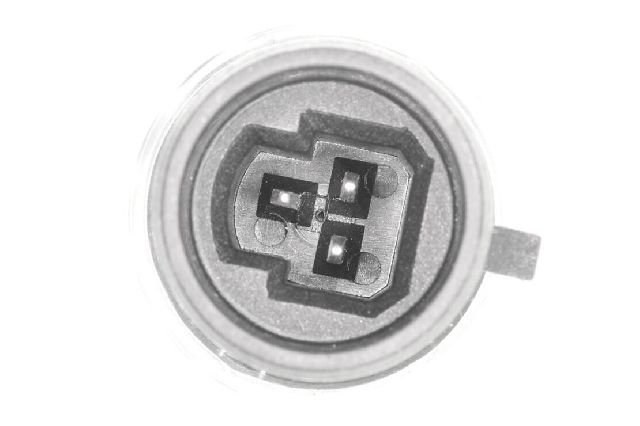
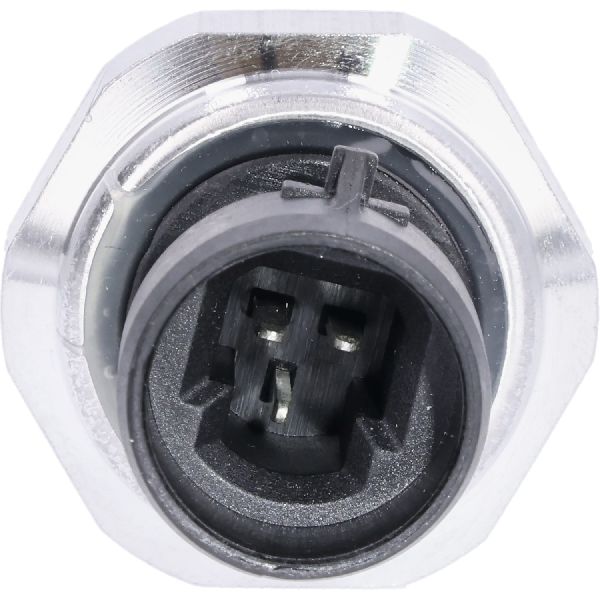
- Faulty Engine Oil Pressure Sensor 🔴 High Probability The sensor is a known high-failure item on these GM High Feature V6 engines. It is made of aluminum and plastic, located in a high-heat area, and can fail internally or leak oil through the body into the 3-pin electrical connector, causing a bad reading.
How to confirm: With the engine off, the gauge should read zero. If it reads high, the sensor is likely shorted. Unplug the sensor; if the gauge then drops to zero, the sensor is bad. The definitive test is to compare the sensor's reading on a scan tool to a reading from a manual, mechanical oil pressure gauge threaded into the same port. If the mechanical gauge is steady and in spec, but the sensor is not, the sensor is faulty.
Typical fix: Replace the engine oil pressure sensor and the small screen/filter located beneath it. It is highly recommended to use an OEM ACDelco part, as some owners report aftermarket sensors failing to resolve the code.
Est. part cost: $40-$80 - Incorrect or Defective Oil Filter 🔴 High Probability → Shop Engine Oil Filter Adapter GM TSBs specifically call out this issue. Using an aftermarket filter or even certain ACDelco filters (e.g., the 'E-core' PF48E) can trigger this code, especially after an oil change or in cold weather. The internal bypass valve and flow characteristics of these filters can be different enough to cause pressure readings the ECM flags as out of range.
How to confirm: Check the part number on the installed oil filter. This is the first thing to check if the P0521 code appeared shortly after an oil change. TSB #PIP5276B specifically advises changing from a PF48E to a PF48 to resolve the code in cold weather on some V8s, highlighting the sensitivity.
Typical fix: Replace the oil filter with a high-quality, OEM-specified part, such as an ACDelco PF48 or a premium alternative known to work well, like the Mobil 1 M1-113A. Clear codes and re-test.
Est. part cost: $10-$15 - Clogged Oil Pressure Sensor Screen 🟡 Medium Probability A small, thimble-sized filter screen sits in the block just below the oil pressure sensor. Sludge from extended oil change intervals or other engine debris can clog this screen, restricting oil flow to the sensor and causing an inaccurate, usually low, reading. Many technicians consider it mandatory to replace this screen when replacing the sensor.
How to confirm: When the oil pressure sensor is removed, use a pick tool or small screwdriver to carefully extract the small filter screen from the engine block. Inspect it for sludge or metallic debris.
Typical fix: Clean the screen with brake cleaner and compressed air, or more reliably, replace it with a new one. They are inexpensive and considered a wear item.
Est. part cost: $5-$10 - Incorrect Oil Level or Viscosity ⚪ Low Probability The 3.6L engines can consume oil, and owners who do not check the level regularly may find it low enough to affect pressure readings, triggering the code.
How to confirm: Check the engine oil level using the dipstick when the engine is cold and on a level surface. Ensure the oil is not excessively dirty, milky (coolant contamination), or smell of fuel. Verify that the oil viscosity used (e.g., 5W-30) matches the manufacturer's specification in the owner's manual.
Typical fix: Perform an oil and filter change with the correct grade of full synthetic oil and an OEM-spec filter.
Est. part cost: $50-$100
Rare But Worth Checking
- Wiring Harness or Connector Damage: The sensor is located on the driver's side of the engine, below the oil filter housing, an area exposed to heat and oil. The wiring can become brittle and break, or oil leaking from a faulty sensor can contaminate the connector pins, causing a poor connection.
- Failing Oil Pump or Worn Engine Bearings: → Shop Engine Oil Pump This is the worst-case scenario. The 3.6L engines are known for timing chain issues, which can be exacerbated by poor oil pressure. If a mechanical oil pressure gauge confirms that the actual oil pressure is low (e.g., below 20 PSI at 2000 RPM when warm), it points to a serious internal engine problem like a failing oil pump, clogged pickup tube, or worn main/rod bearings that requires immediate attention.
Diagnosis Steps

- Check the engine oil level and condition. Top off or change if necessary. This simple step resolves the issue for some owners.
- Inspect the oil filter to ensure the correct part number is installed (e.g., ACDelco PF48). If an aftermarket or PF48E filter is installed and the code appeared after an oil change, replace it with a known good filter.
- Connect an OBD-II scanner to monitor the live oil pressure data from the sensor. Note if it's stuck at a high number (like 129 PSI) with the engine off, or if it reads 0 or fluctuates wildly with the engine running.
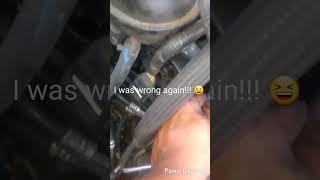
- Visually inspect the oil pressure sensor and its electrical connector for signs of oil leakage or damage. The sensor is located on the driver's side of the engine, below and slightly behind the oil filter housing. Access is tight.
- To gain access for replacement, you will likely need to remove the engine cover, air intake tube/airbox, and unbolt the power steering fluid reservoir 🎬 See how to replace the sensor without removing the power steering. (10mm and 18mm bolts) to move it aside. This provides a clearer path.
- The most definitive test: Connect a mechanical oil pressure gauge to the engine. This requires removing the existing sensor. Compare the mechanical reading to the scanner's reading. If the mechanical gauge shows good, steady pressure but the scanner reading is faulty, the problem is with the sensor, its screen, or its wiring.
- If removing the sensor, always inspect and replace the small filter screen underneath it.
- If the mechanical pressure is confirmed to be low, stop immediately and diagnose the engine's mechanical lubrication system (e.g., oil pump, pickup tube, internal wear).
Parts You'll Likely Need
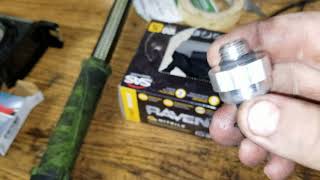
- Engine Oil Pressure Sensor (Switch)
(OEM #12674782)— This is the most frequent cause of P0521. The original sensor fails, providing incorrect readings to the ECM. Using an OEM part is strongly recommended.
Trusted brands: ACDelco (OE), Dorman
OEM price range: $50-$80
Aftermarket price range: $30-$60 - Oil Pressure Sensor Filter/Screen
(OEM #12635753)— This small screen below the sensor often gets clogged with sludge, starving the sensor of accurate pressure readings. It is best practice to replace it whenever the sensor is replaced.
Trusted brands: ACDelco (OE), Dorman
OEM price range: $5-$10
Aftermarket price range: $3-$8 - Specialty Socket (1-1/16 inch, short) — Due to extremely tight clearance around the sensor, a standard deep socket will not fit. A special short 1-1/16" oil pressure sensor socket is required to remove and install the sensor without removing additional components.
Trusted brands: Lisle 13200
Aftermarket price range: $10-$20
Related Codes That Often Appear With This One
- P0520 — P0520 indicates a fault in the oil pressure sensor circuit itself (e.g., open or short), while P0521 points to a performance/range problem. They are closely related and can appear together if the sensor has failed completely or has a wiring issue.
- P0523 — P0523 indicates the sensor circuit voltage is high, often caused by the same failed sensor sticking at a maximum reading. The diagnostic and repair process is identical.
- P0300-P0306 — If actual oil pressure is low, it can affect the timing chain tensioners and camshaft phasers, leading to improper valve timing and causing random (P0300) or specific cylinder misfires.
Technical Service Bulletins (TSBs) & Recalls
- PIP5276B: P0521 in cold weather, recommends replacing PF48E filter with PF48.
- PIP5276G: P0521 or low oil pressure message, references bulletin 10-06-01-008.
- PIP5276E: P0521 after an oil change, recommends using a PF48e filter.
- PIP4786C: General bulletin for low oil pressure message and P0521, advises following standard diagnosis.
Platform-Specific Known Issues
- TSB #PIP5276B: Specifically notes that on cold starts below 0°F, a P0521 code may set on some V8 engines. It advises technicians to check if a PF48E oil filter is installed and, if so, to replace it with a PF48 filter. While for V8s, it demonstrates the filter's impact on the code.
- TSB #PIP5276E / #PIP5276G: These later, superseding bulletins primarily address V8 engines but show the ongoing nature of P0521 diagnostics at GM. They discuss inspecting rocker cover baffles and using a PF48E filter *after* other potential issues are resolved, highlighting the complexity and sometimes contradictory nature of the filter issue.
- TSB #PIP4786C: This bulletin applies to a wide range of GM engines and instructs technicians who find low oil pressure on the scan tool (P0521) but correct pressure with a mechanical gauge to inspect the 'Valve Lifter Oil Filter' (the same screen under the pressure sensor) for debris before replacing any parts.
- Access Difficulty: Owner and mechanic videos consistently show that accessing the sensor requires removing the air intake assembly and unbolting the power steering reservoir to move it out of the way for clearance. It is not a simple 'reach in and unscrew' job.
Mechanic-Grade Diagnostic Values
- Mechanical Oil Pressure at Sensor Port (Engine Hot) — expected: Minimum 20 psi @ 2,000 RPM. Failure: A reading below 20 psi at 2,000 RPM indicates a potential mechanical issue like a failing oil pump or worn bearings. A reading below 20 psi at idle when hot may point to a stuck oil pressure relief valve.
- Sensor Resistance (generic GM-style sensor) — expected: Approximately 240 Ohms at 0 PSI, 103 Ohms at 40 PSI, and 33.5 Ohms at 80 PSI.. Failure: Readings that are wildly different, open (infinite resistance), or shorted (zero resistance) indicate a failed sensor. This test requires a multimeter and comparing readings to a known-good mechanical gauge.
- Scan Tool Live Data (Key On, Engine Off) — expected: 0 PSI. Failure: A reading of a high, fixed value (e.g., 129-130 PSI) indicates the sensor is electrically shorted and has failed.
- Scan Tool Live Data (Engine Running) — expected: Pressure should rise and fall smoothly with engine RPM.. Failure: A reading that is stuck at 0, stuck at max, or fluctuates erratically while a mechanical gauge shows steady pressure confirms a bad sensor or wiring issue.
Scan Tool Commands That Help
- GDS2 / Tech2 / Professional OBD-II Scanner: View Engine Oil Pressure (EOP) Sensor Live Data — This is the primary electronic diagnostic step. Use with Key On, Engine Off to check for a shorted sensor (stuck high reading). Use with Engine Running to compare the sensor's reported pressure against engine RPM and, ideally, a mechanical gauge to confirm if the sensor's reading is irrational.
Real Owner Repair Stories
- YouTube video by 'Fix It Your Muthafuckin Self' (2013 Cadillac CTS Coupe 3.6L) — Oil pressure gauge dropped to zero at idle, but would rise to normal pressure when driving.
✅ What actually fixed it Replacing the engine oil pressure sensor. The video highlights the necessity of a specific short 1-1/16" socket (Lisle 13200) to access the sensor without major disassembly. - YouTube video by 'Alex Flores' (2012 Cadillac CTS 3.0L) — Check Engine Light with code P0523 (Engine Oil Pressure Sensor Circuit High Voltage).
✅ What actually fixed it Replacing the oil pressure sensor. The mechanic noted that to get the socket onto the sensor, a hard power steering line had to be bent slightly out of the way to create clearance, warning that failure to do so could break the sensor. - Reddit user on r/ChevyTrucks (applies to many GM engines) (GM Truck (similar engine family)) — Persistent P0521 code after replacing the sensor.
❌ Tried (didn't work) Replacing the oil pressure sensor.
✅ What actually fixed it Switching to a high-quality oil filter (Mobil 1 M1-113A) resolved the issue, indicating the previous filter was causing pressure reading anomalies.
"I Checked Everything" — The Actual Cause
- In cases where the P0521 code returns even after replacing the sensor, screen, and using the correct oil/filter, and a mechanical gauge confirms low oil pressure (under 20 PSI at idle when hot), the root cause may be a stuck oil pressure relief valve inside the oil pump. This requires removing the oil pump for inspection. This is a known issue addressed in GM Technical Service Bulletin 24-NA-173.
When the Usual Fixes Don't Work
- While replacing the sensor and screen is the most common fix, it is not always successful. In a public forum, one owner reported replacing the sensor three times with no resolution. Another owner reported that their persistent P0521 was only resolved after switching to a Mobil 1 (M1-113A) oil filter, suggesting the previous filter was causing pressure deviations. A third owner noted that an aftermarket sensor failed to fix the code, but installing a genuine OEM ACDelco sensor was successful, highlighting a potential quality difference in aftermarket parts for this specific application.
OEM Part Supersession History
12570798, 12621649, 12621659→12674782— Part has been updated by GM over the years to improve reliability and integrate new materials.
Heads up: While older numbers may still be found, 12674782 is the current recommended OEM replacement part.
Helpful Videos

We Have This Part in Stock


The information in this article is provided for general reference and educational purposes only. Vehicle specifications, procedures, and part compatibility can vary by production date, trim level, and region. Always consult your vehicle's factory service manual and verify part numbers before purchasing or performing repairs. Safety-critical components such as airbags, seat belts, and braking systems should be installed by a qualified professional.
- Cadillac CTS:
- 🧭 Diagnostic Flowchart
- 🎬 Helpful Videos
- 🛍️ Shop This Part
- What's Unique About the 2005-2012 Cadillac CTS
- Symptoms You May Notice
- Most Likely Causes
- Rare But Worth Checking
- Diagnosis Steps
- Parts You'll Likely Need
- Related Codes That Often Appear With This One
- Technical Service Bulletins (TSBs) & Recalls
- Platform-Specific Known Issues
- Mechanic-Grade Diagnostic Values
- Scan Tool Commands That Help
- Real Owner Repair Stories
- "I Checked Everything" — The Actual Cause
- When the Usual Fixes Don't Work
- OEM Part Supersession History
- 🎟️ Get 5% Off