
P0521 on 2010-2014 Cadillac CTS-V: Oil Pressure Sensor Causes and Fixes
On a 2010-2014 CTS-V, P0521 is almost always a faulty oil pressure sensor or its clogged filter screen. Replacing both is the most common fix, with parts costing around $40-$80. Due to the sensor's location at the back of the engine, it's a moderately difficult DIY job requiring a special 1-1/16" socket, extensions, and swivels.
- P0521 on your CTS-V is a critical warning. Do not drive the vehicle until the issue is diagnosed.
- The most likely cause is a failed oil pressure sensor and/or its clogged filter screen.
- Always replace the small filter screen (Part #12585328) when you replace the sensor.
- Before replacing any parts, you must verify the true engine oil pressure with a mechanical gauge to rule out a serious internal engine problem.
- Use only the specified full synthetic oil and a high-quality ACDelco oil filter to prevent future issues.
What's Unique About the 2010-2014 Cadillac CTS-V
The 2010-2014 CTS-V uses the 6.2L Supercharged LSA V8, a high-performance engine that is sensitive to proper oil pressure and quality. Like many GM Gen IV V8s, the oil pressure sensor and its small, underlying filter screen are known failure points. The sensor is notoriously difficult to access, located at the back of the engine block behind the intake manifold and under the firewall cowl, making replacement a more involved job than on many other vehicles. Special tools, like a 1-1/16" (27mm) oil pressure switch socket and various extensions/swivels, are often required to perform the job without removing the intake manifold. GM has also issued service bulletins like PIP5276G related to oil pressure on this engine family, highlighting the importance of using correct parts and procedures.
Diagnostic Flowchart
Tap your situation to follow the diagnostic path that matches what you're seeing on this vehicle.
Symptoms You May Notice
- Check Engine Light illuminated
- Low Oil Pressure warning light or message on the instrument panel
- Oil pressure gauge reading abnormally high (e.g., pegged at max) or low 🎬 Watch what happens when your gauge is pegged over 80 PSI. (e.g., at or near zero)
- Engine running rough or making unusual ticking or knocking noises (in case of actual low pressure)
- Replacing the oil pump before confirming the actual oil pressure is low with a mechanical gauge.
- Replacing the sensor but not the small filter screen underneath it, leading to the code returning.
- Using a cheaper aftermarket oil pressure sensor that fails prematurely or does not resolve the code, requiring the difficult job to be performed a second time with an OEM part.
Most Likely Causes
- Faulty Engine Oil Pressure Sensor 🔴 High Probability This is a very common failure part on GM V8 engines of this era. The sensor is subjected to intense heat and vibration at the back of the engine, leading to internal electronic failure. Some owners report that using non-OEM sensors can lead to the code returning quickly.
How to confirm: With the engine off, the scan tool reading should be 0 PSI. If it's stuck high (e.g., 60-130 PSI), the sensor is bad. The definitive test is to compare the sensor's reading on a scan tool to a mechanical oil pressure gauge; if the mechanical gauge is good (e.g., ~25-30 PSI at warm idle) and the sensor reading is not, the sensor has failed. 🎬 See how to properly diagnose a failed P0521 sender code.
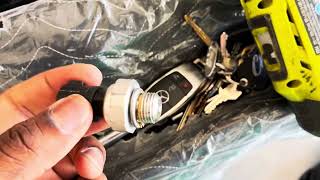
Typical fix: Replace the engine oil pressure sensor. It is critical to also replace the small filter screen located in the block directly underneath it. Using a genuine ACDelco/GM part is highly recommended.
Est. part cost: $40-$80 - Clogged Oil Pressure Sensor Screen 🔴 High Probability A small, thimble-sized filter screen sits just below the sensor to protect it. Sludge or debris from the engine can clog this screen, leading to an inaccurate pressure reading at the sensor. This is a primary cause of the code across the entire GM V8 family.
How to confirm: This is typically found during the replacement of the sensor. The screen is located in the bore where the sensor threads in. It can be removed with a pick or by gently threading a coarse-threaded screw into it to pull it out. Note: Some LSA engines may not have a screen from the factory.
Typical fix: Remove and replace the screen. This part is inexpensive and should always be replaced whenever the oil pressure sensor is serviced.
Est. part cost: $5-$15 - Incorrect or Low Engine Oil 🟡 Medium Probability Using oil that does not meet the required GM dexos specification or the wrong viscosity (e.g., 5W-30) can affect the hydraulic systems and trigger pressure codes. A low oil level will also directly cause low pressure, which can trigger P0521.
How to confirm: Check the engine oil dipstick for the correct level and inspect the oil's condition. A low oil level is a simple but common cause. Verify the oil type used against the owner's manual specifications.
Typical fix: Perform an oil and filter change using the manufacturer-specified oil (full synthetic meeting GM's dexos standard) and a high-quality filter.
Est. part cost: $60-$120 - Incorrect Oil Filter ⚪ Low Probability → Shop Engine Oil Filter Adapter GM engines can be sensitive to the oil filter's internal bypass valve pressure rating. Using a non-specified filter can cause pressure deviations that trigger P0521, especially after an oil change. TSBs for related engines specifically mention issues with using PF48E filters instead of PF48 in certain conditions.
How to confirm: Check the part number on the installed oil filter. Cross-reference it with the GM-specified filter (ACDelco PF48 is often recommended for this V8). If the code appeared immediately after an oil change, this is a very likely cause.
Typical fix: Replace the oil filter with the correct ACDelco part.
Est. part cost: $10-$20
Rare But Worth Checking
- Failing Oil Pump: → Shop Engine Oil Pump While rare, if a mechanical gauge confirms that oil pressure is genuinely low across the RPM range, the oil pump may be worn or failing.
- Wiring Harness Issue: The sensor wiring, which runs behind the hot engine, can become brittle, chafed, or oil-soaked, causing a short or open circuit. A visual inspection of the connector and nearby harness is recommended during sensor replacement.
- Worn Internal Engine Bearings: On very high-mileage engines, excessive clearance in the main or rod bearings can cause a true loss of oil pressure, which would be confirmed with a mechanical gauge.
Diagnosis Steps
- Check the engine oil level and condition. Top off or change if necessary. This is the simplest and first check.
- Connect an OBD-II scanner. Check for P0521 and any other codes. Note the oil pressure reading with the key on, engine off (should be 0 PSI) and at idle. A high reading with the engine off points to a bad sensor.
- Verify the correct oil filter is installed (e.g., ACDelco PF48). If an incorrect filter was recently installed, replace it.
- CRITICAL STEP: Connect a mechanical oil pressure gauge to the engine. This requires removing the existing sensor. Compare the mechanical gauge reading (expect ~25-30 PSI at warm idle) to the scanner's reading.
- If the mechanical gauge shows good pressure but the scanner reading is incorrect, the problem is with the sensor, screen, or wiring.
- Inspect the wiring harness and connector for the oil pressure sensor for any signs of damage, melting, or corrosion.
- If wiring is good and readings confirm a sensor issue, replace the oil pressure sensor and the filter screen underneath it. A special 1-1/16" (27mm) deep socket is recommended. Torque the new sensor to 35 N·m (26 lb-ft) as per video guides. 🎬 Watch this step-by-step LSA oil pressure sensor replacement walkthrough.
- If the mechanical gauge confirms low oil pressure, further engine diagnosis is required to check the oil pump, pickup tube, and internal engine clearances.
Parts You'll Likely Need
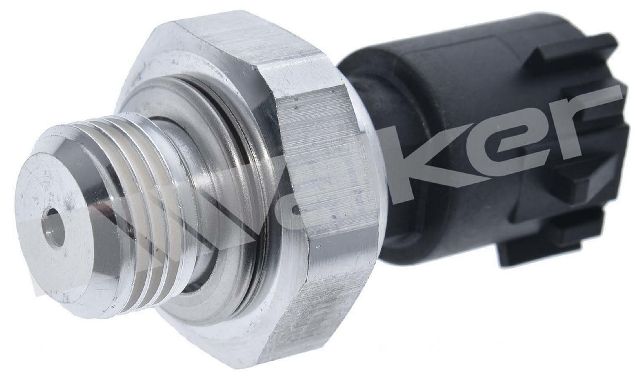
- Engine Oil Pressure Sensor / Switch
(OEM #12673134 (Supersedes: 12621234, 12596951))— This is the most common failure point for this code on this engine. It fails electronically, providing incorrect readings.
Trusted brands: ACDelco, GM Genuine Parts
OEM price range: $40-$70
Aftermarket price range: $25-$50 - Engine Oil Pressure Sensor Filter Screen
(OEM #12585328)— This screen becomes clogged with engine debris and sludge, restricting oil flow to the sensor and causing a false reading. It must be replaced with the sensor.
Trusted brands: ACDelco, Dorman
OEM price range: $5-$15
Aftermarket price range: $5-$10 - Oil Pressure Switch Socket
(OEM #N/A (Tool))— A special 1-1/16" (27mm) deep socket is required to access and remove the sensor from its tight location at the back of the engine.
Trusted brands: Lisle, OEMTools
OEM price range: $10-$20
Aftermarket price range: $10-$20
Related Codes That Often Appear With This One
- P0520 — Indicates a fault in the sensor's electrical circuit (e.g., open or short), which can happen if the sensor fails electrically or the wiring is damaged.
- P0523 — Indicates the sensor circuit is reading high voltage, often seen when the sensor shorts internally and gets stuck at its maximum reading.
- P06DE — As mentioned in TSB #18-NA-246, this code relates to the oil pressure control solenoid. However, this is NOT applicable to the 2010-2014 CTS-V's LSA engine, which does not use this component. This TSB covers a wide range of GM V8s, and this specific associated code applies to newer engine designs, not the LSA.
Technical Service Bulletins (TSBs) & Recalls
- Bulletin #18-NA-246: Mentions P0521 in conjunction with other codes like P06DE on some GM models, pointing to broader oil pressure control system diagnostics.
- Bulletin #PIP5276G: Supersedes earlier versions. Addresses P0521 and low oil pressure warnings, particularly after oil changes on Gen IV V8s. It instructs technicians to verify the correct oil filter is used (PF48/PF48E) and to inspect the left valve cover baffle for leaks, which can be related to oil consumption issues outlined in other TSBs.
Platform-Specific Known Issues
- The location of the sensor at the rear of the engine, under the cowl and behind the intake manifold, makes access extremely difficult. Special sockets, swivel joints, and long extensions are often required to avoid removing the intake manifold.
- GM TSB #PIP5276G specifically mentions DTC P0521 on related V8 engines, often after an oil change, and points to verifying proper oil filters and checking for related issues from other bulletins concerning oil consumption.
Mechanic-Grade Diagnostic Values
- Engine Oil Pressure Sensor Signal Voltage — expected: Typically 0.5V at low pressure and up to 4.5V at high pressure.. Failure: Voltage is stuck high (e.g., 5V), low (0V), or does not change with engine RPM.
- New Sensor Installation Torque — expected: 35 N·m (26 lb-ft). Failure: Over-tightening can damage the new sensor; under-tightening can cause leaks.
- DTC P0521 Set Condition — expected: Pressure should be within a predicted range based on RPM.. Failure: Code sets if the ECM sees pressure greater than 880 kPa (127.6 psi) or less than 8 kPa (1.16 psi) when not expected.
- Healthy Hot Idle Oil Pressure (Modified LSA) — expected: 32-34 PSI. Failure: Significantly lower pressure may indicate a problem, though stock engines may idle slightly lower.
Hidden / Shadow Codes Worth Checking
- Failure Records Data: The ECM stores freeze-frame data, the number of miles driven since the DTC was set, and a Fail/Pass Counter for the diagnostic test. This data can help diagnose intermittent faults that are not currently active. (see via Dealer-level scan tool (e.g., GM Tech2 or GDS2).)
Wiring & Ground Locations
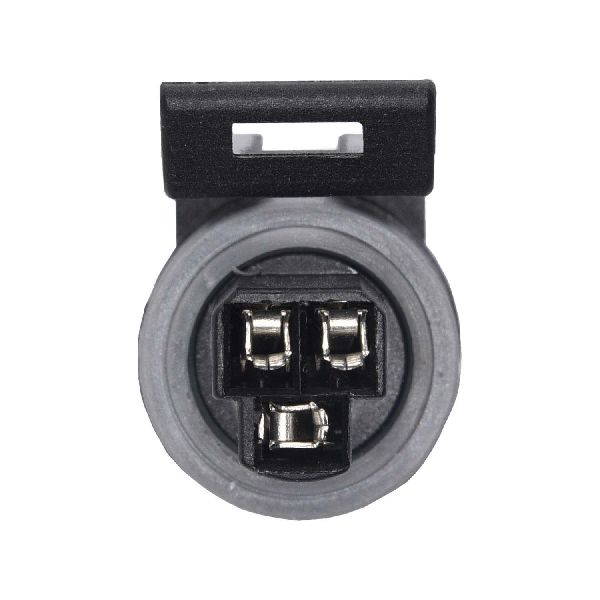
- Oil Pressure Sensor Connector — At the sensor, top rear of the engine block, behind the intake manifold.. This 3-pin connector's wiring can be damaged by engine heat. The typical wire colors are Tan/White (Signal), Gray (5V Reference), and Black (Low Reference/Ground). Verifying signal, voltage, and ground at this connector is a key diagnostic step if a new sensor doesn't fix the code.
- G104 (or similar rear engine ground) — Typically located on the back of the driver's side cylinder head.. This is a primary engine-to-chassis ground strap located near the oil pressure sensor. A loose or corroded connection here can disrupt the sensor's low reference circuit, causing erratic readings and triggering P0521.
- G102 — Typically located on the rear of the engine block.. This ground point serves the ignition coils and other critical engine components. While less direct than G104, a poor connection here can introduce electrical noise that may affect sensor readings.
Real Owner Repair Stories
- Reddit user in r/ChevyTrucks (Chevrolet Truck with similar GM V8 architecture) — P0521 code kept returning after replacing the oil pressure sensor once. The screen had already been removed by a previous owner.
❌ Tried (didn't work) Replacing the oil pressure sensor (likely with an aftermarket part)., Clearing the code with a scan tool.
✅ What actually fixed it For one user, the final fix was using a premium oil filter (Mobil 1 M1-113A) and ensuring the oil level was correct. Another user in the same discussion stressed that using a genuine ACDelco OEM sensor fixed their identical issue after an aftermarket part failed to do so.
"I Checked Everything" — The Actual Cause
- In cases where a new sensor is installed and a mechanical gauge confirms correct oil pressure, but the P0521 code persists, the root cause is almost always an electrical issue. Technicians should inspect the wiring harness for chafing, melting, or breaks between the sensor connector and the ECM. A continuity and voltage drop test on the signal, 5V reference, and ground wires can pinpoint the fault.
OEM Part Supersession History
12596951, 12621234→12673134— Standard part evolution for improved reliability or manufacturing process.
Heads up: No known incompatibilities; the newest part number (12673134) is the correct replacement for all previous versions on this vehicle.
Helpful Videos
We Have This Part in Stock


The information in this article is provided for general reference and educational purposes only. Vehicle specifications, procedures, and part compatibility can vary by production date, trim level, and region. Always consult your vehicle's factory service manual and verify part numbers before purchasing or performing repairs. Safety-critical components such as airbags, seat belts, and braking systems should be installed by a qualified professional.
- Cadillac CTS-V:
- 🧭 Diagnostic Flowchart
- 🎬 Helpful Videos
- 🛍️ Shop This Part
- What's Unique About the 2010-2014 Cadillac CTS-V
- Symptoms You May Notice
- Most Likely Causes
- Rare But Worth Checking
- Diagnosis Steps
- Parts You'll Likely Need
- Related Codes That Often Appear With This One
- Technical Service Bulletins (TSBs) & Recalls
- Platform-Specific Known Issues
- Mechanic-Grade Diagnostic Values
- Hidden / Shadow Codes Worth Checking
- Wiring & Ground Locations
- Real Owner Repair Stories
- "I Checked Everything" — The Actual Cause
- OEM Part Supersession History
- 🎟️ Get 5% Off