
P0521 on 2005-2009 Saab 9-7X: Engine Oil Pressure Sensor Performance Causes and Fixes
On a 2005-2009 Saab 9-7X, code P0521 is almost always caused by a faulty oil pressure sensor or a clogged filter screen located beneath it. The fix involves replacing both parts. On V8 models, the sensor is in a notoriously difficult-to-access location at the back of the engine, making it a labor-intensive job. The 4.2L I6 is significantly easier.
- Do not drive your vehicle with code P0521 until you have verified the actual engine oil pressure with a mechanical gauge.
- The most probable cause is a faulty oil pressure sensor and/or a clogged filter screen directly underneath it.
- Always replace the small filter screen (Part No. 12585328) when you replace the sensor (Part No. 12673134) to prevent a recurring problem.
- The repair is significantly more difficult on the 5.3L and 6.0L V8 engines than on the 4.2L I-6 due to the sensor's location behind the intake manifold.
- Using the correct tools, including a special oil pressure switch socket, extensions, and a swivel joint, is essential for a successful DIY repair on V8 models.
What's Unique About the 2005-2009 Saab 9-7X
The Saab 9-7X is based on the General Motors GMT360 platform, sharing its 4.2L I6, 5.3L V8, and 6.0L V8 engines and electronics with the Chevrolet Trailblazer and GMC Envoy. This code is extremely common on these vehicles due to two specific, well-documented issues: a failure-prone oil pressure sensor and a small, thimble-shaped filter screen directly beneath the sensor that frequently clogs with engine sludge. The combination of these two failure points makes P0521 a very frequent, and often misdiagnosed, issue for 9-7X owners, with the repair difficulty varying dramatically between the I6 and V8 engines.
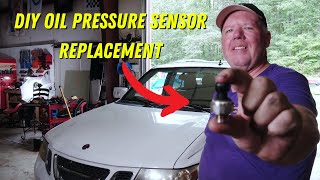
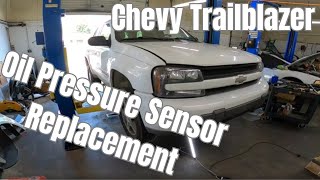
🎬 Watch: Step-by-step oil pressure sensor replacement on a 9-7X V8.Diagnostic Flowchart
Tap your situation to follow the diagnostic path that matches what you're seeing on this vehicle.
Symptoms You May Notice
- Check Engine Light is on
- Low Oil Pressure warning light or message on the instrument cluster.
- Oil pressure gauge reading zero, maxed out (e.g., pegged at 80+ PSI), or fluctuating wildly, especially at idle.
- Engine ticking, clattering, or knocking noises (if actual low oil pressure exists).
- With V8 engines featuring Active Fuel Management (AFM), low oil pressure can cause misfires and trigger a P0300 code.
- Replacing only the oil pressure sensor without also replacing the clogged filter screen underneath it.
- Replacing the oil pump when the issue was only a faulty sensor, clogged screen, or a bad pickup tube O-ring on V8 models.
- Assuming an expensive mechanical failure before verifying true oil pressure with a mechanical gauge.
Most Likely Causes
- Clogged Oil Pressure Sensor Filter Screen 🔴 High Probability → Shop Engine Oil Pressure Sensor This small, thimble-shaped filter, officially the 'Valve Lifter Oil Filter', is located directly under the sensor and is notorious for getting clogged with sludge and debris, starving the sensor of oil and causing false low or erratic readings.
How to confirm: The screen can only be inspected upon removal of the oil pressure sensor. It is often visibly clogged with black sludge. Technicians often use a coarse-threaded screw or pick to extract it.
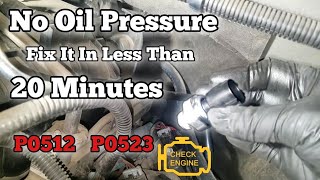
Typical fix: Remove the old screen using a pick or a coarse-threaded screw and replace it with a new one. 🎬 Watch: How to extract and replace the clogged filter screen. This should always be done when replacing the sensor.
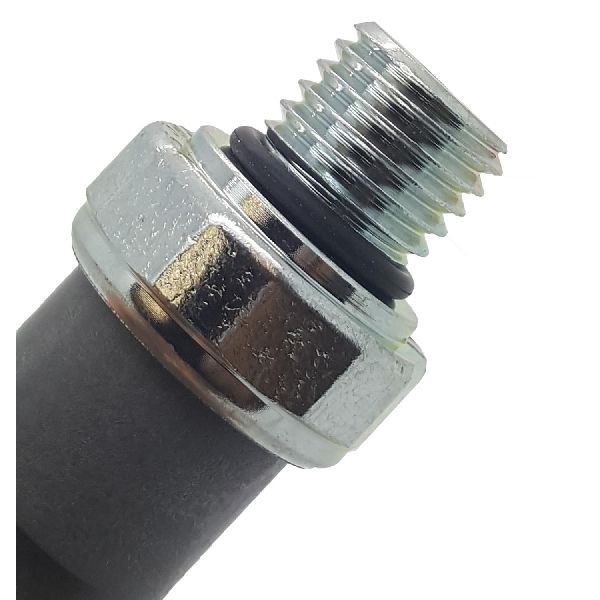
Est. part cost: $5-$15 - Faulty Engine Oil Pressure Sensor (Sending Unit) 🔴 High Probability The original sensors on these GM engines are known to fail electronically, providing incorrect readings. A classic symptom is the gauge pegging high before failing. They can also develop internal leaks, allowing oil to seep into the electrical connector and disrupt the signal.
How to confirm: After verifying actual oil pressure with a mechanical gauge, if the pressure is good but the scan tool reading is bad, the sensor is faulty. Oil found inside the electrical connector is a definitive sign of failure.
Typical fix: Replace the oil pressure sensor. A special deep oil pressure switch socket (e.g., Lisle 13250) is highly recommended 🎬 See this walkthrough for replacing the sensor on the I6 engine. for removal and installation to avoid breaking the sensor.
Est. part cost: $35-$65 - Low or Incorrect Grade of Engine Oil 🟡 Medium Probability
How to confirm: Check the engine oil level via the dipstick and verify the service records to ensure the correct oil viscosity (typically 5W-30) is being used. Some owners report the issue being resolved after an oil change with a high-quality filter.
Typical fix: Perform an oil and filter change with the manufacturer-specified grade of oil and a quality filter.
Est. part cost: $40-$80 - Damaged Wiring or Connector ⚪ Low Probability The sensor's location can make the wiring susceptible to damage. More commonly, oil leaking from a failed sensor contaminates and ruins the connector pigtail, requiring replacement.
How to confirm: Visually inspect the wiring harness and connector for signs of chafing, breaks, or oil saturation. Check for continuity and resistance in the circuit.
Typical fix: Repair the damaged section of wiring or replace the connector pigtail (e.g., ACDelco PT2310).
Est. part cost: $15-$30
Rare But Worth Checking
- Failing Oil Pump or Sticking Pressure Relief Valve: → Shop Engine Oil Pump This is a more serious mechanical issue. GM issued TSB #PIP4786C regarding low oil pressure, which points towards the sensor/screen as the first check. A failing pump would be confirmed by a consistently low reading on a mechanical oil pressure gauge across all RPMs.
- Worn Oil Pump Pickup Tube O-Ring (V8 Engines): → Shop Engine Oil Pump On the 5.3L and 6.0L V8 engines, this O-ring can become hard and brittle with age, allowing the oil pump to suck in air, especially at idle. This causes a loss of oil pressure that may appear normal as RPMs increase. It is a labor-intensive repair requiring oil pan removal.
- Worn Internal Engine Bearings: In high-mileage engines, excessive clearance in the main and rod bearings can lead to a genuine low oil pressure condition. This is a worst-case scenario confirmed by a mechanical gauge and would require an engine rebuild or replacement.
Diagnosis Steps
- Check the engine oil level and condition. Top off or change the oil if necessary, ensuring the correct viscosity and a quality filter are used.
- Connect a scan tool to read the live oil pressure data from the ECM. Note if the reading is stuck (e.g., 129 PSI), erratic, or consistently low.
- CRITICAL STEP: Connect a mechanical oil pressure gauge to the engine to verify the true oil pressure. Compare the mechanical gauge reading to the scan tool data. A healthy engine should have ~25+ PSI at hot idle, and pressure should rise with RPM.
- If mechanical pressure is normal but the scan tool reading is incorrect, the problem lies with the sensor or its circuit.
- Inspect the oil pressure sensor's electrical connector for oil contamination, corrosion, or damage. If oil is present, the sensor has failed internally and both the sensor and connector pigtail should be replaced.
- If the connector is clean and the wiring appears intact, replace both the oil pressure sensor and the small filter screen located in the block beneath it.
- If mechanical pressure is genuinely low, further diagnosis is required to identify the mechanical cause (e.g., pickup tube O-ring on V8s, oil pump, internal wear).
Parts You'll Likely Need
- Engine Oil Pressure Sensor
(OEM #12673134 (supersedes 12616646, 12614969, and others))— This is the most common part to fail, either electronically or by leaking oil. It is responsible for sending the pressure signal to the ECM. The ACDelco equivalent is D1846A.
Trusted brands: ACDelco (GM Original Equipment), Standard Motor Products, Delphi
OEM price range: $45-$60
Aftermarket price range: $25-$50 - Engine Valve Lifter Oil Manifold Filter (Sensor Screen)
(OEM #12585328)— This small screen sits below the sensor and frequently clogs with sludge, causing incorrect readings. It is critical to replace this part along with the sensor.
Trusted brands: ACDelco (GM Genuine), Dorman
OEM price range: $8-$12
Aftermarket price range: $5-$10 - Oil Pressure Switch Socket
(OEM #Lisle 13250 or similar)— A special 1-1/16" deep socket is required to remove and install the sensor without breaking it, especially on the V8 where access is limited.
Trusted brands: Lisle, OEM Tools
OEM price range: N/A
Aftermarket price range: $10-$20 - Sensor Connector Pigtail
(OEM #ACDelco PT2310)— Often required if the original connector is brittle or contaminated with oil from the leaking original sensor.
Trusted brands: ACDelco, Dorman
OEM price range: $20-$30
Aftermarket price range: $10-$20
Related Codes That Often Appear With This One
- P0300-P0308 — On V8 engines with Displacement on Demand (DoD) / Active Fuel Management (AFM), low oil pressure can cause the valve lifters to malfunction, leading to engine misfires.
- P0520 — This code indicates a general fault in the oil pressure sensor circuit, and can appear alongside P0521 which specifies a performance range issue.
- P0523 — This code for 'Circuit High' often appears when the sensor fails and sends a maximum voltage signal, causing the gauge to peg high before the P0521 range code is stored.
Technical Service Bulletins (TSBs) & Recalls
- PIP4786C: States that vehicles may present with a low oil pressure message and a P0521 DTC, and directs technicians to inspect the Valve Lifter Oil Filter for debris if mechanical pressure is confirmed to be good.
Platform-Specific Known Issues
- Extreme Difference in Repair Difficulty: V8 vs. I6: On 5.3L and 6.0L V8 models, the sensor is at the very back of the engine block behind the intake manifold, against the firewall. It requires long extensions, universal joints, and working by feel, making it a frustrating and time-consuming job for even experienced technicians. In contrast, on the 4.2L I6 engine, the sensor is conveniently located on the driver's side of the block, just above the oil filter, and is easily accessible from underneath.
Mechanic-Grade Diagnostic Values
- Oil Pressure Sensor Connector - Pin A to Chassis Ground (V8) — expected: 5V (Reference Voltage from ECM). Failure: Voltage significantly lower than 5V may indicate a short in the harness or a problem with another sensor on the same 5V reference circuit.
- Oil Pressure Sensor Connector - Pin B to Chassis Ground (V8) — expected: 0V (Sensor Ground). Failure: Voltage above 0V indicates a bad ground connection.
- Oil Pressure Sensor Connector - Pin C (Signal Wire) (V8) — expected: ~0.5V with engine off, increasing with engine RPM/oil pressure.. Failure: Voltage stuck high (e.g., 5V) or low (0V), or not changing with RPM, points to a bad sensor.
- Minimum Oil Pressure (Mechanical Gauge) — expected: At least 6 PSI at 1,000 RPM, 18 PSI at 2,000 RPM, and 24 PSI at 4,000 RPM (for 5.3L engine).. Failure: Pressure below these minimums indicates a mechanical engine issue (e.g., oil pump, bearings, pickup o-ring), not a sensor problem.
Scan Tool Commands That Help
- Tech 2 / GDS2: Engine Data Display (Oil Pressure PID) — Used to view the oil pressure value as reported by the sensor to the ECM. This is the primary data point to compare against a mechanical gauge. However, on some earlier GMT360 platforms, the oil pressure signal wire may go directly to the gauge cluster and not be readable by the PCM via the OBD-II port, making a mechanical gauge test the only reliable verification method.
Wiring & Ground Locations
- G102 — Located at the left rear of the engine.. This ground point is used for the ignition coils. While not directly for the oil pressure sensor, a poor engine ground can introduce electrical noise that may affect various sensor readings. Ensuring all engine block grounds are clean and tight is a crucial step in diagnosing any electrical fault.
- G104 — Located on a stud at the rear of the passenger side cylinder head.. This is a primary engine-to-chassis ground point. On some GM V8s, this ground stud is shared by multiple circuits. A loose or corroded G104 can cause erratic behavior in multiple systems, including the instrument panel and sensor circuits. It is physically close to the V8 oil pressure sensor's location and a faulty connection here can cause a weak or floating ground for the sensor circuit.
- Oil Pressure Sensor Connector (V8) — At the sensor, top rear of the engine block against the firewall.. This 3-pin connector is the direct interface. Pin A is the 5V reference, Pin B is the ground, and Pin C is the signal return to the PCM. Checking for voltage and ground at this connector is the most direct way to test the circuit.
Real Owner Repair Stories
- Reddit user in r/ChevyTrucks (Chevrolet Truck with P0521 (common GM issue)) — Persistent P0521 code after replacing the oil pressure sensor.
❌ Tried (didn't work) Replacing the oil pressure sensor with an aftermarket part from a local auto parts store.
✅ What actually fixed it Replacing the new aftermarket sensor with a genuine OEM ACDelco sensor finally resolved the problem. Another user in the same discussion fixed their issue with a high-quality oil filter (Mobil 1 M1-113A). - TrailVoy.com forum user (Chevrolet Trailblazer 4.2L I6) — Intermittent oil pressure gauge dropping to zero at idle, then returning to normal when driving.
❌ Tried (didn't work) Considering replacing the gauge cluster stepper motors.
✅ What actually fixed it The issue was identified as a faulty oil pressure switch. Forum discussion clarified that for the 4.2L I6, the gauge is a 'dummy gauge' controlled by the PCM based on a simple pressure switch (not a variable sensor), which is why it doesn't show true analog pressure. Replacing the switch resolved the erratic gauge behavior.
OEM Part Supersession History
12596951, 12621234→12673134— GM regularly updates part designs to integrate new materials and technologies for improved durability and reliability.
Heads up: The current part, 12673134 (also sold as ACDelco D1846A), is the correct replacement for the V8 engines. Using older stock or an incorrect aftermarket cross-reference may lead to repeat failures.
Model Year Variations Within This Range
- 2005-2009: The 4.2L I6 engine often uses a simpler 2-wire oil pressure *switch* which provides a simple on/off signal to the PCM, which then commands a 'dummy' position on the gauge. The 5.3L and 6.0L V8 engines use a true 3-wire oil pressure *sensor* (transducer) that provides a variable voltage signal corresponding to the actual pressure. This is a critical diagnostic difference, as the testing procedure and expected signal values are different between the two.
Helpful Videos

We Have This Part in Stock


The information in this article is provided for general reference and educational purposes only. Vehicle specifications, procedures, and part compatibility can vary by production date, trim level, and region. Always consult your vehicle's factory service manual and verify part numbers before purchasing or performing repairs. Safety-critical components such as airbags, seat belts, and braking systems should be installed by a qualified professional.
- Saab 9-7X:
- 🧭 Diagnostic Flowchart
- 🎬 Helpful Videos
- 🛍️ Shop This Part
- What's Unique About the 2005-2009 Saab 9-7X
- Symptoms You May Notice
- Most Likely Causes
- Rare But Worth Checking
- Diagnosis Steps
- Parts You'll Likely Need
- Related Codes That Often Appear With This One
- Technical Service Bulletins (TSBs) & Recalls
- Platform-Specific Known Issues
- Mechanic-Grade Diagnostic Values
- Scan Tool Commands That Help
- Wiring & Ground Locations
- Real Owner Repair Stories
- OEM Part Supersession History
- Model Year Variations Within This Range
- 🎟️ Get 5% Off