
P0556 on 2011-2019 Hyundai Sonata: Brake Booster Pressure Sensor Causes and Fixes
This code indicates a problem with the brake booster pressure sensor circuit, which can make the brake pedal hard to press. The most common fix is replacing the brake booster pressure sensor itself or repairing a vacuum leak from a cracked hose connected to it.
- P0556 means your car's power brake system is compromised, making it a serious safety issue.
- The most common symptom is a brake pedal that is suddenly very hard to push.
- The most likely cause is a failed brake booster pressure sensor, followed by a cracked vacuum hose.
- Diagnosis involves checking for vacuum leaks and testing the sensor's electrical signal with a multimeter or scan tool.
What's Unique About the 2011-2019 Hyundai Sonata
For the 2011-2019 Hyundai Sonata, the P0556 code is a straightforward fault related to the conventional vacuum-assisted braking system. Unlike some other manufacturers that use complex electronic or camshaft-driven vacuum pumps, the Sonata in this year range uses a traditional engine vacuum-powered booster. This simplifies diagnosis, as the problem is almost always confined to the sensor, its wiring, or the vacuum hoses connected to the booster. The issue is also common on its platform-mate, the Kia Optima. Some technicians note that for this specific repair on Hyundai/Kia vehicles, using non-OEM sensors can sometimes cause the code to return, making genuine OEM parts a recommended choice.
Generation note: The 2011-2019 range covers two Sonata generations: the YF (2011-2014) and the LF (2015-2019). While the underlying cause and symptoms of P0556 are the same for both, the exact location and part number for the brake booster pressure sensor and related hoses may differ. Always verify the part with your vehicle's VIN. The brake booster assembly for the LF generation (2015-2019) is a distinct part from the YF. Within the YF generation, different part numbers exist for the brake booster depending on the engine (2.0L Turbo vs. 2.4L Non-Turbo).
Symptoms You May Notice
- Hard brake pedal requiring much more effort to press.
- Illuminated Check Engine Light.
- Brake warning light, ABS, or traction control light may also turn on.
- Noticeably longer stopping distances.
- Rough or inconsistent engine idle if a large vacuum leak is the cause.
- Hissing sound coming from the brake booster area.
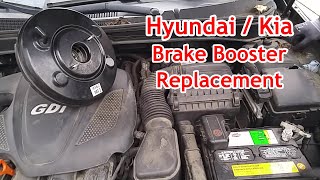
- Replacing the master cylinder when the issue is a loss of vacuum assist.
- Replacing the entire brake booster when only 🎬 Watch: Step-by-step brake booster replacement for Sonata and Optima. the sensor or a vacuum hose is faulty.
Most Likely Causes
- Faulty Brake Booster Pressure Sensor 🔴 High Probability → Shop Power Brake Booster Sensors can fail over time due to heat cycles, internal electronic faults, or contamination. The sensor's internal diaphragm can be damaged, causing its voltage output to drift outside the expected range. Some technicians report that aftermarket sensors can be problematic, recommending an OEM part for this specific replacement on Hyundai vehicles.
How to confirm: Using a scan tool, monitor the sensor's voltage reading. It should change smoothly as the brake pedal is applied and released. If the voltage is stuck, erratic, or outside the typical 0.5V-4.5V range, the sensor is likely bad. 🎬 See how to diagnose sensor circuit range issues. Specific voltage checks are: Key On, Engine Off should read ~4.5V (atmospheric pressure); Engine running at idle should read 0.5V-1.0V (high vacuum).
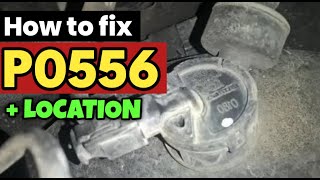
Typical fix: Replace the brake booster pressure sensor. It is typically mounted directly on the brake booster or in the main vacuum line leading to it.
Est. part cost: $40-$100 - Cracked or Leaking Vacuum Hose 🟡 Medium Probability → Shop Vacuum Hose Rubber hoses become brittle and crack with age and exposure to engine heat. This is a very common failure point leading to vacuum leaks.
How to confirm: Visually inspect all vacuum hoses connected to the brake booster for cracks, splits, or loose connections. You can also spray soapy water on the hoses with the engine running and look for bubbles, which indicate a leak. Listen for a hissing sound near the booster. Use a vacuum gauge on the supply hose to the booster; a healthy engine should provide 15-20" Hg of vacuum at idle.
Typical fix: Replace the damaged vacuum hose and any associated check valves.
Est. part cost: $20-$60 - Damaged Wiring or Connector ⚪ Low Probability Wires can become damaged from engine vibration, heat, or corrosion in the connector pins. This can add resistance or cause intermittent shorts, shifting the voltage signal enough to trigger the code.
How to confirm: Visually inspect the wiring harness and connector for the brake booster pressure sensor. Check for frayed wires, loose pins, or corrosion. Use a multimeter to check for 5V reference voltage and a good ground (near 0 ohms to chassis) at the connector. Wiggle the harness while monitoring the sensor's voltage on a scan tool to see if the reading fluctuates, indicating an intermittent connection.
Typical fix: Repair the damaged section of wiring or clean/replace the connector.
Est. part cost: $5-$50
Rare But Worth Checking
- Failing Brake Booster: → Shop Power Brake Booster While less common for this specific code, an internal diaphragm leak in the brake booster itself can cause a loss of vacuum and trigger a P0556. This is often accompanied by a hissing sound from the pedal area when the brakes are applied.
- Defective One-Way Check Valve: A faulty one-way check valve in the vacuum supply hose to the booster can cause improper vacuum levels, leading to the P0556 code. This can be tested by disconnecting the hose from the booster; a 'whoosh' sound indicates the valve was holding vacuum. You should not be able to blow air through the valve towards the booster.
- Faulty Powertrain Control Module (PCM): In very rare cases, the PCM's internal circuit for reading the sensor may fail. This should only be considered after all other possibilities have been exhaustively ruled out.
Diagnosis Steps
- Read the code with an OBD-II scanner and check for any other related codes. Note the freeze-frame data.
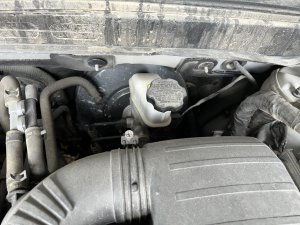
- Visually inspect the brake booster, all connected vacuum hoses, and the sensor's wiring harness for obvious damage like cracks, loose connections, or corrosion.
- With the engine running, listen for any hissing sounds around the brake booster and its hoses, which would indicate a vacuum leak.
- Use a scan tool to monitor the live data from the brake booster pressure sensor. The voltage should be steady at idle and change smoothly when you press and release the brake pedal. Check for specific values: ~4.5V with Key On Engine Off, and 0.5V-1.0V at idle.
- If the signal is erratic or does not change, use a multimeter to backprobe the sensor's connector. Verify you have a 5-volt reference signal and a solid ground connection (near 0 ohms to chassis).
- If the wiring is good but the signal is bad, the sensor is the most likely culprit. Consider using an OEM sensor, as some aftermarket units have been reported to cause issues.
- If the sensor and wiring are good, use a vacuum gauge to test the vacuum supply to the booster. It should be between 15-20" Hg at idle. If vacuum is low, inspect the supply line and one-way check valve.
Parts You'll Likely Need
- Brake Booster Pressure Sensor — This sensor is the most common failure point for a P0556 code, as its internal electronics can fail over time. Some technicians specifically recommend using a genuine OEM part to avoid repeat failures.
Trusted brands: Hyundai Genuine, Vemo, FAE, Delphi
OEM price range: $70-$120
Aftermarket price range: $40-$80 - Brake Booster Vacuum Hose
(OEM #59130-3K600 (Verify with VIN, multiple variants exist))— The rubber hoses that supply vacuum to the booster can crack and leak, causing the sensor to report an out-of-range value.
Trusted brands: Hyundai Genuine, Gates
OEM price range: $40-$70
Aftermarket price range: $20-$50
Mechanic-Grade Diagnostic Values
- Brake Booster Pressure Sensor Signal Voltage (Key On, Engine Off) — expected: ~4.5V. Failure: Voltage is significantly lower, indicating a potential short or sensor failure.
- Brake Booster Pressure Sensor Signal Voltage (Engine at Idle) — expected: 0.5V - 1.0V. Failure: Voltage is stuck high (near 4.5V), indicating no vacuum is being read by the sensor.
- Brake Booster Pressure Sensor Ground Circuit Resistance — expected: Near 0 Ω to chassis ground. Failure: High resistance indicates a poor ground connection, which can cause incorrect sensor readings.
- Vacuum Supply to Brake Booster — expected: 15" - 20" Hg at idle. Failure: A reading below 16" Hg can indicate a leak in the supply hose, a faulty check valve, or a poor vacuum source from the engine.
Scan Tool Commands That Help
- GDS (Hyundai): Pressure Sensor Calibration — This function is explicitly required for the Sonata Hybrid after replacing the Hydraulic Power Unit (HPU). While not confirmed for the standard vacuum booster on non-hybrid models, it indicates that dealer-level software has specific calibration routines for brake pressure systems.
OEM Part Supersession History
39300-2B000→39300-2B100 (potential)— Part update/revision.
Heads up: There is significant confusion in parts catalogs, which often label part number 39300-2B000 as a 'MAP Sensor' (Manifold Absolute Pressure Sensor). While both sensors measure pressure, they are for different systems. It is critical to verify with a VIN at a Hyundai dealership that you are ordering the correct Brake Booster Pressure Sensor and not a MAP sensor, as they may not be interchangeable despite catalog errors.
Model Year Variations Within This Range
- 2011-2014 (YF Generation): The brake booster itself has different part numbers depending on the engine. The 2.0L Turbo engine uses a different booster (e.g., 59110-3Q500) than the 2.4L non-turbo engine (e.g., 59110-2T200). This is important if replacing the entire booster assembly.
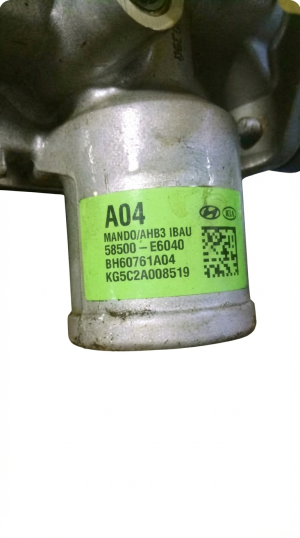
- All Hybrid Models: Hybrid Sonatas do not use a conventional vacuum brake booster. They use a complex electronic Active Hydraulic Boost (AHB) system. A P0556 code on a hybrid model would point to a fault within this different, more complex system and the diagnostic steps would not apply.
Diagnostic Flowchart
Other Known Issues on This Vehicle
Issues unrelated to this code that are worth knowing about as an owner of this generation:
- Theta II Engine Seizure/Failure 🔴 High — Widespread across 2011-2019 models with 2.0L and 2.4L GDI engines. Can occur at various mileages, often preceded by knocking noises. (Ref: Multiple recalls (e.g., NHTSA Campaign 20V746000) and a major class-action settlement extending the powertrain warranty to a Lifetime Warranty for affected vehicles that receive the Knock Sensor Detection System (KSDS) software update.)
- Steering Coupler Disintegration 🟠 Medium — Extremely common on the YF generation (2011-2014). The flexible rubber coupler inside the power steering motor degrades, causing a distinct clicking or clunking noise when turning the wheel. (Ref: Hyundai extended the warranty for this specific part (Part No. 56315-2K000-FFF) under TSB 17-ST-002-1.)
- Excessive Oil Consumption 🟠 Medium — Commonly reported on later models within this range (approx. 2015-2019), often requiring frequent oil top-offs between changes. (Ref: Subject of a class-action lawsuit alleging defective engines. Part of ongoing engine-related investigations.)
- Transmission Shift Quality/Sensor Failure 🟡 Low — Some owners report harsh shifting or an inability to shift, often caused by a failed transmission speed sensor or outdated control module software. (Ref: Software updates were issued by dealers to improve shift quality.)
- No Sound from Speakers 🟡 Low — A common glitch in 2011-2016 models where the audio system (radio, navigation, phone) goes silent. It is typically a software bug in the head unit. (Ref: No formal recall; the common owner fix is to perform a 'hard reset' by disconnecting the negative battery terminal for several minutes.)
Used vs. New Parts: Buying Guide for This Vehicle
When a used part is the smart pick: A used vacuum hose assembly from a low-mileage donor vehicle can be a cost-effective option, provided the rubber is inspected carefully for any signs of brittleness or cracking. A complete brake booster assembly could also be sourced used, but carries more risk.
Donor-vehicle mileage cap: roughly under 50000 miles for the part to have meaningful remaining life.
What to inspect on the donor part:
- For hoses: Squeeze the rubber; it should be pliable and flexible, not hard or crunchy. Check all plastic fittings for cracks.
- For sensors/electronics: Check for any corrosion on the connector pins. Avoid parts from vehicles with signs of flood or fire damage.
- For boosters: Inspect the housing for any signs of significant rust or physical damage like dents or bent flanges, which could indicate an internal leak.
OEM-only on this vehicle (don't cheap out):
- Brake Booster Pressure Sensor: It is strongly recommended to use a genuine OEM sensor for this repair. Some technicians report that aftermarket sensors can have slightly different voltage outputs that may cause the P0556 code to return.
Aftermarket brands forum-validated for this vehicle:
- Gates (for vacuum hoses)
Brands owners have reported issues with on this vehicle:
- Unbranded or 'white-box' electronic sensors from online marketplaces are a significant risk for this particular fault code.
Related OBD-II Codes
Frequently Asked Questions
I found a cheap brake booster pressure sensor online for my 2015 Sonata. Is it okay to use an aftermarket part for the P0556 code?
My 2012 Sonata has the common steering coupler clunk. Is the P0556 brake code related to this issue?
My friend's 2016 Kia Optima has the same P0556 code. Can I use the same diagnostic steps?
The Check Engine Light is on for P0556 on my Sonata. Should I expect any other warning lights?
What specific voltage readings should I look for from the brake booster pressure sensor when diagnosing P0556?
Could an engine problem on my Sonata cause this P0556 brake code?
Helpful Videos
We Have This Part in Stock

The information in this article is provided for general reference and educational purposes only. Vehicle specifications, procedures, and part compatibility can vary by production date, trim level, and region. Always consult your vehicle's factory service manual and verify part numbers before purchasing or performing repairs. Safety-critical components such as airbags, seat belts, and braking systems should be installed by a qualified professional.
- Hyundai Sonata:
- 🧭 Diagnostic Flowchart
- 🎬 Helpful Videos
- 🛍️ Shop This Part
- What's Unique About the 2011-2019 Hyundai Sonata
- Symptoms You May Notice
- Most Likely Causes
- Rare But Worth Checking
- Diagnosis Steps
- Parts You'll Likely Need
- Mechanic-Grade Diagnostic Values
- Scan Tool Commands That Help
- OEM Part Supersession History
- Model Year Variations Within This Range
- Other Known Issues on This Vehicle
- Used vs. New Parts: Buying Guide for This Vehicle
- Related OBD-II Codes
- Frequently Asked Questions
- 🎟️ Get 5% Off