
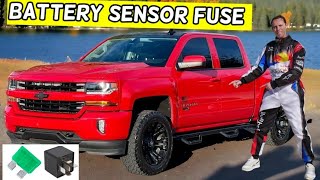
P0562 on 2014-2019 Chevrolet Silverado 1500 6.2L: Low Voltage Causes and Fixes
On a 2014-2019 Silverado, code P0562 is most often caused by a weak or failing battery, a faulty alternator, or poor ground connections. Start by load-testing the battery and cleaning all terminals and main ground points before replacing more expensive parts. The complex Regulated Voltage Control (RVC) system means the battery current sensor and BCM are also potential culprits.
- P0562 indicates a serious voltage issue; do not drive the vehicle as it may stall.
- Always start diagnosis by testing the battery. A simple load test can save you from replacing expensive parts unnecessarily.
- Thoroughly inspect and clean all battery terminals and major ground connections. A bad connection is a common and cheap-to-fix cause.
- Understand that the voltage gauge on these trucks will fluctuate by design. A reading of 12.5-13.0V is not automatically a sign of a problem.
- If you have a 2019 model, be aware of the recall for the alternator B+ cable connection.
What's Unique About the 2014-2019 Chevrolet Silverado 1500
The 2014-2019 Silverado uses a sophisticated Regulated Voltage Control (RVC) system, which is a 'smart' charging system. Unlike older designs that maintain a constant ~14 volts, this system allows the Body Control Module (BCM) to adjust the alternator's output anywhere from ~12.5 to over 15 volts based on driving conditions, battery state of charge, and electrical demand. This complexity means that issues can arise not just from the battery or alternator, but also from the battery current sensor, BCM software, or poor ground connections that are critical for the system's accurate readings. An owner might see voltage as low as 12.5V on the gauge during normal operation, which is not necessarily a fault but a feature of the RVC system to improve fuel economy and battery life.
Symptoms You May Notice
- Check Engine Light is on
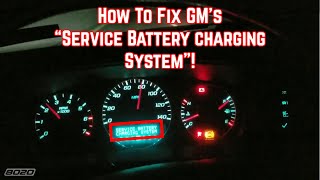
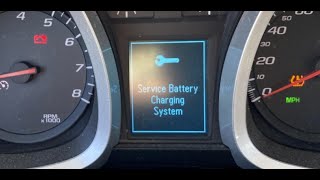
- "Service Battery Charging System" message on the driver information center
- Battery light is illuminated
- Dimming or flickering headlights and interior lights
- Engine stalls, especially at idle or when shifting into gear
- Slow or difficult engine cranking
- Erratic behavior from electronic components like the radio, instrument cluster, or power windows
- Harsh or incorrect transmission shifting
- Stabilitrak/ABS warning lights illuminated, as these modules are sensitive to low voltage
- Replacing the battery when the actual fault is a poor ground connection or a faulty battery current sensor.
- Replacing the alternator when the issue is a slipping serpentine belt or a bad B+ cable connection at the alternator post.
- Assuming the charging system is faulty due to seeing low voltage (~12.5-13.0V) on the gauge, without understanding that this is a normal operating state for the GM Regulated Voltage Control (RVC) system.
Most Likely Causes
- Failing or Weak Battery 🔴 High Probability → Shop Vehicle Battery Batteries have a finite lifespan of 3-5 years, and the high electronic load of modern trucks can expose a weak battery quickly. The factory-installed AGM batteries can be sensitive to deep discharge cycles. Even a battery that reads 12.6V at rest can have a bad cell that causes voltage to plummet under load.
How to confirm: Measure the battery voltage with the engine off; a healthy battery should be at ~12.6V. Use an electronic battery tester to perform a load test, which is the most definitive method. If voltage drops below 9V during the load test, the battery is bad. Many auto parts stores offer this service for free.
Typical fix: Replace the battery. It is recommended to use an AGM battery that meets OEM specifications, such as a Group Size 94R. After replacement, the BCM may need to relearn the battery's state of charge, which can be done using a scan tool or by letting the vehicle sit undisturbed for a few hours.
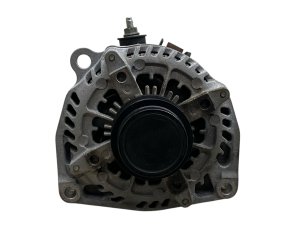
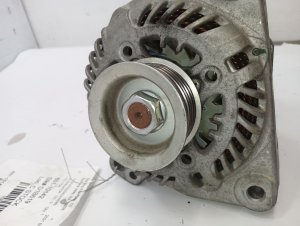
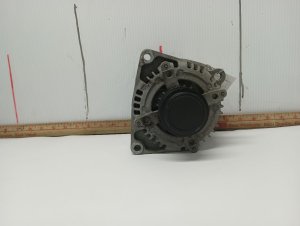
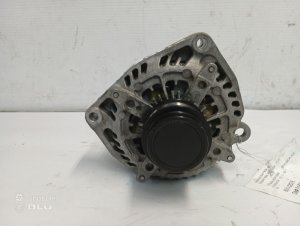
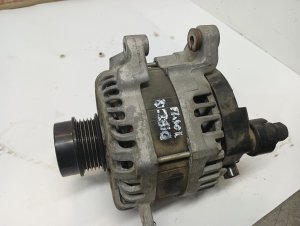
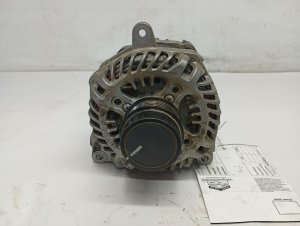
Est. part cost: $180-$350 - Faulty Alternator 🟡 Medium Probability → Shop Alternator Alternators are wear-and-tear items. The smart charging system can sometimes mask an early failure, but eventually, it will be unable to meet the truck's electrical demands, especially under load from accessories.
How to confirm: With the engine running, measure the voltage at the battery terminals. It should fluctuate but generally be between 12.5V and 15.5V depending on the RVC system's commands. If the voltage is consistently below 13.2V with the engine running and loads on, or doesn't increase when electrical loads are turned on, the alternator is a likely suspect.
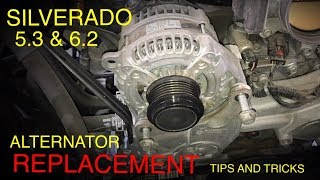
Typical fix: Replace the alternator. Using a quality OEM or remanufactured unit from a brand like ACDelco is advised. The OEM alternator for many L86 models is a 170-amp unit. 🎬 Watch this step-by-step alternator replacement and diagnostic guide
Est. part cost: $250-$500 - Loose or Corroded Battery Terminals / Ground Wires 🟡 Medium Probability → Shop Vehicle Battery GM trucks have several critical ground points (engine to frame, body to frame, battery to chassis) that are susceptible to corrosion or loosening over time, creating high resistance in the electrical circuit. Specific ground locations like G110 and G114 on the left engine compartment rail are known trouble spots.
How to confirm: Visually inspect all battery cable connections, the main engine ground strap, and the body ground strap. Look for corrosion (white or green powder) and ensure all connections are clean and tight. Perform a voltage drop test on the ground and power circuits to find hidden resistance.
Typical fix: Disconnect, clean all contact surfaces with a wire brush, and securely re-tighten the connections. Apply dielectric grease to prevent future corrosion. Replace any cables that are frayed or heavily corroded.
Est. part cost: $0-$100
Rare But Worth Checking
- Faulty Battery Current Sensor: → Shop Vehicle Battery This sensor, located on the negative battery terminal, informs the BCM about the battery's state of charge. If it fails or provides inaccurate data, the smart charging system will not operate correctly, leading to undercharging and a P0562 code. It's a critical but often overlooked component of the RVC system.
- Blown Mega Fuse or Faulty B+ Cable Connection: A recall (NHTSA 19V-888 / GM N192273510) was issued for 2019-2020 models due to excessive glue on the B+ cable ring at the alternator, causing an intermittent connection. This can cause stalling and is a fire risk. While specific to 2019-2020, it highlights a potential failure point on all models in this generation.
- Slipping Serpentine Belt or Faulty Tensioner: → Shop Serpentine Belt If the belt that drives the alternator is worn, glazed, or not held under proper tension, it can slip, preventing the alternator from spinning fast enough to charge effectively, especially under heavy electrical load.
- Faulty Body Control Module (BCM) or Powertrain Control Module (PCM): → Shop Body Control Module In very rare cases, the module responsible for controlling the charging system (BCM) or the module that reports the voltage (PCM) can fail. This should only be considered after all other possibilities have been exhausted.
Diagnosis Steps
- Read all stored DTCs with a quality OBD-II scanner. Note any other codes that are present, especially communication (U-series) or alternator-specific (P06xx) codes.
- With the engine off, use a multimeter to check the battery voltage directly at the terminals. A healthy, fully charged battery should read approximately 12.6 volts.
- Perform a battery load test using an electronic battery tester. This is the most definitive way to confirm a bad battery and should be the first test performed.
- Inspect the battery terminals, positive and negative cable ends, and main chassis ground points (especially G110/G114 on the driver's side frame rail). Clean any corrosion and tighten all connections.
- Start the engine and monitor the charging voltage at the battery terminals. It should be between 12.5V and 15.5V. Turn on heavy loads like headlights, HVAC blower on high, and rear defroster. The voltage should rise to meet the demand, typically to the 14.0-14.8V range.
- If voltage is consistently low, inspect the alternator B+ cable connection for tightness and corrosion. For 2019 models, be aware of recall N192273510 regarding excess glue on this connection.
- Perform a voltage drop test on the main power and ground cables to check for high resistance that wouldn't be visible. A reading over 0.2V indicates high resistance in the cable being tested.
- Inspect the serpentine belt for wear, cracks, or glazing. Check the belt tensioner to ensure it is applying adequate pressure.
- If the battery, alternator, and connections are good, the issue may lie with the battery current sensor on the negative terminal or the BCM/PCM control circuit, which may require more advanced diagnostics with a scan tool that can read BCM data.
Parts You'll Likely Need
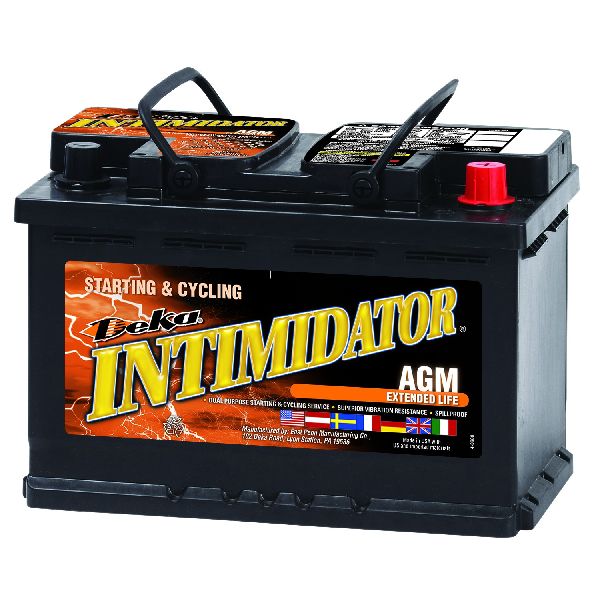
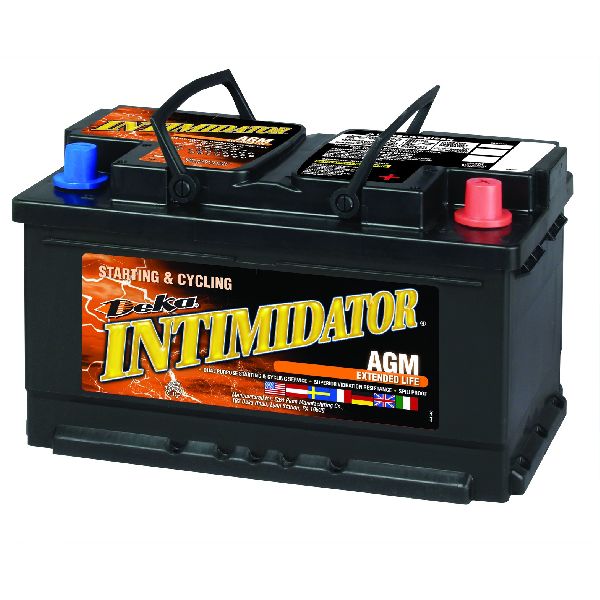
- AGM Battery
(OEM #88865934)— The battery is the most common failure point for a P0562 code, as it is a consumable item with a finite lifespan. The OEM spec is often a Group 94R AGM battery.
Trusted brands: ACDelco, Odyssey, NorthStar
OEM price range: $250-$350
Aftermarket price range: $180-$300 - Alternator
(OEM #84143540)— The alternator is responsible for charging the battery and powering the vehicle when running. Its failure is a primary cause of low system voltage. The L86 often uses a 170-amp Denso-family alternator.
Trusted brands: ACDelco, Denso, Mechman
OEM price range: $350-$500
Aftermarket price range: $250-$450
Related Codes That Often Appear With This One
- U-series codes (e.g., U0140) — Low system voltage can cause communication failures between various control modules on the CAN bus network, as they shut down or report errors due to insufficient power.
- P0621, P0622 — These codes are specific to the alternator control circuit ('L' and 'F' terminals) and often appear alongside P0562 when the alternator itself or its control wiring is the root cause.
- P0606 — On some newer GM trucks, P0562 can be set by the brake module along with P0606 due to a software glitch, often requiring a dealer reprogram per a TSB, though this is more documented on 2020+ models.
Platform-Specific Known Issues
- Recall N192273510: Intermittent B+ Cable Connection (2019-2020 Model Year): For 2019-2020 models specifically, a recall was issued because the battery positive (B+) cable ring at the alternator may have been manufactured with excessive glue, causing a poor connection. This can lead to intermittent charging, stalling, and potentially a fire. The dealer fix involves inspecting the connection, cleaning it, and replacing damaged components if arcing occurred.
Technical Service Bulletins (TSBs) & Recalls
- TSB Bulletin #PIT5634: This bulletin notes that P0562 "System Voltage Low" can lead to misdiagnosis and incorrect repairs. Dealers are advised to inspect for low voltage conditions and follow specific SI diagnostics, as engineering has investigated this issue in relation to hydraulic service brakes.
Mechanic-Grade Diagnostic Values
- Battery Voltage (Key Off, Static) — expected: ~12.6 Volts. Failure: Below 12.4V suggests a discharged or failing battery. Below 12.0V indicates a deeply discharged or bad cell.
- Charging System Voltage (Engine Running, No Load) — expected: 12.5V - 15.5V (Varies based on RVC command). Failure: Consistently below 12.5V or above 15.5V. The voltage should change based on electrical load and battery state.
- Charging System Voltage (Engine Running, Heavy Load) — expected: ~14.0V - 14.8V. Failure: Voltage does not rise to meet demand or stays below 13.2V when accessories like headlights, blower fan, and rear defrost are on.
- Alternator B+ Cable Voltage Drop — expected: < 0.2 Volts. Failure: A reading greater than 0.2V between the alternator B+ post and the positive battery terminal (with engine running and under load) indicates high resistance in the main power cable.
- Ground Cable Voltage Drop — expected: < 0.2 Volts. Failure: A reading greater than 0.2V between the alternator case and the negative battery terminal (with engine running and under load) indicates high resistance in the ground circuit.
- Alternator L-Terminal Signal Voltage (KOER, Connector Unplugged) — expected: ~10 Volts DC. Failure: No voltage or significantly lower voltage indicates a problem with the turn-on signal from the BCM/PCM, preventing the alternator from activating.
Scan Tool Commands That Help
- GDS2 (GM Global Diagnostic System 2): Charging System Data Display — To properly diagnose the RVC system, a technician must use a GDS2 or equivalent high-end scan tool to monitor commanded vs. actual alternator output, battery current sensor readings, and the calculated battery state of charge. A simple voltmeter is insufficient as a low reading can be normal.
- GDS2 (GM Global Diagnostic System 2): Generator Output Control — This bidirectional command allows a technician to manually override the BCM and command the alternator to a specific voltage (e.g., 13.8V). This is used to test if the alternator responds correctly to commands, isolating the alternator from a potential BCM or sensor issue.
- GDS2 (GM Global Diagnostic System 2): Battery Registration / BCM Relearn — After replacing the AGM battery, this function must be performed to reset the BCM's learned battery state of charge. Failing to do so can lead to improper charging (under or overcharging) of the new battery, shortening its life and potentially causing P0562 to return.
Wiring & Ground Locations
- Battery Current Sensor — Integrated into the negative battery terminal connector.. This Hall-effect sensor is the primary input for the Regulated Voltage Control (RVC) system. All negative-side current flow must pass through this sensor. Incorrectly installed aftermarket accessories grounded directly to the battery negative post will bypass the sensor, causing the BCM to have an inaccurate understanding of the battery's state of charge, leading to undercharging and P0562.
- G110 / G114 — On the driver's side frame rail, near the front wheel well area.. These are major chassis ground points for various systems. Corrosion or looseness here can create high resistance, causing widespread electrical issues, including low voltage faults. They are mentioned in the Pass 2 content and are a known trouble spot.
- Engine Block to Firewall Ground Strap — Typically runs from the rear of a cylinder head to a stud on the vehicle's firewall.. This strap ensures the engine block (where the alternator is grounded) has a solid connection to the vehicle body (where many modules are grounded). A broken or corroded strap can cause a significant voltage difference between systems, leading to charging and communication errors.
- Alternator B+ Post — The main threaded stud on the back of the alternator where the large-gauge power cable connects.. This is the single point of output for the entire charging system. A loose nut or corrosion here (as identified in recall N192273510 for 2019 models) creates high resistance, causing a severe voltage drop before the power even reaches the battery.
Real Owner Repair Stories
- GM-Trucks.com user (2006 Silverado 1500 4.8L (Similar RVC system principles)) — Service Charging System light, P0625 (Generator Field 'F' Terminal Circuit Low), corrosion on positive battery terminal.
❌ Tried (didn't work) Replaced Generator Battery Control Module (GBCM), Replaced battery, Cleaned main ground connections, Unplugged 2-pin alternator connector to force default charging (13.7V)
✅ What actually fixed it The user added an additional ground strap from the body to the engine block because the original one was too difficult to access and clean properly. This suggests the original, inaccessible ground was the point of failure. - Reddit r/CarAV user (2011 Silverado (similar RVC system with current sensor)) — Installing a high-power audio system and needing to upgrade the charging system correctly.
❌ Tried (didn't work) Simply adding a ground wire from the battery to the chassis, which bypasses the current sensor.
✅ What actually fixed it The correct method for upgrading grounds on an RVC system is to ensure all primary ground paths pass *through* the factory current sensor on the negative terminal. For a 'Big 3' upgrade, this means running the alternator case ground and chassis ground back to the battery negative terminal *before* the sensor, so the sensor can accurately measure all current draw. Some users physically modify the sensor ring with a Dremel to fit larger gauge wires.
OEM Part Supersession History
ACDelco GM Original Equipment (OE)→GM Genuine Parts— Branding change. GM brought its OEM parts line back under the 'GM Genuine Parts' name. The parts are functionally identical.
Heads up: Parts are interchangeable. A part number like 84143540 may be sold under either brand name but is the same OEM component.
Model Year Variations Within This Range
- 2019: A specific manufacturing defect covered by recall N192273510 involved excessive adhesive on the B+ cable ring terminal at the alternator. This created high resistance and an intermittent connection, directly causing P0562 and potential stalling. While the recall is year-specific, the failure mode (bad connection at the alternator B+ post) is relevant to all years.
- 2014-2015: Early models in this generation were more prone to battery failure under warranty. Multiple forum users with 2015 models reported needing battery replacements within the first 2-3 years of ownership, suggesting potential issues with either the early factory batteries or the RVC system's charging strategy at the time.
Diagnostic Flowchart
Other Known Issues on This Vehicle
Issues unrelated to this code that are worth knowing about as an owner of this generation:
- Active Fuel Management (AFM) Lifter Failure 🔴 High — Common, can occur at various mileages but more frequent after 60,000 miles. Affects cylinders 1, 4, 6, and 7. (Ref: Multiple TSBs, including 15-06-01-002N, address diagnosis and repair.)
- 8L90 Transmission Shudder/Harsh Shifting 🟠 Medium — Very common in early-build (2015-2018) 8-speed transmissions. Often appears as a shudder or vibration between 25-80 mph. (Ref: TSBs issued recommending a fluid flush with a specific updated fluid (Mobil 1 Synthetic LV ATF HP).)
- Direct Injection Carbon Buildup 🟠 Medium — A long-term issue inherent to direct-injected engines. Can cause misfires and reduced performance over 100,000 miles. (Ref: No specific TSB, but a known characteristic of DI engines.)
- Excessive Oil Consumption 🟠 Medium — Some L86 engines may consume oil at a higher-than-normal rate, often linked to the AFM system and piston ring design. (Ref: Subject of class-action lawsuits (e.g., Speerly v. GM).)
Used vs. New Parts: Buying Guide for This Vehicle
When a used part is the smart pick: For a component like an alternator, a used OEM part from a low-mileage, accident-damaged donor vehicle can be a cost-effective and reliable option. Body Control Modules (BCM) can also be sourced used, but they are VIN-locked and will require professional programming to function in a new vehicle.
Donor-vehicle mileage cap: roughly under 75000 miles for the part to have meaningful remaining life.
What to inspect on the donor part:
- For an alternator, check for smooth, quiet bearing rotation with no grinding or roughness.
- Inspect the alternator's pulley for excessive rust or damage.
- Look for a clean, corrosion-free housing and electrical connectors.
- Verify the donor vehicle's mileage and check for signs of front-end collision damage, which could harm the alternator.
OEM-only on this vehicle (don't cheap out):
- Battery Current Sensor: Aftermarket versions of this critical sensor can have poor accuracy, leading to persistent RVC system problems. Given its importance and relatively low cost, OEM is the safest choice.
- Body Control Module (BCM): While a used one can work, the requirement for dealer-level programming makes a new, correctly programmed module a more straightforward repair for most DIYers and independent shops.
Aftermarket brands forum-validated for this vehicle:
- Alternators: ACDelco (OEM), Denso (often the original manufacturer for GM), Mechman (for high-output performance upgrades).
- Batteries: Odyssey, NorthStar, and ACDelco AGM are frequently recommended on forums for their durability.
Brands owners have reported issues with on this vehicle:
- Avoid no-name, 'white-box' alternators from online marketplaces. These often use inferior internal components (diodes, regulators) that fail quickly or cannot communicate properly with the RVC system, causing repeat failures.
Real Owner Stories
Aggregated from forums and TSBs cited above. Mileages and costs reflect what owners reported in those sources.
2019 Silverado 1500 High Country
Symptoms: Multiple codes including P0562; vehicle had to be towed. GM diagnostic procedure recommended checking battery cable clamps and the X50D Battery Fuse Block.
What fixed it: Inspection of EBCM ground connections G110 and G114 as per GM diagnostic recommendations.
Source hint: GM-Trucks.com - 2019 Silverado 1500 High Country Problems Today Had To Be Towed
2019 Silverado 1500
Symptoms: Intermittent charging, stalling, and potential for fire due to arcing at the alternator connection.
What fixed it: Dealer inspection and cleaning of the battery positive (B+) cable ring at the alternator to remove excessive glue, and replacing components damaged by arcing.
Source hint: Recall N192273510: Intermittent B+ Cable Connection (2019-2020 Model Year)
2022 Silverado
Symptoms: Fluctuating voltage between 11V and 14V, near-stalling, and P0562 set specifically in the Brake System Control Module.
What fixed it: The owner replaced the battery and alternator, though the persistent issue led to further investigation of the PCM's voltage regulation.
Source hint: r/MechanicAdvice - 2022 Silverado P0562
Related OBD-II Codes
Frequently Asked Questions
My 2019 Silverado 1500 is stalling and showing low voltage; is there a specific recall I should check?
Which specific ground points should I inspect on my Silverado to resolve a P0562 code?
What type of replacement battery is recommended for the L86 6.2L V8 engine?
My alternator tests fine but I still have P0562; could it be the fuse block?
What is the standard alternator output for the L86 6.2L V8 Silverado?
Can a low voltage condition cause my Silverado's transmission to shift poorly?
Helpful Videos
Used OEM Parts in Stock
New Aftermarket Parts Available


The information in this article is provided for general reference and educational purposes only. Vehicle specifications, procedures, and part compatibility can vary by production date, trim level, and region. Always consult your vehicle's factory service manual and verify part numbers before purchasing or performing repairs. Safety-critical components such as airbags, seat belts, and braking systems should be installed by a qualified professional.
- Chevrolet Silverado 1500:
- 🧭 Diagnostic Flowchart
- 🎬 Helpful Videos
- 🛍️ Shop This Part
- What's Unique About the 2014-2019 Chevrolet Silverado 1500
- Symptoms You May Notice
- Most Likely Causes
- Rare But Worth Checking
- Diagnosis Steps
- Parts You'll Likely Need
- Related Codes That Often Appear With This One
- Platform-Specific Known Issues
- Technical Service Bulletins (TSBs) & Recalls
- Mechanic-Grade Diagnostic Values
- Scan Tool Commands That Help
- Wiring & Ground Locations
- Real Owner Repair Stories
- OEM Part Supersession History
- Model Year Variations Within This Range
- Other Known Issues on This Vehicle
- Used vs. New Parts: Buying Guide for This Vehicle
- Real Owner Stories
- 2019 Silverado 1500 High Country
- 2019 Silverado 1500
- 2022 Silverado
- Related OBD-II Codes
- Frequently Asked Questions
- 🎟️ Get 5% Off