
P0626 on 2008-2009 Hummer H2: Generator Field Circuit Causes and Fixes
This code indicates a fault in the alternator's control circuit. On the 2008-2009 H2, this is almost always caused by a failing alternator with an internal voltage regulator fault. Expect to pay $300-$700 for a quality replacement part, with DIY difficulty rated at 3/5.
- P0626 on a 2008-2009 H2 points to a problem with the alternator's ability to communicate with the vehicle's computer.
- The most common fix is replacing the alternator due to a failed internal voltage regulator.
- Before replacing the alternator, always inspect the two-wire pigtail connector for damage and have the battery professionally tested.
- This vehicle uses a complex Regulated Voltage Control (RVC) system managed by the BCM and PCM.
What's Unique About the 2008-2009 Hummer H2
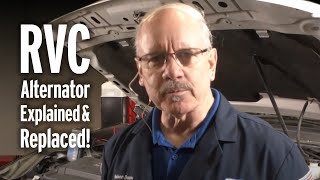
The 2008-2009 Hummer H2 uses a sophisticated, computer-controlled charging system called Regulated Voltage Control (RVC). 🎬 Watch: How the RVC system works and how to replace the alternator. In this system, the Body Control Module (BCM) is the primary controller, monitoring the battery's state of charge via a battery current sensor and determining the desired charging rate. The BCM then sends a signal to the Powertrain Control Module (PCM), which in turn sends a PWM signal to the alternator's 'F' terminal to command the specific output. Owners often report intermittent 'Battery Not Charging' warnings that may temporarily clear after restarting the engine. This behavior is characteristic of a failing internal voltage regulator within the alternator struggling to communicate correctly with the vehicle's control modules.
Symptoms You May Notice
- Intermittent 'Battery Not Charging' message on the driver information center.
- Battery warning light illuminated on the dashboard.
- Voltage gauge showing low or fluctuating readings (e.g., dropping below 12.8V).
- Dimming or flickering headlights and interior lights.
- Engine stalling, especially at idle.
- Needing to restart the engine to get the system to charge again temporarily.
- Dead battery or slow engine cranking.
- Erratic behavior of electronic accessories like the radio or power windows.
- Key getting stuck in the ignition due to loss of electrical power.
- Replacing the battery without testing the alternator. A new battery will quickly be drained by a faulty charging system, leading to a repeat of the symptoms.
- Replacing the alternator without checking the 2-pin pigtail connector. A damaged connector will cause the new alternator to malfunction, leading to the belief that the replacement part was defective.
Most Likely Causes
- Faulty Alternator 🔴 High Probability → Shop Alternator The internal voltage regulator, which receives commands from the PCM, is integrated into the alternator and is the most common point of failure for this code. The complex RVC system is sensitive to regulator faults. Forum discussions with H2 and platform-mate owners frequently conclude with alternator replacement solving the issue.
How to confirm: With the engine running, use a multimeter to check the voltage at the battery terminals. A healthy system should read between 13.8V and 14.5V (though GM RVC systems can command lower voltages, sometimes down to 13.2V, when the battery is fully charged). If the voltage is consistently low, high, or fluctuating wildly, the alternator is likely bad. Many auto parts stores can bench-test the alternator for free if you remove it.
Typical fix: Replace the entire alternator assembly. It is recommended to use a high-quality new or remanufactured unit from a reputable brand like ACDelco to avoid premature failure of the replacement part.
Est. part cost: $250-$720 - Damaged Wiring or Connectors 🟡 Medium Probability The two-wire pigtail connector to the alternator is exposed to significant engine heat and vibration. This can cause the wires to become brittle, chafe, or break, and the connector pins can corrode or lose tension over time.
How to confirm: Visually inspect the wiring harness and the 2-pin electrical connector at the back of the alternator. Look for any signs of corrosion, loose pins, or damaged wires. Wiggle the connector with the engine running to see if it affects charging voltage. Perform a continuity test on the 'F' terminal wire (Generator Field Control) between the alternator and the PCM.
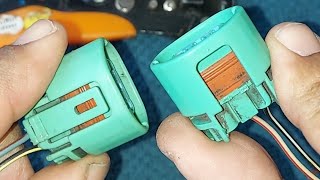
Typical fix: Repair the damaged section of wire or replace the alternator pigtail connector. 🎬 See this guide on how to fix a broken alternator connector. The connector is available as a separate part (e.g., Standard Motor Products S2051 or ACDelco PT2298).
Est. part cost: $20-$60 - Weak or Failing Battery ⚪ Low Probability → Shop Vehicle Battery A battery with an internal short or high resistance can put excessive strain on the charging system. The BCM monitors the battery via a current sensor, and an unhealthy battery can send confusing data, sometimes leading to charging system codes. It's a mandatory first check before replacing expensive components.
How to confirm: Have the battery professionally load-tested and checked for its state of health. A simple voltage check is not sufficient. Most auto parts stores offer this service for free.
Typical fix: Replace the vehicle's battery. Ensure the new battery meets or exceeds the OEM specifications for Cold Cranking Amps (CCA) and is properly registered with the BCM if required by the scan tool.
Est. part cost: $150-$350
Rare But Worth Checking
- Faulty Powertrain Control Module (PCM): → Shop Engine Control Module (ECM) This is very rare. The PCM's internal driver for the alternator field circuit can fail, but this should only be considered after exhaustively ruling out the alternator, wiring, and battery.
- Faulty Body Control Module (BCM): Extremely rare for this specific code. Since the BCM initiates the charging request in the RVC system, a BCM fault could theoretically cause charging issues. However, it would typically be accompanied by many other seemingly unrelated electrical problems in the cabin.
Diagnosis Steps
- Scan for Codes: Read all stored diagnostic trouble codes from all modules (PCM, BCM). Note if P0626 is accompanied by other codes like P0625 or B1516.
- Check Battery Health: Have the battery professionally load-tested to ensure it is in good condition. A bad battery must be replaced before proceeding.
- Inspect Connections: Check the battery terminals for corrosion and tightness. Follow the main battery cables and ground straps to ensure they are secure and free of corrosion. Pay special attention to the main chassis and engine block grounds.
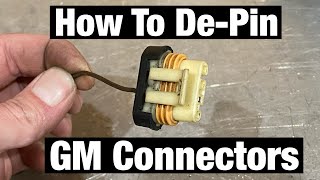
- Inspect Alternator Wiring: Carefully examine the 2-pin electrical connector and wiring harness at the back of the alternator. Look for any signs of damage, melting, or corrosion. 🎬 Learn how to remove pins from a GM alternator connector. Reseat the connector firmly. Wiggle the connector with the engine running to check for intermittent faults.
- Test Charging Voltage: Start the engine. Use a multimeter to measure the DC voltage directly at the battery terminals. The reading should be stable, typically between 13.2V and 14.8V on this RVC system. If it's below 13.0V or above 15.0V, the alternator is highly suspect.
- Test F-Terminal Circuit: For advanced users, use a scan tool to command the generator field control duty cycle. Back-probe the F-terminal wire at the alternator connector and verify the PWM signal with an oscilloscope or a multimeter with a duty cycle function. An open or shorted circuit will show an abnormal or non-existent signal.
- Replace Alternator: If the battery and wiring are good but charging voltage is incorrect and the PWM signal is being sent correctly by the PCM, the alternator's internal regulator has failed. Replace the alternator assembly.
- Clear Codes and Test Drive: After any repair, clear all DTCs and perform a drive cycle to ensure the fault does not return.
Parts You'll Likely Need
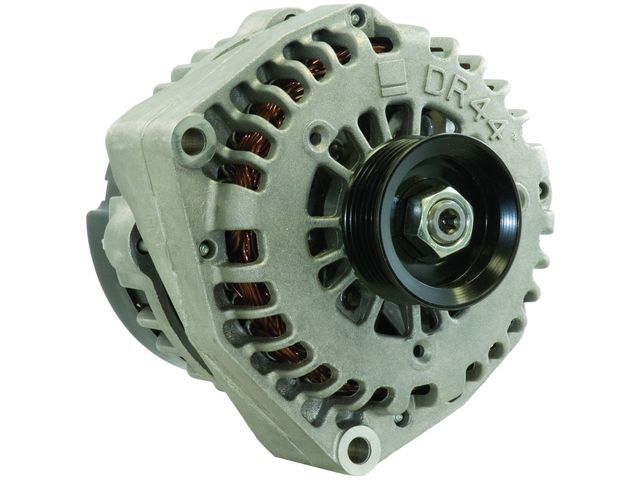
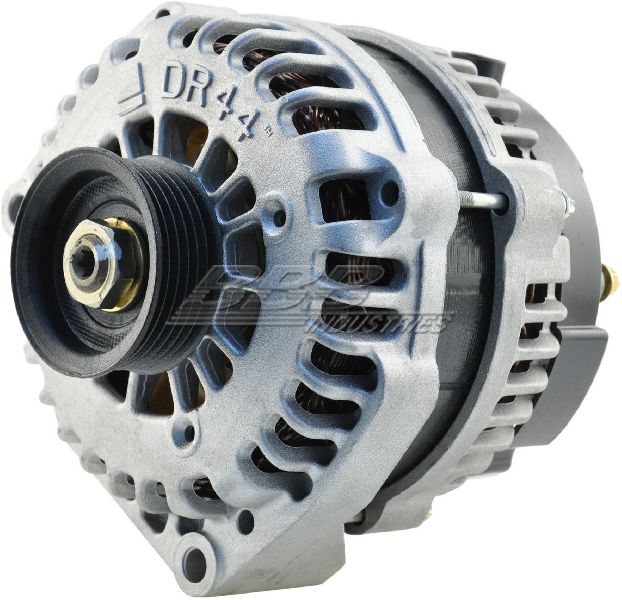
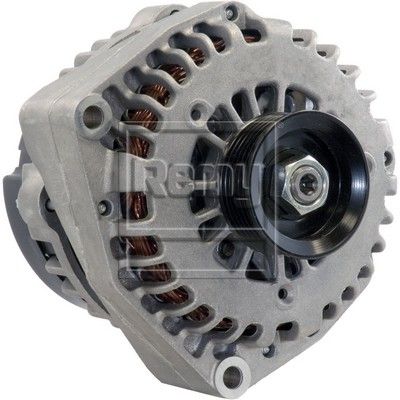
- Alternator
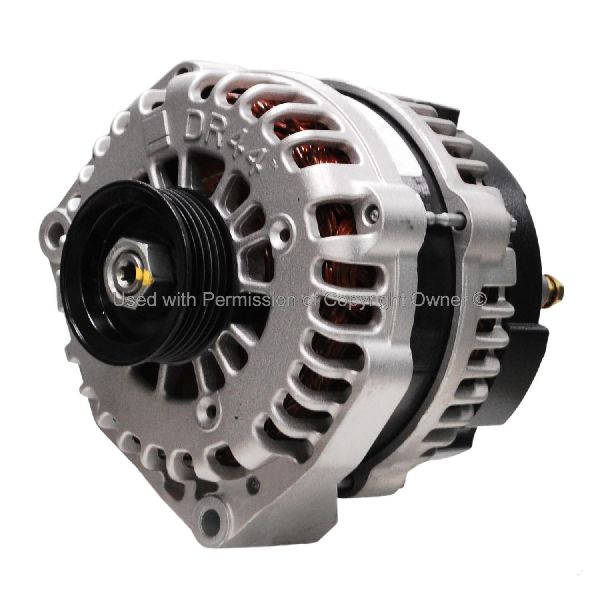
(OEM #ACDelco 84143541 (supersedes 15905871, 15857608))— This is the most frequent cause of P0626, as the internal voltage regulator that communicates with the PCM fails. The 2008-2009 H2 uses a 160 Amp alternator.
Trusted brands: ACDelco (OEM/Reman), Bosch (Reman), Denso, Remy
OEM price range: $400-$720
Aftermarket price range: $250-$450 - Alternator Pigtail Connector
(OEM #ACDelco PT2298 / GM 889889399)— The connector is a common failure point due to heat and vibration, causing a poor connection to the alternator's voltage regulator. Replacing it is a cheap and effective step before condemning the alternator.
Trusted brands: ACDelco (OEM), Standard Motor Products (S2051), Dorman
OEM price range: $40-$60
Aftermarket price range: $20-$40
Related Codes That Often Appear With This One
- P0625 — This code means 'Generator Field/F-Terminal Circuit Low'. P0625 and P0626 are opposites but point to a fault in the same control circuit, often indicating an intermittent wiring or alternator problem.
- P0562 — This code means 'System Voltage Low'. It is a direct consequence of the P0626 fault, as the inability to control the alternator leads to a lack of charging and a drop in overall system voltage.
- B1516 — This code relates to the 'Battery Current Sensor Performance'. A fault with this sensor can disrupt the BCM's ability to correctly assess battery state and command the proper charge rate, potentially contributing to charging system errors.
Technical Service Bulletins (TSBs) & Recalls
- While no specific TSB for P0626 on the H2 was found, GM has issued TSBs for similar models with the RVC system (e.g., some Ram trucks) that sometimes require a PCM software update to correct charging logic. This is not a common fix for the H2 but remains a possibility.
Platform-Specific Known Issues
- The computer-controlled charging system can be sensitive. Some owners have reported getting a bad replacement alternator 'off the shelf', requiring a second replacement to fix the issue. Always use a high-quality part.
- Poor ground connections are a known issue on H2s and can cause a variety of electrical gremlins that mimic alternator failure. It's always worth checking and cleaning the main engine, chassis, and BCM grounds during diagnosis.
Mechanic-Grade Diagnostic Values
- Generator Field Control (F-Terminal) Signal — expected: A 5-volt Pulse Width Modulated (PWM) signal at 128 Hz. The duty cycle normally operates between 5% and 99%.. Failure: A duty cycle of 0-5% or 95-100% indicates a fault condition. If the circuit is open, the alternator defaults to a charge rate of 13.8 volts.
- Battery Current Sensor Signal — expected: A 5-volt PWM signal at 128 Hz, with a normal duty cycle between 5% and 95%.. Failure: A duty cycle of 0-5% or 95-100% is used for diagnostic purposes and indicates a fault with the sensor or circuit.
- RVC System Commanded Voltage — expected: Can range from 12.9V (Fuel Economy Mode) to 15.5V (Charge Mode), depending on battery state of charge, electrical load, and ambient temperature. A common target after startup is 14.5V for 30 seconds.. Failure: Voltage that is consistently outside the 12.9V-15.5V range or does not respond to changing electrical loads (like turning on headlights and fans) suggests a system fault.
Scan Tool Commands That Help
- Tech2 / GDS2: Generator Field Control Duty Cycle / Gen-F-Term Duty Cyc — This bidirectional command allows a technician to manually override the BCM/PCM and command the alternator to a specific output percentage. This is the definitive test to isolate a faulty alternator. If the alternator's output voltage changes according to the commanded duty cycle, the alternator and wiring are likely good, pointing towards a control module issue. If it does not respond, the alternator or its wiring is faulty.
Wiring & Ground Locations
- Engine Control Module (ECM/PCM) — Located in the engine compartment, below the battery and underhood fuse block on the driver's side.. The PCM sends the final PWM control signal to the alternator's 'F' terminal. A corroded connector or damaged pin at the PCM can cause this code.
- Body Control Module (BCM) — Located on the lower left side of the dash, to the left of the steering column.. The BCM is the master controller for the Regulated Voltage Control (RVC) system. It reads the battery current sensor and tells the PCM what charge rate to command.
- Main Engine Ground — There are two primary engine ground points. One is a stud on the starter motor. Another is a stud on the front of the passenger-side cylinder head, behind the alternator.. A poor engine ground can create a voltage differential, causing the PCM to misinterpret the signal from the alternator's field circuit, leading to charging system faults.
- Alternator Connector (X115) — The 2-pin connector on the back of the alternator.. This connector contains the Generator Field Control ('F' terminal) wire. It is a frequent point of failure due to heat and vibration, causing an open or short in the control circuit.
OEM Part Supersession History
15857608, 15905871→84143541— Standard part evolution, likely for improved reliability or manufacturing process changes.
Heads up: The current part number, 84143541, is the correct service replacement for the 2008-2009 H2. While older numbers may be found, using the latest revision is recommended to get the most updated design.
Model Year Variations Within This Range
- 2009 only: The 2009 model year L9H engine is FlexFuel (E85) capable, while the 2008 is not. Additionally, factory Bluetooth capability was added for 2009. These changes do not directly affect the diagnosis of P0626, but confirm the vehicle's specific year is important for other systems.
Diagnostic Flowchart
Other Known Issues on This Vehicle
Issues unrelated to this code that are worth knowing about as an owner of this generation:
- Rear Air Suspension Failure 🔴 High — Very common as the vehicles age. The rubber air springs develop dry rot and cracks, leading to leaks. The compressor then overworks and fails. Typically occurs after 8-12 years or 100k+ miles.
- 6L80 Transmission Problems 🟠 Medium — Issues like torque converter shudder ('rumble strip' feel), harsh 1-2 shifts, or getting stuck in one gear can occur, often after 80k miles. Failures are frequently linked to the torque converter, valve body, or internal TEHCM (Transmission Electro-Hydraulic Control Module).
- HVAC Mode/Blend Door Actuator Failure 🟡 Low — Widespread issue where the plastic gears inside the actuators fail, resulting in inability to change air direction (e.g., stuck on defrost) or control temperature. Very common across the entire GMT900 platform.
- Instrument Cluster Stepper Motor Failure 🟡 Low — Common on many GM vehicles of this era. Individual gauges (speedometer, tachometer, fuel, etc.) may become stuck, read incorrectly, or behave erratically due to stepper motor failure.
- Steering Wheel Position Sensor Failure 🟠 Medium — Failure of this sensor can cause the 'Service Stability System' message to appear and disable traction/stability control. It's a relatively common electronic failure point.
- Cracked Dashboards 🟡 Low — The upper dashboard panel is prone to cracking, especially around the passenger airbag outline and speaker grilles, due to sun exposure and age. This is a cosmetic but very common issue on 2008-2009 models with the updated interior.
Used vs. New Parts: Buying Guide for This Vehicle
When a used part is the smart pick: A used alternator is generally not recommended for this vehicle due to the high failure rate of the internal voltage regulator. The cost of labor to replace it a second time often negates any savings. A used alternator pigtail connector is a viable option if it is in excellent physical condition with no brittleness or corrosion.
Donor-vehicle mileage cap: roughly under 80000 miles for the part to have meaningful remaining life.
What to inspect on the donor part:
- For a used alternator, check for smooth, quiet bearing operation when spinning by hand.
- Inspect the electrical connector pins for any corrosion, bending, or signs of overheating (discoloration).
- Look for a date code on the alternator; a newer unit is preferable.
- Ensure the pulley is not damaged and the decoupler mechanism (if applicable) functions correctly.
OEM-only on this vehicle (don't cheap out):
- Alternator: While some aftermarket brands are acceptable, OEM (ACDelco) is strongly recommended for first-time replacement to ensure compatibility with the sensitive RVC system.
Aftermarket brands forum-validated for this vehicle:
- Denso (often the OE manufacturer)
- Bosch (Remanufactured)
- For high-output needs (winches, audio systems), brands like Mechman are mentioned by enthusiasts, but may require wiring upgrades.
Brands owners have reported issues with on this vehicle:
- Generic, unbranded, or 'white-box' alternators from online marketplaces have a very high rate of premature failure and can cause repeat diagnostic headaches.
Real Owner Stories
Aggregated from forums and TSBs cited above. Mileages and costs reflect what owners reported in those sources.
2008 Hummer H2 L9H 6.2L V8
Symptoms: Experienced intermittent charging problems, with the 'Battery Not Charging' message appearing on the driver information center and the battery warning light illuminating on the dashboard.
What fixed it: Replacement of the entire alternator assembly.
Source hint: HummerForums.com - Multiple threads ('2008 H2 - Charging System Intermittent ??', '2009 H2 Not Charging, Battery Light On')
Related OBD-II Codes
Frequently Asked Questions
My H2 has the same engine as a Yukon Denali. Is this P0626 problem common on those trucks too?
My mechanic wants to replace the alternator, but I've heard replacement parts can be bad out of the box. Is this a known issue for the Hummer H2?
Besides the alternator, what's the most likely part to fail and cause a P0626 code on my 2008 H2?
My voltage gauge is fluctuating and I got a 'Battery Not Charging' message. Could it just be a bad battery?
I'm checking the wiring for issues. Are there any specific ground points on the H2 that are known to cause these kinds of electrical problems?
Is there a specific Technical Service Bulletin (TSB) for code P0626 on the 2008-2009 Hummer H2?
Helpful Videos
Used OEM Parts in Stock

New Aftermarket Parts Available


The information in this article is provided for general reference and educational purposes only. Vehicle specifications, procedures, and part compatibility can vary by production date, trim level, and region. Always consult your vehicle's factory service manual and verify part numbers before purchasing or performing repairs. Safety-critical components such as airbags, seat belts, and braking systems should be installed by a qualified professional.
- Hummer H2:
- 🧭 Diagnostic Flowchart
- 🎬 Helpful Videos
- 🛍️ Shop This Part
- What's Unique About the 2008-2009 Hummer H2
- Symptoms You May Notice
- Most Likely Causes
- Rare But Worth Checking
- Diagnosis Steps
- Parts You'll Likely Need
- Related Codes That Often Appear With This One
- Technical Service Bulletins (TSBs) & Recalls
- Platform-Specific Known Issues
- Mechanic-Grade Diagnostic Values
- Scan Tool Commands That Help
- Wiring & Ground Locations
- OEM Part Supersession History
- Model Year Variations Within This Range
- Other Known Issues on This Vehicle
- Used vs. New Parts: Buying Guide for This Vehicle
- Real Owner Stories
- 2008 Hummer H2 L9H 6.2L V8
- Related OBD-II Codes
- Frequently Asked Questions
- 🎟️ Get 5% Off