
P0641 on 2013-2017 GMC Terrain: 5-Volt Reference 'A' Circuit Fault Causes and Fixes
P0641 on a 2013-2017 GMC Terrain almost always points to a chafed or shorted engine wiring harness, especially where it routes near the ECM or other engine brackets. The fix is to find the damaged wire, repair it, and protect the harness to prevent it from happening again.
- P0641 on a 2013-2017 GMC Terrain is most often a wiring issue, not a sensor issue.
- Before replacing any parts, carefully inspect the entire engine wiring harness for signs of rubbing or damage, especially near the ECM.
- The vehicle will likely enter a 'Reduced Power' mode, making it unsafe for normal driving.
- Repairing the damaged wire and protecting the harness from future rubbing is the most common and permanent solution.
What's Unique About the 2013-2017 Gmc TERRAIN
On this generation of GMC Terrain, particularly those with the 3.6L V6 engine, the engine wiring harness is prone to rubbing against the ECM bracket or other sharp edges on the engine. This specific routing issue is documented in GM Technical Service Bulletin PI1067B and is the most common reason for a P0641 code, often causing more headaches than faulty sensors themselves.
Diagnostic Flowchart
Tap your situation to follow the diagnostic path that matches what you're seeing on this vehicle.
Symptoms You May Notice
- Check Engine Light is on
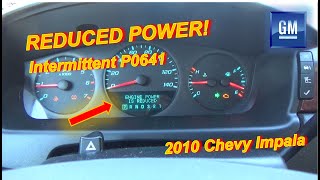
- "Reduced Engine Power" message disp 🎬 Watch: Diagnosing intermittent reduced power and P0641 codes.layed
- Poor engine performance and sluggish acceleration
- Engine may run rough or stall
- Accelerator pedal may become unresponsive.
- Engine oil pressure gauge may drop to zero.
- Features related to the affected sensors may fail (e.g., A/C compressor not engaging).
- Replacing sensors on the 5-volt circuit without first checking the wiring harness. The harness is the most likely cause, and replacing sensors will not fix a shorted wire.
- Replacing the ECM unnecessarily when the fault lies in the external wiring or a connected sensor.
Most Likely Causes
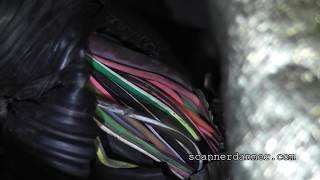
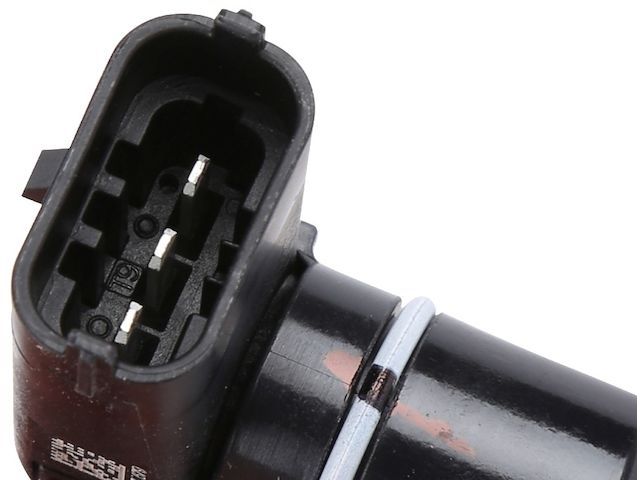
- Chafed or Shorted Engine Wiring Harness 🔴 High Probability → Shop Engine Wiring Harness As documented in TSBs PI1067B and PIT5424, the engine harness is often routed too close to the ECM bracket or the upper rear of the engine, leading to rubbing and eventual wire damage. The gray 5-volt reference wire is often the victim.
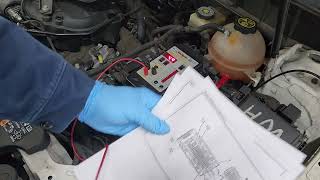
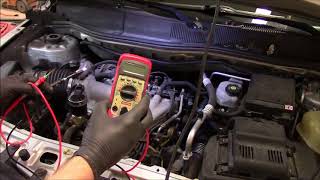
How to confirm: Visually inspect the entire engine wiring harness. Pay extremely close attention to the area where the harness comes off the ECM's X1 connector and passes the metal ECM bracket. 🎬 See how to perform a visual inspection for harness shorts. Also check where the harness runs over the top of the engine near a stud on the manifold, and on AWD models, where the harness runs along the frame rail near the front driveshaft. Wiggling the harness in these areas while monitoring the 5-volt reference signal with a scan tool or multimeter can help pinpoint the location of the short.
Typical fix: Repair the damaged wire(s) by soldering or using a quality butt connector with heat shrink. Re-route or protect the harness with anti-abrasion tape (such as Tesa PET tape) or a rubber sleeve to prevent future contact.
Est. part cost: $5-$25 - Faulty Sensor on the 5-Volt 'A' Circuit 🟡 Medium Probability Any sensor on the circuit can fail internally and short the 5-volt line to ground, causing the entire circuit to go down.
How to confirm: With the key on, unplug each sensor on the 'A' circuit one by one. If the 5-volt reference returns to normal after unplugging a specific sensor 🎬 Watch this walkthrough on troubleshooting the P0641 fault code., that sensor is the culprit. For the GM 3.6L, sensors on this circuit often include the Camshaft Position Sensor, Engine Oil Pressure Sensor, A/C Refrigerant Pressure Sensor, Fuel Tank Pressure Sensor, and sometimes the Fuel Rail Pressure Sensor or Brake Booster Vacuum Sensor.
Typical fix: Replace the faulty sensor.
Est. part cost: $30-$150 - Faulty Engine Control Module (ECM) ⚪ Low Probability → Shop Engine Control Module (ECM)
How to confirm: This should only be considered after all wiring and sensors have been definitively ruled out. The ECM is the source of the 5-volt reference, but internal failure is rare. A technician would confirm by checking for a stable 5V directly at the ECM output pin with the harness disconnected.
Typical fix: Replace and program the ECM.
Est. part cost: $400-$1000
Rare But Worth Checking
- Damaged Fuel Pump Harness Connector:
Diagnosis Steps
- Connect an OBD-II scanner and confirm the presence of P0641 and any other codes. Note any codes for specific sensors, as they provide clues to which components are on the affected circuit.
- Using the scanner's live data, check the status of the "5-Volt Reference 1" circuit. It will likely read 0 volts or a value significantly lower than 5 volts.
- Begin a thorough visual inspection of the engine wiring harness. Focus on the key chafing points: where the harness passes the metal ECM bracket, where it may touch a stud on top of the engine, and on AWD models, where it runs along the frame near the front driveshaft.
- Gently wiggle and manipulate the harness in suspect areas while watching the 5-volt reference on your scan tool. If the voltage returns to 5V, you have found the location of the short.
- If wiggling the harness does not reveal the short, begin unplugging sensors on the 5-volt 'A' circuit one at a time with the key on. After unplugging each sensor, check if the 5-volt reference returns to normal. Common sensors on this circuit include the Camshaft Position Sensor, Oil Pressure Sensor, A/C Pressure Sensor, and Fuel Tank Pressure Sensor.
- If unplugging all sensors does not restore the 5V reference, the short is in the wiring harness itself. You must continue to trace the harness to find the damaged section.
- Once the shorted wire or faulty sensor is found, perform the repair. For a wire, cut out the damaged section, splice in a new piece of wire, and protect it with heat shrink. Wrap the repaired harness section with high-quality anti-abrasion tape.
- If a sensor is identified as the cause, replace it with a new part.
- Clear all diagnostic trouble codes and perform a drive cycle to ensure the repair was successful and the code does not return.
Parts You'll Likely Need
- Engine Wiring Harness Repair Supplies — The most common fix is repairing a chafed wire, which requires basic electrical supplies.
Trusted brands: 3M, Tesa
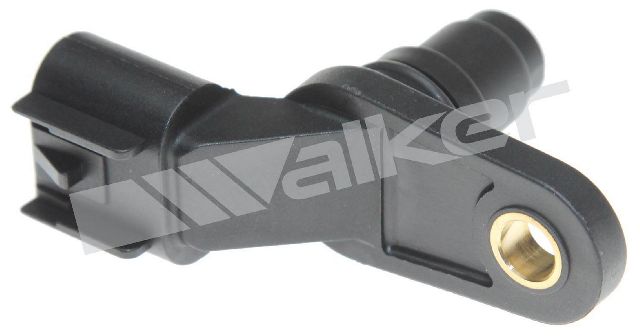
Aftermarket price range: $5-$25 - Engine Oil Pressure Sensor
(OEM #12673134)— If a sensor is at fault, the oil pressure sensor is a common culprit on this circuit. A failure will often cause the oil pressure gauge to read zero.
Trusted brands: ACDelco, Delphi
OEM price range: $40-$70
Aftermarket price range: $25-$50 - Camshaft Position Sensor
(OEM #12674702)— Another sensor commonly found on the 5-volt 'A' circuit that can short internally.
Trusted brands: ACDelco, Bosch
OEM price range: $35-$60
Aftermarket price range: $20-$45 - A/C Refrigerant Pressure Sensor
(OEM #13587668)— This sensor is on the 5V 'A' circuit and a short can cause the A/C system to stop working along with setting the P0641 code.
Trusted brands: ACDelco
OEM price range: $25-$50
Aftermarket price range: $15-$35
Related Codes That Often Appear With This One
- P0261 — This and other injector circuit codes (P0264, P0267, etc.) are mentioned in TSB #PIT5424 as potentially appearing with P0641, likely due to damage in the same section of the engine wiring harness.
- P0340 — Camshaft Position Sensor Circuit Malfunction. The Camshaft Position Sensor is often on the 5-volt reference 'A' circuit, so a fault on the reference line will cause a fault code for the sensor.
- P0522 — Engine Oil Pressure Sensor/Switch Circuit Low Voltage. The oil pressure sensor is another common component on the 5-volt reference 'A' circuit.
- P0452 — Fuel Tank Pressure Sensor/Switch Circuit Low. The Fuel Tank Pressure sensor is also on the 5V 'A' circuit, and a fault here is common.
Technical Service Bulletins (TSBs) & Recalls
- PI-1067B: Notes that P0641, poor performance, and reduced power mode can be caused by the ECM wiring harness rubbing on the ECM bracket. It recommends inspecting the harness coming off the X1 connector and wrapping it with anti-abrasion tape after repair.
- PIT5424: Instructs technicians to inspect the engine harness routing near the ECM and upper rear of the engine for damage when P0641 is present with other codes.
Platform-Specific Known Issues
- TSB #PI-1067B specifically calls out engine harness chafing as a cause for P0641 on these vehicles. The harness may have chafing or damage to the wires where it rubs on the ECM bracket.
- TSB #PIT5424 instructs technicians to inspect the engine harness routing near the ECM and upper rear of the engine for damage when P0641 is present with other codes like P0261.
- Owner forums frequently cite a specific chafe point on AWD models where the harness running along the driver's side frame rail can rub against the front driveshaft, shorting the gray 5V reference wire.
Mechanic-Grade Diagnostic Values
- 5-Volt Reference 1 Circuit Voltage (KOEO) — expected: 5.0V ± 0.1V. Failure: A reading near 0V indicates a short to ground. A reading between 0.1V and 4.8V indicates high resistance or an intermittent short. A reading above 5.1V indicates a short to a higher voltage source.
Hidden / Shadow Codes Worth Checking
- P0641 03: 5-Volt Reference 1 Circuit Voltage Below Threshold. This indicates the ECM has detected the circuit voltage is too low, strongly suggesting a short to ground. (see via GM GDS2 or other professional-grade scan tool capable of reading manufacturer-specific codes and symptom bytes.)
- P0641 07: 5-Volt Reference 1 Circuit Voltage Above Threshold. This indicates the ECM has detected the circuit voltage is too high, suggesting a short to a power source. (see via GM GDS2 or other professional-grade scan tool.)
Scan Tool Commands That Help
- GDS2 (Global Diagnostic System 2): Live Data PID: '5-Volt Reference 1 Status' — This data parameter provides a direct status from the ECM about the circuit's health. Instead of just showing voltage, it will display a state like 'OK', 'Short to Ground', or 'Short to Voltage', which can speed up diagnosis significantly by confirming the fault type before manual testing begins.
Wiring & Ground Locations
- 5V Reference 1 Wire — Throughout the engine harness, connecting the ECM to various sensors.. This wire, typically GRAY on GM vehicles, is the specific circuit that has failed. Finding where this wire is damaged is the primary goal of the diagnosis.
- ECM Connector X1 — On the Engine Control Module, located in the left front of the engine compartment.. This is the source of the 5V reference circuit. TSB PI-1067B specifically mentions inspecting the harness coming off this connector where it can rub on the ECM bracket. On the 3.6L LFX engine, the 5V Ref 1 is often on Pin 50 of this connector.
- Grounds G105 / G106 — Bolted to the engine block or frame rail at the front of the engine compartment.. While not a direct cause of a 5V reference short, poor engine grounds can cause the ECM to function incorrectly and create a host of unpredictable electrical issues. Ensuring these grounds are clean and tight is a crucial step in any electrical diagnosis.
Real Owner Repair Stories
- Multiple owner forums (e.g., equinoxforum.net) (2013 GMC Terrain 3.6L V6) — P0641, Reduced Engine Power, stalling, multiple other sensor codes.
❌ Tried (didn't work) Replacing the Engine Oil Pressure sensor, Replacing the Camshaft Position sensor
✅ What actually fixed it Found a section of the engine wiring harness near the front valve cover where the loom had rubbed through. The gray 5-volt reference wire was exposed and intermittently shorting to the engine block. The fix was to repair the damaged wire and re-secure the harness away from the chafe point. - YouTube Technician Video (GMC/Chevy AWD SUV with 3.6L engine) — Intermittent P0641, especially after driving for a while or on bumpy roads. Reduced Power light would flicker.
❌ Tried (didn't work) Wiggle testing the harness near the ECM and on top of the engine.
✅ What actually fixed it The wiring harness that runs along the driver's side frame rail was rubbing against the front driveshaft (on an AWD model). The gray 5V reference wire was shorting to the spinning driveshaft, causing the intermittent fault. Repairing the wires and zip-tying the harness away from the driveshaft permanently solved the issue.
Helpful Videos
We Have This Part in Stock


The information in this article is provided for general reference and educational purposes only. Vehicle specifications, procedures, and part compatibility can vary by production date, trim level, and region. Always consult your vehicle's factory service manual and verify part numbers before purchasing or performing repairs. Safety-critical components such as airbags, seat belts, and braking systems should be installed by a qualified professional.
- Gmc TERRAIN:
- 🧭 Diagnostic Flowchart
- 🎬 Helpful Videos
- 🛍️ Shop This Part
- What's Unique About the 2013-2017 Gmc TERRAIN
- Symptoms You May Notice
- Most Likely Causes
- Rare But Worth Checking
- Diagnosis Steps
- Parts You'll Likely Need
- Related Codes That Often Appear With This One
- Technical Service Bulletins (TSBs) & Recalls
- Platform-Specific Known Issues
- Mechanic-Grade Diagnostic Values
- Hidden / Shadow Codes Worth Checking
- Scan Tool Commands That Help
- Wiring & Ground Locations
- Real Owner Repair Stories
- 🎟️ Get 5% Off