
OBD-II Code P0651: Sensor Power Supply Problem
What P0651 means, why it triggers, and how to fix it
- Code P0651 indicates a voltage drop or open circuit on the PCM's 5-volt 'B' reference circuit, which powers multiple critical engine sensors.
- Over 80% of P0651 codes stem from a chafed wiring harness or a single internally shorted sensor, not a failed $1,000 PCM.
- Stop driving immediately; this code triggers sudden engine stalling or a 20-mph 'limp mode' that is dangerous in active traffic.
- Diagnose the exact fault by unplugging sensors on the 'B' circuit one by one until the multimeter reading jumps back to a steady 5.0 volts.
- Always scan for companion codes like P0452 or P2135, as they pinpoint exactly which sensor or harness branch contains the short circuit.
What Does P0651 Mean?

Your car's Powertrain Control Module (PCM) sends a steady 5-volt power signal to multiple engine sensors. Code P0651 indicates the computer detects a voltage drop or broken wire on one specific power circuit, labeled the 'B' circuit. This deprives the sensors on that circuit of power, causing them to send dead or erratic signals back to the engine computer.
Technical definition: The SAE/OBD-II definition is "Sensor Reference Voltage 'B' Circuit/Open". This means the Powertrain Control Module (PCM) detects the voltage on the 5-volt reference circuit 'B' is outside its normal 4.75V to 5.25V operating range. The circuit is either open (broken wire) or shorted to ground (reading 0 volts).
🎬 Watch: A quick overview of the P0651 circuit/open code.Can I Drive With P0651?
No — Do Not Drive. Do not drive. The engine stalls unexpectedly or forces the vehicle into a 20-mph 'limp mode', creating a severe collision risk in active traffic. Continuing to drive also risks permanent damage to the catalytic converter.
Common Causes

- Damaged or Frayed Wiring Harness (Very Common) — Wires in the engine bay become brittle from heat, rub against metal engine parts, or suffer rodent damage. A broken wire creates an open circuit, while a chafed wire touching the engine block creates a dead short to ground, instantly dropping the 5-volt signal to zero.
- Internally Shorted Engine Sensor (Common) — A single sensor connected to the 'B' circuit fails internally and shorts out. Because multiple sensors share this single 5-volt power line, one shorted sensor pulls the voltage down for the entire circuit, disabling all connected sensors simultaneously.
- Corroded Connectors & Water Intrusion (Common) — Water leaking into the engine bay or cabin seeps into sensor connectors or the PCM harness. This moisture breeds green corrosion on the metal pins, creating high electrical resistance that chokes off the 5-volt supply.
- Blown Sensor Fuse (Less Common) — The 5-volt reference circuit is protected by a dedicated low-amperage fuse (typically 5A). A sudden short circuit blows this fuse, instantly cutting power to the 'B' circuit and triggering the code.
- Improperly Installed Aftermarket Accessories (Uncommon) — Installers sometimes mistakenly tap remote starters, alarms, or aftermarket lighting into a 5V reference wire instead of a 12V power source. This overloads the circuit and triggers P0651.
- Faulty Powertrain Control Module (PCM) (Rare) — The internal voltage regulator inside the main computer fails, preventing it from generating the 5-volt signal. This requires a full PCM replacement but is extremely rare and only diagnosed after ruling out all wiring faults.
Symptoms

- Engine Stalls or Will Not Start — The engine dies unexpectedly at low speeds or cranks endlessly without starting, usually because the crankshaft or camshaft position sensor lost power.
- Reduced Engine Power (Limp Mode) — The vehicle feels sluggish, refuses to accelerate, or locks into a protective 'limp mode' that caps your speed at 20-30 mph.
- Check Engine Light is On — The MIL illuminates immediately when the PCM detects the voltage drop.
- Erratic Transmission Shifting — The transmission shifts harshly or at the wrong RPMs because it shares sensor data powered by the 'B' circuit.
- Poor Fuel Economy (also visible on scanner) — Without accurate sensor data, the engine defaults to a rich air-fuel mixture, burning significantly more gas.
Diagnostic Flowchart

Tap your situation to follow the diagnostic path that matches what you're seeing on this code.
Common Fixes & Costs
- Repairing Damaged Wiring — Parts: $5-$25, Labor: $150-$300, ~1.5 hr book time (Intermediate)
- Replacing an Internally Shorted Sensor — Parts: $50-$300, Labor: $75-$200, ~1.0 hr book time (DIY)
- Cleaning Corroded Connectors — Parts: $5-$15, Labor: $75-$150, ~0.5 hr book time (DIY)
- Replacing a Blown Fuse — Parts: $1-$5, Labor: $0-$30, ~0.1 hr book time (DIY)
- Replacing the Powertrain Control Module (PCM) — Parts: $600-$1500, Labor: $200-$300, ~2.0 hr book time (Professional)
DIY vs Professional
- Repairing Damaged Wiring — Beginner: Yes, with caution.
Tools: Digital Multimeter, Wire Strippers, Crimpers, Heat Gun, Heat Shrink Connectors. - Replacing an Internally Shorted Sensor — Beginner: Yes.
Tools: Socket set, wrenches, screwdrivers. - Cleaning Corroded Connectors — Beginner: Yes.
Tools: Electrical contact cleaner, small nylon brush, dielectric grease. - Replacing a Blown Fuse — Beginner: Yes.
Tools: Fuse puller. - Replacing the Powertrain Control Module (PCM) — Beginner: No.
Tools: Professional scan tool with J2534 programming capabilities.
Used vs. New Parts: Buying Guide
When a used part is worth it: Never buy a used electronic sensor to fix this code. The savings are minimal compared to the high risk of installing a part that is already internally shorted.
Donor-vehicle mileage cap: roughly under 50000 miles for the part to have meaningful remaining life.
Donor quality checklist:
- Verify the exact part number matches your original sensor.
- Avoid parts from rust-belt states due to connector corrosion.
- Avoid parts from flood-damaged vehicles.
Decision logic:
- If The failed part is an electronic sensor (TPS, MAP, Crank). → Buy a new OEM or premium aftermarket part. Used sensors fail rapidly.
- If The vehicle has over 200K miles and budget is the only concern. → A used sensor from a low-mileage donor is a temporary fix, but expect to replace it again.
- If The failed part is a section of the wiring harness. → Splicing in a used pigtail connector from a salvage yard is highly recommended and cost-effective.
Warranty tradeoff: Used sensors carry a 30-day warranty covering the part only. New OEM sensors carry a 1-year/12,000-mile warranty.
Worst-case if a used part fails: $300 if a used sensor shorts out and requires a second diagnostic fee and replacement.
What Happens If You Wait — Timeline
- 0-1 month: Check Engine Light illuminates. Vehicle exhibits intermittent rough idle or hesitation. The fault may disappear and reappear. (MPG impact: 0-5%% · Added cost: $0-$50 in wasted fuel)
- 1-3 months: Symptoms become permanent. Vehicle frequently enters 'limp mode' with severely reduced power. Stalling in traffic becomes a daily risk. (MPG impact: 5-15%% · Added cost: $50-$150 in wasted fuel)
- 3-6 months: The resulting poor air/fuel mixture overheats the catalytic converter, melting its internal honeycomb structure. (MPG impact: 10-20%% · Added cost: $800-$2000 for a new catalytic converter)
- 6+ months: A persistent short circuit feeds voltage spikes back into the PCM, permanently destroying its internal voltage regulator. (MPG impact: 15-25%+% · Added cost: $1000-$2500+ for PCM replacement and programming)
Cost of Not Fixing It
- 0-1 month: Vehicle enters limp mode, capping speed at 20 mph. Fuel economy drops by up to 20%. Engine stalls randomly in traffic. (Added cost: $50 in wasted fuel)
- 1-6 months: Running a consistently rich air-fuel mixture overheats and melts the internal honeycomb of the catalytic converter. (Added cost: $1200-$2800)
- 6+ months: A persistent short circuit feeds voltage spikes back into the PCM, permanently destroying its internal voltage regulator. (Added cost: $1500+)
Diagnosis Steps
- Scan for Companion Trouble Codes
Use an OBD-II scanner to read all stored codes. P0651 rarely appears alone. Look for codes pointing to specific sensors (e.g., P0452 for Fuel Tank Pressure). These companion codes tell you exactly which sensor or harness branch to test first.
Tools: OBD-II Scanner (Beginner) - Perform a Targeted Visual Inspection
Inspect the wiring harness routing for the 'B' circuit sensors. Look for wires crushed between the engine and transmission, melted against the exhaust, or chewed by rodents. Check the sensor connectors for green corrosion or pushed-back pins.
Tools: Flashlight, Inspection Mirror (Beginner) - Test Reference Voltage at the Sensor
Turn the key ON (engine off). Unplug an easy-to-reach sensor on the 'B' circuit. Set your multimeter to DC Volts. Probe the 5V reference pin on the harness connector and ground the black lead to the battery. A healthy circuit reads 4.75V to 5.25V. A reading of 0V confirms a short or open circuit.
Tools: Digital Multimeter, Vehicle Wiring Diagram (Intermediate) - Isolate the Faulty Sensor (The Unplug Method)
Leave your multimeter connected to the 5V reference wire. Unplug every sensor on the 'B' circuit one by one. Watch the multimeter. If the voltage suddenly jumps back to 5.0V when you unplug a specific sensor, that sensor is internally shorted and must be replaced.
Tools: Digital Multimeter, Vehicle Wiring Diagram (Intermediate) - Check for a Short to Ground in the Harness
If unplugging all sensors does not restore the 5V signal, the wiring harness is shorted. Disconnect the battery and the PCM connector. Set the multimeter to Ohms. Probe the 5V reference wire and a chassis ground. A reading of 'OL' (infinite resistance) is good. Any numerical reading confirms the wire is touching metal.
Tools: Digital Multimeter (Advanced) - Check the Sensor Circuit Fuse
Locate the fuse box and find the fuse labeled 'ECU Ref' or 'Sensor'. Pull it and check if it is blown. If it is blown, replace it. If the new fuse blows immediately upon turning the key, you have a dead short to ground that must be traced.
Tools: Owner's Manual, Fuse Puller (Beginner) - Perform a Live Data Wiggle Test
Connect a professional scan tool and monitor the live data PID for 'Sensor Reference Voltage B'. While watching the screen, aggressively wiggle the wiring harness and connectors along the engine block. A sudden voltage drop on the screen pinpoints the exact location of a hidden broken wire.
Tools: Professional Scan Tool (Advanced) - Analyze the Circuit with a Lab Scope
For highly intermittent faults that a multimeter misses, connect an automotive oscilloscope to the 5V reference wire. A healthy circuit shows a flat 5V line. Spikes, dropouts, or 'hash' on the waveform confirm a failing connection or a failing PCM voltage regulator.
Tools: Automotive Oscilloscope (Professional)
When This Code Triggers (Freeze-Frame Conditions)
- Engine Coolant Temp: 180-210°F (Engine at normal operating temperature.)
- Engine RPM: 1200-2500 RPM (During light acceleration or steady cruise.)
- Engine Load: 25-60% (Vehicle is under a moderate load, not idling or at full throttle.)
- Vehicle Speed: 25-60 mph (Often occurs during city or highway driving, not at a standstill.)
Related Codes
- P0652 — Sensor Reference Voltage 'B' Circuit Low. While P0651 usually means 0 volts (open), P0652 means voltage is present but too low (e.g., 2V). Both point to a short to ground.
- P0653 — Sensor Reference Voltage 'B' Circuit High. The 5V wire is shorted to a 12V power wire. This is highly dangerous to the PCM and requires immediate harness repair.
- P0452 — Fuel Tank Pressure Sensor Circuit Low. If this code appears with P0651, the fuel tank pressure sensor is on the 'B' circuit and is the most likely source of the short.
- P2135 — Throttle/Pedal Position Sensor Voltage Correlation. A P0651 voltage drop causes the throttle sensors to send conflicting data, triggering P2135 and forcing limp mode.
Climate & Environmental Factors
- High Humidity / Rain: Moisture seeps into compromised wire insulation or unsealed connectors, causing immediate short circuits that trigger P0651. These faults often disappear temporarily when the engine bay dries out.
- Winter / Road Salt: Saltwater spray creates a highly corrosive environment. It rapidly degrades exposed copper wiring and connector pins, creating the high electrical resistance that chokes the 5-volt signal.
- Extreme Cold: Freezing temperatures turn plastic wire insulation brittle. Normal engine vibration then cracks the insulation, exposing the bare copper wire to the metal engine block and causing a dead short.
How to Talk to a Mechanic About This Code
Say this: "I have an active P0651 code for the 'Sensor Reference Voltage B Circuit'. I need to schedule a diagnostic appointment to trace the 5-volt circuit and find the source of the short. Please check for companion sensor codes and inspect the harness for common chafe points."
This proves you understand the code is an electrical circuit fault, not a specific part failure. It directs the technician to trace the wiring rather than blindly replacing sensors.
Avoid saying:
- 'Just fix whatever's wrong'
- 'My check engine light is on, can you look at it?'
- 'I think it's the throttle sensor, can you replace it?'
Questions to ask before authorizing the repair:
- Did you find the short in the wiring harness or inside a specific sensor?
- Can you show me the damaged wire or explain how you confirmed the sensor was internally shorted?
- If it's a wiring issue, how will you repair it (solder, heat-shrink butt connectors)?
- What is the warranty on this electrical repair?
Where to Take It: Dealer vs Independent vs Chain
- Dealer:
Recommended only if your vehicle is under warranty or requires a PCM replacement and programming.
Best for: Vehicles under powertrain or emissions warranty, Vehicles with known manufacturer TSBs for P0651 (GM, VW), Complex diagnostics on newer European vehicles
Downsides: Highest labor rates ($150-$250/hr), Dealers often refuse to repair a single wire, forcing you to buy a $1,000 complete engine harness (Typical cost: +50% vs. baseline) - Independent Shop:
The best choice. A skilled independent shop will trace and repair the broken wire for $200, whereas a dealer will quote $1,500 for a new harness.
Best for: Out-of-warranty vehicles, Finding and repairing specific wiring harness damage, Cost-effective sensor replacement
Downsides: Quality varies. You must find a shop with an ASE-certified technician specializing in electrical diagnostics. (Typical cost: +0% vs. baseline) - Chain Shop:
Avoid completely. Chain shops are not equipped for complex electrical circuit diagnostics.
Best for: Oil changes, tires, and brakes
Downsides: Technicians lack the advanced oscilloscopes and wiring diagrams required for 5-volt reference tracing., High risk of the 'parts cannon' approach (replacing good sensors until the code goes away). (Typical cost: -10% vs. baseline)
When to Walk Away From the Repair
If the estimated repair cost exceeds 40% of the car's private-party value, reconsider the repair.
- Car worth $5000, fix is $2500: Walk away. A $2,500 PCM/harness replacement on a $5,000 car is a poor investment.
- Car worth $15000, fix is $300: Fix it. A $300 wiring repair restores a valuable asset.
- Car worth $3000, fix is $1500: Walk away. The repair cost is 50% of the vehicle's value.
What Scan Tool You Need for This Code
Minimum: A scanner that reads live data PIDs (Parameter IDs) to monitor the 5-volt reference signal in real-time.
A $20 code reader only shows the P0651 code. You need to see the live voltage drop on a screen while you wiggle wires or unplug sensors to find the exact location of the short.
Budget: BlueDriver Pro (~$100) — Connects to your smartphone to display and graph live data streams. You can watch the 'Sensor Reference Voltage B' PID drop out during a wiggle test.
Mid-range: Foxwell NT510 Elite (~$180) — Offers brand-specific diagnostics and live data graphing. It reads proprietary manufacturer codes that basic scanners miss.
Professional: Autel MaxiCOM MK808 (~$500) — Provides full bidirectional control and comprehensive live data. It allows you to test circuits and view system-wide health checks to rapidly pinpoint the electrical fault.
Rent vs buy: Auto parts stores scan codes for free, but they will not let you borrow the tool for the live data diagnosis needed for P0651. Buy the BlueDriver if you plan to DIY this repair.
How to Clear the Code After You Fix It
- Reconnect the battery if it was disconnected for the repair.
- Use an OBD-II scan tool to clear all diagnostic trouble codes.
- Perform a complete OBD-II drive cycle to allow readiness monitors to run.
Drive cycle (~30 minutes): Start with a cold engine. Idle for 3 minutes with the A/C and rear defroster on. Drive for 15 minutes in stop-and-go city traffic. Drive for 10 minutes at a steady 55-60 mph on the highway. Allow the vehicle to cool down completely.
Readiness monitors affected: Catalyst Monitor, Evaporative System Monitor, Oxygen (O2) Sensor Monitor
Before emissions retest: drive at least 100 miles to fully set monitors.
Watch out for:
- Clearing the code with a scanner does not pass an emissions test; the readiness monitors must read 'Ready'.
- The code returns immediately upon startup if the short circuit was not actually fixed.
- Having less than 1/4 tank or more than 3/4 tank of gas prevents the EVAP monitor from running.
Will This Fail Emissions / State Inspection?
Yes — this code typically fails an OBD-II emissions inspection.
- California: An active Check Engine Light is an automatic failure. You must complete a full drive cycle to set all monitors to 'Ready' before re-testing.
- New York: The NYS DMV emissions inspection includes an OBD-II scan. An active P0651 code results in an automatic failure.
- Texas: In emissions-testing counties, the vehicle cannot be registered until the P0651 code is repaired and the inspection is passed.
Most Commonly Affected Vehicles
- Chevrolet / GMC Silverado, Suburban, Equinox (2004-2014) — The wiring harness frequently gets crushed between the back of the engine and the transmission bell housing, severing the 5V reference wire.
- Volkswagen / Audi TDI Models (Passat, Jetta, Golf) (2005-2021) — The wiring loom near the oil cooler and EGR valve melts from excessive heat, shorting the circuit and causing a no-start condition.
- Ford F-150, Explorer, Mustang (2004-2010) — Check the main engine harness for severe chafing near the A/C accumulator bracket and along the passenger-side frame rails.
- Dodge / Ram Ram 1500/2500, Durango (2005-2014) — Frequently triggered by an internally shorted Throttle Position Sensor (TPS) pulling down the entire 5V circuit.
- Honda Civic, Accord (2011-2023) — The 'B' circuit is heavily tied to the A/C pressure sensor. A failing A/C sensor shorts the circuit and triggers P0651 alongside A/C failure.
- Hyundai Santa Fe, Genesis (2008-2012) — The Accelerator Position Sensor (APS) is a common failure point that shorts the reference voltage, causing immediate limp mode.
- BMW 3-Series, X5 (2006-2016) — Valve cover oil leaks drip directly onto the wiring harness below, degrading the insulation and causing shorts between wires.
- Mercedes-Benz C-Class, E-Class (2008-2018) — Sensor connector corrosion is the primary culprit. Rarely a PCM failure.
Manufacturer-Specific Notes
- General Motors (GM): GM issues multiple TSBs (like 22-NA-003) specifically for wiring harness chafing. The harness routing on trucks often rubs against transmission bolts or A/C brackets, making physical wire damage the #1 cause of P0651 on GM vehicles.
- Volkswagen (VW): On 2.0L TDI engines, the wiring loom near the oil cooler is a known hotspot that melts and shorts the 5V circuit. Newer VWs with the Delphi DCM6.2V ECU also suffer from internal ECU hardware failures that directly trigger this code.
- Ford: Ford connectors are highly susceptible to moisture intrusion. P0651 often appears intermittently after heavy rain and disappears when dry. Packing connectors with dielectric grease is a mandatory repair step.
- SAAB / GM: Saab technical documents state that a short to voltage on the *signal* return wire of certain components triggers a reference voltage DTC like P0651, which misleads technicians into checking the wrong wire.
Real Owner Stories
2007 Chevy Equinox with ~150K miles
Check Engine Light on, code P0651. Vehicle cranked but would not start.
What they tried:
- Owner suspected bad sensors based on YouTube videos.
- Used a multimeter to check continuity from the ECM to the Cam, Throttle, and Crank sensors.
- Found zero continuity on the Crankshaft Position Sensor wire.
Outcome: Discovered the wiring harness was crushed between the engine and transmission, severing the wire. The owner spliced the broken wire, re-routed the harness, and the code cleared permanently.
Lesson: On GM vehicles, harness pinching is incredibly common. A simple continuity test from the ECM to the sensor pinpoints a broken wire without guessing.
2013 VW Polo 1.2 TDI with rough idle
Rough idle, flashing glow plug light, and limp mode. Codes P0651 and an EGR fault were present.
What they tried:
- Technician unplugged sensors on the 'B' circuit one by one.
- Unplugged the EGR valve; code remained.
- Unplugged the crankshaft position sensor.
Outcome: Unplugging the faulty crankshaft position sensor instantly restored the 5V signal and cleared the P0651 code. The sensor had an internal short.
Lesson: The 'unplug method' is the fastest way to find a shorted sensor. Never assume a part is good; test it by isolating it from the circuit.
2009 VW Passat 2.0 TDI No-Start
Car cranked but wouldn't start. Displayed 'Engine Fault Workshop!' Only stored code was P0651.
What they tried:
- Owner asked forums, which suggested replacing the boost pressure sensor.
- Took the vehicle to an independent VW specialist.
Outcome: The mechanic found the wiring harness near the oil cooler had melted from engine heat, shorting the 5V wire to ground. Repairing the melted wires fixed the car.
Lesson: VW TDI engines have known wiring hotspots near the oil cooler and EGR. Always perform a visual inspection for melted wires before buying sensors.
2016 GMC Canyon with intermittent P0651
Intermittent P0651 and limp mode. Code would appear and disappear randomly.
What they tried:
- Owner searched for GM Technical Service Bulletins (TSBs).
Outcome: Found GM TSB 22-NA-003. Inspected the harness and found it rubbing against a transmission bell housing bolt. Taped the wire and zip-tied it away from the bolt, fixing the issue.
Lesson: Always check for TSBs. Manufacturers document exact locations where wiring harnesses chafe, saving you hours of diagnostic time.
How to Prevent This Code From Triggering
- Apply dielectric grease to electrical connectors (Whenever a connector is disconnected for service) — Dielectric grease blocks moisture and salt from entering connectors, preventing the pin corrosion that creates high resistance and triggers P0651.
- Inspect and secure wiring harnesses (During every oil change) — Visually check for harnesses resting on hot exhaust or sharp metal. Zip-tie loose harnesses away from hazards to prevent chafing and shorts.
- Install protective wire loom (As needed for vulnerable wiring) — Adding high-temperature split loom to wires near the engine block prevents the insulation from baking, cracking, and exposing bare copper.
- Implement rodent prevention measures (Ongoing, if parking outdoors) — Rodents chew soy-based wire insulation. Keep the engine bay clean and wrap vulnerable harnesses in capsaicin-treated rodent tape.
- Clean battery terminals (Every 6-12 months) — Battery corrosion creates voltage drops that stress the PCM's internal voltage regulators, leading to premature computer failure.
Frequently Asked Questions
What does the 'B' in P0651 mean?
Manufacturers use multiple 5-volt reference circuits (labeled A, B, C) to power different groups of sensors. The 'B' simply identifies which specific circuit has the voltage drop. You must check a wiring diagram to see exactly which sensors live on circuit B.
What is the most common misdiagnosis for P0651?
Replacing the PCM or buying new sensors without tracing the wiring first. Always confirm the 5-volt reference signal is restored before spending money on new parts.
Can aftermarket parts cause a P0651 code?
Yes. Improperly wired remote starters or LED lights tapped into a 5V sensor wire overload the circuit. Disconnect any recent aftermarket additions to see if the code clears.
Will I have to replace my car's computer (PCM)?
Rarely. Over 95% of P0651 codes result from a chafed wire or a shorted sensor. Only replace the PCM if a professional confirms its internal voltage regulator is completely dead.
How much does it cost to diagnose a P0651 code?
Shops charge a 1-to-2 hour diagnostic fee ranging from $100 to $300. This covers the labor-intensive process of tracing the wiring harness to find the exact short circuit.
Can I fix P0651 myself?
Yes, if you own a multimeter and can follow a wiring diagram. Unplugging sensors one by one to find a short is highly DIY-friendly, but repairing a buried wiring harness requires advanced skills.
What's the difference between an open circuit and a short circuit?
An 'open' is a broken wire that stops voltage from flowing. A 'short' means the wire touches bare metal or another wire, draining the 5 volts to ground or spiking it to 12 volts.
Key Takeaways
- Code P0651 indicates a voltage drop or open circuit on the PCM's 5-volt 'B' reference circuit, which powers multiple critical engine sensors.
- Over 80% of P0651 codes stem from a chafed wiring harness or a single internally shorted sensor, not a failed $1,000 PCM.
- Stop driving immediately; this code triggers sudden engine stalling or a 20-mph 'limp mode' that is dangerous in active traffic.
- Diagnose the exact fault by unplugging sensors on the 'B' circuit one by one until the multimeter reading jumps back to a steady 5.0 volts.
- Always scan for companion codes like P0452 or P2135, as they pinpoint exactly which sensor or harness branch contains the short circuit.
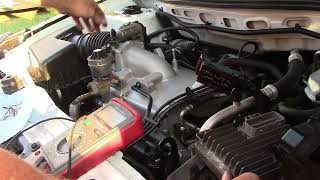
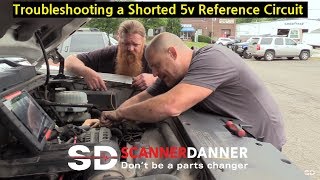
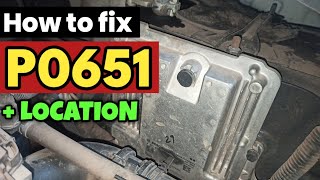
Helpful Videos

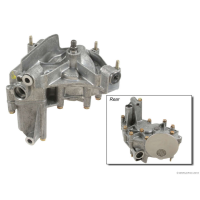
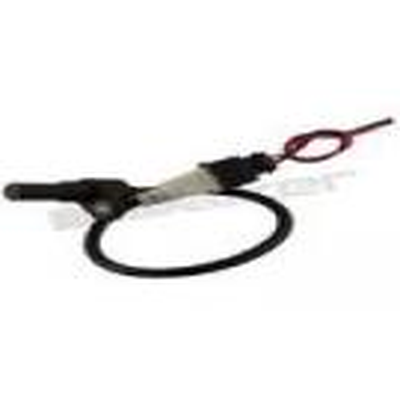
Shop the Parts Behind P0651
Below are the parts most often responsible for code P0651, ranked by how frequently each one is the actual culprit (per the diagnosis above). Tap any to see what we have for your vehicle.


The information in this article is provided for general reference and educational purposes only. Vehicle specifications, procedures, and part compatibility can vary by production date, trim level, and region. Always consult your vehicle's factory service manual and verify part numbers before purchasing or performing repairs. Safety-critical components such as airbags, seat belts, and braking systems should be installed by a qualified professional.
- 🧭 Diagnostic Flowchart
- 🎬 Helpful Videos
- 🛍️ Shop This Part
- What Does P0651 Mean?
- Can I Drive With P0651?
- Common Causes
- Symptoms
- Common Fixes & Costs
- DIY vs Professional
- Used vs. New Parts: Buying Guide
- What Happens If You Wait — Timeline
- Cost of Not Fixing It
- Diagnosis Steps
- When This Code Triggers (Freeze-Frame Conditions)
- Related Codes
- Climate & Environmental Factors
- How to Talk to a Mechanic About This Code
- Where to Take It: Dealer vs Independent vs Chain
- When to Walk Away From the Repair
- What Scan Tool You Need for This Code
- How to Clear the Code After You Fix It
- Will This Fail Emissions / State Inspection?
- Most Commonly Affected Vehicles
- Manufacturer-Specific Notes
- Real Owner Stories
- 2007 Chevy Equinox with ~150K miles
- 2013 VW Polo 1.2 TDI with rough idle
- 2009 VW Passat 2.0 TDI No-Start
- 2016 GMC Canyon with intermittent P0651
- How to Prevent This Code From Triggering
- Frequently Asked Questions
- What does the 'B' in P0651 mean?
- What is the most common misdiagnosis for P0651?
- Can aftermarket parts cause a P0651 code?
- Will I have to replace my car's computer (PCM)?
- How much does it cost to diagnose a P0651 code?
- Can I fix P0651 myself?
- What's the difference between an open circuit and a short circuit?
- Key Takeaways
- 🎟️ Get 5% Off