
P0651 on 2015-2019 Buick LaCrosse: Sensor Voltage Circuit Fault Causes & Fixes
This code indicates a fault in the 'B' 5-volt reference circuit that powers several engine sensors. The most common causes are a faulty sensor shorting the circuit or damaged wiring. The provided TSB suggests this code may appear with oil pressure-related code P06DE, making the Engine Oil Pressure sensor a primary suspect. Diagnosis involves isolating the faulty component on the shared circuit.
- P0651 means there is a fault on the 5-volt power supply circuit shared by several engine sensors.
- On your LaCrosse, check for code P06DE first, as a TSB indicates a known link related to the oil pressure system.
- The most common fix is replacing a single faulty sensor that is shorting out the circuit, or repairing a damaged wire.
- Do not replace the expensive ECM until you have ruled out all other possibilities.
- Diagnosis involves unplugging sensors one-by-one to see if the fault clears, which isolates the problem component.
What's Unique About the 2015-2019 Buick LACROSSE
For this generation of Buick LaCrosse and other GM vehicles on the Epsilon II platform, P0651 has a documented association with code P06DE, which relates to the engine oil pressure control circuit. A Technical Service Bulletin (TSB #PIP5247A) for the 2015-2019 model years specifically notes that P0651 may be set along with P06DE, and that diagnostics for P06DE should be followed first. 🎬 See how to diagnose the P06DE oil pressure code. This TSB further explains that the root cause of the P06DE code could be mechanical, such as broken piston oil nozzles (squirters) found in the oil pan, which leads to low oil pressure. This mechanical failure can, in turn, cause the Engine Oil Pressure sensor to report erratically, potentially shorting the 5-volt reference circuit and triggering P0651.
Diagnostic Flowchart
Tap your situation to follow the diagnostic path that matches what you're seeing on this vehicle.
Generation note: This range covers the end of the second generation (2015-2016) and the entire third generation (2017-2019) of the LaCrosse. While the P0651 code's meaning is the same, the specific sensors on the 'B' reference circuit and wiring harness routing may differ between these two generations. For many GM vehicles, the 5-Volt Reference 2 ('B') circuit provides power to the Accelerator Pedal Position (APP) sensor 1, Throttle Position (TP) sensors, and the Crankshaft Position (CKP) sensor. Always verify a wiring diagram for your specific model year.
Symptoms You May Notice
- Check Engine Light is on
- Reduced engine power or 'limp mode'
- Engine running rough, misfiring, or stalling
- Hard starting or no-start condition
- Decreased fuel efficiency
- Other sensor-related codes may be present
- Sluggish and slow acceleration
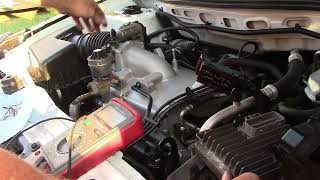
- Replacing the ECM first. The ECM is rarely the cause and should only be replaced after all sensors and wiring on the circuit have been thoroughly tested. 🎬 Watch: A master class on diagnosing 5V reference circuits.
- Replacing a single sensor without testing. If multiple sensor codes are present, the issue is more likely the shared reference circuit rather than all sensors failing at once. The proper method is to unplug sensors one by one to isolate the fault.
Most Likely Causes
- Faulty Sensor on the 5-Volt Circuit 🔴 High Probability An internal short in any sensor on the 'B' circuit can pull the entire circuit's voltage down, triggering the code. Given TSB PIP5247A, the Engine Oil Pressure (EOP) sensor is a primary suspect when P06DE is also present. Other sensors on the GM 5V Ref 2 circuit that could fail include the Accelerator Pedal Position (APP) sensor, Throttle Position (TP) sensor, and Crankshaft Position (CKP) sensor.
How to confirm: Unplug sensors on the 'B' circuit one by one with the key on. If the 5-volt reference returns to normal on the other sensor connectors after unplugging a specific sensor, that sensor is faulty. A scan tool can be used to monitor the 5-volt reference circuit status, which should change from 'Fault' to 'OK' when the bad sensor is disconnected.
Typical fix: Replace the faulty sensor.
Est. part cost: $30-$150 - Damaged Wiring Harness 🟡 Medium Probability Wires can become frayed, corroded, or pinched from heat, vibration, or improper routing, causing a short to ground or an open circuit. One common failure point found on related GM vehicles is the harness getting pinched between the engine and transmission, particularly after a transmission replacement or service. The gray reference wire is often the victim in this scenario.
How to confirm: Visually inspect the wiring harness leading to all sensors on the 'B' circuit, paying close attention to areas where it might rub or be pinched. Check for continuity between the ECM and sensor connectors using a multimeter to find opens or shorts.
Typical fix: Repair or replace the damaged section of the wiring harness.
Est. part cost: $5-$50 for repair, $200-$600 for harness replacement - Faulty Engine Control Module (ECM) ⚪ Low Probability → Shop Engine Control Module (ECM) While rare, the internal voltage regulator within the ECM that supplies the 5-volt reference can fail. This should always be the last suspected cause after ruling out all other possibilities.
How to confirm: This should be the last step. After confirming all sensors and wiring are good, check for 5-volt output directly at the ECM connector pins. If voltage is absent or incorrect (and there are no shorts in the harness), the ECM is likely the cause.
Typical fix: Replace and reprogram the Engine Control Module.
Est. part cost: $400-$1000
Rare But Worth Checking
- Corroded or Loose Connectors: Moisture or dirt can get into connectors for the ECM or sensors, causing poor connections that disrupt the voltage signal. Always check connectors for green or white corrosion or pushed-out pins.
- Blown Fuse: Some reference voltage circuits are protected by a fuse, often labeled 'ECU Ref' or 'Sensor Ref'. While not always the case, it's a simple and quick check to perform.
Diagnosis Steps
- Connect an OBD-II scanner and check for any other codes. Codes for specific sensors (e.g., P06DE) can help identify the affected circuit and the likely culprit.
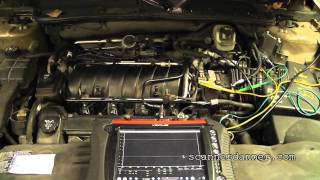
- Obtain a wiring diagram for your specific vehicle year and engine to identify all sensors on the 5-volt reference 'B' circuit (often called Ref 2). 🎬 Watch: How to fix a P0651 code without a wiring diagram.
- With the key on and engine off, use a multimeter to check for 4.8-5.2 volts at the reference wire (often gray on GM vehicles) of an easily accessible sensor on the circuit.
- If voltage is low or absent, begin unplugging sensors on that circuit one at a time, re-checking the voltage at another sensor's connector after each one is disconnected.
- If unplugging a sensor restores the 5-volt signal, that sensor has an internal short and is the culprit.
- If unplugging all sensors does not restore voltage, the fault is likely in the wiring harness or the ECM. Inspect the harness for any signs of damage, chafing, or corrosion, especially between the engine and transmission.
- Check for continuity on the reference wire from the ECM connector to each sensor connector to find any open circuits. Test the reference wire for a short to ground.
- If wiring and sensors are confirmed to be good, the final step is to verify that the ECM is outputting 5 volts on the correct pin. If it is not, the ECM is likely faulty.
Parts You'll Likely Need
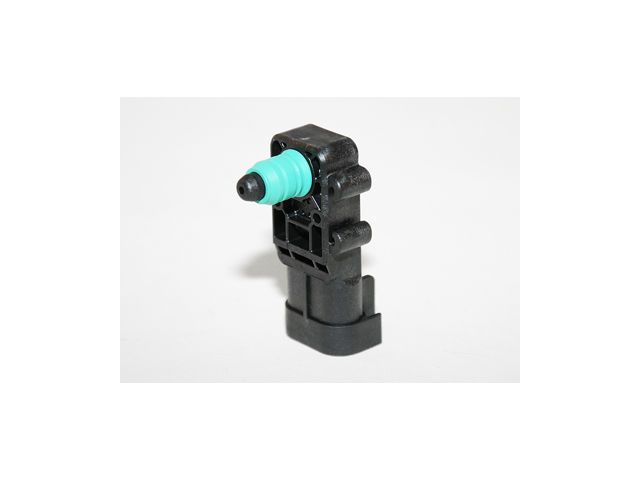
- Engine Oil Pressure Sensor
(OEM #ACDelco 12673532 or 12673134 (Verify fitment))— The TSB linking P0651 to P06DE makes this a primary suspect for causing the short on the 5-volt reference circuit.
Trusted brands: ACDelco, Delphi, Standard Motor Products, Dorman
OEM price range: $40-$70
Aftermarket price range: $25-$50 - Fuel Tank Pressure Sensor
(OEM #ACDelco 13502903 (Common on platform mates, verify fitment))— This is another common sensor found on 5-volt reference circuits that can fail and cause this code. On some GM vehicles, it shares a 5V reference circuit with the oil pressure sensor and A/C pressure sensor.
Trusted brands: ACDelco, Bosch, Standard Motor Products
OEM price range: $50-$90
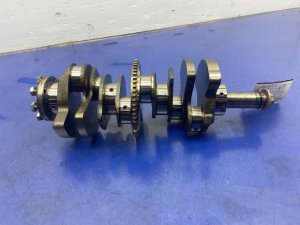
Aftermarket price range: $30-$60 - Crankshaft Position Sensor — On many GM vehicles, the crankshaft position sensor is on the 'B' (Ref 2) circuit. A failure can cause a no-start or stalling condition along with P0651.
Trusted brands: ACDelco, Denso
OEM price range: $60-$110
Aftermarket price range: $40-$80
Related Codes That Often Appear With This One
- P06DE — As noted in TSB #PIP5247A, this code for the Engine Oil Pressure Control Circuit Stuck On is frequently set with P0651. P06DE can be caused by low/dirty oil, but also by mechanical failures like broken piston oil squirters. The resulting oil pressure issue can cause the EOP sensor to fail, shorting the 5V reference circuit and triggering P0651.
Technical Service Bulletins (TSBs) & Recalls
- PIP5247A: Notes that P0651 may set along with P06DE (Engine Oil Pressure Control Circuit Stuck On) and that diagnostics for P06DE should be followed first.
Platform-Specific Known Issues
- Pinched Wiring Harness After Service: In at least one documented case on a related GM vehicle, the P0651 code was traced to a wiring harness that was pinched between the engine block and the transmission after a transmission replacement. The gray 5-volt reference wire was crushed, causing it to short and bring down the entire circuit. This highlights the importance of inspecting the harness carefully after major repairs in that area.
- Short in an Unrelated Component on the Same Circuit: A 2010 Chevy Impala with P0651 and other codes had the issue traced to a shorted secondary air injection (SAI) check valve. Because the SAI valve was on the same 5-volt reference circuit, unplugging it restored voltage to the other sensors and allowed the car to run properly. This demonstrates the diagnostic importance of identifying and testing ALL components on the shared circuit, not just the most obvious ones.
Mechanic-Grade Diagnostic Values
- Sensor Reference Voltage 'B' Circuit at an accessible sensor connector (e.g., gray wire) — expected: 4.8 V to 5.2 V with Key On, Engine Off.. Failure: A reading near 0V indicates a short to ground. A reading significantly below 4.8V indicates high resistance or a partial short. No voltage could be an open wire or a faulty ECM.
- Amperage draw on each 5V reference wire at the ECM connector — expected: Extremely low, in the milliamps (mA) range.. Failure: The wire with the highest amperage draw (e.g., 100mA or 0.1A) is the one with the short to ground. This test requires a low-amp clamp or piercing probes and a multimeter set to a low amperage scale.
Scan Tool Commands That Help
- GDS2 / Tech2: 5-Volt Reference Circuit Status — When diagnosing a P0651, a dealer-level scan tool can display the status of the 5-volt reference circuits (e.g., Ref 1, Ref 2, Ref 3). The status will typically read 'OK' or 'Fault'. This allows a technician to see in real-time when a short is removed (e.g., by unplugging a sensor) as the status changes from 'Fault' to 'OK'.
Wiring & Ground Locations
- G103 — Located at the left rear of the engine compartment on the cowl, above the brake booster on some GM platforms.. This is a major ground point that grounds the Body Control Module (BCM) and Engine Control Module (ECM). A poor connection here can cause a multitude of electrical issues, including reference voltage faults.
- Main Engine to Chassis Ground — Typically a large cable from the engine block or bell housing to the chassis frame rail, often near the transmission.. While the ECM has its own dedicated grounds, a poor main engine ground can cause current to seek alternative paths, potentially disrupting sensitive circuits like the 5V reference. It's a foundational check for any electrical diagnosis.
- ECM/PCM Ground Wires — Multiple pins on the ECM connectors that are grounded to the chassis or engine block. Often located under the ignition control module bracket on 3800 engines or directly to the block.. The ECM requires a solid ground to provide a stable 5V reference. A faulty ground connection for the ECM itself can cause the reference voltage to be unstable or absent, triggering P0651.
Real Owner Repair Stories
- YouTube video from a DIY mechanic (GM vehicle with P0651 (specific model not a LaCrosse, but demonstrates a common GM failure pattern)) — No-start or runs poorly, P0651 code present, multiple sensor codes.
❌ Tried (didn't work) Initial checks of easily accessible sensors did not reveal the problem.
✅ What actually fixed it The wiring harness was found to be pinched between the engine and transmission after a recent transmission replacement. The gray 5-volt reference wire was crushed and shorted to ground. The fix involved separating the engine and transmission slightly to free the harness, repairing the damaged wires, and re-routing the harness to prevent it from being pinched again. - ScannerDanner Forum (2007 GMC Yukon XL Denali 6.2L with P0641 (5V Reference '1' Circuit Fault)) — Reduced engine power mode, throttle disabled.
❌ Tried (didn't work) Cleaned all grounds., Unplugged all sensors on the circuit one by one., Visually inspected the entire wiring harness for two days.
✅ What actually fixed it The issue was a faulty Engine Control Module (ECM). The scan tool showed the 5V reference at 2.83V, but back-probing the sensors showed a correct 5.05V. This discrepancy indicated the ECM's internal monitoring circuit had failed, not the external circuit itself. The final fix was to replace the ECM.
Model Year Variations Within This Range
- 2017-2019 (Third Generation): The LaCrosse was completely redesigned for 2017, moving to the P2XX platform. It features a new standard 3.6L V6 engine (LGX) with 310 hp and an 8-speed automatic transmission. This redesign includes different wiring harnesses, module locations, and potentially different sensors on the 5V reference circuits compared to the 2015-2016 models. The body and interior are entirely different.
- 2015-2016 (Second Generation): These models are on the Epsilon II platform. The standard engine was a 3.6L V6 (LFX) with 304 hp mated to a 6-speed automatic. An optional 2.4L eAssist mild hybrid was also available. Diagnostic procedures and component locations will be specific to this platform generation.
Helpful Videos


Used OEM Parts in Stock
New Aftermarket Parts Available


The information in this article is provided for general reference and educational purposes only. Vehicle specifications, procedures, and part compatibility can vary by production date, trim level, and region. Always consult your vehicle's factory service manual and verify part numbers before purchasing or performing repairs. Safety-critical components such as airbags, seat belts, and braking systems should be installed by a qualified professional.
- Buick LACROSSE:
- 🧭 Diagnostic Flowchart
- 🎬 Helpful Videos
- 🛍️ Shop This Part
- What's Unique About the 2015-2019 Buick LACROSSE
- Symptoms You May Notice
- Most Likely Causes
- Rare But Worth Checking
- Diagnosis Steps
- Parts You'll Likely Need
- Related Codes That Often Appear With This One
- Technical Service Bulletins (TSBs) & Recalls
- Platform-Specific Known Issues
- Mechanic-Grade Diagnostic Values
- Scan Tool Commands That Help
- Wiring & Ground Locations
- Real Owner Repair Stories
- Model Year Variations Within This Range
- 🎟️ Get 5% Off