
P0651 on 2016-2019 Chevrolet Camaro: Sensor Voltage 'B' Circuit Fault Causes and Fixes
P0651 on a 2016-2019 Camaro indicates a fault in the 5-volt 'B' reference circuit (also known as 5V Ref 2) that powers critical engine sensors. The most common causes are a damaged wiring harness chafing against the engine or chassis, or a single faulty sensor on the circuit shorting out the entire circuit. On this platform, the Crankshaft Position (CKP) sensor, Accelerator Pedal Position (APP) sensor, and Fuel Rail Pressure sensor are frequently implicated. Diagnosis is key before replacing par
- P0651 is an electrical fault in the 5-volt 'B' reference circuit; it is not a specific part failure.
- Do not replace parts without diagnosis. The most common fix is repairing a damaged wire or replacing a single shorted sensor.
- Symptoms can be severe, including reduced power or a no-start condition, so the issue should be addressed promptly.
- Check for other codes. P0335 (Crank Sensor) or P2135 (Throttle/Pedal Sensor) appearing with P0651 strongly points to a fault on this shared circuit.
- A thorough visual inspection of the wiring harness is a critical first step and can often reveal the problem.
What's Unique About the 2016-2019 Chevrolet CAMARO
On the sixth-generation Camaro, which is built on the GM Alpha platform, the P0651 code is often related to a fault in the wiring harness or one of the key sensors sharing the 'B' reference circuit. Forum discussions and technical documents confirm the Accelerator Pedal Position (APP) sensor, Throttle Position Sensor (TPS), and Crankshaft Position Sensor (CKP) are on the 5-volt reference 2 ('B') circuit. A problem with any one of these components or their wiring can trigger this code and cause significant issues like reduced power or a no-start condition. A forum thread for a 5th Gen Camaro highlighted a case where wires rubbing together in the engine compartment caused this exact code, a common issue across generations.
Diagnostic Flowchart
Tap your situation to follow the diagnostic path that matches what you're seeing on this vehicle.
Generation note: While this article focuses on the 2016-2019 6th generation, the P0651 code and its causes (wiring harness chafe, sensor shorts) are very common on the previous 5th generation (2010-2015) Camaro as well. A Camaro5 forum thread details a user's P0651 issue caused by frayed wires near the fuse block mount. Another found the cause to be wires rubbing together in the engine compartment.
Symptoms You May Notice
- Check Engine Light is on
- "Service StabiliTrak" message may appear
- "Reduced Engine Power" message and associated limp mode
- Engine runs rough or misfires
- Engine may stall or not start
- Poor fuel efficiency
- Gas pedal becomes unresponsive
- Tachometer may drop to zero while driving
- Replacing the throttle body without confirming it's the source of the fault.
- Replacing multiple sensors without testing the circuit first. A single shorted sensor can make other good sensors appear faulty.
- Replacing the ECM when the actual problem is a simple wiring short or a faulty sensor.
Most Likely Causes
- Damaged Wiring Harness 🔴 High Probability Engine harnesses on GM vehicles are susceptible to chafing against engine components, transmission casings, or brackets, leading to shorts or open circuits. A user on a Camaro5 forum had this exact issue where the harness rubbed near the fuse block. Another common spot is where the harness might be pinched between the engine and transmission, especially if service has been performed. A TSB for a previous generation noted a common issue with the engine harness shorting to ground on the inner fender near the ECM or at connector X102.
How to confirm: Visually inspect the entire engine wiring harness for any signs of rubbing, melting, or corrosion. Pay close attention to areas where it passes near the transmission, engine block, fuse block, and firewall. A 'wiggle test' (wiggling the harness while the engine is running or key is on) can help identify an intermittent short. Use a multimeter to check for continuity and shorts to ground on the 5-volt reference wire (often a gray or purple/white wire on GM vehicles).
Typical fix: Repair the damaged section of the wire using solder and heat-shrink tubing. Protect the harness from future damage using a high-quality loom or by re-routing it away from sharp edges or heat sources.
Est. part cost: $5-$50 - Faulty Sensor on the 5V 'B' Circuit 🟡 Medium Probability A single sensor on the circuit can fail internally, creating a short that pulls the voltage down for all other sensors on that same circuit. Common sensors on this circuit for GM vehicles include the accelerator pedal position (APP) sensor, crankshaft position sensor (CKP), and sometimes the fuel rail pressure sensor or oil pressure sensor.
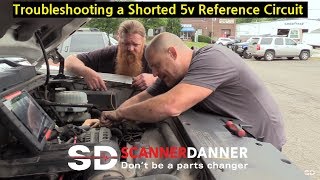
How to confirm: With the key on and engine off, use a scan tool to monitor the 5-volt reference 'B' voltage. Unplug sensors on the 'B' circuit one by one. When the faulty sensor is unplugged, the voltage on the scan tool should return to a stable 5 volts. This isolates the shorted component. 🎬 Watch: Troubleshooting a shorted 5v reference circuit on a Chevy.
Typical fix: Replace the identified faulty sensor. For example, if unplugging the crankshaft position sensor restores voltage, replace the CKP sensor.
Est. part cost: $40-$200 - Poor Electrical Connection ⚪ Low Probability Connectors for the ECM or engine sensors can become loose or corroded over time, causing an intermittent open in the circuit. On some GM trucks, technicians have found main harness connectors swapped by mistake after major engine work, causing this code.
How to confirm: Inspect the main ECM connector and individual sensor connectors for corrosion, moisture, or backed-out pins. Wiggle the harness while monitoring the voltage to see if the fault is intermittent.
Typical fix: Clean the connectors with electrical contact cleaner and apply dielectric grease. Secure any loose connections or repair damaged pins.
Est. part cost: $5-$15
Rare But Worth Checking
- Faulty Engine Control Module (ECM): → Shop Engine Control Module (ECM) This is a rare cause. The ECM's internal 5-volt regulator can fail, but all other possibilities like wiring and sensors should be exhaustively ruled out first before condemning the ECM.
- Improperly Installed Aftermarket Accessories: Aftermarket devices like throttle controllers or lighting that are incorrectly tapped into a 5-volt reference circuit can overload it and cause this code.
Diagnosis Steps
- Read all stored DTCs with a capable OBD-II scanner. Note any other codes that appear with P0651, as they provide crucial clues (e.g., P0335 points towards the CKP sensor circuit).
- Check for any relevant Technical Service Bulletins (TSBs) for your specific vehicle, like PIP5247A.
- Use a scan tool to monitor the live data for the 'Sensor Reference Voltage B' (or Ref 2) circuit. See if the voltage is out of the 4.8-5.2 volt specification.
- Perform a thorough visual inspection of the engine wiring harness, especially near the transmission case, throttle body, crankshaft sensor, and around the ECM. Look for chafed, melted, or pinched wires.
- If the voltage is low, begin unplugging sensors that are known to be on the 'B' circuit (e.g., Accelerator Pedal Sensor, Crankshaft Position Sensor, Fuel Rail Pressure Sensor) one at a time, checking the scan tool after each one. If the voltage returns to 5V after unplugging a sensor, that sensor is the likely cause of the short.
- If unplugging all sensors does not restore voltage, the fault is likely in the wiring harness itself (a short to ground).
- Use a multimeter to check for continuity on the reference wire (often gray on GM models) from the ECM connector to each sensor connector to find an open circuit. Also, check for a short to ground on the same wire.
- If the wiring and all sensors are confirmed to be good, the final step is to suspect a faulty ECM.
Parts You'll Likely Need
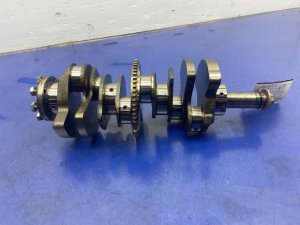
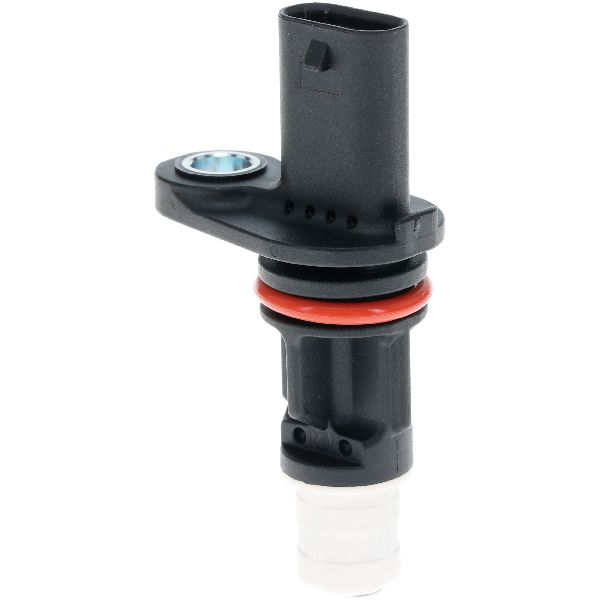
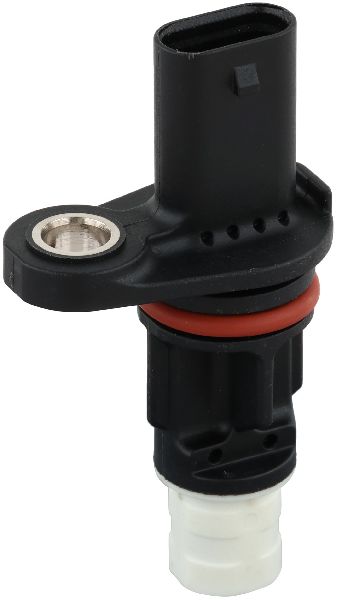
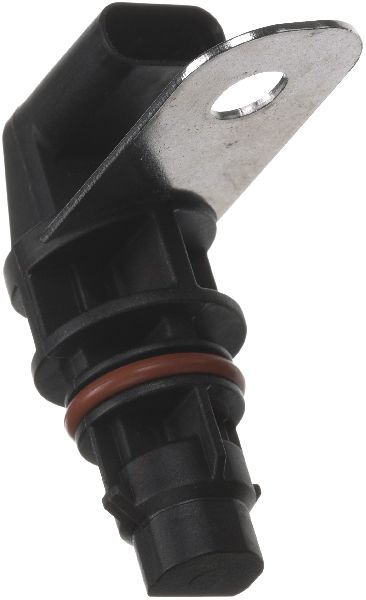
- Crankshaft Position Sensor
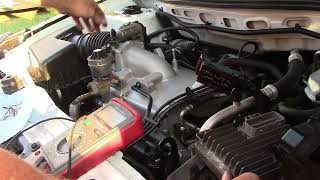
(OEM #12646781 (for 3.6L V6), 12703627 (for 6.2L V8, supersedes 12585546))— This sensor is critical for engine timing and is commonly found on the 5-volt reference circuit. Its location can expose its wiring to damage, and it's a frequent culprit when P0651 and P0335 appear together. 🎬 Watch: How to locate and replace the crankshaft position sensor.
Trusted brands: ACDelco, Delphi
OEM price range: $45-$80
Aftermarket price range: $25-$60 - Accelerator Pedal Position (APP) Sensor
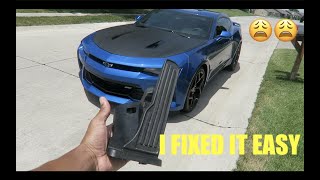
(OEM #84873707 (Note: Often sold as a complete pedal assembly))— The APP sensor is part of the drive-by-wire system and is frequently on the 5V reference circuit. A failure here directly causes reduced power modes. The sensor is typically integrated into the accelerator pedal assembly. 🎬 See how a broken gas pedal triggers reduced engine power.
Trusted brands: ACDelco
OEM price range: $80-$150
Aftermarket price range: $50-$100 - Wiring Harness Pigtail / Connector — If the fault is a damaged connector at a sensor or a specific spot in the harness, a new pigtail m
Related Codes That Often Appear With This One
- P06DE — As cited in NHTSA TSB #PIP5247A, P0651 can appear with P06DE on related GM vehicles. P06DE relates to the oil pressure control system, and the oil pressure sensor may share the same 5-volt reference circuit.
- P0335 — This code is for the Crankshaft Position Sensor (CKP) circuit. The CKP sensor is often powered by the 5-volt reference 'B' circuit, so a fault on the circuit will cause a CKP code. A user on Camaro6 reported getting both codes simultaneously, leading to a no-gas-pedal situation.
- P2135 — This code indicates a Throttle/Pedal Position Sensor/Switch 'A'/'B' Voltage Correlation error. Since the throttle and pedal sensors are often on the 5-volt reference circuit, a P0651 fault can trigger this correlation code. A Corvette owner reported this combination when their car entered reduced power mode.
- P0192 — This code indicates Fuel Rail Pressure Sensor Circuit Low Voltage. On some GM engines, the fuel rail pressure sensor is on the 5V Ref 2 circuit. A wiring issue or shorted sensor can cause both P0651 and P0192 to appear.
Technical Service Bulletins (TSBs) & Recalls
- PIP5247A: Mentions that P0651 may be set in the ECM along with P06DE and to follow diagnostics for P06DE. This TSB applies to many GM vehicles, including the Camaro's platform mate, the Cadillac ATS.
Platform-Specific Known Issues
- Wiring Harness Chafing: A common failure point across multiple Camaro generations is the engine wiring harness rubbing through its insulation on a metal bracket, engine component, or the transmission case. A user on Camaro5.com found their issue was caused by wires rubbing near the fuse block mount. Another repair video for a different GM vehicle showed the harness pinched between the engine and transmission after a repair, causing a P0651. Careful inspection of the entire harness is critical.
- Crankshaft Position Sensor Failure: → Shop Engine Crankshaft Position Sensor A user on the Camaro6 forums reported experiencing P0651 along with P0335 (Crankshaft Position Sensor Circuit), which resulted in the gas pedal becoming completely unresponsive. This points to the CKP sensor or its wiring as a primary suspect when both codes are present.
Mechanic-Grade Diagnostic Values
- Sensor Reference Voltage 'B' on a scan tool (Key On, Engine Off) — expected: Approximately 5.0 V (typically within 4.8V - 5.2V).. Failure: Voltage significantly below 4.8V (short to ground) or 0V (open circuit).
- Engine RPM on a scan tool while cranking — expected: 100 to 500 RPM.. Failure: A reading of zero RPM while the engine is physically cranking strongly suggests a failed Crankshaft Position Sensor or its circuit, which is often on the 5V Ref 2 circuit.
- Crankshaft Position Sensor AC Voltage (for 2-wire sensors) — expected: 0.2V to 2.0V AC while cranking the engine.. Failure: No AC voltage produced while cranking indicates a failed sensor.
- Crankshaft Position Sensor DC Voltage (for 3-wire Hall effect sensors) — expected: Power wire to ground should be ~5V with key on. Signal wire should fluctuate between 0V and 5V while cranking.. Failure: No power on the reference wire, or a signal wire that is stuck high or low, indicates a fault in the sensor or circuit.
Scan Tool Commands That Help
- GDS2 (or equivalent professional scan tool): Monitor 'Sensor Reference Voltage B' Live Data — This is the primary diagnostic step. With the key on and engine off, observe the voltage. If it is low or zero, begin unplugging sensors on the 5V Ref 2 circuit one by one. When the scan tool parameter changes from 'Malfunction' to 'OK' or the voltage returns to 5V, the disconnected component or its pigtail is the source of the short.
Wiring & Ground Locations
- 5V Reference 2 Wire — In the main engine wiring harness, running from the ECM to various sensors.. This wire, often Gray or White/Black on GM vehicles, is the specific circuit that sets code P0651 when it shorts to ground or has an open.
- Harness Chafe Point: Transmission Bellhousing — The area where the engine wiring harness passes over or near the engine/transmission bellhousing.. This is a widely documented failure point. The harness can be pinched during transmission service or rub through from vibration, causing the 5V reference wire to short to the transmission case (ground), triggering P0651.
- ECM Connector X1, Pins 47 & 56 — On the main Engine Control Module (ECM). For the 3.6L V6, the X1 connector is identifiable by a Blue terminal position assurance lock.. On some GM wiring schematics, these pins are the specific terminals for the 5-Volt Reference 2 circuit (wire color WH/BK). This is the source of the circuit and a key test point for diagnosing a harness issue vs. a faulty ECM.
- Engine Ground (near starter) — On the passenger side of the engine block, underneath the exhaust manifold near the starter.. This ground point is reportedly not tightened well from the factory on some 6th Gen Camaros and can cause a host of erratic electrical issues, including bouncing tachometers and other symptoms associated with reference voltage problems.
- Grounds G104 / G111 (V6 Engine) — For the 3.6L LFX V6, G104 is at the front of the engine, and G111 is on the lower left rear of the engine block.. These are main engine block grounds. A loose or corroded ground can cause unstable voltages and trigger reference circuit codes.
Real Owner Repair Stories
- Camaro5 Forum User (2013 Camaro SS LS3 (5th Gen, but demonstrates a common failure pattern)) — Car would not start, 'Engine Power Reduced' message, P0651 code returned instantly after clearing.
❌ Tried (didn't work) Clearing the code.
✅ What actually fixed it The user had just reinstalled the transmission. The dealer diagnosed and confirmed the wiring harness was pinched between the engine and the transmission, causing the short. - Camaro5 Forum User (Used Camaro (model year not specified)) — P0651 code.
❌ Tried (didn't work) Self-diagnosis.
✅ What actually fixed it A dealer technician found that wires were rubbing together in the engine compartment near the steering column area. The harness was improperly routed from a previous event. Securing the harness and repairing the wires resolved the code. - Camaro6 Forum User (2018 ZL1 (Supercharged)) — Service StabiliTrak message, no response from gas pedal, codes P0335 and P0651.
❌ Tried (didn't work) Clearing codes initially.
✅ What actually fixed it The dealer determined the cause was a dirty throttle body, likely due to oil blow-by from the supercharger. They cleaned the throttle body and performed TSBs for the wiring harness and a fluttering speedometer, which resolved the issue. - YouTube - Diesel Dan (2007 Chevy Equinox (demonstrates GM wiring failure)) — P0651 code after a used transmission was installed.
❌ Tried (didn't work) Initial inspection.
✅ What actually fixed it The technician found the wiring harness was pinched between the engine and transmission. The gray 5V reference wire was completely smashed and broken inside the insulation. Repairing the wire and re-routing the harness fixed the problem.
Helpful Videos


Used OEM Parts in Stock
New Aftermarket Parts Available


The information in this article is provided for general reference and educational purposes only. Vehicle specifications, procedures, and part compatibility can vary by production date, trim level, and region. Always consult your vehicle's factory service manual and verify part numbers before purchasing or performing repairs. Safety-critical components such as airbags, seat belts, and braking systems should be installed by a qualified professional.
- Chevrolet CAMARO:
- 🧭 Diagnostic Flowchart
- 🎬 Helpful Videos
- 🛍️ Shop This Part
- What's Unique About the 2016-2019 Chevrolet CAMARO
- Symptoms You May Notice
- Most Likely Causes
- Rare But Worth Checking
- Diagnosis Steps
- Parts You'll Likely Need
- Related Codes That Often Appear With This One
- Technical Service Bulletins (TSBs) & Recalls
- Platform-Specific Known Issues
- Mechanic-Grade Diagnostic Values
- Scan Tool Commands That Help
- Wiring & Ground Locations
- Real Owner Repair Stories
- 🎟️ Get 5% Off