
P0651 on 2015-2019 GMC Canyon: Sensor Voltage Circuit 'B' Causes and Fixes
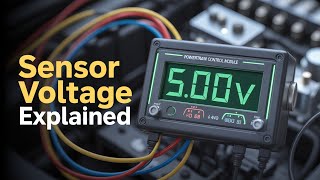
This code indicates a fault in the 5-volt reference circuit 'B' that powers several engine sensors. On the GMC Canyon, this is often caused by a chafed wiring harness, particularly near the engine or transmission, or a faulty sensor shorting the circuit. The fix involves inspecting the harness and unplugging sensors one-by-one to isolate the fault.
- P0651 on a 2015-2019 GMC Canyon is an electrical fault, not necessarily a bad sensor.
- Thoroughly inspect the engine wiring harness for damage, especially near the exhaust and pulleys, before replacing any parts.
- If the code is accompanied by P06DE, focus your diagnosis on the oil pressure sensor and its circuit.
- The most effective diagnostic method is to unplug sensors on the affected circuit one-by-one to see if the fault clears.
- A faulty ECM is a possible but extremely unlikely cause.
What's Unique About the 2015-2019 Gmc CANYON

For the 2015-2019 GMC Canyon and its platform-mate, the Chevrolet Colorado, the P0651 code has specific, well-documented causes. A notable issue is the engine wiring harness chafing on various components, such as the exhaust heat shield, A/C compressor, transmission bell housing bolts, or power steering pump pulley, as outlined in GM Technical Service Bulletin 22-NA-003. Additionally, TSB PIP5247A links P0651 with code P06DE, pointing towards issues with the oil pressure control system. These bulletins highlight that a wiring problem is a more probable cause than random sensor failure on this specific truck.
Diagnostic Flowchart

Tap your situation to follow the diagnostic path that matches what you're seeing on this vehicle.
Symptoms You May Notice
- Check Engine Light is on
- Engine may run rough, stall, or hesitate
- Reduced engine power (Limp Mode)
- Stabilitrak warning light may illuminate
- Erratic or no reading from the oil pressure gauge
- Air conditioning may blow hot air
- Hard starting or no-start condition
- Service 4WD message may appear
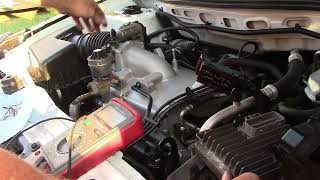
- Loss of RPM signal on tachometer 🎬 Watch: Understanding the Sensor Reference Voltage B circuit while engine is running
- Replacing sensors without first testing the circuit. A technician might replace a sensor that has a code associated with it (like a Crankshaft Position Sensor), but the root cause is the shared 5-volt reference circuit being shorted by a different sensor or a wiring issue.
Most Likely Causes

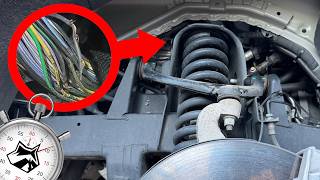
- Chafed or Damaged Wiring Harness 🔴 High Probability GM has issued TSBs (like 22-NA-003 and PIP5416) for the Canyon/Colorado platform, warning that the engine harness can chafe against multiple components. Specific chafe points include the A/C compressor, transmission bell housing bolts, serpentine belt area, and the exhaust heat shield. Owners have reported the harness getting pinched between the engine and transmission during repairs.
How to confirm: Visually inspect the entire engine wiring harness. Pay close attention to where it runs near hot exhaust components, sharp metal edges (like heat shields or brackets), moving pulleys, and pinch points like the transmission bellhousing. Look for melted plastic, exposed copper wires, or pinch points. A user found their harness had worn through on a metal shield near the throttle body.
Typical fix: Repair the damaged section of wire using solder and heat-shrink tubing. Secure the harness away from the contact point using zip ties, anti-abrasion tape, or a protective sleeve 🎬 See this quick tip for fixing chafed engine wiring to prevent future damage.
Est. part cost: $5-$25 - Faulty Sensor on the 'B' Circuit 🟡 Medium Probability A sensor can fail internally and create a short circuit, pulling down the 5-volt reference for all other sensors on that same circuit. The Engine Oil Pressure Sensor is a common failure point, often leaking oil into the electrical connector.
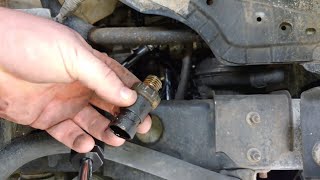
How to confirm: Identify the sensors on the 'B' circuit (typically the Engine Oil Pressure Sensor, A/C Pressure Sensor, and Fuel Tank Pressure Sensor). With the key on, unplug each sensor one by one. If unplugging a specific sensor causes the code to go away (or the 5V signal to return on the other sensor connectors), that sensor is the culprit.
Typical fix: Replace the faulty sensor. If replacing the oil pressure sensor, it's wise to clean the oil from the harness connector 🎬 Watch: Step-by-step GMC Canyon oil pressure switch replacement with electrical contact cleaner.
Est. part cost: $30-$150
Rare But Worth Checking
- Faulty Engine Control Module (ECM): → Shop Engine Control Module (ECM) This is very rare and should only be considered after all wiring and sensor issues have been definitively ruled out. The internal voltage regulator in the ECM can fail, but it's much more likely the problem is external to the module.
Diagnosis Steps
- Read all stored DTCs with an OBD-II scanner. Note any other codes that are present, as they can provide clues to which sensor circuit is affected.
- Obtain a wiring diagram for your specific engine to identify which sensors are on the 5-volt reference 'B' circuit. For GM vehicles, this circuit often includes the Engine Oil Pressure Sensor, A/C Refrigerant Pressure Sensor, and Fuel Tank Pressure Sensor.
- Visually inspect the engine wiring harness thoroughly. Pay special attention to the areas mentioned in TSB 22-NA-003 and PIP5416, such as near the A/C compressor, serpentine belt, and transmission bell housing bolts.
- If no visible damage is found, begin isolating the circuit. With the key on and engine off, disconnect one sensor on the 'B' circuit.
- Use a multimeter to check for 5 volts at the reference wire terminal on the connector of one of the *other* sensors on the same circuit. A normal reading is between 4.8 and 5.2 volts. If the correct voltage is now present, the sensor you just unplugged is the one causing the short.
- Repeat this process, unplugging one sensor at a time, until the faulty component is identified.
- If unplugging all sensors does not restore the 5-volt signal, the issue is likely in the wiring harness itself (an open or short to ground). Check for continuity on the reference wire (often a grey wire on GM vehicles) from the ECM connector to each sensor connector to find an open circuit.
- If all wiring and sensors are confirmed to be good, the final step would be to test the ECM itself, though this is the least likely cause.
Parts You'll Likely Need

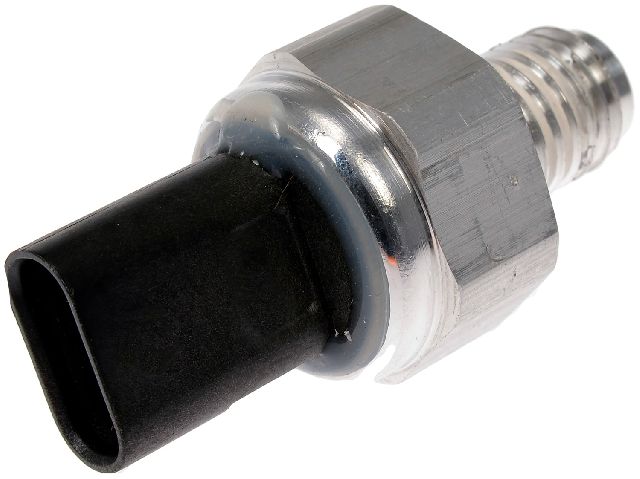
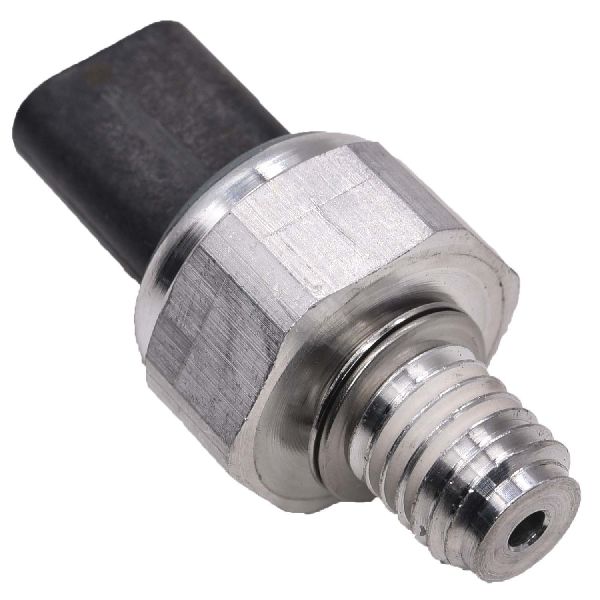
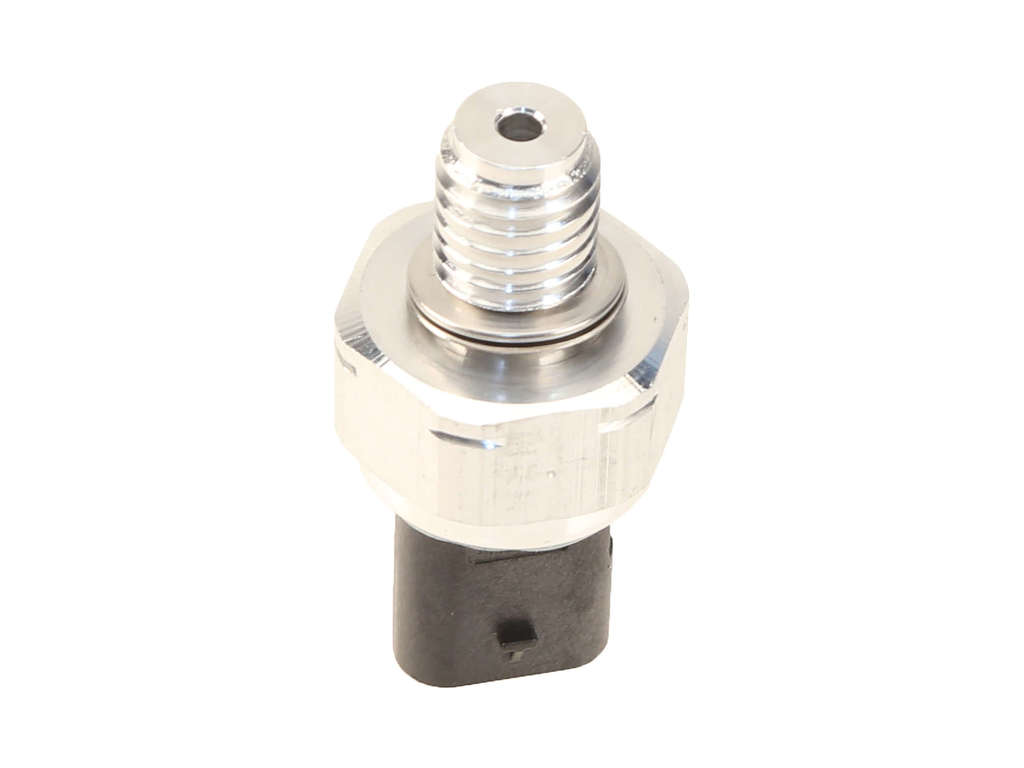
- Engine Oil Pressure Sensor
(OEM #12673134)— Given the link to code P06DE in TSB PIP5247A, the oil pressure sensor (which is on a 5V reference circuit) is a likely candidate if a sensor is at fault. These sensors are also known to fail and leak oil into the electrical connector.
Trusted brands: ACDelco, Standard Motor Products
OEM price range: $40-$60
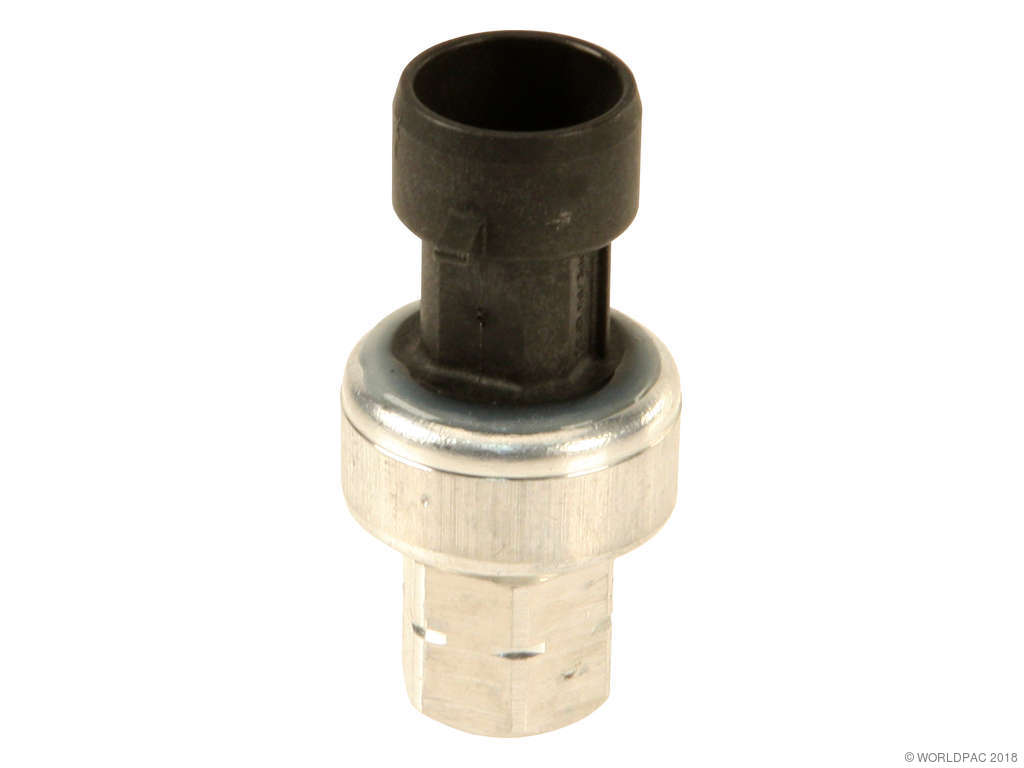
Aftermarket price range: $25-$45 - A/C Refrigerant Pressure Sensor
(OEM #13587668)— This sensor is commonly on the 5V reference 'B' circuit and is a known potential failure point that can short the circuit.
Trusted brands: ACDelco, Denso
OEM price range: $50-$75
Aftermarket price range: $30-$50 - Wiring Repair Supplies — If the cause is a chafed harness, you will need wire, solder, heat-shrink tubing, and high-quality electrical tape or anti-abrasion loom to perform a durable repair.
OEM price range: $10-$25
Aftermarket price range: $10-$25
Related Codes That Often Appear With This One
- P06DE — As noted in TSB PIP5247A, this code for the oil pressure control solenoid often appears with P0651. The P0651 indicates the underlying electrical fault that is preventing the oil pressure system from functioning correctly.
- P0336 — This Crankshaft Position Sensor (CKP) code can appear with P0651 if the CKP sensor is on the affected 5-volt reference 'B' circuit. A Reddit user reported these two codes together on a 2017 Canyon. The P0651 fault can cause a loss of the RPM signal from the CKP sensor.
- P0641 — This is a similar code for the 'Sensor Reference Voltage 'A' Circuit'. TSB 22-NA-003 and PIP5416 list both P0641 and P0651 as potential results of a chafed wiring harness, indicating the damage could affect multiple reference circuits.
Technical Service Bulletins (TSBs) & Recalls
- PIP5247A: Mentions that P0651 may be set with P06DE and diagnostics should follow the procedure for P06DE.
- 22-NA-003: Details potential for the engine wiring harness to chafe on the exhaust heat shield, A/C compressor, serpentine belt area, and other components, causing various DTCs including P0651.
- PIP5416: Details multiple engine wiring harness chafe locations and lists many associated DTCs, including P0651 and P0641.
Platform-Specific Known Issues
- TSB 22-NA-003 & PIP5416: Widespread Harness Chafing: Warns of the engine wiring harness chafing on multiple locations, including the A/C compressor, serpentine belt area, transmission bell housing bolts, and the exhaust heat shield at the right rear of the engine. This damage can cause P0651, P0641, and a host of other electrical issues and symptoms.
- TSB PIP5247A: Link to Oil Pressure Issues: Specifically notes that DTC P0651 may be set along with P06DE (Engine Oil Pressure Control Solenoid Valve Performance). It advises technicians to follow the diagnostic procedure for P06DE, strongly suggesting the fault lies within that system's sensor or wiring.
- Owner Experience: Harness Pinched by Transmission: A YouTube video shows a mechanic discovering the wiring harness was crushed between the engine and transmission after a transmission replacement. The grey 5V reference wire was severed, causing a P0651 code. This highlights a critical area to check if recent major work has been performed.
- Owner Experience: Harness Rub-Through on Shield: A 2024 Canyon owner on Reddit reported that their wiring harness rubbed through on a metal shield for the throttle body, causing electrical issues. The fix was to repair the wire and apply foam padding to the shield to prevent recurrence.
Mechanic-Grade Diagnostic Values
- 5-Volt Reference 'B' Circuit Voltage — expected: 4.8 - 5.2 Volts with key on, engine off.. Failure: A reading near 0V indicates a short to ground. A reading near battery voltage (~12V) indicates a short to voltage. The DTC sets if the voltage is out of this range for more than 0.5 seconds.
- Vehicle Battery Voltage — expected: Greater than or equal to 12.4 Volts.. Failure: Low battery voltage can cause instability in reference circuits and trigger false codes.
Scan Tool Commands That Help
- GDS2 / Tech2 (or equivalent professional scanner): Live Data: '5-Volt Reference 1/2' Parameter — Use this to monitor the circuit's voltage in real-time. While unplugging sensors one-by-one, watch this parameter. When the faulty sensor is unplugged, the scan tool parameter should change from 'Fault' to 'OK' or return to the 4.8-5.2V range.
- Professional Scanner with Bidirectional Control: Active Test / Functional Test — This can be used to command specific components on the circuit to operate, helping to isolate an intermittent fault without having to physically access the component.
Wiring & Ground Locations

- 5V Reference Wire — Within the main engine wiring harness, running from the ECM to all sensors on the 'B' circuit.. This wire, often grey on GM vehicles, is the power supply for the sensors. It is frequently the point of failure due to chafing or being pinched, especially between the engine block and transmission bellhousing.
- G103 / G105 (Example Ground Points) — Common GM engine bay ground points. G103 is often on the cowl above the brake booster. G105 is often in the left front of the engine compartment. On trucks, primary grounds from the battery cable attach to the engine block and the frame.. A poor ground connection for the ECM or the sensors can cause floating voltages and instability on the 5V reference circuits, leading to a P0651 code. Cleaning these main grounds is a critical diagnostic step.
- ECM Connector (e.g., J2) — The main connectors at the Engine Control Module.. This is the source of the 5V reference signal. Pinout charts show specific pins for low reference (ground) wires, such as J2-24 for the Engine Oil Pressure sensor and J2-27 for the Crank Sensor on some GM models, which helps in testing for continuity.
Real Owner Repair Stories
- YouTube channel 'Diesel Dan' (Vehicle make/model not specified, but a common GM setup.) — P0651 code, vehicle would not run right.
❌ Tried (didn't work) Initial diagnosis was difficult without a wiring diagram.
✅ What actually fixed it The mechanic found the engine wiring harness was crushed between the engine block and the transmission after a recent transmission replacement. The grey 5-volt reference wire was severed. The fix required separating the engine and transmission slightly to access the harness, repair the broken wire with a butt connector and heat shrink, and reroute it to prevent future pinching. - GMTNation forum user (Chevrolet Trailblazer (similar GM 5V reference design)) — Intermittent P0651, multiple dash lights, reduced engine power mode, rough idle.
❌ Tried (didn't work) Visual inspection of the harness did not reveal any obvious wear spots.
✅ What actually fixed it The suggested fix, which is a common cause on this platform, was a faulty electronic fan clutch shorting out the 5V reference circuit. The diagnostic step is to unplug the fan clutch, clear the codes, and see if P0651 returns. If it does not, the fan clutch is the culprit.
OEM Part Supersession History
12596951, 12621234→12673134— Standard part revision and consolidation by the manufacturer.
Heads up: The new part number is the correct service replacement for the older numbers.13502758, 13502759, 22634172, 22678731→13587668— Standard part revision and consolidation by the manufacturer for the A/C Refrigerant Pressure Sensor.
Heads up: The new part number is the correct service replacement for the older numbers.
Model Year Variations Within This Range
- 2015-2019: While not a specific year-to-year change, GM distributes sensors across two main 5V reference busses (Ref 1 for P0641, Ref 2 for P0651). On a related GM engine, Ref 2 (P0651) powered the Accelerator Pedal Sensor 1, Throttle Position Sensors 1 & 2, Crankshaft Position (CKP) sensor, and Secondary Air Injection (AIR) pressure sensor. Ref 1 powered the MAP, Fuel Tank Pressure, A/C Pressure, APP 2, and Camshaft Position sensors. This distribution can vary by engine (2.5L, 3.6L, 2.8L Diesel), so a wiring diagram is crucial to know which sensors are on the 'B' circuit for your specific truck.
Helpful Videos
We Have This Part in Stock


The information in this article is provided for general reference and educational purposes only. Vehicle specifications, procedures, and part compatibility can vary by production date, trim level, and region. Always consult your vehicle's factory service manual and verify part numbers before purchasing or performing repairs. Safety-critical components such as airbags, seat belts, and braking systems should be installed by a qualified professional.
- Gmc CANYON:
- 🧭 Diagnostic Flowchart
- 🎬 Helpful Videos
- 🛍️ Shop This Part
- What's Unique About the 2015-2019 Gmc CANYON
- Symptoms You May Notice
- Most Likely Causes
- Rare But Worth Checking
- Diagnosis Steps
- Parts You'll Likely Need
- Related Codes That Often Appear With This One
- Technical Service Bulletins (TSBs) & Recalls
- Platform-Specific Known Issues
- Mechanic-Grade Diagnostic Values
- Scan Tool Commands That Help
- Wiring & Ground Locations
- Real Owner Repair Stories
- OEM Part Supersession History
- Model Year Variations Within This Range
- 🎟️ Get 5% Off