
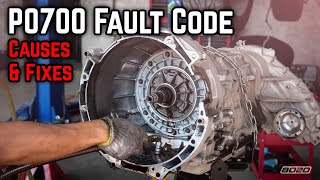
P0700 on 2013-2015 Cadillac ATS: Transmission System Malfunction Guide
On a 2013-2015 Cadillac ATS, P0700 is often caused by a poor connection at the main transmission wiring harness (connector X1). This is a known issue documented in GM Technical Service Bulletin PIC4740F. Before replacing any parts, inspect the harness for unseated pins or chafing against a bracket on the passenger side of the transmission bell housing.
- P0700 on this Cadillac ATS is a flag, not a diagnosis. You must scan the TCM for the real codes.
- The most likely cause is a known wiring issue at the main transmission connector (X1), as per GM TSB #PIC4740E.
- Before replacing any expensive parts like the TCM, perform a thorough inspection of the transmission wiring harness for loose pins or chafing.
- This code is often accompanied by communication codes like U0100 and U0101, reinforcing the likelihood of a wiring or connection problem.
- Due to the complexity and need for a specific scan tool, professional diagnosis is recommended if the initial visual inspection doesn't reveal an obvious fault.
What's Unique About the 2013-2015 Cadillac ATS
For the 2013-2015 Cadillac ATS, this code is frequently linked to a specific wiring issue documented by General Motors in Technical Service Bulletin #PIC4740F (which supersedes PIC4740E). The bulletin highlights that a wide array of communication and system codes, including P0700, can be triggered by unseated pins in the main transmission harness connector (X1) or by the harness chafing against a specific bracket. The chafing point is located on the passenger side of the vehicle where the transmission bell housing attaches to the engine block. This makes a thorough inspection of this specific connector and harness section the most critical first step in diagnosis.
Diagnostic Flowchart
Tap your situation to follow the diagnostic path that matches what you're seeing on this vehicle.
Symptoms You May Notice
- Check Engine Light (Malfunction Indicator Lamp) is on
- Multiple warning lights on the dashboard (e.g., StabiliTrak, ABS)
- Harsh or erratic shifting
- Transmission gets stuck in one gear
- Vehicle enters 'Reduced Engine Power' or 'limp' mode
- Intermittent 'no crank' or 'no start' condition
- Door locks cycling intermittently while driving
- Speedometer and/or tachometer drop to zero while driving
- Scan tool loses communication with the TCM or ECM
- Replacing the Transmission Control Module (TCM) without first thoroughly inspecting the X1 wiring harness and connector per TSB PIC4740F.
- Replacing internal transmission components like shift solenoids when the root cause is a communication or wiring issue.
- Performing a full transmission rebuild when the only fault is an external electrical connection.
Most Likely Causes
- Unseated Pins or Damage at Transmission Harness Connector (X1) 🔴 High Probability → Shop Transmission Assembly This is a well-documented issue in GM TSB #PIC4740F for this specific vehicle platform. The design allows for poor pin connections or harness chafing over time.
How to confirm: Visually inspect the main transmission connector (X1). Disconnect it and, as per the TSB, gently tug on each individual wire to ensure the pins are fully seated, noting that a side load can cause a false positive lock. Inspect the harness for any signs of rubbing or damage, especially at the securing bracket on the passenger side of the bell housing.
Typical fix: Reseat any loose pins in the connector. Repair any chafed or broken wires using a pigtail connector kit if necessary. Secure the harness so it hangs below the bracket to prevent future chafing.
Est. part cost: $0-$75 for connector repair kits or wiring supplies. - Low or Degraded Transmission Fluid 🟡 Medium Probability → Shop Transmission Assembly
How to confirm: Check the transmission fluid level and condition according to the manufacturer's procedure. The fluid should be at the correct level, red in color (not brown or tan), and not have a burnt smell.
Typical fix: Top off the fluid if low. If the fluid is old, dark, or burnt, a fluid and filter change is required.
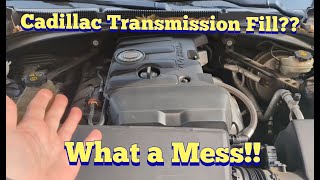
Est. part cost: $50-$150 for fluid and a filter. 🎬 See this walkthrough on finding the tricky transmission fill location.
- Faulty Transmission Control Module (TCM) ⚪ Low Probability → Shop Transmission Assembly
How to confirm: This is a diagnosis of exclusion. If all wiring, connectors, grounds, and sensors test good, and communication with the TCM is intermittent or impossible even with a direct connection, the module itself may be faulty. This is often misdiagnosed when the real issue is wiring.
Typical fix: Replace the Transmission Control Module and program it to the vehicle.
Est. part cost: $400-$1000+
Rare But Worth Checking
- Faulty Internal Transmission Component: → Shop Transmission Assembly This could include a failing shift solenoid, a bad transmission speed sensor, or a faulty valve body. These issues will almost always set a more specific code in the TCM that a capable scan tool can read.
- Poor Vehicle Ground Connection: GM vehicles of this era are known for having issues with main electrical ground points, which can cause a flood of communication codes like U0073, U0100, and P0700. Cleaning and securing the main battery-to-frame and engine block grounds can sometimes resolve these intermittent electrical problems.
Diagnosis Steps
- Use an OBD-II scanner capable of accessing the Transmission Control Module (TCM) to read all stored transmission-specific codes. Document all codes (P-codes and U-codes) and freeze-frame data. Do not proceed based on P0700 alone.
- Prioritize diagnosis based on TSB #PIC4740F. Locate the main transmission electrical connector, known as X1.
- Disconnect the battery. Disconnect the X1 connector and inspect it for corrosion, moisture, or damaged pins.
- Per the TSB, gently tug on each individual wire leading into the connector to ensure they are fully seated and locked in place. A side load on the wires can give a false sense of security.
- Locate the harness securing bracket on the passenger side of the transmission bell housing. Inspect the wiring harness routing for any signs of chafing, melting, or physical damage where it might contact the bracket or engine block.
- If wiring issues are found, repair them. Reseat loose pins or use an appropriate pigtail connector kit for damaged sections. Ensure the harness is routed to hang below the bracket.
- Reconnect the harness and battery, clear the codes, and perform a test drive to see if the codes return.
- If no wiring issues are found, inspect and clean major vehicle ground points, particularly the main battery ground to the frame and any grounds on the engine block.
- If the problem persists, proceed with diagnosing the specific codes found in the TCM (e.g., for a specific sensor or solenoid).
- Check the transmission fluid level and condition. Correct as necessary.
- If all else fails, further professional diagnosis of the TCM itself may be required.
Parts You'll Likely Need
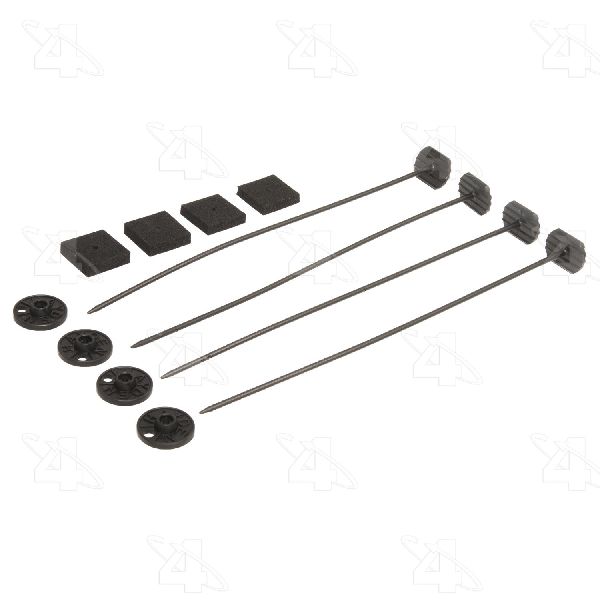
- Transmission Wiring Harness Connector Pigtail Kit — The most probable cause for this code on this vehicle is unseated pins or damage at the main transmission connector (X1), as per TSB PIC4740F. A pigtail kit is used to repair damaged wires or terminals.
Trusted brands: ACDelco, Dorman
OEM price range: $40-$80
Aftermarket price range: $20-$50 - Automatic Transmission Fluid (DEXRON-VI) — Required if the fluid is found to be low, degraded, or if the transmission pan needs to be removed for any related service.
Trusted brands: ACDelco, Valvoline, Castrol
OEM price range: $15-$25 per quart
Aftermarket price range: $8-$15 per quart
Related Codes That Often Appear With This One
- U0073 — Indicates a Control Module Communication Bus 'A' Off fault, directly related to the wiring issues described in TSB PIC4740F.
- U0100 — Lost Communication With ECM/PCM. This is a very common companion code when the transmission harness has a fault, indicating a network-wide problem.
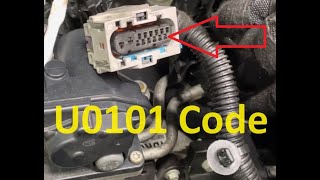
- U0101 — Lost Communication With TCM. This code specifically confirms a communication breakdown between the main computer and the transmission module, pointing directly to the harness or TCM itself. 🎬 Watch: How to diagnose and fix U0101 lost communication codes.
- U0121 — Lost Communication With Anti-Lock Brake System (ABS) Control Module. The network communication issue is rarely isolated and often affects multiple modules on the CAN bus.
Technical Service Bulletins (TSBs) & Recalls
- PIC4740F (supersedes PIC4740E): Addresses multiple symptoms including no-crank, hard shifting, and various warning lights, pointing to inspection of the transmission X1 connector and harness for the root cause of P0700 and other codes. It gives specific instructions to tug-test wires and check for chafing at the bell housing bracket.
Platform-Specific Known Issues
- A known issue documented in TSB #PIC4740F involves unseated pins in the transmission connector X1 or harness chafing against a bracket on the passenger side of the bell housing, leading to P0700 and numerous communication (U-prefix) codes.
Mechanic-Grade Diagnostic Values
- 6L45/6T45 Transmission Pressure Control Solenoid Resistance — expected: 3.0 - 5.5 Ohms. Failure: A reading outside this range, or an open/short circuit, indicates a faulty solenoid.
- 6L45/6T45 Transmission Shifter Solenoid Resistance — expected: 16 - 20 Ohms. Failure: A reading outside this range indicates a faulty solenoid.
- Negative Battery Cable to Engine Block Nut Torque — expected: 45 Nm (33 ft lb). Failure: A loose connection can cause widespread communication DTCs, including P0700 and U-codes.
- Battery Fuse Block Cable Nut Torque — expected: 15 Nm (11 ft lb). Failure: Loose connections at the main fuse block can cause intermittent power loss to critical modules.
Hidden / Shadow Codes Worth Checking
- Various P-codes (e.g., P0751, P0722): The P0700 code does not have its own 'shadow codes'. Instead, P0700 acts as a general alert from the TCM to the ECM. The true 'hidden' codes are the specific transmission faults (like shift solenoid performance or speed sensor circuit faults) stored within the TCM itself, which require a more advanced scanner (like GM's GDS2) to read. (see via A scan tool capable of communicating directly with the Transmission Control Module, not just the Engine Control Module.)
Scan Tool Commands That Help
- GDS2 (GM Global Diagnostic System 2): Transmission Adaptive Values Learn — Used after a transmission repair or to correct harsh shifting conditions. This function, found under 'TCM > Configuration / Reset Function', relearns the clutch apply pressures without requiring a road test.
- GDS2 (GM Global Diagnostic System 2): Data Bus Diagnostic Tool — When multiple 'U' (communication) codes are present with P0700, this tool can be used to poll the CAN bus and identify which specific control modules are not responding, helping to isolate the location of a wiring break or faulty module.
- GDS2 (GM Global Diagnostic System 2): Solenoid Valve Commanded State — Allows a technician to command individual shift or pressure control solenoids ON or OFF while monitoring transmission data to verify solenoid and circuit functionality. This is found under 'Module Diagnostics > TCM > Control Functions'.
- GDS2 (GM Global Diagnostic System 2): TCC (Torque Converter Clutch) Enabled/Disabled — To diagnose if a vibration concern is related to TCC shudder. By commanding the TCC ON and OFF, a technician can isolate the vibration source.
Wiring & Ground Locations
- X1 Connector — The main 16-pin electrical connector on the transmission case.. This is the primary location for unseated pins and harness damage as identified in TSB PIC4740E/F. A poor connection here is the most common cause of P0700 and related communication codes on this vehicle.
- G101 — Located at the lower front of the engine block.. This ground point serves the Engine Control Module (ECM) and Transmission Control Module (TCM). A poor connection here can directly cause communication loss codes U0100 and U0101.
- G104 — On the front of the right cylinder head (3.6L) or the lower rear of the cylinder head (2.0T/2.5L). Note: Location on 4-cylinders moved from front to rear of engine mid-December 2012.. A TSB specifically calls for inspecting this ground on 2013 models for being clean and tight, as a fault here can cause intermittent electrical issues and DTCs.
- G103 / G107 — G103 is on the upper rear of the cylinder head (non-3.6L) or front of right cylinder head (3.6L). G107 is also on the front of the right cylinder head (3.6L).. These are primary engine block grounds that ensure a stable reference for various sensors and modules. A poor connection can cause erratic behavior and communication faults.
- G202 / G301 — Located in the left kick panel area, inside the cabin.. These grounds serve interior modules, including the BCM on some diagrams. While less likely to be the primary cause, a fault here could contribute to a flood of communication codes.
Real Owner Repair Stories
- Chevrolet Forum user 'GRIMMM' (2014 Chevy Truck (similar GM electrical architecture)) — Vehicle suddenly shut down with 'Service Stabilitrak' and 'Reduced Engine Power' messages. Set codes P0700 and U0100. Low battery reading on dash.
❌ Tried (didn't work) Initially thought it was a major transmission or engine failure.
✅ What actually fixed it The user was advised that these symptoms are classic signs of a weak battery and/or bad ground connections on this GM platform. The recommended fix was to have the battery load tested and to clean the main chassis and engine ground points before diagnosing the transmission, as the P0700 was likely a secondary code caused by the electrical instability.
OEM Part Supersession History
Various (Pre-2010 6L80 Separator Plate 24246916)→Various (Post-2010 6L45/50 Separator Plate 24245720)— Design change in valve body and separator plate around 2010. Later models (like the 2013-2015 ATS) use a plate without certain exhaust ports found in earlier designs.
Heads up: The 2013-2015 ATS uses the later style 6L45 valve body. It has taller Input Speed Sensor (ISS) and Output Speed Sensor (OSS) bosses compared to the 6L80/90. Using incorrect valve body components or separator plates can cause shifting problems or codes.
Model Year Variations Within This Range
- 2013 (Early Production): On 4-cylinder (2.0T/2.5L) models built before mid-December 2012, a key engine ground was located at the front of the engine. On models built after this date, the ground was moved to the rear of the engine. This is important when inspecting ground G104 per related TSBs.
Helpful Videos

We Have This Part in Stock


The information in this article is provided for general reference and educational purposes only. Vehicle specifications, procedures, and part compatibility can vary by production date, trim level, and region. Always consult your vehicle's factory service manual and verify part numbers before purchasing or performing repairs. Safety-critical components such as airbags, seat belts, and braking systems should be installed by a qualified professional.
- Cadillac ATS:
- 🧭 Diagnostic Flowchart
- 🎬 Helpful Videos
- 🛍️ Shop This Part
- What's Unique About the 2013-2015 Cadillac ATS
- Symptoms You May Notice
- Most Likely Causes
- Rare But Worth Checking
- Diagnosis Steps
- Parts You'll Likely Need
- Related Codes That Often Appear With This One
- Technical Service Bulletins (TSBs) & Recalls
- Platform-Specific Known Issues
- Mechanic-Grade Diagnostic Values
- Hidden / Shadow Codes Worth Checking
- Scan Tool Commands That Help
- Wiring & Ground Locations
- Real Owner Repair Stories
- OEM Part Supersession History
- Model Year Variations Within This Range
- 🎟️ Get 5% Off