
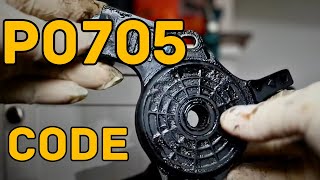
P0705 on 2011-2018 Hyundai Sonata: Transmission Range Sensor Circuit Fixes
On a 2011-2018 Sonata, code P0705 is almost always caused by a faulty transmission range sensor, also known as an inhibitor switch. Replacing this externally-mounted sensor is the most common fix. An OEM part costs around $60-$100, with aftermarket versions available for less. This is a very common failure across many Hyundai and Kia models of this era.
- P0705 on a 2011-2018 Sonata points overwhelmingly to a bad inhibitor switch (transmission range sensor).
- Symptoms are serious and affect safety, including harsh shifting, no-start conditions, and incorrect gear indication.
- The most likely fix is replacing the inhibitor switch, which is mounted on the outside of the transmission.
- Before replacing the part, always check the wiring and connector for corrosion or damage, as this can cause the same code.
- This is a manageable DIY repair for those with some mechanical experience, but professional service is recommended due to the safety-critical nature of the transmission.
What's Unique About the 2011-2018 Hyundai SONATA
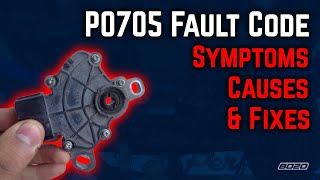
For this generation of Hyundai Sonata, the transmission range sensor (inhibitor switch) is a well-documented, high-failure item. Hyundai has issued multiple Technical Service Bulletins (TSBs) that directly address diagnosing and replacing this switch for code P0705. 🎬 Watch: Common causes and fixes for the P0705 code. Unlike some vehicles where the sensor is inside the transmission, the Sonata's sensor is mounted externally on the front of the transmission case. This makes it more accessible for replacement but also more exposed to the elements like moisture and road debris, which can lead to internal corrosion and failure.
Diagnostic Flowchart
Tap your situation to follow the diagnostic path that matches what you're seeing on this vehicle.
Generation note: This range covers two Sonata generations: the YF (2011-2014) and the LF (2015-2018). While the P0705 code has the same meaning for both, and the inhibitor switch is a common problem on both, the specific part number for the switch may differ. The YF generation often uses part number 42700-26000 (which may be superseded by 42700-26500 or 42700-26700), while the LF generation often uses 42700-3B700. Always verify the part number with your vehicle's VIN before purchasing.
Symptoms You May Notice
- Check Engine Light is on
- Harsh or jolting shifts, especially between Park, Reverse, and Drive.
- Gear position indicator on the dashboard is blank or incorrect.
- Vehicle will not start, or only starts in Neutral but not Park.
- Intermittent no-start that may be temporarily resolved by jiggling the gear shifter.
- Backup/reverse lights do not turn on when in Reverse.
- Transmission enters 'limp mode,' often stuck in 3rd or 4th gear.
- Replacing the transmission valve body when the issue is the external sensor.
- Replacing the entire transmission when only the inexpensive external switch is needed.
- Replacing the PCM/TCM before verifying the sensor and wiring are good.
Most Likely Causes
- Faulty Inhibitor Switch (Transmission Range Sensor) 🔴 High Probability → Shop Transmission Park Inhibitor Switch This is a known high-failure item addressed by multiple Hyundai TSBs (e.g., #17-AT-005). The switch is exposed to weather and road debris, leading to internal corrosion and failure. Forum users and owners consistently report this as the fix for P0705.
How to confirm: Use a scan tool to monitor the sensor's output while shifting gears. If the reading doesn't match the gear selector's position, the sensor is likely bad. A multimeter can also be used to test for correct continuity at the sensor's connector pins for each gear position, as outlined in service manuals.
Typical fix: Replace the inhibitor switch. This involves removing the air cleaner box and battery/battery tray for access, disconnecting the shift cable, and unbolting the old switch from the transmission case. Crucially, the new switch must be aligned correctly, typically by placing the transmission in Neutral and inserting a 5mm bolt or alignment pin into the switch's alignment hole before tightening the mounting bolts.
Est. part cost: $40-$115 - Damaged Wiring or Corroded Connector 🟡 Medium Probability The wiring harness leading to the inhibitor switch is located under the hood near the transmission and can be susceptible to heat, moisture, and physical damage over time. Water intrusion into the connector is a possible cause, especially after driving in heavy rain or through high water.
How to confirm: Visually inspect the wiring harness and the connector at the inhibitor switch for any signs of corrosion (green or white powder), frayed wires, or loose pins. Perform a continuity test on the wires between the sensor and the control module.
Typical fix: Repair the damaged section of wiring or clean the connector terminals carefully. If corrosion is severe, the connector pigtail may need to be replaced.
Est. part cost: $5-$50 - Misadjusted Shift Cable or Linkage ⚪ Low Probability While less common, a stretched or misadjusted shift cable can cause a mismatch between the position of the gear shifter inside the car and the actual position of the manual lever on the transmission where the sensor is located. This can cause the sensor to send a signal that is 'in between' gears.
How to confirm: Check that the gear indicator on the dash corresponds correctly to each shifter position. If the car starts in Neutral but not Park, it's a strong indicator of a misadjustment. The adjustment is typically made at the transmission lever end of the cable.
Typical fix: Adjust the shift cable at the transmission lever according to the manufacturer's procedure. This can sometimes be done in conjunction with a sensor alignment.
Est. part cost: $0 (if adjustment only)
Rare But Worth Checking
- Faulty Powertrain Control Module (PCM) or Transmission Control Module (TCM): → Shop Transmission Assembly This is very rare and should only be considered after the sensor, wiring, and linkage have been thoroughly tested and confirmed to be good. TSB 17-AT-005 lists this as the final step if all other diagnostics fail. This is an expensive last resort.
Diagnosis Steps
- Connect an OBD-II scanner and confirm P0705 is present. Note any other transmission-related codes (P0706, P0707, P0708 are common).
- Using the scanner's live data function, monitor the Transmission Range Sensor (PRNDL) input. Shift the lever through all gears (P, R, N, D) and verify the scanner displays the correct position for each one.
- If the data is incorrect, intermittent, or does not change, locate the inhibitor switch on the front of the transmission, below the battery tray.
- To access the switch, you will likely need to remove the air intake duct, the battery, and the battery tray (held by 4 bolts).
- Visually inspect the switch's electrical connector and wiring harness for corrosion, damage, or loose connections.
- If the wiring looks good, check for proper shift cable adjustment. A common symptom of misadjustment is the ability to start in 'N' but not 'P'.
- If the sensor is suspected, replace it. During installation, place the transmission manual lever in Neutral. Install the new switch, and before tightening the mounting bolts, insert a 5mm bolt or alignment pin through the alignment hole on the switch to lock it in the correct neutral position. Tighten the bolts, then remove the pin.
- Re-connect the shift cable and battery, clear the DTCs, and perform two drive cycles (key-on to key-off) to confirm the fix.
Parts You'll Likely Need
- Inhibitor Switch / Transmission Range Sensor
(OEM #42700-26000 (YF) / 42700-3B700 (LF))— This is the most common failure part for code P0705 on this vehicle, as confirmed by owner complaints and manufacturer TSBs. Part numbers vary by generation; 42700-26000 is common for 2011-2014 YF models and may be superseded by 42700-26500/42700-26700. Part 42700-3B700 is common for 2015-2018 LF models. Always verify with VIN.
Trusted brands: Hyundai (Genuine), Kia (Genuine), Dorman, Standard Motor Products (SMP)
OEM price range: $60-$115
Aftermarket price range: $40-$70
Related Codes That Often Appear With This One
- P0706 — P0706 indicates a range/performance issue with the same sensor, often triggered by intermittent signals or misalignment, while P0705 indicates a circuit malfunction (like an open or short). They frequently point to the same root cause and are listed together in Hyundai's TSBs.
- P0707 — P0707 indicates the sensor circuit is open (low input), which is a specific type of malfunction that can trigger the general P0705 code.
- P0708 — P0708 indicates the sensor circuit is shorted (high input), another specific fault of the same component that can set a P0705.
Technical Service Bulletins (TSBs) & Recalls
- 17-AT-005: Provides comprehensive diagnostic steps for P0705, P0706, P0707, and P0708, focusing on the inhibitor switch, its circuit, and the critical alignment procedure. It applies to Sonata and many other Hyundai models.
- 5NP-G7B2Q-02: An earlier TSB that also describes the procedure to replace the inhibitor switch as a fix for P0705.
- 19-AT-024H: Lists P0705 - Range switch sensor circuit as a code to be diagnosed with their service procedure.
- 12-AT-022-1: An older TSB from 2012 that also details the diagnostic and repair procedure for P0705 on the YF Sonata and other models, confirming the long history of this issue.
Platform-Specific Known Issues
- TSB 17-AT-005: The Definitive Guide: Hyundai TSB #17-AT-005 is the primary document for this issue. It covers P0705, P0706, P0707, and P0708 and provides a detailed diagnostic flowchart. It confirms symptoms like 4th gear fail-safe, no gear indication, and intermittent no-start. Crucially, it details the replacement and alignment procedure, including removing the battery/tray for access and using a 5mm pin for alignment in Neutral.
- Owner Experience: Intermittent No-Start and Blank Gear Indicator: On a Reddit thread, a 2014 Sonata owner described the P0705 code appearing after the gear selection display on the dash went blank while driving. Another user on a different thread described having to turn the car on and off repeatedly until the 'P' icon appeared before they could shift into drive, a classic symptom of a failing switch.
- DIY Repair Story from Hyundai-Forums: A thread on Hyundai-Forums.com titled 'P0705 Transmission Range Sensor Circuit Malfunction' provides a good guide for the DIY repair. A user confirms that replacing the inhibitor switch, located under the battery tray, resolved their harsh shifting and check engine light.
Mechanic-Grade Diagnostic Values
- Voltage drop at rear combination lamp ground — expected: Less than 0.2 V. Failure: A reading greater than 0.2V indicates a poor ground connection that needs to be cleaned and tightened.
- Continuity of wiring between PCM and inhibitor switch — expected: Approximately 0 ohm. Failure: A high resistance or infinite (O.L.) reading indicates an open circuit in the harness.
- Inhibitor switch continuity test — expected: Continuity should exist between specific pairs of terminals depending on the selected gear position (P, R, N, D).. Failure: A lack of continuity in a specified gear position indicates a failed switch.
Scan Tool Commands That Help
- Hyundai GDS (Global Diagnostic System): Data Analysis > A/T menu > Shift Lever Switch — This is the primary diagnostic step to verify if the PCM is receiving the correct signal from the inhibitor switch. The technician monitors this data while moving the gear selector to see if the displayed gear matches the physical gear, which quickly identifies a faulty signal.
Wiring & Ground Locations
- Rear Combination Lamp Ground — In the trunk area, near the rear tail light assemblies.. Hyundai TSB #17-AT-005 specifically instructs technicians to check this ground for tightness and proper connection. A poor ground here can cause electrical noise or voltage issues that interfere with various control module operations, potentially leading to a false P0705 code even if the inhibitor switch itself is good.
- BCM (Body Control Module) — Located under the driver's side of the dashboard, typically above the gas pedal.. The BCM is a central hub for many electronic signals. While the inhibitor switch primarily communicates with the PCM/TCM, issues with BCM wiring, connectors, or internal faults can sometimes create network communication errors that may manifest as transmission-related codes.
OEM Part Supersession History
42700-26000→42700-26500, then 42700-26700— Standard part revision and improvement.
Heads up: These parts are for the YF generation (2011-2014) Sonata.42700-3B100→42700-3B500, then 42700-3B700— Standard part revision and improvement.
Heads up: These parts are for the LF generation (2015-2018) Sonata.
Model Year Variations Within This Range
- 2011-2018 (Hybrid Models): Sonata Hybrid (YF HEV & LF HEV) models require additional safety steps before this repair. According to TSB #17-HC-003-1, the high-voltage system must be de-energized by removing the safety plug and the technician must verify with a scan tool (GDS) that the Inverter Capacitor Voltage is less than 30V before proceeding.
Helpful Videos


We Have This Part in Stock


The information in this article is provided for general reference and educational purposes only. Vehicle specifications, procedures, and part compatibility can vary by production date, trim level, and region. Always consult your vehicle's factory service manual and verify part numbers before purchasing or performing repairs. Safety-critical components such as airbags, seat belts, and braking systems should be installed by a qualified professional.
- Hyundai SONATA:
- 🧭 Diagnostic Flowchart
- 🎬 Helpful Videos
- 🛍️ Shop This Part
- What's Unique About the 2011-2018 Hyundai SONATA
- Symptoms You May Notice
- Most Likely Causes
- Rare But Worth Checking
- Diagnosis Steps
- Parts You'll Likely Need
- Related Codes That Often Appear With This One
- Technical Service Bulletins (TSBs) & Recalls
- Platform-Specific Known Issues
- Mechanic-Grade Diagnostic Values
- Scan Tool Commands That Help
- Wiring & Ground Locations
- OEM Part Supersession History
- Model Year Variations Within This Range
- 🎟️ Get 5% Off